Table of Contents
Advertisement
Version 2.0 OPERATION MANUAL
Thank you very much for purchasing the ZOOM
Please read this manual carefully to learn about all the functions of the
you will be able to use it fully.
Keep this manual in a convenient place for reference when necessary.
Usage and safety precautions............... 2
Introduction ....................................... 3
Terms used in this manual .................. 3
Part names ....................................... 4
Turning the power on ........................ 6
Display information ........................... 7
Adjusting effects ................................. 9
Using the output booster ..................... 17
Adjusting the master level .................. 17
Using patches .................................... 18
Changing USB audio settings ............... 24
Changing various settings .................. 27
Using the tuner ................................. 33
Copying or reproduction of this Operation Manual in part or in whole without permission is prohibited.
Contents
Using rhythms .................................... 39
Using the looper ................................. 41
Using the pedal ................................. 46
Setting the tempo .............................. 47
Setting how the TAP LED blinks ............ 48
Using as an audio interface .................. 50
Adjusting the pedal ........................... 51
Updating the firmware ........................ 53
Troubleshooting ................................. 56
Rhythm List ....................................... 57
Specifications .................................... 58
© 2016 ZOOM CORPORATION
.
so that
Advertisement
Table of Contents

Related Manuals for Zoom G5n


Summary of Contents for Zoom G5n
-
Page 1: Table Of Contents
Version 2.0 OPERATION MANUAL Thank you very much for purchasing the ZOOM Please read this manual carefully to learn about all the functions of the so that you will be able to use it fully. Keep this manual in a convenient place for reference when necessary. -
Page 2: Usage And Safety Precautions
Operation using an AC adapter If the unit becomes broken or malfunctions, immediately Use only a ZOOM AD-16 AC adapter with this unit. disconnect the AC adapter, turn the power OFF and disconnect Do not do anything that could exceed the ratings of outlets and other cables. -
Page 3: Introduction
Download new effects and patches Our free Effects/Patch Manager software for Windows and MacOS allows you to regularly download new effects and patches created by ZOOM. For detailed information, see the ZOOM website (http://www.zoom.co.jp/downloads/). Terms used in this manual Patch can store up to 200 patches with effect parameter settings and ON/OFF states. -
Page 4: Part Names
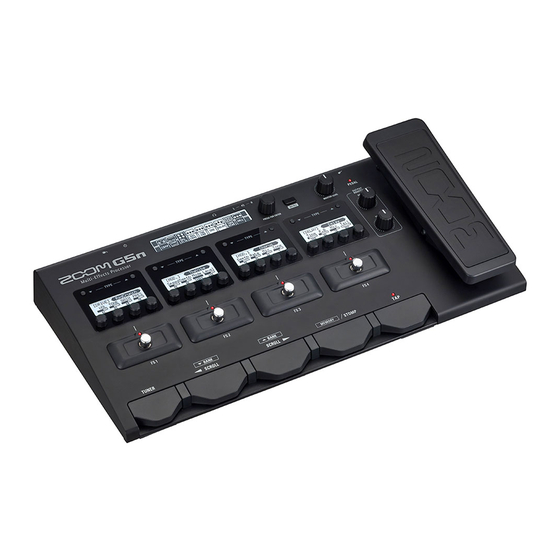
Part names Part names Front panel Control knob/enter key MENU key Overview Display MASTER LEVEL knob Expression pedal TYPE keys BOOST knob Unit Display Parameter knobs TONE knob (In explanations, these will be shown like this: Footswitches FS1–FS4 TUNER switch BANK/SCROLL switches Mode switch TAP switch... -
Page 5: Turning The Power On
Turning the power on To turn the power on • Lower the amplifier’s volume all the way. • Connect the AC adapter before setting the POWER switch to ON. • Turn the power of your guitar amplifier or PA system on and raise its volume. HINT starts up in the mode used when the POWER switch was last turned OFF . -
Page 6: Display Information
Display information Display in STOMP mode Overview Display HINT The effects currently shown on the 4 Unit Displays have white backgrounds. Unit Display Standard effect Parameter names Parameter values Large effect Parameter names Parameter values Switching unit display contents Press to switch between showing parameters and effect names. -
Page 7: Display Information
Display information Display in MEMORY mode Overview Display Unit Display Patch name Patch number... -
Page 8: Adjusting Effects
Adjusting effects Press to change to STOMP mode. Turning effects ON/OFF • Press • This turns that effect ON/OFF . [OFF] [ON] NOTE has special functions for some effect types. The parameter function assigned to shown on the Unit Display with white letters on a dark background. Ordinary SOLO ON/OFF... - Page 9 Adjusting effects NOTE allows you to combine up to 9 effects in whatever order you like. If limits on the processing capability or the number of units used are exceeded, a "PROCESS OVERFLOW" warning will appear and effects will be bypassed. To end bypassing, delete some effects or change their types. Overview Display Unit Display Selecting effect categories...
- Page 10 Adjusting effects Adjusting parameters • Turn HINT Parameter adjustments are saved automatically. NOTE Set Time, Rate and other effect parameters to musical notes to sync them to the tempo. Scrolling effect displays • Press • Press repeatedly to scroll the effect displays. ê...
-
Page 11: Adding Effects
Adjusting effects Adding effects • Confirm that the Overview Display shows the Home Screen. • Press to open the MENU screen. • Turn to select ADD. NOTE If 9 effects are already in use, ADD will not be shown. • Press to open the ADD screen. - Page 12 Adjusting effects • A cable will be added to the Unit Display. • Press to select the effect type. Unit Display Overview Display Completing the addition of effects • Turn to select EXIT. • Press • The Home Screen reopens.
- Page 13 Adjusting effects Deleting effects • Confirm that the Overview Display shows the Home Screen. • Press to open the MENU screen. • Turn to select DELETE. • Press to open the DELETE screen. • Turn to select the effect to delete. •...
- Page 14 Adjusting effects HINT Turn to cancel deletion. • Turn to select EXIT. • Press • The Home Screen reopens. Changing the effect order • Confirm that the Overview Display shows the Home Screen. • Press to open the MENU screen. •...
- Page 15 Adjusting effects • Turn to select the effect to swap. • Press to confirm the effect to swap. • Turn to swap with the next effect in the chain. • Press to end selection of the effect. • Turn to select EXIT. •...
-
Page 16: Using The Output Booster
Using the output booster The output booster function affects the signal just before output, emulating a tube booster. Setting the boost level • Turn NOTE • Turn all the way to the left to turn boost OFF . • Turning this right increases the boost amount. Adjusting the audio quality •... -
Page 17: Using Patches
Using patches Selecting patches Switching patches • Press • Switch to MEMORY mode. Overview Display Unit Display NOTE The selected patch has a white background. Switching banks • In MEMORY mode, press • This changes the bank. ê NOTE • Press and hold to change banks continuously. - Page 18 Using patches Setting independent patch parameters Entering patch setting mode • Confirm that the Overview Display shows the Home Screen. • Press to open the MENU screen. • Turn to select PATCH. • Press to open the PATCH SETTINGS screen. Adjusting patch levels •...
- Page 19 Using patches NOTE The setting range is 0–120. • Press to confirm the patch level. Changing patch names • Turn to select the character to change. • Press to confirm the character to change. • Turn to change the character. •...
-
Page 20: Saving Patches
Using patches NOTE • The characters and symbols that can be used are as follows. ! # $ % & ' () +, -. ; = @ [] ^ _ ` { } ~, (space) A–Z, a–z, 0–9 • Press and hold to change the character type. - Page 21 Using patches • Turn to select where the patch will be saved. • Press to confirm where the patch will be saved. • Turn to select YES. HINT Select NO to cancel saving the patch. • Press to save the patch. Swapping patches •...
- Page 22 Using patches • Turn to select SWAP . • Press to open the SWAP screen. • Turn to select the patch to be swapped. • Press to confirm the patch to be swapped. • Turn to select YES. HINT Select NO to cancel swapping. •...
-
Page 23: Changing Usb Audio Settings
Changing USB audio settings Opening the USB AUDIO screen • Confirm that the Overview Display shows the Home Screen. • Press to open the MENU screen. • Turn to select USB. • Press to open the USB AUDIO screen. - Page 24 Changing USB audio settings Adjusting the USB audio monitoring balance • On the USB AUDIO screen, turn to select MONITOR BALANCE. • Press • Turn to adjust the monitoring balance. NOTE • This adjusts the balance between the DAW software (computer) output and the direct monitoring signals. •...
-
Page 25: Adjusting The Recording Level
Changing USB audio settings Adjusting the recording level • On the USB AUDIO screen, turn to select RECORDING GAIN. • Press • Turn to adjust the recording level. NOTE • This adjusts the volume sent to the DAW software (computer). •... -
Page 26: Changing Various Settings
Changing various settings Opening the SETUP screen • Confirm that the Overview Display shows the Home Screen. • Press to open the MENU screen. • Turn to select SETUP . • Press to open the SETUP screen. Setting the auto save function •... - Page 27 Changing various settings • On the SYSTEM screen, turn to select AUTO SAVE. • Press • Turn to set AUTO SAVE to ON/OFF . NOTE When set to OFF , no patch or effect parameters will be saved automatically. • Press to confirm the auto save setting.
- Page 28 Changing various settings Setting up an external pedal This setting makes 2 pedal effects usable, with the pedal effect selected second assigned to the external pedal. • On the SETUP screen, turn to select EXT PDL. • Press • Turn to switch the external pedal ON/OFF .
- Page 29 Changing various settings Setting the preselect function With this setting, pressing to change the bank only changes what is shown on the display until you press to confirm the patch change. • On the SETUP screen, turn to select PRESEL. •...
- Page 30 Changing various settings Setting the eco mode When eco mode is on, the will automatically turn off if not used for 10 hours. • On the SETUP screen, turn to select SYSTEM. • Press to open the SYSTEM screen. • On the SETUP screen, turn to select eco.
-
Page 31: Adjusting The Display Contrast
Changing various settings Adjusting the display contrast • On the SETUP screen, turn to select LCD CNTRST. • Press to open the LCD CONTRAST screen. • Turn to select a display to adjust its contrast. • Press to confirm the display. •... -
Page 32: Using The Tuner
Using the tuner Activating the tuner • Confirm that the Overview Display shows the Home Screen. • Press • This enables the tuner. NOTE Whenever the Overview Display shows any other screen, press to reopen the Home Screen. Tuning a guitar •... -
Page 33: Using The Tuner
Using the tuner Closing the tuner • Press when the TUNER screen or MENU screen is open. • The Home Screen reopens. Changing the tuner settings Opening the TUNER MENU screen • Confirm that the Overview Display shows the TUNER screen or Home Screen. - Page 34 Using the tuner • Press to open the TUNER MENU screen. Changing the tuner mode • On the TUNER MENU screen, turn to select OUTPUT. • Press • Turn to set it to BYPASS, MUTE or EFFECT. BYPASS When the tuner is operating, the sound is output without any effects. MUTE When the tuner is operating, no sound is output.
- Page 35 Using the tuner Changing the standard pitch of the tuner • On the TUNER MENU screen, turn to select CALIBRATION. • Press • Turn to change the standard pitch. NOTE The setting range is 435–445 Hz for middle A. • Press to confirm the standard pitch of the tuner.
- Page 36 Using the tuner Changing the tuner type • On the TUNER MENU screen, turn to select TYPE. • Press • Turn to select the tuner type. CHROMATIC The chromatic tuner shows the nearest pitch name (semitone) and how far the input sound is from that pitch.
- Page 37 Using the tuner Using flat tuning • On the TUNER MENU screen, turn to select FLAT. • Press • Turn to change the flat tuning. NOTE • You can drop the tuning by one ( x 1), two ( x 2) or three ( x 3) semitones. •...
-
Page 38: Using Rhythms
Using rhythms Selecting a rhythm • Press to change to STOMP mode. • Press to select a rhythm. Playing a rhythm • Press for the unit using the rhythm effect. • The rhythm starts playing. HINT • During rhythm playback, you can switch between STOMP and MEMORY modes. •... - Page 39 Using rhythms Setting rhythms Selecting rhythm patterns • Turn for the unit using the rhythm. NOTE See P57 for information about the patterns. Adjusting the rhythm tempo • Turn for the unit using the rhythm. NOTE • The setting range is 40–250 bpm. •...
-
Page 40: Using The Looper
Using the looper Selecting the looper • Press to change to STOMP mode. • Use to select a LOOPER for the desired unit. 1-unit looper 2-unit looper NOTE • There are 4 types of loopers: 1-unit mono, 2-unit mono, 1-unit stereo and 2-unit stereo. •... - Page 41 Using the looper • Recording stops and loop playback starts. If the recording time is set to "MANUAL" Loop playback will start when you press again or when the maximum recording time is reached. If the recording time is set to a musical note Loop playback will start when the set recording time is reached.
- Page 42 Using the looper With 2-unit looper • During loop playback, press for the second unit in the LOOPER. • This stops the playback. ■ ■ Deleting phrases With 1-unit looper • When loop playback is stopped, press and hold for the unit using the looper.
- Page 43 Using the looper Setting the looper ■ ■ Setting the looper recording time • Turn for the unit using the looper. NOTE • The setting options include MANUAL and 1–64 quarter notes. • The recording time for the mono looper is from 1.5 to 80 seconds (40 seconds when UNDO is ON). •...
- Page 44 Using the looper ■ ■ Setting how loop playback stops • Turn for the unit using the looper. STOP Stop playback immediately. FINISH Play to the end and then stop. FADE OUT Stop after fading out. ■ ■ Adjusting the looper volume •...
-
Page 45: Using The Pedal
Using the pedal Selecting the pedal effect • Press to change to STOMP mode. • Press to select the pedal effect. NOTE To select the pedal category, press while pressing and holding , or press while pressing and holding Turning the pedal effect ON/OFF •... -
Page 46: Setting The Tempo
Setting the tempo The tempo is used for the looper, rhythm, and delay. In addition, some modulation effects can be synchronized. To synchronize the tempo, select an effect that can be synchronized in advance and set a synchronizable parameter, such as "Time" or "Rate" to a musical note ("... -
Page 47: Setting How The Tap Led Blinks
Setting how the TAP LED blinks The TAP LED can be set to blink only when the tap tempo function is being used or at all times. • Press to open the MENU screen. • Turn to select SETUP . •... - Page 48 Setting how the TAP LED blinks • Press • Turn to set how the TAP LED blinks. ALWAYS ON The TAP LED always blinks. TAP MODE ONLY The TAP LED only blinks when the tap tempo function is being used. •...
-
Page 49: Using As An Audio Interface
Using as an audio interface The system requirements are as follows. Compatible OS Windows ® Windows 7 (32-bit, 64-bit) ® Windows 8.1 (32-bit, 64-bit) ® Windows 10 (32-bit, 64-bit) ® ® 32-bit: Intel Pentium 4 1.8 GHz or faster, RAM 1 GB or more ®... -
Page 50: Adjusting The Pedal
Adjusting the pedal Calibrating the sensitivity • Turn the power switch ON while pressing • Operate the pedal as instructed on the display, and press when required. • "Complete!" will appear before play mode becomes active. NOTE Calibrate in the following cases. –... -
Page 51: Restoring Default Settings And Patches
Restoring default settings and patches • While pressing , set the POWER switch to ON. • Turn to select YES. HINT Select NO to cancel initialization. • Press to initialize. • "Complete!" will appear on the display when initializing completes. HINT Executing the All Initialize function will restore all the settings of the , including its patches, to... -
Page 52: Updating The Firmware
Updating the firmware Checking the firmware version • Confirm that the Overview Display shows the Home Screen. • Press to open the MENU screen. • Turn to select SETUP . • Press to open the SETUP screen. • Turn to select SYSTEM. •... -
Page 53: Updating The Firmware
Updating the firmware • Turn to select VERSION. • Press and check the version. - Page 54 • Launch the version update application on your computer, and execute the update. NOTE HINT Do not disconnect the USB cable during the See the ZOOM website for instructions about update. how to use the application. • "Complete!" will appear on the display when updating completes. HINT •...
-
Page 55: Troubleshooting
MUTE mode ( P34). The recorded level in a DAW is low There is a lot of noise • Check the recording level setting ( P26). • Check shielded cables for defects. • Use only a genuine ZOOM AC adapter. -
Page 56: Rhythm List
Rhythm List PatternName TimSig PatternName TimSig PatternName TimSig GUIDE R&B1 Jazz2 8Beats1 R&B2 Fusion 8Beats2 70s Soul Swing1 8Beats3 90s Soul Swing2 16Beats1 Motown Bossa1 16Beats2 HipHop Bossa2 16Beats3 Disco Samba1 Rock1 Samba2 Rock2 PopRock Breaks1 Rock3 IndiePop Breaks2 ROCKABLY EuroPop Breaks3 R'n'R... -
Page 57: Specifications
-119 dBu Noise floor (residual noise) -101 dBu Control input For FP01/FP02 Power AC adapter DC9V (center minus plug), 500 mA (ZOOM AD-16) Dimensions 225 mm(D) X 454 mm(W) X 75 mm(H) USB Audio Weight 3.4 kg FP01/FP02 expression pedal Options •... -
Page 59: Zoom Corporation
ZOOM CORPORATION 4-4-3 Kandasurugadai, Chiyoda-ku, Tokyo 101-0062 Japan http://www.zoom.co.jp Z2I-2449-03...
Need help?
Do you have a question about the G5n and is the answer not in the manual?
Questions and answers