Table of Contents
Advertisement
Quick Links
Advertisement
Table of Contents

Related Manuals for Baxi SPC 180 ECO


Summary of Contents for Baxi SPC 180 ECO
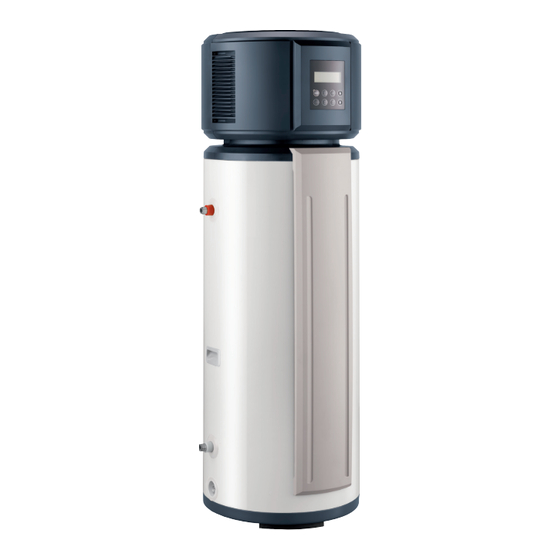
- Page 1 Italia Installation and Service Manual Thermodynamic water heater SPC 180 ECO...
- Page 2 Dear Customer, Thank you very much for buying this Appliance. Please read through the manual carefully before using the product, and keep it in a safe place for later reference. In order to ensure continued safe and efficient operation we recommend that the product is serviced regularly. Our service and customer service organisation can assist with this.
-
Page 3: Table Of Contents
3.2.3 Domestic hot water set point temperature ......................17 3.3 Dimensions and connections ........................18 3.4 Electrical diagrams ........................... 19 3.4.1 SPC 180 ECO water heater ..........................19 Description of the product 4.1 General description ........................... 21 4.2 Main components ............................22 4.3 Description of the control panel ......................... - Page 4 Table of Contents Before installation 5.1 Regulations governing installation ......................25 5.2 Choice of location ............................25 5.2.1 Data plate ................................25 5.2.2 Installing the water heater ..........................26 5.3 Transport ..............................28 5.3.1 Precautions for transporting the appliance ......................28 5.4 Unpacking and preparation ........................
- Page 5 Table of Contents 9 Maintenance 9.1 General ..............................42 9.2 Standard inspection and maintenance operations ..................43 9.2.1 Refrigerant circuit .............................. 43 9.2.2 Hydraulic circuit ..............................43 9.2.3 Aeraulics ................................43 9.2.4 Magnesium anode ............................. 44 9.2.5 Checking the safety valve or safety unit ......................44 9.3 Maintenance record .............................
-
Page 6: Safety Instructions
1 Safety Instructions 1 Safety Instructions 1.1 General safety instructions Danger This appliance can be used by children aged 8 years and above and persons with reduced physical, sensory or mental capabilities or lack of experience and knowledge if they are given correct supervision or instruction on using the appliance in complete safety and understand the hazards involved. -
Page 7: Instructions On The Hydraulic Connections
1 Safety Instructions Note Never remove or cover the labels and data plates affixed to appliances. Labels and data plates must be legible throughout the entire lifetime of the appliance. Immediately replace damaged or illegible instructions and warning stickers. Caution If the home is unoccupied for a long period and there is a risk of frost, drain the water heater. - Page 8 1 Safety Instructions Note ● The appliance is intended to be permanently connected to the water mains. ● Maximum / minimum water inlet pressure: See chapter on Technical Specifications. ● The pressure limiter device must be regularly operated in order to remove limescale deposits and ensure that it is not blocked.
-
Page 9: Specific Safety Instructions
1 Safety Instructions 1.3 Specific safety instructions Warning In accordance with the NFC 15.100 electrical safety standard, only qualified professionals are permitted access to the inside of the appliance. Warning ● Ensure correct earthing. ● Heating water and domestic water must not come into contact with each other. -
Page 10: Liability
1 Safety Instructions 1.4 Liability 1.4.1 Manufacturer's liability Our products are manufactured in compliance with the requirements of the various Directives applicable. They are therefore delivered with the any markings and documents necessary. In the interests of the quality of our products, we strive constantly to improve them. -
Page 11: Safety Data Sheet: R-134A Refrigerant Fluid
1 Safety Instructions 1.5 Safety data sheet: R-134a refrigerant fluid 1.5.1 Product identification ■ Name of the refrigerant fluid R-134a 1.5.2 Identification of hazards ■ Effects harmful to health: - The vapours are heavier than air and may lead to asphyxia owing to reduced oxygen levels. -
Page 12: Fire Prevention Measures
1 Safety Instructions 1.5.5 Fire prevention measures ■ Appropriate extinguishing agents: All extinguishing agents can be used. ■ Inappropriate extinguishing agents: None to our knowledge. In the event of fire nearby, use the appropriate extinguishing agents. ■ Specific hazards: ● Rise in pressure. In the presence of air, an inflammable mixture may form under certain temperature and pressure conditions. -
Page 13: Personal Protection
1 Safety Instructions 1.5.8 Personal protection ■ Respiratory protection: ● If insufficient ventilation: AX type cartridge mask ● In confined spaces: Full self-contained breathing apparatus. ■ Hand protection: Protective gloves in leather or nitrile rubber. ■ Eye protection: Safety glasses with side protection. ■... -
Page 14: About This Manual
2 About this manual 2 About this manual General This manual is intended for the installers of a SPC 180 ECO thermodynamic water heaters. Documentation available ● Installation and Service Manual ● User Guide Symbols used 2.3.1 Symbols used in the manual... -
Page 15: Technical Specifications
3 Technical specifications Technical specifications Homologations 3.1.1 Certifications ■ NF certification Appliances concerned: ETWH180E, ETWH230E Specifications LCIE 103-15/B (July 2011) for NF Electricity Performance Marking This product complies with the requirements of the following NF Electricity Standards: ● EN 60335-1:2002 +A1:2004 +A11:2004 +A12:2006 +A2:2006 +A13:2008 +A14:2010 ●... -
Page 16: Technical Data
3 Technical specifications Technical data 3.2.1 Characteristics of the appliance Model Unit SPC 180 ECO Daily electricity consumption (Qelec) 4.058 Declared load profile Sound power level at 1 m indoors (L Storage volume (V) Mixed water at 40°C (V40) Heating power (HP) -
Page 17: Heating Time Of The Thermodynamic Water Heater Depending On The Ambient Air Temperature
A Heating time for a set point of 55°C B Heating time for a set point of 65°C X Air temperature (°C) Y Heating time (hours) Fig.2 SPC 180 ECO model SPC 180 ECO model Economic Mode Hybrid Mode 20 25 30 32 35 40... -
Page 18: Dimensions And Connections
3 Technical specifications Dimensions and connections Fig.3 Dimensions and connections Description Unit SPC 180 ECO Diameter of the water heater Height of the water heater 1670 Height cold water connection Height hot water connection 1050 Height drain opening Height condensates discharge opening... -
Page 19: Electrical Diagrams
3 Technical specifications Electrical diagrams 3.4.1 SPC 180 ECO water heater Fig.4 Electrical diagram Black Ambient temperature sensor White Main control board Black Gray White Evaporator temperature sensor Yellow/green Temperature sensor of the tank Discharge air temperature sensor Suction temperature sensor... - Page 20 3 Technical specifications Connector Name Inductor Inductor CN1-35 Terminal base SW2_1 Disinfect temp. 70°C/65°C SW2_2 With disinfect/ without disinfect SW3_1 Electric heater 1550W SW3_2 With E-heater/ without E-heater Main control board Power supply Black Blue Brown Orange Gray White Yellow/Green Neutral Phase Ground...
-
Page 21: Description Of The Product
Description of the product Description of the product General description The thermodynamic water heaters in the SPC range have the following characteristics: ● Floor-standing thermodynamic water heater with heat pump taking energy from the ambient air ● Control panel with display of the hot water temperature in the tank and hourly programming ●... -
Page 22: Main Components
4 Description of the product Main components Fig.5 Description of the components of the thermodynamic water heater 1 Top cover 2 Back cover 3 Front cover 4 Axial fan 5 Evaporator assembly 6 Magnesium anode 7 Domestic hot water outlet 8 Electricity supply cable 9 Condenser 10 Domestic cold water inlet... -
Page 23: Description Of The Control Panel
Description of the product Description of the control panel 4.3.1 Description of the control keys Fig.6 The control keys 1 ON/OFF key 2 ON indicator light (red) 3 Clock setting ECONOMY MODE 4 Cancellation key TEMP 5 Setting the start-up time on the programmer HYBRID MODE 6 Setting the shut-down time on the programmer TIME... -
Page 24: Standard Delivery
4 Description of the product Standard delivery The delivery includes: - The thermodynamic water heater - Condensate discharge hose A manuals bag containing: - Kyoto Protocol sticker - The user manual for the complete system - The installation and service manual for the complete system Accessories and options Accessories Package... -
Page 25: Before Installation
5 Before installation Before installation Regulations governing installation Caution Installation and maintenance of the appliance must be done by a certified professional in accordance with prevailing statutory texts and codes of practice. Note Pursuant to Article L. 113-3 of the French Consumer Code, the installation of this equipment must be done by a certified operator whenever a refrigerant connection connection is necessary (the case with split systems, even when fitted with a... -
Page 26: Installing The Water Heater
5 Before installation 5.2.2 Installing the water heater Caution When installing the appliance, abide by the IP21 protection rating. Caution - Do not install the thermodynamic water heater in premises exposed to gas, vapours or dust. - Install the thermodynamic water heater in a dry, frost-free room at a minimum temperature of 5°C. - Page 27 NIE-C-022 Fig.10 Position to be allowed for the thermodynamic water heater V >15m SPC 180 ECO A (mm) 1670 ■ Ventilation ● Respect the minimum dimensions given in the diagram opposite. ● Respect the distances on either side of the water heater and between the back of the appliance and the internal wall of the premises.
-
Page 28: Transport
5 Before installation Transport 5.3.1 Precautions for transporting the appliance ● The thermodynamic water heater must be stored and transported in its packaging and not filled with water. ● Ambient transport and storage temperatures admissible: Fig.11 Transporting the water heater from -20 to +60°C. -
Page 29: Installation
6 Installation Installation General Note Pursuant to Article L. 113-3 of the French Consumer Code, the installation of this equipment must be done by a certified operator whenever a refrigerant connection is necessary (the case with split systems, even when fitted with a quick coupling device). -
Page 30: Hydraulic Connections
6 Installation Hydraulic connections Caution Before making the hydraulic connections, it is essential to flush the domestic hot water circuits. If flushing has to be done using an aggressive product, neutralise the rinsing water before disposing of it in the waste water network. - Page 31 6 Installation ■ Safety valve or unit Caution In accordance with safety rules, a safety valve calibrated to 0.7 MPa (7 bar) is mounted on the water heater's s domestic cold water inlet. ● We recommend NF-marked hydraulic diaphragm safety control units. ●...
-
Page 32: Electrical Connections
6 Installation Electrical connections 6.4.1 Recommendations Warning ● Only qualified professionals may carry out electrical connections and always with the power off. ● To ensure the conformity of electrical installation, the appliance must be powered by a circuit comprising an omnipolar switch with a gap distance of more than 3 mm. -
Page 33: Schematic Diagram
6 Installation 6.4.2 Schematic diagram Fig.14 Schematic installation diagram 538 kW/h 15 / 45 A 500 mA C1 C2 40 A 16 A TEST 1 Water heater 2 Meter 3 Connection circuit breaker 4 AC-type differential switch 5 Circuit breakers Warning Electrical power cut: loss of the time and timer program. -
Page 34: Connecting The Appliance
6 Installation 6.4.3 Connecting the appliance Fig.15 Connection Caution Please ensure that the polarities shown on the terminals are followed: live (L), neutral (N) and earth 4. 1 Connect the connection cable already wired into the distribution board. 6.5 Filling the installation Fig.16 Filling the tank Once the hydraulic and electrical connections have been made:... -
Page 35: Commissioning
7 Commissioning Commissioning General Commissioning of the water heater must be done: ● When it is used for the first time; ● After a prolonged period of shut-down; ● After any event that may require complete reinstallation. Note Commissioning of the water heater allows the user to review the various settings and checks to be made to start up the water heater in complete safety. -
Page 36: Configuration Of Anti-Legionella Mode
7 Commissioning Fig.17 Switch off the current. 7.3.2 Configuration of anti-legionella mode Caution Before working on the appliance, ensure that it is switched off and safe. NIE-B-059 Fig.18 Anti-legionella mode ■ Setting the parameters for anti-legionella mode The parameters for anti-legionella mode are set directly on the PCB in switch SW2 1. -
Page 37: Selecting The Various Modes
7 Commissioning 7.3.3 Selecting the various modes - ECONOMIC MODE: In this mode, the appliance can only heat water with the heat pump. The ambient temperature range suited to this mode is 5°C~43°C. - HYBRID MODE: In this mode, the appliance can heat water with the heat pump, the electric resistor or both systems simultaneously. -
Page 38: Changing Heat Source
7 Commissioning 7.3.4 Changing heat source Fig.19 Heat source The default heat source is the heat pump. ● If the ambient temperature falls outside the heat pump's operating range, the heat pump shuts down. The appliance automatically activates ECONOMY MODE the electric resistor and lights up the LA icon on the display. -
Page 39: Consultation Function
7 Commissioning Fig.20 Consultation function 7.3.7 Consultation function 1 Press the CLOCK and CANCEL buttons simultaneously. The appliance switches to maintenance and repair mode and the ECONOMY MODE ECONOMY MODE consultation function can be accessed. 2 Press the arrows to show the operating parameters one by one TEMP TEMP TEMP... -
Page 40: Checks After Commissioning
7 Commissioning Checks after commissioning 7.4.1 Points to be checked after commissioning Fig.21 Checks 1 Check the tightness of the connections. 2 Check the water pressure. 3 Check that there are no errors on the regulator. 4 Check the temperature on the domestic hot water temperature sensor to ensure that the appliance is working correctly. -
Page 41: Switching Off The Appliance
8 Switching off the appliance 8 Switching off the appliance 8.1 Switching off the installation Caution Do not switch off the appliance in order not to delete the control parameters (no frost protection). Instead, press the OFF button on the display. Prolonged absence In the event of a prolonged absence (holidays), press the OFF button on the display. -
Page 42: Maintenance
9 Maintenance 9 Maintenance General Caution Installation and maintenance of the appliance must be done by a certified professional in accordance with prevailing statutory texts and codes of practice. Caution Before working on the appliance, ensure that it is switched off and safe. -
Page 43: Standard Inspection And Maintenance Operations
9 Maintenance Standard inspection and maintenance operations 9.2.1 Refrigerant circuit No maintenance is required on the refrigerant circuit on the thermodynamic water heater. Check the tightness of the connections using a leak detector. Check the performance of the heat pump: check on temperatures. 9.2.2 Hydraulic circuit Check the tightness of the water connections. -
Page 44: Magnesium Anode
9 Maintenance 9.2.4 Magnesium anode The magnesium anode must be checked every year. After the first check, determine the frequency of future checks on the basis of anode wear. 1 Shut off the domestic cold water inlet. 2 Drain the hot water tank: - Open the hot water tap. -
Page 45: Maintenance Record
9 Maintenance 9.3 Maintenance record Date Checks made Remarks Carried out by Signature 7638897 - v02 - 14032016... -
Page 46: Troubleshooting
10 Troubleshooting 10 Troubleshooting 10.1 Messages (Ex and Px type code) 10.1.1 Messages on the display If a fault occurs, the screen displays an error code beside the water temperature indicator: - The “ALARM” pictogram appears - The audible warning signal sounds. 1 Make a note of the code displayed. - Page 47 10 Troubleshooting Code Description Corrective action Protection against overloads on Check that the compressor is not damaged. the compressor (ten seconds after switching on the compressor, the current overload control starts up). 1) The compressor only is running: if the current load is > 7 A, the compressor is shut down and the protection activated.
-
Page 48: Scrapping / Recycling
11 Scrapping 11 Scrapping / Recycling 11.1 General 11.1.1 Considerations regarding scrapping ■ Product waste: Consult the manufacturer or the supplier for information on recovery or recycling. ■ Soiled packaging: Reuse or recycle after decontamination. Destroy in authorised installations. Caution This appliance bears the recycling symbol pursuant to European Directive 2012/19/EU on Waste from Electrical and Electronic Equipment (WEEE). -
Page 49: Appendices
12 Appendices 12 Appendices 12.1 Declaration of Conformity The appliance complies with the standard type described in the EC declaration of conformity. It has been put into circulation in accordance with the requirements of European Directives. The original of the declaration of compliance is available from the manufacturer. 7638897 - v02 - 14032016... -
Page 50: Commissioning Protocol
12 Appendices 12.2 Commissioning protocol 12.2.1 Appliance concerned Description of the appliance Please fill in Range Model Software version 12.2.2 General points Inspection points Checked? Position of the water heater, distance from the wall Circulation direction of the refrigerant fluids Tightness of the refrigerant fittings Pressure during evacuation prior to filling Evacuation time and outside temperature during evacuation... - Page 51 7638897 - v02 - 14032016...
- Page 52 36061 BASSANO DEL GRAPPA (VI) - ITALY Via Trozzetti, 20 Servizio clienti: Tel +39 0424 517800 - Fax +39 0424 38089 www.baxi.it 7629897 - v02 - 14032016 7629897-001-04 7638897-001-02...
Need help?
Do you have a question about the SPC 180 ECO and is the answer not in the manual?
Questions and answers