Table of Contents
Advertisement
Advertisement
Table of Contents

Related Manuals for Precisa XM 60


Summary of Contents for Precisa XM 60
- Page 1 Moisture analyser XM 60, XM 60-HR, XM 66 Operating Instructions 350-8103-003i1...
-
Page 2: Declaration Of Conformity
Precisa EM 120-HR with infrared radiator, halogen radiator or dark radiator Mark applied EU Directive Standards 2014/30/EU EN61326 2014/35/EU EN61010 Date: 20.04.2016 Signature: R. Grolimund R & D Manager Precisa Gravimetrics AG , Moosmattstrasse 32 , Postfach 352 , CH-8953 Dietikon 350-7579-004a.docx... -
Page 3: Identification
Identification ■ Identification These Operating Instructions apply to the Precisa XM series moisture analyser with its ten-key control panel and multifunction display. Customer Service Precisa Gravimetrics AG Moosmattstrasse 32 CH-8953 Dietikon Tel. +41-44-744 28 28 Fax. +41-44-744 28 38 email service@precisa.ch For information on local customer service centers: http://www.precisa.com... -
Page 4: Overview
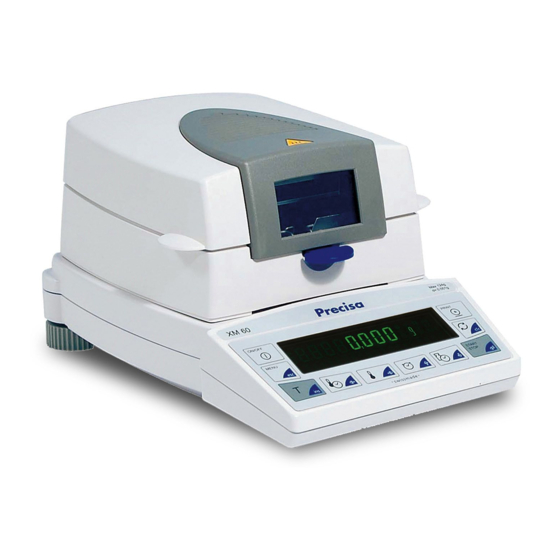
■ Overview Overview 11 12 Max 62g d=0,001g ON/OFF PRINT MENU START STOP... - Page 5 Overview ■ Description Section Halogen heater PT100 temperature sensor 9.3.2 Weighing pan 3.3 / 6.2 Draftshield Sample holder 10-key membrane keypad Display Rotating adjustable feet Serial interface, RJ45 socket Levelling bubble Mechanical anti-theft protection Mains connection socket Mains fuse Prefix display 5.4.4 / 5.4.6 Measurement display Starting weight...
-
Page 6: Table Of Contents
■ Table of Contents Identification ............... 1 Overview..............2 ..........Introduction7 Useful tips on the Operating Instructions ......8 Warranty card ............. 8 Safety ............9 Representations and symbols ........9 Safety instructions............9 Set up ............11 Unpacking ..............11 Transport, storage ............. - Page 7 Password protection ..........30 5.3.13 Anti-theft encoding............ 32 5.3.14 Key tone ..............32 5.3.15 Precisa BUS (not available for firmware Nxx) ....33 Application menu operation ........34 5.4.1 Activating the application menu ........34 5.4.2 Methods ..............35 Saving a method ............36 Loading a method............
- Page 8 6.4.1 Print statistics ............56 6.4.2 Reset statistics............57 Ash residue program ........58 Ash residue XM 60, XM 60-HR ........59 Ash residue XM 66 ............ 60 7.2.1 Ash residue of the desiccated samples ......60 7.2.2 Ash residue with new tare weight ....... 62 Data transfer ..........
- Page 9 • optimum resolution • easy-to-read vacuum fluorescent display • large viewing window for perfect sample monitoring • a memory for 20 methods (XM 60, XM 60-HR), with all the drying settings • automatic detection that the measurement has ended by means of ADAPTSTOP •...
-
Page 10: Introduction7
» currently activated is displayed. language english Warranty card A warranty card, which was filled in by your Precisa dealer before you received the moisture analyser, is enclosed with the Operating Instructions. NOTE Check that the warranty card is inside these Operating Instructions... -
Page 11: Safety
2 Safety ■ Safety Representations and symbols Important safety-related instructions are highlighted visually at the description of what to do: DANGER Warning of a possible danger which may lead to death or to serious injury. CAUTION Warning of a possible danger which may lead to minor injury or damage. - Page 12 If you spill any liquid onto the instrument, unplug it from the electrical supply immediately. Do not operate the moisture analyser again until you have had it checked by a Precisa service engineer. CAUTION Some of the parts, like the heating element and the viewing window, may become considerably hotter while it is in operation.
-
Page 13: Set Up
(see chapter 3.2.2 "Storage"). • Read these Operating Instructions carefully before operating the balance, even if you have used Precisa equipment before and pay particular attention to the safety instructions (see chapter 2 "Safety"). -
Page 14: Transport, Storage
■ 3 Set up Transport, storage 3.2.1 Transport and shipping Your moisture analyser is a precision instrument. Treat it with care. Avoid shaking it or subjecting it to any heavy jolts or vibrations during transport. Avoid serious temperature fluctuations and getting the instrument damp (condensation) during transport. -
Page 15: Inspection And Assembly
3 Set up ■ Inspection and assembly The moisture analyser does not come fully assembled. Once you have unpacked all the parts, check that the delivery is complete and assemble the individual components in the order indicated below. Components delivered Components delivered Moisture analyser Sample holder (3) -
Page 16: Choosing A Suitable Location
• You can now place an aluminium pan (4) on the pan support. NOTE All the parts must be attached together without exerting undue force. Do not apply any force. If you have any problems, the Precisa customer service will be happy to help. Choosing a suitable location... -
Page 17: Connecting It To The Mains
3 Set up ■ Connecting it to the mains Follow safety instructions when connecting the instrument to the mains: DANGER The instrument may only be operated using the original mains cord supplied. If the mains cord supplied is not long enough, only use an extension cord fitted with a protective earth conductor. -
Page 18: Safety Measures
■ 3 Set up Safety measures The safety class 1 instrument, the moisture analyser, may only be plugged into a socket which has been installed in accordance with regulations and is fitted with a protective earth terminal. The safety effect may not be undone by using an extension lead without an earth wire. -
Page 19: Weight Calibration
3 Set up ■ Weight calibration Since the Earth's gravity is not the same everywhere, each balance must be adjusted to compensate for the gravity at each location, in accordance with the underlying physical weighing principle. This adjustment process, which is known as "calibration", must be carried out on initial installation and then each time the instrument is moved to another location. -
Page 20: First Measurement
■ 4 First measurement First measurement Once the moisture analyser is successfully up and running, you can perform an initial measurement to familiarize yourself with the new instrument and to test it for any malfunctions. Switch the instrument on using the «ON/OFF» key. The instrument performs a self-diagnostics test to check the main functions. - Page 21 4 First measurement ■ • Close the hood The instrument is prepared for the first measurement. • Start the measurement by pressing the «START/STOP» key. START STOP The heating element heats up to 105°C, and the fan starts to cool. The moisture analyser display is divided into 100.00 %...
- Page 22 ■ 4 First measurement • Once the drying has ended, an audio signal sounds, and the heating is switched off. The fan keeps running until the temperature in the sample room drops below 40°C. XX.xx % • The measurement display shows the result in the unit of measurement DURATION XX.X MIN set.The measurement result is...
-
Page 23: Operation
5 Operation ■ Operation The moisture analyser has two main menus: the configuration menu and the application menu. Instrument-specific parameters and the layout of the report printout are defined in the configuration menu. You can either work with the basic configuration programmed in the factory or define and save a user configuration which is adapted to suit your specific needs. -
Page 24: Menu
■ 5 Operation NOTE The geometry of the menu tree diagram corresponds to the path configurations of the two main menus. In program operation mode, the key symbols highlighted in blue apply on the control panel. Key(s) Designation Function in weighing mode •... -
Page 25: Setting And Saving The Configuration
DATE AND TIME format p.m. and a.m.) PASSWORD Password protection for the menu definitions Activation/deactivation and change to the anti- THEFTCODE theft code KEY TONE Activation of the keypad sound LANGUAGE Language (E, D, F) Enables disables Precisa BUS accessories... -
Page 26: Activating The Configuration Menu
■ 5 Operation Representation conventions: • The settings programmed in the factory are depicted in bold. • In order to aid clarity, the only part of the menu tree shown in each function description is the part which relates to the function in question. -
Page 27: Configuring The Report Printout
5 Operation ■ 5.3.3 Configuring the report printout The report printout can be configured in the "SET DATA PRINT" menu option. The options marked "ON" are contained in the report and are printed. The "MODE PC" function allows the measurement printout to be output in a format which the PC can support. - Page 28 (see chapter 5.3.10 "Interface functions"). Example of a report printout with all the available selection options. Report title, only output in printer mode. *********** PRECISA XM 60 *********** -------------------------------------- Date and time, if this is switched on. Date 07.10.2016...
-
Page 29: Configuring The Application Menu
5 Operation ■ 5.3.4 Configuring the application menu • SET APP. MENU EDIT METHOD ON/OFF METHOD-ID ON/OFF TARGET WEIGHT ON/OFF UNIT ON/OFF PRINTRATE ON/OFF STANDBY TEMP. ON/OFF AUTOSTART ON/OFF The options activated under "SET APP. MENU" are enabled in the application menu and can be changed and set there (see chapter 5.4 "Application menu operation"). -
Page 30: Balance Calibration
■ 5 Operation 5.3.6 Balance calibration • SET BALANCE CAL. MODE OFF disabled EXTERNAL external EXT.-DEF. external with a freely defined weight (DEF. n.nnn g) DEF.0.0000 g Calibration weight for the EXT. DEF. mode For details about calibrating the balance, see chapter 3.8 "Weight calibration"... -
Page 31: Interface Functions
5 Operation ■ 5.3.10 Interface functions • SET INTERFACE BAUDRATE Select the baud rate 1200 2400 4800 9600 19200 PARITY 7-EVEN-1STOP Select the parity 7-ODD-1STOP 7-NO-2STOP 8-NO-1STOP 8-EVEN-1STOP 8-ODD-1STOP HANDSHAKE Select the handshake XON-XOFF function HARDWARE OFF/ON Select the HID function The RS232/V24 interface on the instrument is matched to the interface of a peripheral instrument with the aid of the interface functions (see chapter 8 "Data transfer"). -
Page 32: Password Protection
The password protection is deactivated in the factory settings. The preprogrammed password set in the factory is: 7 9 1 4 This password is the same for all Precisa instruments and is always valid, at the same time as a password selected by the operator. - Page 33 5 Operation ■ Procedure for activating the password protection: Display Step - - - - - - - - Press repeatedly, until the "PASS- « » WORD" is displayed. PASSWORD - - - - - - - - - - - - The first digit in the password «...
-
Page 34: Anti-Theft Encoding
The anti-theft encoding is deactivated in the factory settings. The preprogrammed code set in the factory is: 8 9 3 7 This code is the same in all Precisa instruments. Therefore, for security reasons enter your own code. Keep your own code in a safe place. -
Page 35: Precisa Bus (Not Available For Firmware Nxx)
5 Operation ■ 5.3.15 Precisa BUS ( not available for firmware Nxx • BUS ON/OFF Switch Precisa BUS on and off To connect any Precisa BUS accessories switch the BUS to ON, else switch it OFF to have a normal RS232 communication.. -
Page 36: Application Menu Operation
■ 5 Operation Application menu operation This section explains the structure of the application menu and its functions. The structure of the application menu is dynamic and can be defined in the configuration menu (see chapter 5.3.4 "Configuring the application menu"). If a menu option is disabled in the configuration menu, it is not contained in the current application menu. -
Page 37: Methods
The XM66 moisture analyser features two freely definable methods, as per the XM 60 or XM 60-HR, and three additional fixed methods (cannot be changed), which have been specially created for the moisture determination of sewage sludge. -
Page 38: Saving A Method
■ 5 Operation of the method currently loaded is displayed in the info line. If the entry "EDIT METHOD" is switched off in the configuration menu under "Set application menu" (see chapter 5.3.4 "Configuring the application menu"), the menu options "STORE METHOD" and "CLEAR METHOD"... -
Page 39: Loading A Method
5 Operation ■ Display Step - - - - - - - - The name of the method must be « » changed. REPLACE METHOD - - - - - - - - Enter the new name for the method. METHOD TEST - - - - - - - - The method is saved and the moisture... -
Page 40: Setting Method Name
■ 5 Operation methods are saved, you cannot go to the "CLEAR METHOD" menu. If you press the « » key, the selected method is deleted, and the moisture analyser switches back to the weighing mode. NOTE A saving sequence can be cancelled at any time by pressing «esc». 5.4.2.4 Setting method name •... -
Page 41: Units
(see chapter 5.5.3 "The change key"). The high resolution moisture analyzers XM 60-HR has a ten times hig- her readability for the weight and also a ten times higher readability for some of the units for the moisture calculation. -
Page 42: Print Rate
■ 5 Operation Unit Calculation Residual weight in g / kg [‰]: g / kg ---------- - 1000 ⋅ Residual weight in g: RESIDUAL WEIGHT Moisture in g: WEIGHTLOSS MW DW – Explanations for the ATRO units The ATRO unit is required exclusively in the wood industry. In practice, wood contains different amounts of water, which can change continuously. -
Page 43: Autostart
5 Operation ■ Adjusts the temperature in the sample chamber to the set temperature, provided the sample chamber is closed. The temperature range available is 30°C ... 100°C. A flashing circle in the display indicates the stanby temperature is not reached, yet. 5.4.7 Autostart •... -
Page 44: Special Operating Keys
■ 5 Operation Special operating keys 5.5.1 The tare key – Ensure that there is no drying taking place, i.e. that the instrument is in weighing mode. • Activating taring – Press «T» briefly. – A taring procedure is performed. •... -
Page 45: The Print Key
If no drying has been performed since the instrument was started up, the weight value is printed. • Printing out the statistics (only XM 60, XM 60-HR) – Keep «PRINT» pressed until "PRINT STATISTICS" is displayed –... - Page 46 ■ 5 Operation Interface settings Interface : Baudrate : 9600 Parity : 7-even-1stop Handshake : Hardware Security settings Data-protection : off Theft-protection : off Key settings Key tone: on • Printing the application settings – Keep «PRINT» pressed until "PRINT APPLICATIONS" is displayed. –...
-
Page 47: The Change Key
– The measurement is started. • Stopping drying manually – Drying is under way. – Press «START/STOP» briefly. – The measurement is stopped. • Statistics Info (only XM 60, XM 60-HR) – Keep «START/STOP» pressed until "STATISTICS INFO" is dis- played. – Release «START/STOP»... - Page 48 ■ 5 Operation • Reset Statistics (only XM 60, XM 60-HR) – Keep «START/STOP» pressed until "RESET STATISTICS" is dis- played. – Release «START/STOP» • Ash residue – Ensure that there is no drying taking place, i.e. that the instrument is in weighing mode.
-
Page 49: Determining Moisture Levels
6 Determining moisture levels ■ Determining moisture levels The moisture analyser is used as a quick and reliable means of determining the moisture content in powders and liquids by the thermogravimetric process. Fundamental principles The term moisture does not just relate to water, it also encompasses all substances which evaporate when they are heated. -
Page 50: Adjusting To The Existing Measuring Process
■ 6 Determining moisture levels 6.1.1 Adjusting to the existing measuring process The moisture analyser is frequently used in place of other drying techniques (like the drying oven) because it is easier to operate and offers shorter measuring times. Consequently, the conventional measuring process has to be adapted to the device so that comparable results can be achieved. -
Page 51: Preventing Samples Being Encrusted
6 Determining moisture levels ■ Solids: • Distribute powder samples evenly on the weighing pan. • Make course samples smaller using a mortar or grinder. Do not expose the sample to any heat while you are grinding it as this will lead to a loss of moisture. -
Page 52: Setting Drying Parameters
■ 6 Determining moisture levels NOTE The additional solvent is taken into account in the measurement printout because all the interim values are calculated on the basis of the current weight value. However, it has no bearing on the drying result because the solvent has completely dried off. - Page 53 The drying temperature is predefined by the user. During the first three minutes of drying, the target temperature is exceeded by 40%. (In the XM 60, XM 60-HR the time is selectable between 0.1 - 99.9 min) Once this time has elapsed, the temperature is adjusted down to the target temperature.
- Page 54 ■ 6 Determining moisture levels This program is used for samples with a very high moisture content. T [ C] 140 % 100 % t [s] 180 s Soft drying The drying temperature is predefined by the user. The end temperature is started up gently with a low heat output.
-
Page 55: Temperature
6 Determining moisture levels ■ 6.3.2 Temperature This function key is used to start the drying temperature input. The drying temperature can be entered in 1°C increments from 30°C ... 230°C. After 10 minutes temperatures higher than 200°C are automatically adjusted down to 200°C over the course of the next 20 minutes. -
Page 56: Switch-Off Criteria
This function key is used to start the definition of the switch-off criteria for the measurement. XM 60, XM 60-HR Two freely definable stop modes are available according to the "digit per time" resp. "% per time" principle. There is also the automatic stop mode "ADAPTSTOP". - Page 57 60 s t [s] One digit is the smallest change in measurement that can be displayed by the moisture analyser. In the XM 60, XM 66: 1 digit = 1 mg In the XM 60-HR: 1 digit = 0.1 mg...
-
Page 58: Statistics (Xm 60, Xm 60-Hr)
■ 6 Determining moisture levels on the basis of the drying progress. Statistics (XM 60, XM 60-HR) All results are automatically taken into the statisical evaluation. – Insure that there is no drying taking place, i.e. that the instrument is in weighing mode. -
Page 59: Reset Statistics
6 Determining moisture levels ■ Recorded values : 57.34 % : 57.38 % : 57.34 % : 57.39 % Information on calibration Last calibr. weight : 13.03.2016 Last calibr. temp. : 13.03.2016 6.4.2 Reset statistics The statistic are reseted by •... -
Page 60: Ash Residue Program
ASH RESIDUE The determination method of ash residue varies between the models XM 60, XM 60-HR and XM 66. When determining the ash residue, the desiccated sample is taken as the entry value. This sample is re- duced to ash in an external furnace and then re-weighed in the moi- sture analyser. -
Page 61: Ash Residue Xm 60, Xm 60-Hr
7 Ash residue program ■ Ash residue XM 60, XM 60-HR The XM 60 and XM 60-HR can only store one initial sample weight. There are no options to set parameters for ash residue determination. Ash residue: – Ensure that no moisture analysis is taking place, i.e. that the instrument is in weighing mode. -
Page 62: Ash Residue Xm 66
■ 7 Ash residue program NOTE Tare the moisture analyser with an empty pan before starting the ash residue process. Ash residue XM 66 The moisture analyser XM66 can store up to four initial sample weights ("MEMORY CHOICE ON"), which are not deleted after deter- mination of the ash residue. - Page 63 7 Ash residue program ■ The ash residue is calculated using the dry mass. Ash residue: Ensure that no moisture analysis is taking place, i.e. that the instru- ment is in weighing mode. Display Step The weighing numbers 1 .. 4 «...
-
Page 64: Ash Residue With New Tare Weight
■ 7 Ash residue program Display Step 0.000 9 Change to residual « » ORIGINAL 0,000 9 Confirm the choice « » RESIDUaL 0.000 9 Tare the device without load «T» Tare 0.235 9 Put the pan with the ash onto the balance RESIDUaL 0.000 9... - Page 65 7 Ash residue program ■ Display Step 0.000 9 Tare the device without load «T» Tare 2.535 Place the empty pan1 onto «T» the balance. Measure tara 1. tare pan 4.809 Pour the sample into the pan. « » Confirm original weight original 0.000 4.809...
- Page 66 ■ 7 Ash residue program 5.19 % « » Confirm weighing ash residue The ash residue is automatically calculated and printed. If "MEMORY CHOICE OFF", the process will run for only one sample. Selection of the initial sample weight number and re-zero are not nes- seccary.
-
Page 67: Data Transfer
8 Data transfer ■ Data transfer The moisture analyser is equipped with an RS232/V24 interface for data transfers to peripheral instruments. Before the data transfer, the RS232 interface must be matched with the one in the peripheral instrument in the instrument's configuration menu (see chapter 5.3.10 "Interface functions"). -
Page 68: Connection Scheme
■ 8 Data transfer Blank (space) Prefix (+,–, space) Decimal point D0...D7 Digits U ... Unit (only if the weight is stable, otherwise no unit is sent) Carriage return Line feed NOTE Unused positions are filled with spaces. The decimal point DP can be between D0 and D7. Connection scheme •... -
Page 69: Remote Control Commands
8 Data transfer ■ • Pin configuration of the RJ45 socket moisture RJ 45 Remark analyser n.c. Not connected RS 232 out 2 Out (V24) In (V24) Out (9 ... 16V) RS 232 in In (V24) Out (V24) EXTBUS In (5V, logic) Remote control commands Command Function... -
Page 70: Examples Of The Remote Control Of The Instrument
■ 8 Data transfer Command Function SDTttmmjj Set date and time (German: (Tag, Monat, Jahr, hhmmss Stunde, Minute, Sekunde) SDTmmddyy Set date and time (Month, Day, Year, Hour, hhmmss Minutes, Seconds) T (ttt) Tare or set tare to a specific value ZERO Set instrument to 0 (if weight is stable and within the zero setting range) -
Page 71: Service
Do not operate the moisture analyser again until you have had it checked by a Precisa service engineer. The connection ports on the back of the instrument may not come into contact with liquids. -
Page 72: Replacing The Mains Fuse
– 115 volt variant: T 6.3 A, 115 V, 5x20 mm • If the instrument still does not work after replacing the fuse, contact the Precisa Service Center. DANGER Under no circumstances should you use other fuses or attempt to... -
Page 73: Calibration, Adjustment
9 Service ■ Calibration, adjustment The calibration of the moisture analyser is defined in the configuration menu (see chapter 3.8 "Weight calibration" and see chapter 5.3.6 "Balance calibration"). NOTE The balance calibration and the temperature calibration can be interrupted at any time by pressing «ON/OFF». 9.3.1 Calibrating the balance Possible types of balance calibration: •... - Page 74 ■ 9 Service Display Step - - 50 Place the calibration weight on the weighing pan. The display continous to flash. +50,000 Calibration is complete when the display stops flashing External calibration with a freely definable weight "SET CALIBRATION MODE EXT.-DEF." must be set in the configuration menu (see chapter 5.3.6 "Balance calibration") for external calibration with a freely definable weight.
-
Page 75: Temperature Adjustment
Calibration report printout Balance calibration report Calibration ------------ Time of the calibration and instrument Date 16.10.2002 Time 12:51:36 Name : XM 60 data Software : N50-0000 Serialno : 3300-1 Status of the calibration Calibration o.k. Operator ID, if activated under Set Print Operator Format (see chapter 5.3.3 "Configuring... - Page 76 Temperature calibration report printout Temperature calibration report Temperature Calibration ----------------------- Time of the calibration and instrument Date 16.10.2016 Time 12:51:36 Name : XM 60 data Software : C01-0000 Serialno : 5600500 Identifier of the temperature adjustment Temp. Reference ID : 0.02...
-
Page 77: Firmware Update
Error messages The instrument displays an error description in the info line. NOTE If an error occurs without any corresponding description in the info line, a Precisa service engineer must be called. Error message Cause Starting value too • The sample weight is too small small (<0.200 g). - Page 78 ■ 9 Service a Precisa service engineer. Fault Possible causes Weight display • Instrument is not switched on does not light • Mains cord is not plugged in • Mains fuse is faulty "OL" is • The weight range has been exceeded (observe...
- Page 79 9 Service ■ Fault Possible causes The printer • The parity setting or the baud rate of the prints interface don't match incorrect • The data cable is faulty characters Drying won't • The sample is not stable start...
-
Page 80: Overview
■ 10 Overview Overview 10.1 Technical data Spezification XM 60 (-HR) XM 66 Heat source, heater type Halogen / Infra-red / Halogen / Infra-red / Dark Radiator Dark Radiator Weighing range [g] / Readability [g] 124 / 0.001 (0.0001) 310 / 0.001... - Page 81 10 Overview ■ Spezification XM 60 (-HR) XM 66 Memory capacity: Methods (with all settings) 2 + 3 fixed User texts Operation: "Easy access" sample holder Display Keypad 10 keys 10 keys Password protection Special features: Initial weighing with limits / Initial...
-
Page 82: Accessories
350-8508 -10 V ... +10 V (10 mV resolution) Input/output module 350-8509 (6 TTL inputs, 8 relay outputs) Multiplexer for up to 7 Precisa instruments 350-8513 (RS232) Data cable RJ 45 - RJ 45, 0.75 m 350-8525 Data cable RJ 45 - RJ 45, 1.5 m 350-8520 Data cable RJ 45 - RJ 45, 3.0 m... - Page 83 10 Overview ■ Dust fillter complete 350-8587 50 g adjustment weight, +/- 0.1mg 350-8241...
-
Page 84: Menu
■ 10 Overview 10.3 Menu 10.3.1 Configuration menu tree «MENU» Key is pressed during switch-on: • SET DATA PRINT SET PRINTFORMAT DATE AND TIME ON/OFF BALANCE-ID ON/OFF METHOD-ID ON/OFF COUNTER ON/OFF DRYER SETUP ON/OFF PRINTRATE ON/OFF OPERATOR-ID ON/OFF CAL.-INFO ON/OFF PRINT RATE 1.0 MIN OPERATOR... - Page 85 10 Overview ■ • SET BALANCE CAL. MODE MODE EXTERNAL MODE EXT.-DEF. DEF. 0.0000 g • TEMP. CAL. TEMP. CAL. ON/OFF • STABILITY STABILITY MEDIUM HIGH • QUICK-START QUICK-STARTON/OFF • SET INTERFACE BAUDRATE 1200 2400 4800 9600 19200 PARITY 7-EVEN-1STOP 7-ODD-1STOP 7-NO-2STOP 8-NO-1STOP...
-
Page 86: Application Menu Tree
■ 10 Overview • PASSWORD PASSWORD –––– DATA-PROTECTION HIGH NEW PASSWORD – – – – • THEFTCODE THEFTCODE –––– THEFT-PROTECTIONON/OFF NEW CODE – – – – • KEY TONE KEY TONE ON/OFF • LANGUAGE LANGUAGE ENGLISH SPRACHE DEUTSCH LANGUE FRANCAISE •... -
Page 87: Key Menus
10 Overview ■ • METHOD METHOD ttt... • SET TARGET WEIGHT WEIGHT CHECK ON/OFF NOMINAL 5.000 g UPPER LIMIT 6.000 g LOWER LIMIT 4.000 g • UNIT UNIT 100-0% 0-100% ATRO 100-999% ATRO 0-999% G/KG RESIDUAL WEIGHT WEIGHT LOSS • PRINT RATE PRINT RATE 1.0 MIN •... -
Page 88: Setting Drying Parameters
XM 66 RESET COUNTER PRINT not for XM 66 PRINT STATISTICS PRINT STATUS PRINT APPLICATIONS • Tare key TARE not displayed only XM 60-HR HR MODE ON/OFF BALANCE CALIBRATION TEMP. CALIBRATION • Change key 100-0% 0-100% ATRO 100-999% ATRO 0-999%... -
Page 89: Setting And Saving The Configuration
10 Overview ■ • STOPMODE XM 60, XM 60-HR DIGIT/TIME 2/20 • %/ZEIT 0.2/20 AUTO STOP DIGIT/TIME %/TIME ADAPTSTOP • STOPMODE XM 66 AUTOSTOP 1/20 D/S • AUTOSTOP 2/10 2/20 2/30 2/60 ADAPTSTOP FREE 10.3.5 Setting and saving the configuration «MENU»... - Page 90 ■ 10 Overview...
-
Page 91: Index
10 Overview ■ 10.4 Index tory 23 Connection scheme 66 Accessories 80 ADAPTSTOP 55 Adjusting to the existing measuring process 48 Data transfer 65 Anti-theft code 32 Date and Time 29 Application menu 21 Drying parameters 50 Application menu, activating 34 Drying, start 45 Application menu, configura- Drying, stop 45... - Page 92 ■ 10 Overview Service 69 Servicing 69 Key sound 32 Socket RJ45 67 Soft drying 52 Software update 75 Levelling 16 Standard drying 51 Location 14 Standby temperature 40 Standby temperature, enabling Mains connection 15 Starting drying 45 Maintenance 69 Starting Weight 38 Method, content 35 Statistics, Reset 46...
Need help?
Do you have a question about the XM 60 and is the answer not in the manual?
Questions and answers