Sign In
Upload
Download
Table of Contents
Contents
Add to my manuals
Delete from my manuals
Share
URL of this page:
HTML Link:
Bookmark this page
Add
Manual will be automatically added to "My Manuals"
Print this page
×
Bookmark added
×
Added to my manuals
Manuals
Brands
Artesia Manuals
Musical Instrument
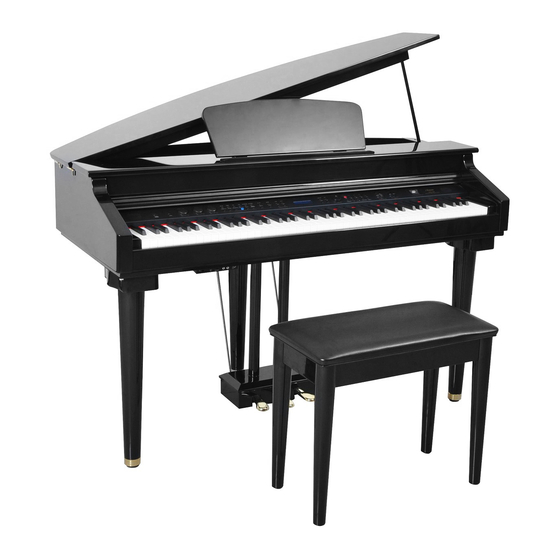
AG-50
Owner's manual
Artesia AG-50 Owner's Manual
Micro baby
Hide thumbs
1
2
3
Table Of Contents
4
5
6
7
8
9
10
11
12
13
14
15
16
17
18
19
20
21
22
23
24
25
26
27
28
29
30
31
32
33
34
35
36
37
38
39
40
41
42
43
44
45
46
47
48
49
50
51
52
53
54
55
56
57
58
59
60
61
page
of
61
Go
/
61
Contents
Table of Contents
Troubleshooting
Bookmarks
Table of Contents
Table of Contents
Taking Care of Your Digital Piano
Service and Modification
Handling and Transport
Cleaning
Location
Power
Panel Controls
Connector Panel
Bottom of Piano
Demo
Play Demo Songs
Choose a Demo Song
Play Along Demo Songs
Keyboard Voices
Voice Select
Adjusting the Keyboard Voice Volume
Layer Voice
Split Voice
Reverb/Chorus
Duet
Equalizer
Rhythm
Rhythm Style Select
Using the Rhythm Style
Adjusting the Tempo
Split Point for Auto Accompaniment
Adjusting the Chord
Adjusting the Auto Accompaniment Volume
Auto Accompaniment
Single Mode
Fingered Mode
Using the Auto Accompaniment
Metronome
Function
Adjusting the Keyboard Voice Volume
Transpose
Master Tune
Touch Cure
Main Octave
Split Octave
Dual Octave
Split Point
Chord Point
Chord Type
Main/Split/Dual Pan
Reverb Type
Reverb Level
Chorus Type
Chorus Level
Usb MIDI in
MIDI out
Local
Usb Play Mode
Usb Play Speed
Auto Record Track
Usb Mute Track
Bluetooth
Auto Close Time
Factory Reset
Registration Memory
Save Registration
Recall Registration
Style Hold
Record
Local Recording
Play Back
Delecting Tracks
Usb Recording
Play Back
Delecting Tracks
Play Along Songs
Select and Listen to a Song
Practicing the Right Hand Melody of the Song
Practicing the Left Hand Melody of the Song
Practicing both Hands of the Song
Usb
Insert the Usb
Remove the Usb
Play
Bluetooth
Bt-1 Artesia Bluetooth Connection
Bluetooth Connection
MIDI
MIDI Connection
MIDI out
Local On/Off
MIDI Implementation Chart
Auto Bass Chord Fingering Guide
Voice List
Style List
Troubleshooting
Specifications
Advertisement
Quick Links
1
Handling and Transport
2
Panel Controls
3
Bottom of Piano
4
Troubleshooting
Download this manual
Table of
Contents
Previous
Page
Next
Page
1
2
3
4
5
Advertisement
Table of Contents
Need help?
Do you have a question about the AG-50 and is the answer not in the manual?
Ask a question
Questions and answers
Related Manuals for Artesia AG-50
Musical Instrument Artesia AP-8 Owner's Manual
Deluxe upright digital piano (38 pages)
Musical Instrument Artesia AG-41 Owner's Manual
Deluxe upright digital piano (63 pages)
Musical Instrument Artesia ag-40 Assembly Manual
(7 pages)
Musical Instrument Artesia A-10 Owner's Manual
(40 pages)
Musical Instrument Artesia AG-30 Owner's Manual
Micro baby (61 pages)
Musical Instrument Artesia AM-3 Owner's Manual
(36 pages)
Musical Instrument Artesia AP-100 Assembly Manual
Upright digital piano (4 pages)
Musical Instrument Artesia A-61 Owner's Manual
(36 pages)
Musical Instrument Artesia A-20 Owner's Manual
(44 pages)
Musical Instrument Artesia AG-28 Assembly Manual
Grande (6 pages)
Musical Instrument Artesia FUN-1 Owner's Manual
(8 pages)
Musical Instrument Artesia DP-150E Owner's Manual
(32 pages)
Musical Instrument Artesia DP10E-WH Owner's Manual
(40 pages)
Musical Instrument Artesia PE-88 Owner's Manual
Virgin musical instruments (53 pages)
Musical Instrument Artesia PA-88H Owner's Manual
(34 pages)
Musical Instrument Artesia Dp-10e Assembly Manual
Home digital piano (4 pages)
This manual is also suitable for:
Ag-30
Table of Contents
Print
Rename the bookmark
Delete bookmark?
Delete from my manuals?
Login
Sign In
OR
Sign in with Facebook
Sign in with Google
Upload manual
Upload from disk
Upload from URL


Need help?
Do you have a question about the AG-50 and is the answer not in the manual?
Questions and answers