Table of Contents

Related Manuals for Sunny 068


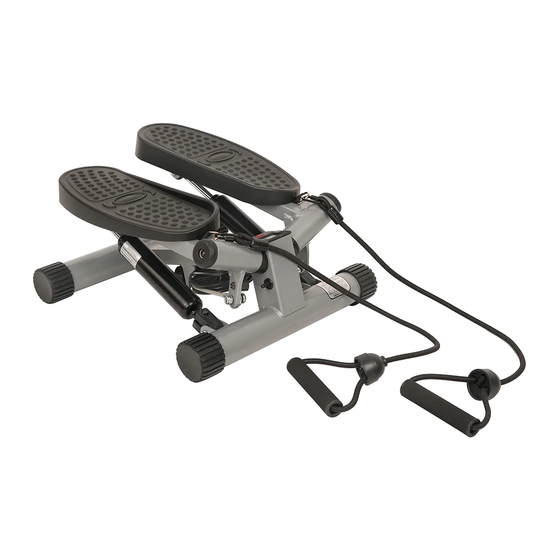
Summary of Contents for Sunny 068
- Page 1 TWISTING STAIR STEPPER WITH BANDS NO. 068 USER MANUAL IMPORTANT: Read all instructions carefully before using this product. Retain owner’s manual for future reference. For customer service, please contact: support@sunnyhealthfitness.com...
-
Page 2: Important Safety Information
IMPORTANT SAFETY INFORMATION We thank you for choosing our product. To ensure your safety and health, please use this equipment correctly. It is important to read this entire manual before assembling and using the equipment. Safe and effective use can only be assured if the equipment is assembled, maintained, and used properly. -
Page 3: Exploded Drawing & Parts List
EXPLODED DRAWING & PARTS LIST PART NUMBER PART QUANTITY... -
Page 4: Assembly Instructions
ASSEMBLY INSTRUCTIONS 1. Remove the main frame from the box. 2. Lift one pedal up with your hands. 3. Ensure the cable is secured around the wheel as shown in the picture below. 4. Turn the Knob (No. 3) clockwise "+" all the way until it’s reached its furthest point. Knob (No. - Page 5 ASSEMBLY INSTRUCTIONS You may now step onto your stepper and begin use! The assembly is complete! TO ADJUST THE STEPPING HEIGHT: NOTE: The stepper is set at its highest stepping height after assembly. To lessen the range of the stepping height, loosen the Knob (No. 3) by turning counter-clockwise.
- Page 6 EXERCISE BAND INSTRUCTIONS 1. Unscrew the hook nut located on the band until one end of the hook is open as shown in the first picture below. 2. Attach the band hook onto the pedal hook and screw the hook nut closed so that the pedal hook is secured within the hook nut.
-
Page 7: Maintenance And Care
MAINTENANCE & CARE 1. If the stepper screeches during exercise, please discontinue use and do the following: loosen the screw located on the U-Shaped iron and then loosen the cable as shown in the picture below. Next, lubricate both the U-Shaped iron and cable to improve the sliding condition. -
Page 8: Exercise Computer
EXERCISE COMPUTER Our computerized display console on the Sunny Twisting Stair Stepper with Bands allows the user to tailor a personalized workout by monitoring their progress. During a workout, the display console will alternately and repeatedly display your Time, Calories, Count, Reps per minute and Scan (all of the above). -
Page 9: Changing The Battery
CHANGING THE BATTERY 1. Remove the plastic cap from the battery. 2. Remove the battery using your hand or with the tool provided. 3. Insert the new battery with your hand or the provided tool. Ensure that the positive side of the battery (+) is facing upward once the new battery is in place.
Need help?
Do you have a question about the 068 and is the answer not in the manual?
Questions and answers