Table of Contents
Advertisement
Available languages
Available languages
Advertisement
Chapters
Table of Contents

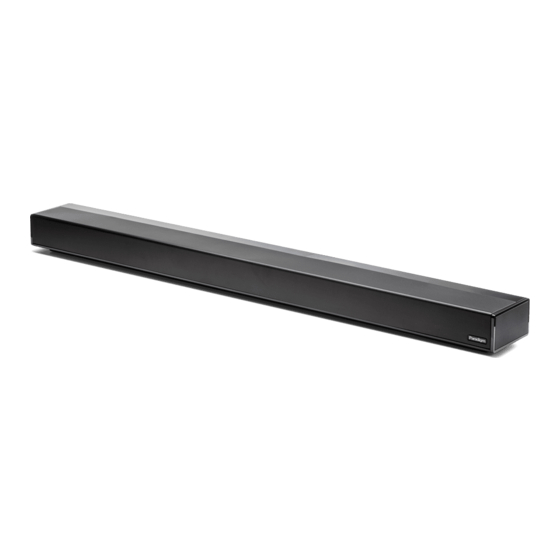
Related Manuals for Paradigm SOUNDPLAY


Summary of Contents for Paradigm SOUNDPLAY
- Page 2 No naked flame sources, such as candles, should be placed on the product. SOUNDPLAY Do not expose this apparatus to dripping or splashing and ensure that no objects filled Tested to comply with FCC standards.
- Page 3 • Reorient or relocate the receiving antenna. Paradigm Electronics Inc. • Increase the separation between the equipment 205 Annagem Blvd. Mississauga, ON L5T 2V1 and receiver.
- Page 4 This Class B digital apparatus complies with Canadian Hereby, Paradigm Electronics Inc., declares that this CAN ICES-3(B) / NMB-3(B). Operation is subject to the Paradigm SOUNDPLAY is in compliance with the following two conditions: (1) this product may not cause essential requirements and other relevant provisions of: harmful interference, and (2) this product must accept 1995/5/EC –...
- Page 5 Dolby Laboratories. Other trademarks and trade names are those of their respective owners. The Bluetooth word mark and logos are registered trademarks owned by Bluetooth SIG, Inc. and any use of such marks by Paradigm Electronics Inc. is under license.
-
Page 6: Table Of Contents
Introduction and Overview ..... . 7 Menu Option: Bass Mode ..... 20 Placement and Mounting . - Page 7 rev. 001 wall mount installation template soundbar power cord wall bracket POWER MENU MUTE USB cable shoulder for ARC ™ BASS MODE ™ bolts NIGHT NORMAL BASS + calibrated microphone BLUETOOTH OPTICAL 1 OPTICAL 2 IR emitter ANALOG 1 ANALOG 2 remote control AAA batteries...
-
Page 8: Introduction And Overview
INTRODUCTION AND OVERVIEW Thank you—the Paradigm owner, for loving what we tweeters and woofers. Surround channels are do, and making it possible for us to do what we love. simulated using sophisticated digital signal Paradigm’s dedicated in-house engineering processing that directs sound from the system’s and design team developed the SOUNDPLAY to tweeters and woofers throughout the room. -
Page 9: On-Wall Installation
ON-WALL INSTALLATION WARNING! We strongly recommend The soundbar can be mounted above or below a locating the wall bracket so at least television with the feedback display and rear con- one of the screw locations attaches to a stud. WARNING! To prevent injury, nection panels orientated towards the bottom or top of the soundbar (depending on your specific this apparatus must be securely attached to the... - Page 10 3. Using a stud finder, determine if there is a wall Fig. 2a stud directly behind one of the three center screw locations (fig. 2a). If no stud is found: use the center most screw location and drill a pilot hole for the wall anchor.
-
Page 11: Connection
Fig. 3 13.7mm CONNECTION Fig. 4 Turn your soundbar off before making or breaking any signal connections! WARNING! The p owe r co rd s h o u ld n o t b e installed, removed, or left detached from the soundbar while the other end is connected to an AC power source. -
Page 12: Signal Connection
If you remove your soundbar from the country of Please note, if your soundbar is being used in original sale, be certain that AC power supplied an on-wall installation you may find it helpful to in any subsequent location is suitable before con- use 90°... -
Page 13: Subwoofer Connection
LFE (low frequency locations a remote would not normally reach. effects) channel information in multi-channel recordings and/or reinforce bass performance of stereo recordings. A Paradigm subwoofer or an alternative brand subwoofer can be connected via the soundbar’s “Sub Out” RCA connection. - Page 14 Fig. 6 Non Multi- Audio Only Sources: Non Multi-Channel Sources: MP3 Player, VCR, Older Game Console, Etc. CD Player, Etc. audio: audio: audio: analog digital optical analog IR Out Optical 1 In Analog 1 In Sub Out IR Out Optical 2 In Analog 2 In Left Left...
-
Page 15: Control Panel
CONTROL PANEL Your soundbar features seven buttons that this button a second time or pressing either control the following functions: volume button will restore the previous volume setting. MENU: Activates the setup menu. When the VOL+/VOL–: Adjusts volume. When the menu is menu is activated the menu button will take you back one level, the volume buttons will function activated the volume buttons will function as up/... -
Page 16: Changing The Remote's Battery
BASS MODE – BASS+: Increases bass output. Fig. 9 BASS MODE – NORMAL: Restores normal levels. INPUT: Activates the selected input. POWER MENU MUTE CHANGING THE REMOTE’S BATTERY Caution! Danger of explosion if battery is incorrectly replaced. Replace only with the same or equivalent type. The remote control for your speaker uses two AAA type batteries. -
Page 17: Display
DISPLAY Fig. 10 Audio Codec Status Current Input OPTICAL 1 Volume Level Current Input Anthem Room Custom Name Correction Status Current Input Custom Name: This indicates Your soundbar displays the following information: the input that is currently active using its Audio Codec Status: If an audio signal with custom user defined name. -
Page 18: The Menu System
THE MENU SYSTEM Fig. 11 Menu Enter / Menu Menu Select Down Fig. 12 NAVIGATING THE MENU** The menu is navigated using the ‘up/down/ left/right/enter’ navigation system. Up and Down are used to cycle through the menu and submenu options. Right or Select are used to access a submenu or to select an option. -
Page 19: Menu Option: Subwoofer
MENU OPTION: SUBWOOFER Subwoofer > Wired Sub: This option configures Subwoofer: Enter the submenu by pressing the the soundbar to use an external subwoofer enter button. Here you may configure external connected via a cable to the soundbar’s Sub subwoofer integration. It is possible to connect Out RCA connection. - Page 20 AN OVERVIEW OF THE MENU STRUCTURE (CONTINUED) Wireless Setup [setup wireless] Service [advanced controls] –› Bluetooth Pairing [Bluetooth Pairing] –› Firmware [displays firmware versions] Learn Remote [learn remote codes for second remote control] –› MCU [displays soundbar firmware version] –› Volume + –...
-
Page 21: Menu Option: Bass Level
MENU OPTION: BASS LEVEL MENU OPTION: STEREO MODE Bass Level: Enter the submenu by pressing the Stereo Mode: Enter the submenu by pressing the enter button. Here you can configure bass output enter button. Here, you may set how the soundbar by ±10dB in increments of 2dB. -
Page 22: Menu Option: Display
MENU OPTION: DISPLAY your soundbar’s in-room sound, then computes the required correction to yield optimal perfor- Display: Enter the submenu by pressing the mance within your acoustic environment. enter button. The settings in this menu allow Anthem Room Correction > Off or On: This you to adjust the brightness of the display and configure the display to automatically turn on option turns the Anthem Room Correction... -
Page 23: Menu Option: Wireless Setup
the power button on the control panel or remote you to configure how the soundbar responds to control. Activate by pressing the enter button and incoming IP commands when it is in standby mode. the soundbar will respond with ‘Saved’. Power Settings >... -
Page 24: Menu Option: Source Name
The learning function of the soundbar allows remote approximately 12 inches (30cm) from you to program either scenario. the soundbar and press the appropriate but- ton four times. If the new command is learned Learn Remote: Enter the submenu by press- successfully, the soundbar’s display will display ing the enter button. -
Page 25: Menu Option: Service
Service > Factory Reset: Enter the submenu buttons will move to the next/previous space. To finish programming an input name, use the by pressing the enter button. Resetting the left/right buttons to move all the way to the left soundbar will restore all settings to the factory or right. -
Page 26: Menu Option: Usb Upgrade
MENU OPTION: USB UPGRADE USB Upgrade: Enter the submenu by pressing the enter button. USB Upgrade > Upgrade DSP > No or Yes: This option turns the DSP Upgrade off or on. Activate by pressing the enter button and the soundbar will respond with ‘Saved’. -
Page 27: Surround Sound Decoding
30 seconds, and plug it occasionally require firmware updates. Please back in. Press the power button to turn the check www.paradigm.com for the latest firmware soundbar on. This reboot will cycle the power updates. off and on. -
Page 28: Arc (Anthem Room Correction)
(ANTHEM ROOM CORRECTION) ™ Even when the finest speakers are perfectly 3. Download the latest version of ARC-2 software positioned, the room itself still has a dramatic from www.anthemav.com and install it. Follow impact on any system’s sound, an impact more the on-screen instructions. -
Page 29: Limited Warranty
In no event shall Warranty is Void if: Paradigm Electronics Inc., their agents or repre- • The product has been abused (intentionally sentatives be responsible for any incidental or accidentally);... -
Page 30: Frequently Asked Questions
This could be caused by any number of things. Review the “Connection” section of this manual Paradigm does not provide a pivoting wall- for a better understanding of recommended bracket for this soundbar. Aftermarket options connection methods and possible options that may exist, but we can not recommend or guar- might impact the soundbar’s ability to receive... -
Page 31: Troubleshooting
Paradigm is supported. If so, instead of encoded audio from your television and ‘learning’ with the soundbar, use the code other audio/video source components. - Page 32 When using an aftermarket remote, the sound- External sub is too quiet bar turns off when the television turns on • Turn up the volume on the subwoofer. • Turn the television on. Manually press the • Adjust the bass level setting in the soundbar Power button on the soundbar so that both menu system.
-
Page 33: Dimensional Drawings
DIMENSIONAL DRAWINGS WALL MOUNT CONFIGURATION 3.9 ” (9.9cm) 46.1” (117cm ) 5” (12.7cm ) FRONT VIEW 0.4 ” AUDIO & POWER (1.1cm) VIDEO 9.2 ” CONNECTIONS 3.8” (23.4cm) (9.6cm) 18.7” (47.5cm) 8.9” (22.7cm) 32” (81.3cm ) 18.3” (46.4cm ) 12” (30.5cm ) BACK VIEW 3.8”... - Page 34 NOTES...
- Page 36 NOTES...
- Page 38 16 La prise principale du cordon d’alimentation doit être fac- ilement accessible. 17 MISE EN GARDE : risque d’explosion si la pile n’est pas SOUNDPLAY placée correctement. Remplacez la pile uniquement avec Testé pour être conforme aux normes FCC le même type de pile ou un type équivalent (AAA). Jetez les POUR UNE UTILISATION À...
- Page 39 28 Si le compartiment à piles ne se ferme pas bien, cessez ÉNONCÉ SUR LES INTERFÉRENCES DE LA FEDERAL d’utiliser le produit et gardez-le hors de la portée des COMMUNICATIONS COMMISSION : Cet équipement a été enfants. testé et jugé conforme aux limites d’un appareil numérique 29 Si vous pensez que les piles ont été...
- Page 40 WEEE. • Le cordon d’alimentation ne doit pas être installé, enlevé À cette fin, Paradigm a demandé à ses distributeurs dans ou laissé détaché de l’enceinte lorsque l’autre extrémité les pays membres de l’Union européenne de reprendre et est raccordée à...
- Page 41 Le mot servant de marque Bluetooth et les logos sont des marques de commerce déposées possédées par Bluetooth SIG, Inc. et toute utilisation de ces marques par Paradigm Electronics Inc. est autorisée par licence.
- Page 42 Introduction et aperçu ......7 Surrounds (ambiophoniques) ....21 Positionnement et montage .
- Page 43 rev. 001 gabarit d'installation pour montage au mur cordon d'alimentation support mural pour récepteur du caisson de sous-graves POWER MENU MUTE cordon BASS MODE microphone NIGHT NORMAL BASS + d'alimentation étalonné ARC pour la barre de son Boulons à BLUETOOTH épaulement OPTICAL 1 OPTICAL 2...
-
Page 44: Introduction Et Aperçu
L’équipe de génie et de conception dévouée de la pièce. Paradigm a développé la barre de son SOUNDPLAY Bluetooth afin d’offrir un rendement multicanaux exceptionnel garantit la compatibilité avec les à... -
Page 45: Installation Sur Un Mur
INSTALLATION SUR UN MUR MISE EN GARDE! Nous vous recom- La barre de son peut être montée au-dessus ou mandons fortement de positionner en-dessous d’une télévision avec l’affichage de rétro- le support mural de façon à ce qu’au action et les panneaux de connexion arrière orientés moins une vis soit fixée dans un montant. - Page 46 3. À l’aide d’un détecteur de montant, déterminez si un mural. Avant de relâcher, assurez-vous que la barre de montant du mur se trouve directement derrière l’un son est bien fixée dans les trous piriformes et qu’elle des trois emplacements de vis centraux (fig. 2a). est bien soutenue (fig.
-
Page 47: Raccordement
Fig. 3 13,7mm RACCORDEMENT Fig. 4 MISE EN GARDE! Éteignez la barre de son avant de faire ou de défaire des raccords de signal! MISE EN GARDE! Le cordon d’alimentation ne doit pas être installé, enlevé ou laissé détaché de la barre de son lorsque l’autre extrémité... -
Page 48: Raccordement Du Signal
Le cordon d’alimentation doit être inséré fermement De plus, si vous connectez la sortie audio de votre dans la prise CA du panneau de raccordement télévision à l’aide d’une connexion Optique numérique arrière de la barre de son, puis l’autre extrémité doit ou Analogique gauche/droite (RCA), votre télévision être insérée dans une prise murale CA appropriée. -
Page 49: Raccordement D'un Caisson De Sous-Graves
La plupart des utilisateurs souhaiteront passer les entendu, d’utiliser un superbe caisson de sous-graves câbles directement des composantes sources à la Paradigm. barre de son et passer un câble optique numériqu de Aucun caisson de sous graves la barre de son à la télévision, afin de transmettre le signal vidéo. - Page 50 réglage de filtre passif « bypass » ou « LFE », nous recommandons de régler le filtre passif au niveau le plus élevé. SORTIES IR Ces prises acceptent les émetteurs IR avec des con- necteurs monostyles de 3,5 mm. Un émetteur IR est inclus avec la barre de son.
-
Page 51: De Sous-Graves
Fig. 6 Sources audio/vidéo quine sont pas Sources audio uniquement : Connexion réseau : à canaux multiples : magnétoscope, lecteur MP3, lecteur utiliser Ethernet en tant que solution console de jeu plus ancienne, etc. CD Player, etc. de rechange à une connexion Wi-Fi. Réseau : Audio : Audio :... -
Page 52: Panneau De Commande
PANNEAU DE COMMANDE Votre barre de son comporte sept boutons qui commandent MUTE (SOURDINE) : Met la barre de son en sourdine. les fonctions suivantes : Lorsque le son est en sourdine, la barre de son indiquera « MUTE ». En appuyant sur ce bouton une deuxième fois ou POWER/STANBY (ALIMENTATION/VEILLE) : Allume et en appuyant sur le bouton du volume, le réglage du volume éteint la barre de son. -
Page 53: Changer La Pile De La Télécommande
BASS MODE – NORMAL (MODE GRAVES – NORMAL) : (Éteindre) distincts. D’autres offrent un seul bouton pour Rétablit les niveaux normaux. basculer de Allumer à Éteindre. La fonction appren- tissage (learning) de la barre de son vous permet de INPUT (ENTRÉE) : Active l’entrée choisie. programmer en fonction de ces deux scénarios. -
Page 54: Affichage
AFFICHAGE Fig. 9 [Statut Wi-Fi] [Statut Audio Codec] [Entrée actuelle] [Niveau de volume] [Nom personnalisé [Statut Anthem de l'entrée actuelle] Room Correction] Nom personnalisé de l’entrée actuelle : Ceci indique Votre barre de son affiche les renseignements suivants : l’entrée qui est actuellement active en utilisant le nom Statut Audio Codec : Si un signal audio avec encodage défini par l’utilisateur. -
Page 55: Le Système De Menu
LE SYSTÈME DE MENU Fig. 10 [Menu] [Entrer/ [Menu [Menu choisir] bas] haut] Fig. 11 et Bas sont utilisées pour naviguer dans les options du menu et du sous-menu. Le bouton de Droite ou Entrer/ choisir est utilisé pour accéder à un sous-menu ou pour choisir une option. -
Page 56: Option Du Menu : Caisson De Sous-Graves
OPTION DU MENU : CAISSON DE SOUS-GRAVES Subwoofer > No Sub (Caisson de sous-graves > aucun caisson) : Cette option configure la barre de Subwoofer (Caisson de sous-graves) : Entrez dans le son pour gérer toute l’information sur les graves et ne sous-menu en appuyant sur le bouton enter (entrer). - Page 57 UN APERÇU DE LA STRUCTURE DU MENU (SUITE) Wireless Setup [configuration sans fil] –› Bluetooth Pairing [jumelage Bluetooth] Service [commandes avancées] Learn Remote [apprendre les codes de la télécommande pour une –› Firmware [micrologiciel, affiche les versions du micrologiciel] –› MCU [affiche la version du micrologiciel de la barre de son] deuxième télécommande] –›...
-
Page 58: Bass Level (Niveau Des Graves)
Subwoofer > Wired Sub (Caisson de sous-graves > Surrounds > Off (Ambiophoniques > éteint) : Cette caisson câblé) : Cette option configure la barre de son option configure la barre de son (quand elle détecte pour qu’elle utilise un caisson de sous-graves externe un contenu encodé... -
Page 59: Stereo Mode (Mode Stéréo)
Stereo Mode > Voice+ (Mode stéréo > Voix+) : Cette Display > Bright (Affichage > brillance) : Cette option option configure la barre de son pour reproduire les configure l’affichage de la barre de son pour qu’il soit canaux de gauche et de droit avec un canal central à... -
Page 60: Anthem Room Correction
Touch Display > Off (Affichage tactile > éteint) : Cette OPTION DU MENU : ANTHEM ROOM CORRECTION option configure l’affichage tactile de la barre de son être éteint lorsque le soundbar est sur. Activez-la en Anthem Room Correction (Système de correction appuyant sur le bouton enter (entrer) et la barre de de la pièce Anthem) Entrez dans le sous-menu en son répondra par «... - Page 61 pendant environ 20 minutes. Lorsque la barre de son son sera toujours à ce niveau lorsqu’elle s’allume ou détecte un signal audio, elle s’allume automatique- qu’elle sort du mode veille. Le niveau par défaut est ment. Activez-la en appuyant sur le bouton enter –35dB.
-
Page 62: Wireless Setup (Configuration Sans Fil)
Lorsque ce paramètre est réglé à « éteint », la barre tissage (learning) de la barre de son vous permet de de son ne répondra pas aux commandes IP entrantes programmer en fonction de ces deux scénarios. lorsqu’elle est éteinte ou en mode veille. Si le contrôle IP Learn Remote (Apprentissage télécommande) : est réglé... -
Page 63: Source Name (Nom De La Source)
• ARC On [Anthem Room Correction On] (ARC allumé) ple, vous pouvez programmer l’entrée « Optical 1 » • ARC Off [Anthem Room Correction Off] (ARC éteint) pour qu’elle indique « DVD ». Choisissez la commande que vous souhaitez pro- À... -
Page 64: Usb Upgrade (Mise À Jour Usb)
Service > Factory Reset > In store > No (Service > affichera la version actuelle du micrologiciel pour le réinitialisation usine > en magasin > Non) : Activez en module du bouton tactile de la barre de son. appuyant sur le bouton enter (entrée). Le fait de choi- Service >... -
Page 65: Décodage Du Son Ambiophonique
Appuyez sur le bouton mises à jour du micrologiciel. Veuillez consulter le Power pour allumer la barre de son. Ce redémarrage site Web www.paradigm.com pour obtenir les mises à éteindra et allumera l’alimentation électrique, et forcera jour les plus récentes du micrologiciel. -
Page 66: Arc Mc (Anthem Room Correction)
(ANTHEM ROOM CORRECTION) Même lorsque les meilleures enceintes sont 3. Téléchargez la version la plus récente du logiciel parfaitement positionnées, la pièce elle-même peut ARC-2 sur www.anthemav.com et installez-le. avoir un effet important sur tout système de son, et un Suivez les instructions à... -
Page 67: Garantie Limitée
à l’une des conditions définies dans le ande et d’adéquation pour tout usage particulier, et ne paragraphe suivant, la garantie est nulle. peut être élargie ou étendue par quiconque. Paradigm • La garantie ne s’applique pas à un usage commer- Electronics Inc. -
Page 68: Foire Aux Questions
Puis-je monter la barre de son sur le mur à l’aide de central dédié? Non. La barre de son est conçue pour supports muraux qui pivotent? Paradigm ne fournit fonctionner comme un appareil de lecture audio à 2 pas de support mural qui pivote avec la barre de son. -
Page 69: Dépannage
Aucun son ne sort de la barre de son et de du fabricant pour savoir si votre télécommande ma télévision secondaire est supportée par Paradigm. Le cas • Lorsque vous utilisez la barre de son pour échéant, au lieu « d’apprendre » avec la barre de reproduire l’audio, la sortie audio de la télévision... - Page 70 être défectueuse. Mon barre de son ne réagit pas comme elle le devrait Appelez le service à la clientèle de Paradigm au 905-696-2868 pour obtenir les détails. • Éteignez et allumez la barre de son à l’aide de la télécommande ou du bouton Power du panneau...
-
Page 71: Dessins Dimensionnels
DESSINS DIMENSIONNELS CONFIGURATION DE MONTAGE MURAL 3,9 po (9,9cm ) 46,1 po (117cm ) 5 po (12,7cm ) VUE AVANT ALIMENTATION 0,4 po CONNEXIONS AUDIO ET VIDÉO (1,1cm) 9,2 po 3.8 po (23,4cm) (9,6cm) 18,7 po (47,5cm) 8,9 po (22,7cm) 32 po (81,3cm ) 18,3 po (46,4cm ) 12 po (30,5cm ) - Page 72 NOTES...
Need help?
Do you have a question about the SOUNDPLAY and is the answer not in the manual?
Questions and answers