
Related Manuals for NETGEAR WAC104


Summary of Contents for NETGEAR WAC104
-
Page 1: User Manual
802.11ac Wireless Access Point Model WAC104 User Manual October 2016 202-11698-01 350 E. Plumeria Drive San Jose, CA 95134... - Page 2 For the current EU Declaration of Conformity, visit http://kb.netgear.com/app/answers/detail/a_id/11621. Compliance For regulatory compliance information, visit http://www.netgear.com/about/regulatory. See the regulatory compliance document before connecting the power supply. Trademarks NETGEAR, Inc., NETGEAR and the NETGEAR Logo are trademarks of NETGEAR, Inc. Any non-NETGEAR trademarks are used for reference purposes only.
-
Page 3: Table Of Contents
Contents Chapter 1 Hardware Overview of the Access Point Unpack the Access Point..................6 Top Panel With LEDs.....................6 Back Panel......................7 Position the Antennas....................8 Product Label......................9 Chapter 2 Install and Access the Access Point in Your Network Position Your Access Point...................11 Connect the Access Point to Your Router or Network..........12 Connect the Access Point to Your Router............12 Connect the Access Point to a Network With a DHCP Server......14 Connect the Access Point With a Static IP Address to Your Network....16... - Page 4 802.11ac Wireless Access Use the Reset Button..................45 Erase the Settings...................45 Change the IP Address Settings of the Access Point..........46 View Devices Currently on the Network...............48 View the Status and Statistics of the Access Point..........49 View Information About the Access Point and the IP and WiFi Settings..49 View the Traffic Statistics.................52 Change the Traffic Statistics Polling Frequency..........54 View or Clear the Logs..................54...
-
Page 5: Chapter 1 Hardware Overview Of The Access Point
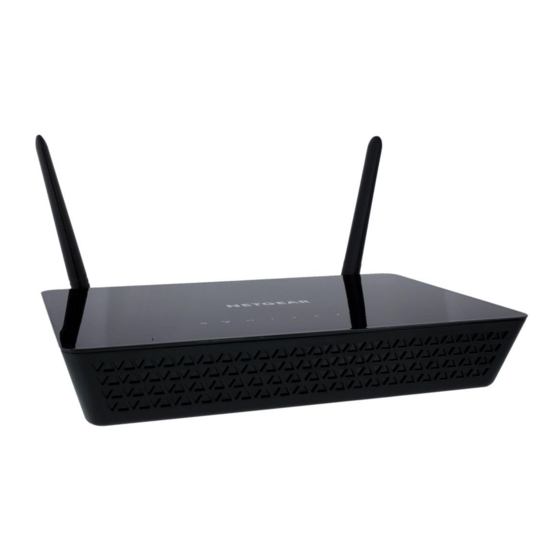
Hardware Overview of the Access Point The NETGEAR 802.11ac Wireless Access Point Model WAC104, in this manual referred to as the access point, supports dual-band concurrent operation at 2.4 GHz and 5 GHz with combined throughput of 1.2 Gbps (300 Mbps at 2.4 GHz and 867 Mbps at 5 GHz).The access point can be used in a standalone configuration connected... -
Page 6: Unpack The Access Point
The package contains the access point, Ethernet cable, power adapter (localized to the country of sale), and installation guide. Figure 1. WAC104 package contents Top Panel With LEDs The status LEDs are located on the top panel of the access point. -
Page 7: Back Panel
802.11ac Wireless Access Table 1. LED descriptions Description Power • Solid green. The access point is ready. • Solid green temporarily, blinking green temporarily, and finally solid green. The access point is starting or was reset to factory default settings and is restarting. For more information about resetting the access point to factory default settings, see Return on page 44. -
Page 8: Position The Antennas
802.11ac Wireless Access Figure 2. Access point back panel Viewed from left to right, the back panel contains the following components: • WPS button. Press the WPS button to join the access point’s WiFi network without typing the WiFi password. For more information, see Wi-Fi Protected Setup Method on page 24. -
Page 9: Product Label
802.11ac Wireless Access Product Label The product label on the bottom panel of the access point shows the default login information, default WiFi network names (SSIDs), serial number, and MAC address of the access point. Figure 4. Access point label Hardware Overview of the Access Point... - Page 10 Install and Access the Access Point in Your Network This chapter describes how you can install and access the access point in your network. The chapter contains the following sections: • Position Your Access Point on page 11 • Connect the Access Point to Your Router or Network on page 12 •...
-
Page 11: Position Your Access Point
802.11ac Wireless Access Position Your Access Point The access point lets you access your network anywhere within the operating range of your WiFi network. However, the operating distance or range of your WiFi connection can vary significantly depending on the physical placement of your access point. -
Page 12: Connect The Access Point To Your Router Or Network
802.11ac Wireless Access Connect the Access Point to Your Router or Network The access point functions as a WiFi access point and LAN switch for Internet access but does not provide routing services such as NAT and a DHCP server. Do not directly connect the access point to your DSL or cable modem. - Page 13 802.11ac Wireless Access To connect the access point to a router and log in to the access point: Connect the Ethernet cable that came in the package to one of the access point’s Ethernet ports. You can use any of the four LAN ports on the access point. Connect the other end of the cable to a LAN port on your router.
-
Page 14: Connect The Access Point To A Network With A Dhcp Server
802.11ac Wireless Access Connect the Access Point to a Network With a DHCP Server If your network includes a DHCP server or you want to let your router’s built-in DHCP server assign an IP address to the access point, you must enable the access point’s DHCP client. After setup, to access the access point web management interface (also referred to as user interface), you must use the IP address that the network’s DHCP server or router’s built-in DHCP server assigns to the access point. - Page 15 802.11ac Wireless Access The Power LED lights solid green. If the Power LED does not light, press the Power On/Off button. Wait for the WiFi LED to light solid green. If the WiFi LED does not light, press the WiFi On/Off button.
-
Page 16: Connect The Access Point With A Static Ip Address To Your Network
802.11ac Wireless Access If you changed the IP address settings of your computer in Step 4, reinstate the IP address settings that your computer was using before. Note This step assumes that the access point is now connected to the same router or network that your computer was connected to before you connected it with an Ethernet cable to the access point. - Page 17 802.11ac Wireless Access Figure 7. Connect the access point with a static IP address to a network To connect the access point with a static IP address to a network and log in to the access point: Connect the Ethernet cable that came in the package to one of the access point’s Ethernet ports. You can use any of the four LAN ports on the access point.
- Page 18 802.11ac Wireless Access Connect to the access point by doing one of the following: • Connect your WiFi device to the access point by using one of the WiFi network names (SSIDs) on the product label. A network key or password is not required. For more information, see Join the WiFi Network of the Access Point on page 23.
-
Page 19: Log In To The Access Point After Setup To View Or Change Settings
802.11ac Wireless Access If you changed the IP address settings of your computer in 4, reinstate the IP address settings Step that your computer was using before. Note This step assumes that the access point is now connected to the same router or network that your computer was connected to before you connected it with an Ethernet cable to the access point. -
Page 20: Change The Language
802.11ac Wireless Access The user name is admin. The default password is password. The user name and password are case-sensitive. The Home page displays a dashboard that lets you see the status of your access point at a glance. You can click the IP Settings, Wireless Settings (2.4GHz b/g/n), or Wireless Settings (5GHz a/n/ac) heading to view more detailed information. -
Page 21: Change The Admin Password
802.11ac Wireless Access The page refreshes with the language that you selected. Change the admin Password We recommend that you change the default password that you use to log in to the access point to a more secure password. This is the password that you use to log in to the access point with the user name admin. The ideal password contains no dictionary words from any language and contains uppercase and lowercase letters, numbers, and symbols. -
Page 22: Set The Time Zone And Adjust The Daylight Saving Time
802.11ac Wireless Access To set up password recovery: Open a web browser from a computer that is connected to the same network as the access point or to the access point directly through an Ethernet cable or WiFi connection. Enter the IP address that is assigned to the access point. If you did not enable the DHCP client on the access point or did not assign a static IP address, enter the default access point IP address 192.168.0.100. -
Page 23: Connect To The Access Point's Network After Installation
802.11ac Wireless Access From the menu, select the time zone for the area in which the access point operates. If the access point is in an area that observes daylight saving time, select the Automatically adjust for Daylight Savings Time check box. Click the Apply button. -
Page 24: Wi-Fi Protected Setup Method
802.11ac Wireless Access To connect a device manually to the WiFi network of the access point: Make sure that the access point is receiving power (its Power LED is lit) and that the WiFi radios are on (the WiFi LED is lit). On the WiFi device that you want to connect to your access point, open the software application that manages your WiFi connections. - Page 25 802.11ac Wireless Access Press the WPS button of the access point for three seconds. Within two minutes, press the WPS button on your WiFi device, or follow the WPS instructions that came with the device. The WPS process automatically sets up the device with the network password and connects the device to the WiFi network of the access point.
-
Page 26: Chapter 3 Manage The Basic Wifi Network Settings
Manage the Basic WiFi Network Settings This chapter describes how you can manage the basic WiFi network settings of the access point. For information about the advanced WiFi settings, see Manage the Advanced WiFi Features on page 56. If you want to change the settings of the access point’s WiFi network, use a wired connection to avoid being disconnected when the new WiFi settings take effect. -
Page 27: Manage The Basic Wifi Settings And Wifi Security Of The Wifi Network
802.11ac Wireless Access Manage the Basic WiFi Settings and WiFi Security of the WiFi Network The access point comes with preset WiFi network names (SSIDs) and with open networks without WiFi security. You can find the preset SSIDs on the access point label (see Product Label on page 9). - Page 28 Field Description AP Name The name of the access point. By default, the name is WAC104. Region From the menu, select the region in which the access point operates. For some countries. you cannot change the region because it is preset.
- Page 29 802.11ac Wireless Access (Continued) Field Description Channel From the Channel menu, select Auto for automatic channel selection or select an individual channel. The default selection is Auto. Note In some regions, not all channels are available. Do not change the channel unless you experience interference (shown by lost connections or slow data transfers).
- Page 30 802.11ac Wireless Access (Continued) Field Description Security Options This information applies to the 2.4 GHz WiFi network. If you change the WiFi security, select one of the following WiFi security options for the access point’s WiFi network: • None. This option is the default setting. An open WiFi network does not provide any security. Any WiFi device can join the network.
- Page 31 802.11ac Wireless Access (Continued) Field Description Channel From the Channel menu, select an individual channel. The default channel depends on your selection from the Region menu. Note In some regions, not all channels are available. Do not change the channel unless you experience interference (shown by lost connections or slow data transfers).
- Page 32 802.11ac Wireless Access (Continued) Field Description Security Options This information applies to the 5 GHz WiFi network. If you change the WiFi security, select one of the following WiFi security options for the access point’s WiFi network: • None. This option is the default setting. An open WiFi network does not provide any security. Any WiFi device can join the network.
-
Page 33: Configure Wep Legacy Wifi Security
802.11ac Wireless Access Configure WEP Legacy WiFi Security Wired Equivalent Privacy (WEP) security is a legacy authentication and data encryption mode that is superseded by WPA-PSK and WPA2-PSK. WEP limits the WiFi transmission speed to 54 Mbps (the access point is capable of speeds of up 300 Mbps in the 2.4 GHz band). If you want to change the WiFi settings of the access point’s network, use a wired connection to avoid being disconnected when the new WiFi settings take effect. - Page 34 802.11ac Wireless Access In the Security Options section, select the WEP radio button. From the Authentication Type menu, select one of the following types: • Automatic. Clients can use either Automatic or Shared Key authentication. • Shared Key. Clients can use only Shared Key authentication. From the Encryption Strength menu, select the encryption key size: •...
-
Page 35: Configure Wpa And Wpa2 Enterprise Wifi Security
802.11ac Wireless Access • If your WiFi-enabled computer or mobile device is already connected to another WiFi network in your area, disconnect it from that WiFi network and connect it to the WiFi network that the access point provides. Some WiFi devices automatically connect to the first open network without WiFi security that they discover. - Page 36 802.11ac Wireless Access In the Security Options section below either the Wireless Network (2.4GHz b/g/n) section or the Wireless Network (5GHz a/n/ac) section, select the WPA/WPA2 Enterprise radio button. In the WPA/WPA2 Enterprise section, enter the settings as described in the following table. Field Description Encryption mode...
-
Page 37: Control The Wifi Radios
802.11ac Wireless Access • Does your WiFi device display as an attached device? (See View Devices Currently on the Network on page 48.) If it does, it is connected to the network. • Are you using the correct network name (SSID) and password? Control the WiFi Radios The access point provides internal WiFi radios that broadcast signals in the 2.4 GHz and 5 GHz bands. - Page 38 802.11ac Wireless Access Select Advanced Setup > Advanced Wireless Settings. Do one of the following in the Wireless Network (2.4GHz b/g/n) section, Wireless Network (5GHz a/n/ac) section, or both sections: • Turn off the radio. Clear the Enable Radio check box. The WiFi LED and the WPS LED turn off •...
- Page 39 Manage the Access Point and Monitor the Traffic This chapter describes how you can manage the settings for administering and maintaining the access point and monitor the network. The chapter includes the following sections: • Update the Firmware of the Access Point on page 40 •...
-
Page 40: Update The Firmware Of The Access Point
You can check to see if new firmware is available and update the access point to the new firmware. You can also visit the NETGEAR support website, download the firmware manually, and update the access point to the new firmware. -
Page 41: Manually Upload New Firmware And Update The Access Point
To download new firmware manually and update your access point: Visit downloadcenter.netgear.com, locate the support page for your product, and download the new firmware. Read the new firmware release notes to determine whether you must reconfigure the access point after updating. -
Page 42: Manage The Configuration File Of The Access Point
802.11ac Wireless Access WARNING: To avoid the risk of corrupting the firmware, do not interrupt the update. For example, do not close the browser, click a link, or load a new page. Do not turn off the access point. Wait until the access point finishes restarting and the Power LED remains solid green. -
Page 43: Restore The Settings
802.11ac Wireless Access Click the Backup button. Choose a location to store the file on your computer. The name of the backup file is NETGEAR_WAC104.cfg Follow the directions of your browser to save the file. Restore the Settings If you backed up the configuration file, you can restore the configuration from this file. To restore configuration settings that you backed up: Open a web browser from a computer that is connected to the same network as the access point or to the access point directly through an Ethernet cable or WiFi connection. -
Page 44: Return The Access Point To Its Factory Default Settings
802.11ac Wireless Access The following procedure works only if you already did set up password recovery. To recover your password: Open a web browser from a computer that is connected to the same network as the access point or to the access point directly through an Ethernet cable or WiFi connection. -
Page 45: Use The Reset Button
802.11ac Wireless Access Use the Reset Button CAUTION: This process erases all settings that you configured in the access point. To reset the access point to factory default settings: On the back of the access point, locate the recessed Reset button to the left of the Power On/Off button. Using a straightened paper clip, press and hold the Reset button for at least five seconds. -
Page 46: Change The Ip Address Settings Of The Access Point
802.11ac Wireless Access Enter the access point user name and password. The user name is admin. The default password is password. The user name and password are case-sensitive. The Home page displays. Select Administration > Backup Settings. The Backup Settings page displays. Click the Erase button. - Page 47 802.11ac Wireless Access The Home page displays. Select Advanced Setup > IP Settings. The previous figure shows that the access point’s DHCP client is enabled. Configure the IP settings by taking one of the following actions: • Disable the DHCP client and configure a static IP address by doing the following: Select the Use fixed IP Address (not recommended) radio button.
-
Page 48: View Devices Currently On The Network
802.11ac Wireless Access View Devices Currently on the Network You can view the active wired and WiFi devices in both the network to which the access point is connected and the access point network. If you do not recognize a WiFi device, it might be an intruder. To display the attached wired and WiFi devices: Open a web browser from a computer that is connected to the same network as the access point or to the access point directly through an Ethernet cable or WiFi connection. -
Page 49: View The Status And Statistics Of The Access Point
802.11ac Wireless Access (Continued) Field Description Wireless Devices Status If access control is enabled (see Manage Access to the WiFi Network Through a WiFi Access List on page 58), the access control status of the device in the network (Allowed or Blocked). Device Name The device name, if detected. - Page 50 Field Description AP Information AP Name The access point name. By default, the name is WAC104. For more information, Manage the Basic WiFi Settings and WiFi Security of the WiFi Network page 27. Ethernet MAC Address The Media Access Control (MAC) address of Ethernet (LAN) interface through which the access point connects to the router or network switch or hub.
- Page 51 802.11ac Wireless Access (Continued) Field Description Wireless MAC Address for 2.4 The MAC address of the 2.4 GHz radio. This address is also the basic service set identifier (BSSID) of the 2.4 GHz radio. This address does not change. Wireless MAC Address for 5 The MAC address of the 5 GHz radio.
-
Page 52: View The Traffic Statistics
802.11ac Wireless Access (Continued) Field Description Channel The channel that the 2.4 GHz band of the WiFi network uses. SSID The WiFi network name for the 2.4 GHz band of the WiFi network. Mode The WiFi Mbps settings that the 2.4 GHz band of the WiFi network uses. Broadcast SSID Displays whether the 2.4 GHz band of the WiFi network broadcasts its SSID. - Page 53 802.11ac Wireless Access To view the traffic statistics for the ports of the access point: Open a web browser from a computer that is connected to the same network as the access point or to the access point directly through an Ethernet cable or WiFi connection. Enter the IP address that is assigned to the access point.
-
Page 54: Change The Traffic Statistics Polling Frequency
802.11ac Wireless Access (Continued) Field or Column Description Up Time The time elapsed since this port acquired the link. Poll Interval The interval at which the statistics are updated on this page. For more information, see Change the Traffic Statistics Polling Frequency on page 54. - Page 55 802.11ac Wireless Access To view or clear the logs: Open a web browser from a computer that is connected to the same network as the access point or to the access point directly through an Ethernet cable or WiFi connection. Enter the IP address that is assigned to the access point.
- Page 56 Manage the Advanced WiFi Features This chapter describes how you can manage the advanced WiFi features of the access point. For information about the basic WiFi settings, see Manage the Basic WiFi Network Settings on page 26. If you want to change the settings of the access point’s WiFi network, use a wired connection to avoid being disconnected when the new WiFi settings take effect.
-
Page 57: Add A Wifi Schedule
802.11ac Wireless Access Add a WiFi Schedule You can use this feature to turn off the WiFi signal from your access point at times when you do not need a WiFi connection. For example, you might turn it off at night or for the weekend. You can add a separate WiFi schedule for each WiFi band. -
Page 58: Manage Access To The Wifi Network Through A Wifi Access List
802.11ac Wireless Access In the Wireless Network (2.4GHz b/g/n) section or Wireless Network (5GHz a/n/ac) section, click the Add a new period button. Use the menus, radio buttons, and check boxes to set up a period during which you want to turn off the WiFi signal and specify whether the schedule is recurrent. - Page 59 802.11ac Wireless Access To add WiFi devices to the access control list and enable access control: Enter the IP address that is assigned to the access point. If you did not enable the DHCP client on the access point or did not assign a static IP address, enter the default access point IP address 192.168.0.100.
-
Page 60: Manage The Wps Settings
802.11ac Wireless Access Click the Add button. The WiFi device that you added shows in the table on the Wireless Client Access List, that is, it is added to the access control list. The radio button for the WiFi device lets you select the device if you want to change (edit) it or remove it from the access control list. - Page 61 The Advanced Wireless Settings page displays. Scroll down to the bottom of the page. The WAC104’s PIN field displays the fixed PIN that you use if you want to configure the access point’s WiFi settings from another platform through WPS.
-
Page 62: Manage Advanced Wifi Settings
802.11ac Wireless Access Manage Advanced WiFi Settings For most WiFi networks, the advanced WiFi settings work fine and you do not need to change the settings. To manage advanced WiFi features: Open a web browser from a computer that is connected to the same network as the access point or to the access point directly through an Ethernet cable or WiFi connection. -
Page 63: Set Up A Wifi Distribution System
2347), and the preamble mode (the default is Automatic) are reserved for WiFi testing and advanced configuration only. Do not change these settings unless directed by NETGEAR support or unless you are sure what the consequences are. Incorrect CTS/RTS Threshold settings might disable the WiFi function of the access point unexpectedly. -
Page 64: Set Up The Wifi Base Station
802.11ac Wireless Access For WiFi repeating, you must set up a WiFi base station and a WiFi repeater: • WiFi base station. The access point functions as the parent access point that bridges traffic to and from the child repeater access point. The base station also handles local WiFi and wired computers. To configure this mode, you must know the MAC address of the child repeater access point. -
Page 65: Set Up A Wifi Repeater
Use a wired Ethernet connection to set up a repeater unit to avoid conflicts with the WiFi connection to the base station. If you are using the access point as the base station with a non-NETGEAR access point as a repeater, you might need to change more configuration settings. In particular, you might need to disable the DHCP server function on the non-NETGEAR access point that is the repeater. - Page 66 802.11ac Wireless Access If you did not enable the DHCP client on the access point or did not assign a static IP address, enter the default access point IP address 192.168.0.100. A login window opens. Enter the access point user name and password. The user name is admin.
- Page 67 802.11ac Wireless Access In the Base Station MAC Address field, enter the MAC address of the access point that functions as the base station. Click the Apply button. Your settings are saved. Verify connectivity across the LANs. If the configuration is set up correctly, a computer on any WiFi or wired LAN segment of the access point that functions as the repeater can connect to the Internet or share files and printers with any other computer or server connected to the access point that functions as the base station.
-
Page 68: Troubleshooting
Troubleshooting This chapter provides information to help you diagnose and solve problems that you might experience with the access point. If you do not find the solution here, check the NETGEAR support site at netgear.com/support product and contact information. The chapter contains the following sections: •... -
Page 69: Quick Tips For Troubleshooting
802.11ac Wireless Access Quick Tips for Troubleshooting If your network is unresponsive or does not function normally, restart your network: Unplug the Ethernet cable from the access point to your router, network switch, or network hub. Turn off the access point. Plug in the Ethernet cable from the access point to your router, network switch, or network hub. -
Page 70: Troubleshoot With The Leds
• Make sure that you are using the 12V, 1.5A power adapter that NETGEAR supplied for this product. If the error persists, a hardware problem might exist. For recovery instructions or help with a hardware problem, contact technical support at netgear.com/support. -
Page 71: Wifi Led Is Off
Use the Reset Button on page 45). If the error persists, a hardware problem might exist. For recovery instructions or help with a hardware problem, contact technical support at netgear.com/support. WiFi LED Is Off If the WiFi LED remains off, check to see if both radios on the access point are disabled (see... -
Page 72: Troubleshoot Internet Browsing
802.11ac Wireless Access Troubleshoot Internet Browsing If your computer or WiFi device is connected to the access point but unable to load any web pages from the Internet, it might be for one of the following reasons: • Your computer might not recognize any DNS server addresses. A DNS server is a host on the Internet that translates Internet names (such as www addresses) to numeric IP addresses. -
Page 73: Changes Are Not Saved
802.11ac Wireless Access Changes Are Not Saved If you are logged in to the access point web management interface and the access point does not save the changes that you make on a page, do the following: • When entering configuration settings, always click the Apply button before moving to another page or tab or your changes are lost. -
Page 74: Test The Path From Your Computer To A Remote Device
802.11ac Wireless Access Check that the appropriate LEDs are on for your network devices. If your access point and computer are connected to a separate Ethernet switch, make sure that the link LEDs are lit for the switch ports that are connected to your computer and access point. •... -
Page 75: Appendix A Factory Default Settings And Technical Specifications
Factory Default Settings and Technical Specifications This appendix includes the following sections: • Factory Settings on page 76 • Technical Specifications on page 77... -
Page 76: Factory Settings
For more information about resetting the access point to its factory settings, see Return the Access Point to Its Factory Default Settings on page 44. Table 2. WAC104 access point factory default settings Feature Default Setting Access point login User login URL 192.168.0.100... -
Page 77: Technical Specifications
802.11ac Wireless Access Table 2. WAC104 access point factory default settings (Continued) Feature Default Setting 20/40 MHz coexistence Enabled Fragmentation length 2346 CTS/RTS threshold 2347 Preamble mode Long Preamble Transmission speed Automatic, nonconfigurable Note Throughput can vary. Network conditions and... - Page 78 802.11ac Wireless Access Table 3. WAC104 access point specifications (Continued) Feature Description Operating humidity 10 to 90% maximum relative humidity, noncondensing Storage temperature –4° to 158°C (–20º to 70ºF) Storage humidity 5 to 95% maximum relative humidity, noncondensing Four 10/100/1000BASE-T Ethernet (RJ-45) ports with Auto Uplink (Auto MDI-X) WiFi standards •...
- Page 79 802.11ac Wireless Access Table 3. WAC104 access point specifications (Continued) Feature Description Operating frequency range • 2.4 GHz band US: 2.412–2.462 GHz Europe: 2.412–2.472 GHz Australia: 2.412–2.472 GHz Japan: 2.412–2.472 GHz • 5 GHz band US: 5.18–5.24 + 5.745–5.825 GHz Europe: 5.18–5.24 GHz and DFS (5.25–5.35 + 5.50–5.70)
Need help?
Do you have a question about the WAC104 and is the answer not in the manual?
Questions and answers