Table of Contents
Advertisement
KD-DV5606/
DVD/CD RECEIVER
KD-DV5605/KD-DV5604
Having TROUBLE with operation?
Please reset your unit
Refer to page of How to reset your unit
For canceling the display demonstration, see page 4.
For installation and connections, refer to the separate manual.
INSTRUCTIONS
EN
GET0654-001A
© 2010 Victor Company of Japan, Limited
0110DTSMDTJEIN
[U/UH/UI]
Advertisement
Table of Contents

Related Manuals for JVC KD-DV5606


Summary of Contents for JVC KD-DV5606
- Page 1 KD-DV5606/ DVD/CD RECEIVER KD-DV5605/KD-DV5604 Having TROUBLE with operation? Please reset your unit Refer to page of How to reset your unit For canceling the display demonstration, see page 4. For installation and connections, refer to the separate manual. INSTRUCTIONS GET0654-001A ©...
- Page 2 Thank you for purchasing a JVC product. Please read all instructions carefully before operation, to ensure your complete understanding and to obtain the best possible performance from the unit. IMPORTANT FOR LASER PRODUCTS 1. CLASS 1 LASER PRODUCT 2. CAUTION: Do not open the top cover. There are no user serviceable parts inside the unit; leave all servicing to qualified service personnel.
-
Page 3: Table Of Contents
CONTENTS How to attach/detach the control panel How to attach/detach the control panel ..How to reset your unit ....... How to forcibly eject a disc ......PREPARATIONS Canceling the display demonstration ..Setting the clock ........INTRODUCTIONS How to reset your unit Playable disc type ........ -
Page 4: Preparations
Canceling the display demonstration Turn on the power. Select <DEMO OFF>. [Turn] [Hold] [Press] (Initial setting) Finish the procedure. [Press] Setting the clock Turn on the power. [Hold] (Initial setting) Select <CLOCK>. [Turn] [Press] Select <CLOCK SET>. [Press] Adjust the hour. [Turn] [Press] Adjust the minute. -
Page 5: Introductions
Playable disc type Disc type Recording format, file type, etc Playable DVD-Video * Region Code: South East Asia, Hong Kong region: 3 India: 5 Ex.: DVD-Audio/DVD-ROM DVD Recordable/Rewritable DVD-Video (DVD-R/-RW * , +R/+RW * DVD-VR • DVD Video: UDF bridge MPEG1/MPEG2 •... -
Page 6: Operations
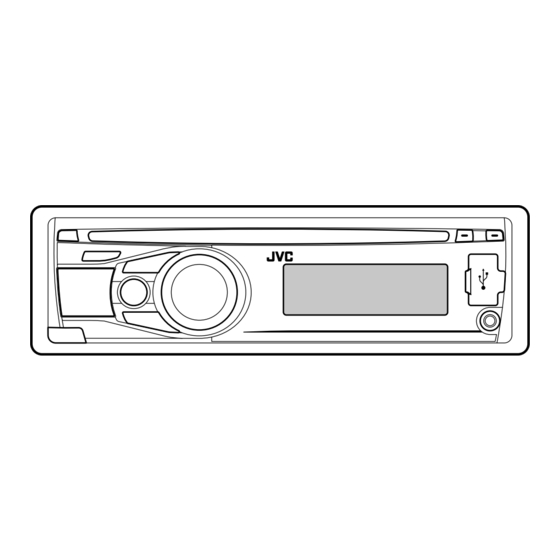
Basic operations Using the control panel • FM/AM: Search for station. Detach the panel. • DISC/USB: Select chapter/track. • FM/AM: Select preset station. • DISC: Select title/program/playlist/folder. Eject disc. • USB: Select folder. • Turn on the power. • Turn off the power [Hold]. Return to the previous menu. -
Page 7: Using The Remote Controller (Rm-Rk255)
Display window • (setting) indicator Playback mode indicators— (random), (repeat) • (search) indicator MENU indicator TAG (Tag information) indicator Tr (track) indicator LOUD (loudness) indicator Source display / Track number / Folder number / Disc/device information indicators— (track/file), (folder) Title number / PBC indicator / Time countdown indicator / Setting and list operation information Main display ST (stereo) indicator... - Page 8 • USB: – JPEG/MPEG Video/MP3/WMA/WAV: Selects the folders if included. ¢ buttons • FM/AM: – Searches for stations automatically if pressed briefly. – Searches for stations manually if pressed and held. • DISC/USB: – Reverse skip/forward skip if pressed briefly. –...
- Page 9 ¡ buttons * DUAL button • DVD-Video: Slow motion playback (during • Not applicable for this unit. pause). DIRECT button • DVD-VR/VCD: Forward slow motion playback • DISC/USB: Enters direct search mode for (during pause). chapter/title/program/playlist/folder/track • JPEG/MPEG Video/MP3/WMA/WAV/USB: when pressed with SHIFT button (see page 16 for Reverse search/forward search.
-
Page 10: Listening To The Radio
Listening to the radio Select “FM” or “AM.” Search for a station to listen—Auto Search. When a station is tuned in, searching stops. To stop searching, press the same button again. • You can also search for a station manually—Manual Search. Hold either one of the buttons until “M”... -
Page 11: Title Assignment
Manual presetting (FM/AM) Select “FM” or “AM.” You can preset up to 18 stations for FM and 6 stations for AM. Ex.: Storing FM station of 92.50 MHz into preset Show the title entry screen. number “04.” [Hold] [Hold] Assign a title. Select a character. -
Page 12: Disc Operations
Disc operations Before performing any operations... Turn on the monitor to watch the playback picture. If you turn on the monitor, you can also control playback of other discs by referring to the monitor screen. (See pages 17 – 20.) The disc type is automatically detected, and playback starts automatically (for DVD: automatic start depends on its internal program). -
Page 13: Operations Using The Control Panel
Operations using the control panel Pressing (or holding) the following buttons allows you to... Changes the display information Disc type Operation • : [Press] Select chapter ¢ [Hold] Reverse/fast-forward chapter * ∞ • : Select title • DISP : Current chapter number and Elapsed playing time Current chapter number and Clock Current title and chapter number... -
Page 14: Selecting The Playback Modes
Selecting the playback modes You can use only one of the following playback modes at a time. [Turn] [Press] [Turn] [Press] Ô REPEAT RANDOM Disc type REPEAT RANDOM CHAPTER RPT: Repeat current chapter — TITLE RPT: Repeat current title CHAPTER RPT: Repeat current chapter PROGRAM RPT: Repeat current program —... -
Page 15: Operations Using The Remote Controller (Rm-Rk255)
Operations using the remote controller (RM-RK255) Button Stop play Stop play Start play/Pause (if pressed during play) Start play/Pause (if pressed during play) JPEG: Slide show: Each track is shown for a few seconds. • Reverse/forward chapter search * MPEG: Reverse/forward track search * (No sound can be heard.) sound can be heard.) - Page 16 Button Stop play Stop play Stop play Start play/Pause (if pressed Start play/Pause (if pressed Start play/Pause (if pressed during play) during play) during play) Reverse/forward track search * Reverse/forward track search * Reverse/forward track search * • Forward slow motion * during pause (No sound can be heard.) –...
- Page 17 • For JPEG/MPEG Video/MP3/WMA/WAV, track is Entering time/numbers searched within the same folder. fi Press to change the number, then press • For DVD-VR, program/playlist search is possible move to the next entry. during Original program playback (PG)/Playlist fi • Each time you press , the number increases/ playback (PL).
- Page 18 Playback information Removing the on-screen bar Current title/chapter Current program/chapter Current playlist/chapter Operations using the control Current track screen Current folder/track (JPEG/MPEG Video/MP3/WMA/WAV/CD) Time indication These operations are possible on the monitor using the Elapsed playing time of the disc (For remote controller.
- Page 19 Operations using the list screen Select a folder or track. These operations are possible on the monitor using the remote controller. Before playing, you can display the folder list/track list to confirm the contents and start playing a track. Start playback. List screen (JPEG/MPEG Video/MP3/WMA/ JPEG/MPEG Video: Press ENT (enter) or WAV)
- Page 20 List screen (DVD-VR) Disc setup menu You can use ORIGINAL PROGRAM or PLAY LIST screen These operations are possible on the monitor using the anytime while playing DVD-VR with its data recorded. remote controller. Select a list screen. Enter the disc setup menu while stop. Select a menu.
- Page 21 Menu Item Setting MENU Select the initial disc menu language. Refer also to “Language codes” on page 31. LANGUAGE AUDIO Select the initial audio language. Refer also to “Language codes” on page 31. LANGUAGE SUBTITLE Select the initial subtitle language or remove the subtitle (OFF). Refer also to “Language codes”...
-
Page 22: Usb Operations
USB operations You can connect a USB mass storage class device (except HDD) to the unit. This unit can play JPEG/MPEG Video/MP3/WMA/WAV tracks stored in a USB mass storage class device (such as a USB memory, Digital Audio Player, etc.). Turn on the power. -
Page 23: External Devices
• Some USB devices may not work immediately after you turn on the power. • The detect time and response time may be very long for some USB devices (such as Digital Audio Player, etc.). • For more details about USB operations, see pages 29 and 30. Listening to the other external components You can connect an external component to the AUX (auxiliary) input jack on the control panel. -
Page 24: Selecting A Preset Sound Mode
Selecting a preset sound mode You can select a preset sound mode suitable to the music genre. Selecting from Menu. [Hold] [Turn] [Press] (back to the beginning) • See page 25 for <USER> settings. Preset value setting for each sound mode Preset value Sound BASS... -
Page 25: Menu Operations
Storing your own sound mode Adjust the sound elements of the selected tone. You can store your own adjustments in memory. Select <USER>. [Turn] [Press] [Hold] Adjust the frequency. Adjust the level. Adjust the Q-slope. [Turn] [Press] Range/selectable item Sound element BASS MIDDLE... - Page 26 Category Menu item Selectable setting, [reference page], Initial: Underlined CLOCK SET : Adjust the hour, then the minute, [4]. Clock setting (Initial: 1:00) : Select a preset sound mode suitable to the music genre. Equalizer USER, ROCK, CLASSIC, POPS, HIP HOP, JAZZ : Dims the display when you turn on the headlights.
- Page 27 Category Menu item Selectable setting, [reference page], Initial: Underlined FADER * R06 – F06 [ 00 ] : Adjust the front and rear speaker output balance. BALANCE L06 – R06 [ 00 ] : Adjust the left and right speaker output balance. LOUD •...
-
Page 28: More About This Unit
More about this unit General Disc operations • If you turn off the power while listening to a disc, disc General play will start automatically, next time you turn on • In this manual, words “track” and “file” are the power. interchangeably used. - Page 29 * <.mod> is an extension code used for the MPEG-2 files as the initial language. In addition, for some discs, recorded by JVC Everio camcorders. the initial languages settings will not work as you set • The stream format should conform to MPEG system/ due to their internal disc programming.
- Page 30 • Do not use a USB device with 2 or more partitions. Sounds reproduced through the rear • When connecting with a USB cable, use the USB 2.0 analog terminals (Speaker out/LINE OUT) cable. 2-channel signal is emitted. When playing a multi- •...
- Page 31 Somali WO Wolof Esperanto Yiddish MY Burmese Albanian Xhosa Estonian Javanese Nauru Serbian Yoruba Basque Georgian Nepali Siswati Zulu JVC bears no responsibility for any loss of data in the USB mass storage class device while using this System. REFERENCES...
-
Page 32: Maintenance
Maintenance How to clean the connectors To keep discs clean Frequent detachment will deteriorate the connectors. A dirty disc may not play correctly. To minimize this possibility, periodically wipe the If a disc does become dirty, wipe it with connectors with a cotton swab or cloth moistened with a soft cloth in a straight line from center alcohol, being careful not to damage the connectors. -
Page 33: Troubleshooting
Troubleshooting What appears to be trouble is not always serious. Check the following points before calling a service center. Symptom Remedy/Cause Sound cannot be heard from the speakers. • Adjust the volume to the optimum level. • Make sure the unit is not muted/paused (see page 6). •... - Page 34 Symptom Remedy/Cause No picture appears on the monitor at all. • Connect the video cord correctly. • Select a correct input on the monitor. The monitor shows black and white wavy Select an appropriate video format (PAL/NTSC) for your pictures (DVD-Video/DVD-VR/JPEG/MPEG/ monitor (see page 26).
- Page 35 Symptom Remedy/Cause Noise is generated. The track played back is not an MP3/WMA/WAV track. Skip to another file. (Do not add the extension code <.mp3>, <.wma>, or <.wav> to non-MP3/WMA/WAV tracks.) “READING” keeps flashing on the display. • Readout time varies depending on the USB device. •...
-
Page 36: Specifications
Specifications Maximum Power Output: Front/Rear: 50 W per channel Continuous Power Output Front/Rear: 19 W per channel into 4 Ω, 40 Hz to (RMS): 20 000 Hz at no more than 0.8% total harmonic distortion Load Impedance: 4 Ω (4 Ω to 8 Ω allowance) Tone Control Range: Bass: ±12 dB (60 Hz, 80 Hz, 100 Hz, 120 Hz) - Page 37 Signal Detection System: Non-contact optical pickup (semiconductor laser) Number of Channels: 2 channels (stereo) Frequency Response: DVD, fs=48 kHz/96 kHz: 16 Hz to 22 000 Hz CD, fs=44.1 kHz: 16 Hz to 20 000 Hz Dynamic Range: 96 dB Signal-to-Noise Ratio: 98 dB Wow and Flutter: Less than measurable limit...
Need help?
Do you have a question about the KD-DV5606 and is the answer not in the manual?
Questions and answers