Subscribe to Our Youtube Channel
Summary of Contents for X2 Digital Wireless Systems X2-VIDEO-201
- Page 1 X2 VIDEO 2-WIRE ROOM STATION 7" COLOR TFT Designed & Manufactured to meet Australian specifications x2security.com X2-VIDEO-200 X2-VIDEO-201 (Memory)
-
Page 2: Table Of Contents
Content Product Introduction Product Introduction 9.4 Unlock Time Thank you for purchasing the X2 Video intercom. Please read instructions carefully and follow directions Parts and Features 9.5 CCTV Surveillance Period Menu Function 9.6 Extension Switch Time before installing products. Any problems regarding this product, please contact your supplier. Main Menu Interface 10.System Setup Function Setup... -
Page 3: Parts And Features
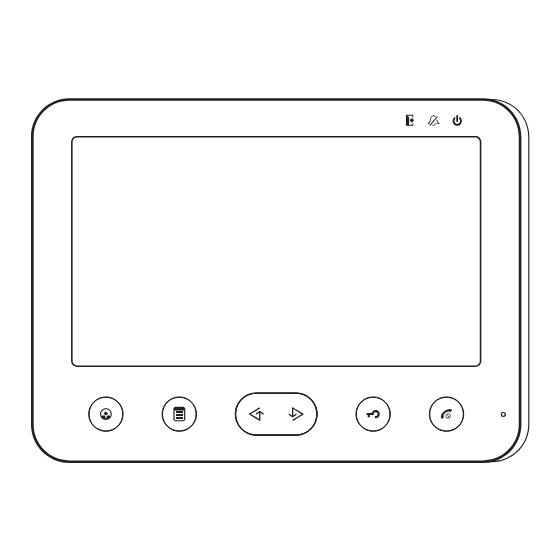
Power Left/Up/Away Right Take Photo Right/Down/Mute Review Picture Unlock/Return Down Select Menu Talk/Stop/Power Return NOTE Delete 1.The button function of X2-VIDEO-200 and X2-VIDEO-201 Series are corresponding. 2. Touch the centre of button to operate the unit (as the finger indicates). -
Page 4: Menu Function
Away setting (Only available for W100) AWAY MUTE Do Not Disturb (mute) Setup Note: During operation, power LED keeps lighting. Keytone Setup X2-VIDEO-201 TIME Unlock Time Setup OPEN CCTV TIME CCTV Surveillance Period Setup TIME Extension switch time setup AUX. -
Page 5: System Setup
RESET LANGUAGE Language Setup Note: The menu is only display the help information, you cannot directly operate the functions in this interface. Image Memory Interface (X2-VIDEO-201) VIEW Under main menu interface, touch DEL ALL choose the “STORAGE SET” item, then touch... -
Page 6: Operation
Operation Operation 1. ON / OFF 3.3 Standby Transfer To Talk a.After connecting the power supply, the unit will sound “DI” with LED flashes, then power LED Under standby mode, touch to start talk with Door 1. turns red, which means the unit is powering on and in standby mode. If only door 2 connected with, touch to start talk with door 2 directly. -
Page 7: Monitor Cctv Camera
Operation Operation 7.Talk Volume Adjustment 4.2 Monitor CCTV Camera (Optional) During talk, touch to adjust the talk volume and save automatically, which has 9 levels of Under standby mode, touch and hold to monitor CCTV1. The monitoring channel would be adjustment. -
Page 8: Away Setup
Operation Operation 9.1 Away Setup (Only available for X2-VIDEO-201) to turn ON/OFF keytone. AWAY Under function setup interface, choose the “AWAY SET” item by touching , then touch MUTE Storage Help SOUND to turn ON/OFF away mode. OPEN TIME CCTV... -
Page 9: Extension Switch Time
Operation Operation 10.System Setup AWAY MUTE Under main menu interface, touch choose SYSTEM , then touch to enter into Storage Help SOUND OPEN TIME system setup interface. CCTV TIME MANUAL AUX. TIME 2ND / PEDAL CTRL ROOM NO. SET MANUAL MUSIC Storage Help... -
Page 10: Room Number Setup
Operation Operation 2ND / PEDAL CTRL ROOM NO. SET MUSIC Storage Help TIME 20XX/01/01 01:00 RESET LANGUAGE ENGLISH Calling from 1 door (the outdoor unit) Calling from 2 door (equipped with the calling device) Note: Please make sure every room has its own room number to avoid confliction. When you turn on the pedal control for talk mode 10.3 Ringtone Setup 1. -
Page 11: Time Setup
Operation Operation 2ND / PEDAL CTRL MUSIC 2ND / PEDAL CTRL MUSIC ROOM NO. SET MUSIC ROOM NO. SET MUSIC MUSIC MUSIC VOLUME MUSIC MUSIC VOLUME Storage Help Storage Help TIME 20XX/01/01 01:00 MUSIC TIME TIME 20XX/01/01 01:00 MUSIC TIME RESET RESET LANGUAGE... -
Page 12: Language Setup
ENGLISH ENGLISH POLSKI РУССКИЙ 11.2 Review Picture 11.Image Memory Interface (Only available for X2-VIDEO-201) Under image memory interface, choose VIEW, and touch to confirm, the unit will enter into review Under main menu interface, touch choose STORAGE, touch to confirm, the unit will mode. -
Page 13: Delete Picture
Operation Operation 12.2 Contrast 11.3 Delete Picture Under image adjustment interface, choose CONTRAST to adjust the contrast, you are able to adjust Under image memory interface, choose DEL ALL, touch to confirm, all of the pictures will be in 100 levels. deleted. -
Page 14: Busy Status
Operation Operation 13.Busy Status 15.Outdoor station alarm When one of the room stations is under talking or monitoring mode, others will enter into busy mode. If indoor unit sounds “DI DI...”and indicator flashes, it means the outdoor station 1 or 2 After finishing talking or monitoring, all of the units will go back to standby mode. -
Page 15: Led\Voice Status Introduction
Trouble Shooting Guide LED/Voice Status Introduction Problem Possible reason Solution 1.LED Status -Power is not connected. -Check if the power is on. The unit is powering on. The unit does not work. LED turns on -The unit is OFF. -Refer to Operation 1 “ON/OFF”, turn on the unit. The unit is under mute mode. -
Page 16: Specifications
Specifications Model No. X2-VIDEO-200 X2-VIDEO-201 Item Screen 7’color TFT Power voltage and current DC13.5-15V/1.5A Connection In series Memory Power consumption 600mA ) CCTV input Typical 1Vp-p(75ohm Operation temperature -10℃ +55℃ Optional extension room station room stations (which has intercom function)


Need help?
Do you have a question about the X2-VIDEO-201 and is the answer not in the manual?
Questions and answers