Table of Contents
Advertisement
Quick Links
Advertisement
Table of Contents

Related Manuals for Brivis BX3


Summary of Contents for Brivis BX3
- Page 1 Service shall be carried out only by Authorised Personnel. This Service Manual must NOT be left with the Owner, or distributed to other persons not permitted to obtain this information by Brivis Climate Systems. 281 Issue 1 - Service Manual - BX3...
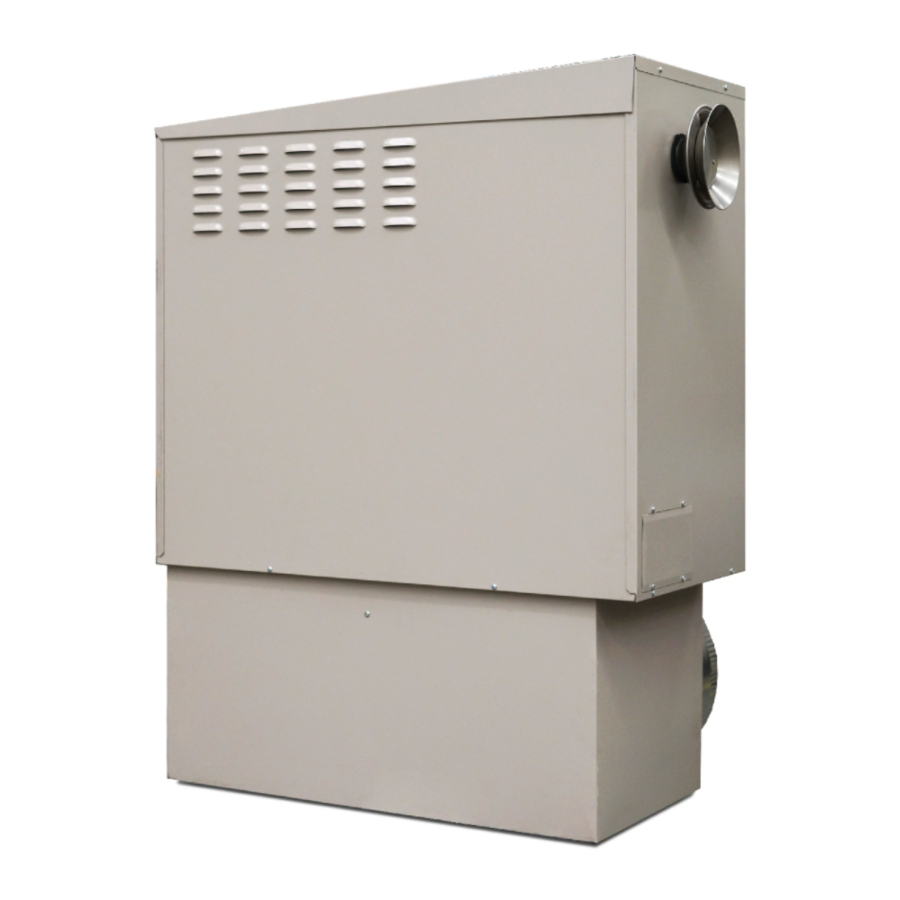
- Page 2 Ducted Central Heaters, in particular Brivis series heaters. Brivis Classic BX3 Buffalo Model Gas Ducted Heater The New Brivis Buffalo BX3 series ducted central heater is an updated Model to the Classic Buffalo range heater. The Brivis BX3 Ducted central heater has a new electronic control system and combustion now fan forced.
- Page 3 • Troubleshooting • Main Components Servicing • Dismantling Procedures Further information on installation and operation of Brivis Buffalo BX3 heaters can be obtained from the Heating Installer’s Manual and Heating Owner’s manual Note: Safety Warning DO NOT PLACE ARTICLES ON OR AGAINST THIS APPLIANCE.
-
Page 4: Table Of Contents
1.7 Motor Wiring Diagrams ................7 2.0 Thermostat Installation and Wiring ............8 3.0 COMPONENT OPERATION ..............10 3.1 BX3 Gas Ducted Unit Components ............10 3.2 Gas Valve Operation ................10 3.3 Spark Igniter .................... 11 3.4 Flame Sensor ..................11 3.5 Combustion Fan Operation .............. - Page 5 7.6 Main Fan Assembly Removal ..............34 7.7 HCDSI24-1 Electronic Control Board Removal ........35 7.8 240 to 24 Volt Transformer Removal ............35 7.9 Heat Exchanger Removal ................ 36 8.0 Flue Instructions ..................38 281 Issue 1 - Service Manual - BX3...
-
Page 6: Heater Operation
1.0 HEATER OPERATION This section provides an overview of the operation of the BX3 series heaters. It is vital that an understanding of how BX3 series heaters, and their components, operate in order to service the BX3 Series heater effectively and efficiently. -
Page 7: Circuit Diagram
1.2 Circuit Diagram Brivis Buffalo BX3 281 Issue 1 - Service Manual - BX3... -
Page 8: Wiring Colour Code
Orange 24Vac Ground Green High Voltage (From left to right refer to diagram in section 1.1) Function Colour Flame Sense White Neutral Blue Combustion Fan Brown Circulation Fan Active Brown Wiring Colour 281 Issue 1 - Service Manual - BX3... -
Page 9: Bx315 Technical Information
Tytronics HCDSI24-1DT control box with LED diagnostic display, flame roll-out Klixon , direct main in-shot burners, induced combustion airflow, circulation air fan has an optional 3 speeds for heating. Wiring terminal connection for thermostat / system with heat. 281 Issue 1 - Service Manual - BX3... -
Page 10: Bx320 Technical Information
Tytronics HCDSI24-1DT control box with LED diagnostic display, flame roll-out Klixon , direct main in-shot burners, induced combustion airflow, circulation air fan has an optional 3 speeds for heating. Wiring terminal connection for thermostat / system with heat. 281 Issue 1 - Service Manual - BX3... -
Page 11: Bx326 Technical Information
Tytronics HCDSI24-1DT control box with LED diagnostic display, flame roll-out Klixon , direct main in-shot burners, induced combustion airflow, circulation air fan has an optional 3 speeds for heating. Wiring terminal connection for thermostat / system with heat. 281 Issue 1 - Service Manual - BX3... -
Page 12: Motor Wiring Diagrams
8 Ohms Resistance @ 20° C Low Winding 31.6 Ohms 18 Ohms 9.3 Ohms Resistance @ 20° C Impellor Size – 255mm x 180 255mm x 180 284mm x 265 diam. x width 281 Issue 1 - Service Manual - BX3... -
Page 13: Thermostat Installation And Wiring
2.0 Thermostat Installation and Wiring Wiring the Thermostat (Heating only) Brivis Manual and Brivis Programmable Thermostats can be wired directly to a Classic heater for heating only applications. Wiring the Manual and Programmable Thermostats. Run twin core cable no less than 0.75mm² in cross section from the heater “Terminal Block” to the thermostat •... - Page 14 Wiring the Brivis Programmable Thermostat (Add-On & Fan Only) The BX3 does control board does not have provision for “Add-On” cooling. For “Add-On” cooling operation the unit can be configured. Refer to Diagram 5 for interconnection to the unit and wall control for “Add-On” cooling.
-
Page 15: Component Operation
The gas valve is controlled by the HCDSI 24 -1 PCB control. Please see the technical data sheet for the optimum gas pressures. 281 Issue 1 - Service Manual - BX3... -
Page 16: Spark Igniter
During a normal shut down sequence, the burners will shut down, and the combustion fan will switch off after 5 seconds. Combustion Fan Motor Resistance Reading 24.3 Ohms Fime Winding Resistance @20 281 Issue 1 - Service Manual - BX3... -
Page 17: Burner
LED indicator. An additional Red LED provides direct indication of the pressure switch status. HCDSI 24 -1 Control Board Ignition Plug LED’s 240Vac connection. 24 Volt AC Connections Ignition coil 2 amp fuse 281 Issue 1 - Service Manual - BX3... -
Page 18: Pressure Switch
PRESSURE SWITCH: The pressure switch is a Cleveland NS2 series diaphragm pressure differential activated switch. The BX3 models have one pressure switch. Please refer to the technical data sheets for the operating range. The pressure switch for proving sufficient combustion airflow is located in the vicinity of the combustion fan and measures the vacuum pressure in the heat exchanger outlet box. -
Page 19: Operation Flow Charts
Flame validate time Has flame been present for 5.5 seconds? Initiate main fan hold-off time of 20 seconds. Fan speed ramps up to required speed Normal operation continues Steady state operation 281 Issue 1 - Service Manual - BX3... -
Page 20: Heater "Shut Down" Flow Chart
3.11 Heater “Shut down” Flow Chart Heater thermostat switched off Gas valve closes Combustion fan post-purge (5 sec) Circulation Fan Off Delay 80 Seconds Main fan turns off 281 Issue 1 - Service Manual - BX3... -
Page 21: Installation & Commissioning
Hi-Limit activation continues longer than Hi-Limit fan + cool down times. Eight flash (200mS flashcode: Frequency Lockout - Timing fault. 101010101010101000000000) Supply frequency outside operating limits. Microprocessor clock outside operating limits. 281 Issue 1 - Service Manual - BX3... - Page 22 Lockout shall be cleared by any of the following: • Power isolation for more than 2 seconds • Cycle of the Thermostat input 6 times within a 60 seconds, each cycle must be at least 2- seconds in duration. 281 Issue 1 - Service Manual - BX3...
-
Page 23: One Flash - Over Heat Condition
Supply air over heat and Flame Roll - out All Brivis BX3 models have a supply air over heat switch located near the supply air discharge and is activated when the supply air reaches 90° C on the BX326 but on the BX315 and BX320 are activated at 110°... -
Page 24: Two Flashes - Pressure Switch Inactive
7. Flue pipe has collected excessive condensate – check for potential collection points (there must be a continual fall back to the heater – 20mm rise per Metre). 8. Check pressure switch pressures on 2 flashes pressure switch lockout. 281 Issue 1 - Service Manual - BX3... -
Page 25: Three Flashes - Purge / Interwait
4. Check igniter is in its right location 5. Check gas pressure or supply pressure 6. Check gas valve loom and connections 7. Check if the control board is sparking 5.7 Six Flashes – Valve Fault Lockout Reason: 281 Issue 1 - Service Manual - BX3... -
Page 26: Seven Flashes - Over Temp Lockout
A failure in the clock circuit shall enter the unit into lockout and flash the eight flash on the LED status light. Service Checklist 1. Check power supply. 2. Check polarity at power point. 3. Check transformer voltage. 4. Control board failure. 281 Issue 1 - Service Manual - BX3... -
Page 27: Nine Flashes - Flame Lockout Invalid Flame
LED. Service Checklist 1. Check power supply. 2. Check polarity at power point. 3. Check transformer voltage. 4. Control board failure. 5.13 Twelve Flashes – Secondary Fafeguard Timing Fault 281 Issue 1 - Service Manual - BX3... -
Page 28: Three Slow Flashes - Ground Fault Lockout
1. Check the earthing system. 2. Check the control board. 3. Check the flame sensor. 4. Check the gas valve. 5. Check the flame roll out switch. 6. Check the flame roll out switch loom. 281 Issue 1 - Service Manual - BX3... -
Page 29: Three Slow Flashes - Ground Fault Lockout
1. Check the earthing system. 2. Check the control board. 3. Check the flame sensor. 4. Check the gas valve. 5. Check the flame roll out switch. 6. Check the flame roll out switch loom. 281 Issue 1 - Service Manual - BX3... -
Page 30: Main Components Servicing
If this is the case then this situation should be rectified. • Remove the manometer and remove the test point. • Replace the gas inlet tap and test for gas leakage. Note: Please use an approved sealant. 281 Issue 1 - Service Manual - BX3... - Page 31 10. Please ensure there is no leaks on each of the pressure tap screw. Note: Please use an approved sealant. For gas pressure please refer to technical information sheet. 281 Issue 1 - Service Manual - BX3...
-
Page 32: Combustion Fan Servicing
It may be required to remove the combustion fan to inspect it totally.(Refer to section 7.2 C for removal procedure of the combustion fan). For air pressure signals please refer to technical information sheet. 281 Issue 1 - Service Manual - BX3... -
Page 33: Spark Igniter Servicing
1. Remove the burner assembly as described in removal procedure 5 2. Measure the distances as shown in the diagram below. 3. Installation is a reversal of the removal procedure. 12±2 mm 11±2 mm 281 Issue 1 - Service Manual - BX3... -
Page 34: Pressure Switch Servicing
4. Remove fan assembly from housing. 5. Clean impellor and motor. 6. Clean housing. 7. Reassemble. 8. Check all wiring cables and plug connections. Installation is a reversal of the removal procedure. 281 Issue 1 - Service Manual - BX3... -
Page 35: Unit Operation
4. Check the maximum burner pressure at the test point provided on the gas valve. 5. Check the duct system airflow distribution, balance and adjust as required. 6. Check the unit’s selected 3 speed fan is appropriate for optimum heat output for the application. 281 Issue 1 - Service Manual - BX3... -
Page 36: Dismantling Procedures
Ensure that the gas inlet feed-tube is retightened and checked for leaks. 2. Ensure that the gas valve loom is not damaged along its length and at the connector. 281 Issue 1 - Service Manual - BX3... -
Page 37: Gas Valve Removal
Installation is a reversal of the removal procedure with attention to the following points: 1. Clean both surfaces to be re-mated together. Apply sufficient (but not excessive) silicon to the combustion fan’s mating surface 281 Issue 1 - Service Manual - BX3... - Page 38 Installation is a reversal of the removal procedure with attention to the following points: 1. Clean both surfaces to be re-mated together. 2. Apply sufficient (but not excessive) silicon to the combustion fan’s mating surface. 281 Issue 1 - Service Manual - BX3...
-
Page 39: Main Fan Assembly Removal
Once the fan motor is exposed then slide the fan motor upwards and away from the fan compartment 281 Issue 1 - Service Manual - BX3... -
Page 40: Hcdsi24-1 Electronic Control Board Removal
(Blue – Yellow) @ 230 VAC Secondary Voltage (With Load) ± 3% VAC (Blue -Yellow) @ 230 VAC Resistance reading on primary wiring @ 20 63.6 Resistance reading on Secondary @ 20 1.45 281 Issue 1 - Service Manual - BX3... -
Page 41: Heat Exchanger Removal
10. Unscrew the gas feed tube off the gas cock and then remove away from the unit. 11. Then raise the heat exchanger making sure the heat exchanger has been fully removed. 281 Issue 1 - Service Manual - BX3... - Page 42 • Ensure that the gas inlet feed-tube is retightened and checked for leaks. • Ensure that the gas valve loom is not damaged along its length and at the connector. Heat exchanger removal (Photos) Screw locations (7 off) securing heat exchanger. 281 Issue 1 - Service Manual - BX3...
-
Page 43: Flue Instructions
State or Territory in which the products are installed. You must ensure that the installation of the products will comply with those laws, regulations and standards, and that the products recommended to customers are fit for the purpose for which they are intended 281 Issue 1 - Service Manual - BX3... - Page 44 © Brivis Climate Systems Pty. Ltd. 2015. All rights reserved. No part of these documents may be used in any way or form without prior written consent from Brivis Climate Systems Pty Ltd. March 2015 Brivis Pty Ltd...
Need help?
Do you have a question about the BX3 and is the answer not in the manual?
Questions and answers