Advertisement
Quick Links
Advertisement

Subscribe to Our Youtube Channel
Related Manuals for Sonim XP6 IS


Summary of Contents for Sonim XP6 IS
- Page 1 USER GUIDE SONIM XP6 IS / ECOM EX-HANDY 09 English...
- Page 2 Copyright © 2015 Sonim Technologies, Inc. used at high volume for prolonged periods of time. SONIM and the Sonim logo are trademarks of Sonim To prevent possible hearing damage, do Technologies, Inc. Other company and product names not listen at high volume levels for long may be trademarks or registered trade-marks of the periods.
- Page 3 Phone Specifications Managing Cell Broadcasts Your SIM Card Inserting the SIM Card Managing Phone Security Settings———————— 34 About Android Security Your Sonim XP6 IS /ECOM EX-HANDY 09—————— Managing Security Settings —— 16 Locking your Screen Switching On Encrypting Phone Data...
- Page 4 Location Access Setting TTY Mode Backup and Restore Data DTMF Tones Managing Accounts Call Barring Syncing Your Account Call Forwarding Call Waiting Managing Contacts———————— 39 Sending Messages———————— 48 Add a New Contact View the Contact Details Sending SMS/MMS Message Sending a Message from Contacts Managing Message Settings Dialing a Number from Contacts Deleting Messages...
-
Page 5: For Portable Device Usage
FOR PORTABLE DEVICE USAGE (<20cm from body/ SAR needed) CE Statement———————— 63 CE Statement CE Mark & NB Identification Number Countries Where Sonim XP6 IS / ECOM EX-Handy 09 Model is Sold Declaration of Conformity———————— 65 EC - Declaration of Conformity Index———————— 66... -
Page 6: Swipe Or Slide
Congratulations on the purchase of a Sonim XP6 IS / Familiarize yourself with the terminology and symbols ECOM EX-HANDY 09 mobile phone. This phone is a used in the guide to help you use your phone effectively. GSM/GPRS/EDGE/UMTS/LTE enabled handset with... - Page 7 BACK Displays the previous screen. Use the Left Selection Key to perform this function. Confirms an action. Use the Center key to perform this function. HOME Moves the current working application to the recent applications list/background and displays home screen. RECENT Displays the options for the current screen.
- Page 8 Avoid using the phone in close proximity to personal medical devices, such as pacemakers and hearing aids. Use only Sonim XP6 IS /ECOM EX-HANDY 09 approved charging equipment to charge your phone and avoid damage to your phone. The symbol of the crossed-out wheeled bin indicates that this product, and any enhancements marked with this symbol, can not be disposed as unsorted waste but must be taken to separate collection at their end-of-life.
- Page 9 Ensure that only qualified personnel install or repair your phone. The Sonim XP6 IS /ECOM EX-HANDY 09 is water-proof and can be submerged to 2 metres for 1 hour. • Ensure to properly close the rubber cover of the charging connector and audio connector, to avoid deposits of water drops on these connectors, when the phone is immersed in water.
- Page 10 (10) gram of tissue. comprehensive international safety guidelines, developed by scientific organizations, for example, ICNIRP The highest SAR value for the Sonim XP6 IS / ECOM Ex- (International Commission on Non-Ionizing Radiation Handy 09 phone when tested by Sonim for use: Protection) and IEEE (The Institute of Electrical and •...
- Page 11 and 131°F). A device with a hot or cold battery may Child Safety not work temporarily, even when the battery is fully Do not allow children to play with your mobile phone or charged. Battery performance is particularly limited in its accessories.
- Page 12 Battery Usage Sonim XP6 IS / ECOM Ex-Handy 09 phone comes with Insert Charger a built-in battery. For any battery related queries contact Insert the charger plug into a power outlet Sonim customer support. • Use only a Sonim XP6 / IS ECOM Ex-Handy 09 certified battery that is designed for this phone model.
- Page 13 environment will compromise the intrinsically safe • Set screen brightness to Auto and set a shorter nature of the device. Sleep timeout (1 minute). The display settings are located in Settings > Device > Display. Verifying and Optimizing Battery Usage •...
- Page 14 What Is In the Box ? Feature Description The list of items in the Sonim XP6 IS /ECOM EX-HANDY 09 phone box are: Network LTE Band B1/ B3/ B7/ B8/ B20/ B38(TD-LTE) (EU) • Sonim XP6 IS / ECOM Ex-Handy 09 phone with...
- Page 15 Inserting the SIM Card Step 1 Remove screw A using the screwdriver and Remove the headset port cover. Step 2 Remove screw B using the screwdriver and Remove SIM cover. Step 3 Insert the pin on the multi-tool into the pinhole and press down. The SIM card tray will pop up.
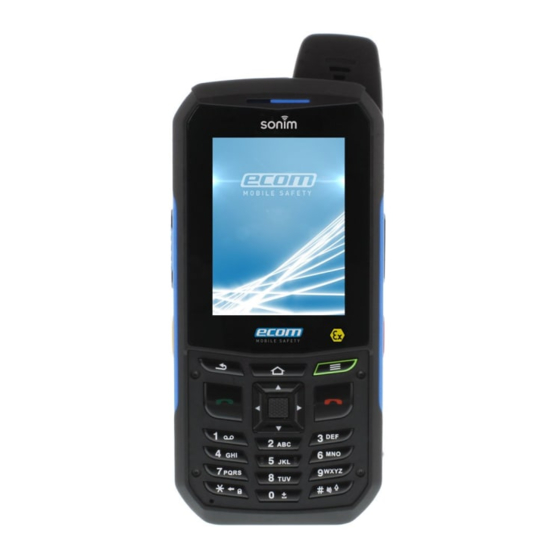
- Page 16 Sonim XP6 IS /ECOM EX-HANDY 09 Phone Headset port SIM card slot Loudspeaker Receiver Display screen Power On key Volume Navigation Keys Home Reserved for Sonim Protect Contacts application Return Options Call reject/Power On/Off Call/Accept Press and hold to access voicemail...
- Page 17 Default > slide Hardware Physical keyboard to the OFF Touch and Type Operations position. Sonim XP6 IS /ECOM EX-HANDY 09 is a touch phone. If you already have Gmail account, use your Gmail You can use your fingers to manipulate icons, buttons, address and password or else, create a Gmail account.
- Page 18 action occurs. Display icons • Drag: Touch and hold an icon for a moment and Service indicator then, without lifting your finger, move your finger on and Signal the screen until you reach the target position. For strength indicator example, you can drag to reposition shortcuts on the Home screen.
- Page 19 The Application menu or grid is located above the quickly left or right. navigation buttons in the home screen. The app icons Creating a Folder on the Home Screen you keep in the tray remain visible on every Home screen panel.
- Page 20 4G LTE Network connected Deleting an application icon from the home screen does not delete the application. You must go to the Applications panel and select the application to uninstall it. Roaming Home Screen Indicators UMTS connected The icons displayed at the top of the screen provides information about the status of the device.
- Page 21 Phone Operations Without SIM Card Icons Description You can perform the following operations without New E mail inserting a SIM card in your phone. • Make emergency calls. FM radio • View and modify all settings except Data usage and mobile network related settings.
- Page 22 the current screen. Press the Power and Volume down button simultaneously. The screnshot is captured and stored in the gallery. A screenshot captured icon ( ) is also displayed in the home screen top bar.
- Page 23 Keypad Functions The following table displays the various keys and the corresponding functions they perform: Keypad key Operations • Press to end a call. • Press when in another application screen, to return to home screen. Press to reject an incoming call. •...
- Page 24 ALPHA-NUMERIC Press the required keys ( 1- 0) to enter the desired phone number and press • to make a call. KEYS • Enter text while in the text editor. Press and hold in standby mode to access your Voice mail. •...
- Page 25 separator). Time and Date Settings You can set and display the date and time on the phone. Language and Input Settings You can also select the display format. You can set the phone’s language to either US Spanish or From the Home or All Apps screen ( ), tap english preferred language.
- Page 26 rate. using screenshot capture. Tapping on Default language status, displays the • Photos: includes photos downloaded • languge set for speech output. and the photos synced from google account. Select Language & Input > Text-to-speech • Wallpapers: includes images that are pre- output>...
- Page 27 • Camera (PTP): Lets you transfer photos using From the Home or All Apps screen ( ), tap camera software and transfer any files that don’t Settings ( support MTP. Scroll down and tap Battery, located under Device • USB Tethering: To perform USB tethering. Select settings.
- Page 28 Using Torch Settings ( Scroll down and tap Apps , located under Device You can add the torch widget to the home or lock settings. The following tabs are displayed: screendha. • Downloaded: Displays all applications Using Torch from Home screen downloaded from Google Play™...
- Page 29 Press and hold your preferred network. You can access Internet when you connect your Sonim XP6 IS / ECOM Ex-Handy 09 to a Wi-Fi network. To Select Modify Network. The network setting details connect your phone to a Wi-Fi network,...
- Page 30 Pairing a Bluetooth Device preferred paired Bluetooth device. Tap Rename to rename the display name of the To activate Bluetooth and pair your Sonim XP6 IS / device . ECOM Ex-Handy 09 phone with other Bluetooth devices: Tap Unpair to remove the device from your paired...
- Page 31 The USB Tethering option can be enabled Mobile data access is disconnected automatically as only on connecting the USB cable to the soon as you reach this limit. You cannot access the Internet and related phone features do not work. You receive a notification once you reach the set data Setting Up Wi-Fi Hotspot usage limit.
- Page 32 From the Home or All Applications screen, tap edited, from the list of VPN networks configured. Settings ( Tap Edit profile. Tap More located under Wireless & Networks Modify the required information. settings. Tap Save to save the changes. Tap VPN. Deleting a VPN Network Tap Add network icon ( ).
- Page 33 to add a new access point. Tap Network operator to to choose network operator. Managing Cell Broadcasts You can activate cell broadcasts to get emergency and important broadcast messages from your service provider. The broadcast message settings such as Show extreme threats, Show severe threats, Show AMBER alerts, Turn on notifications, Vibrate and Speak alert message are enabled by default.
- Page 34 Tap Screen lock and select one of the following About Android Security options to configure phone: Android provides a multi-layered approach to the • None: Disables the phone lock. security. • Slide: When the phone is locked slide to your •...
- Page 35 Tap Trusted Credentials to view and verify the info in the lock screen. You can modify this detail • whenever required. system and user certificates. • Tap Install from Storage to install certificates from Encrypting Phone Data storage if any. You can encrypt your accounts,settings downloaded Protecting your Phone from Harmful Applications applications and their data,media and other files.
- Page 36 shortcuts in the lock screen. Tap Owner Info to add and display owner information.
- Page 37 Location Access need to replace your device or erase its data, you can restore your data for any accounts that were previously If you enable Google Location Service™, ou can let backed up. your device access GPS, Wi-Fi networks, and mobile To backup your data, networks to estimate your location.
- Page 38 Accounts. If this option is not checked, you can only sync the Deleting an Account data manually. You can also sync manually to collect messages, e-mail, and other recent information. You can remove any account and all the information If auto-sync is disabled. it extends your phone’s associated with it from your device, including e-mail, battery life.
- Page 39 You can use the phonebook to maintain your contacts. It icon ( ), to open the message screen. enable you to perform call,SMS, mms etc. (Optional). Tap Attachment ( ), to attach a To access the contacts, multimedia file. From Home or All Apps screen ( ), tap People ( Type the message and tap Send ( The contacts saved in the phonebook are displayed.
- Page 40 Press the Options key located about the Call end Tap OK. button and select Import/Export. The contacts are exported to the SIM card. Tap Manage SIM Card contacts. Exporting Phone Contacts to Storage The list of contacts stored in your SIM card is displayed.
- Page 41 message. Ensure to setup your e-mail account • Enable All calls to voice-mail to forward all before sending e-mail messages. Else you are incoming calls from that contact to your voice- requested to setup the e-mail account. mail box. • Messaging: Send the contact details as a •...
- Page 42 Scroll to the required contact and tap the contact, tap the contact to view the contact details. Press the Options key located above the Call end button and select Delete.
- Page 43 Making a Call Icons Description From Home or All Apps screen ( ) , tap on Phone Answer the call. The Phone screen with last dialled number, frequently called contacts, Call history ( ), dial pad ( ) and call options ( ) is displayed.
- Page 44 Tap Call options ( ). You can also press the Options button located about the End call button. Tap the Call history icon ( Tap Settings. Tap All to view all the incoming, outgoing and missed calls. Changing Ringtones Tap Missed to view only the missed calls. In the Call settings screen, tap Phone ringtone.
- Page 45 can send quick response to the caller. Tap on Call Screening and enable Screening Outgoing calls to call only numbers stored in the To view and edit quick responses, in the Call settings FDN list screen, tap Quick responses, tap the specific response Screening Incoming Calls message to edit.
- Page 46 Setting TTY Mode Options Function If you enable TTY mode, hearing-impaired individuals can Outgoing calls All voice calls or International voice send and receive phone calls as text over the phone. calls or International voice calls except home country. In the call settings screen, tap TTY mode to view and modify TTY mode settings.
- Page 47 Forward when Forward calls when your phone is unreachable switched off or is in out of coverage area. Call Waiting When call waiting is enabled and the phone is in conversation, the incoming number is displayed when you receive a call. To activate call waiting in the call settings screen, tap Additional settings.
- Page 48 SMS and MMS are convenient and inexpensive means size of <=1 Mb. To add an attachment, tap Attach of communication. You can send a text message to ). Select the attachment type from the following other people via SMS service. MMS allows you to send options: messages by including multimedia content such as Browse the operation type from the below list and...
- Page 49 View and edit the following settings: Read reports Activate read report for multimedia messages. Settings Description SMS enabled Set the default messaging Auto-retrieve Activate automatic retrieval for application. multimedia messages in home network. Delete old Delete the old messages messages automatically when the storage Roaming Activate automatic retrieval...
- Page 50 Setting Up E-mail Accounts Settings Description You have to configure and create an e-mail account to Attach picture Attach a photo from the phone access the e-mail functionalities. memory. To create an E-mail account, from the home screen Attach video Attach a video from the phone or All Apps icon ( ), tap on Settings (...
- Page 51 • Add the starred folder • Moving the message to some other folder • Mark as unread...
- Page 52 You can view and modify the keyboard, language and Personal Dictionary dictionary setting using the Phone Settings. For more information, refer “Google Play™” on page You can add your own words to your personal dictionary so that your device remembers them. Text Entry Options To add a word or phrase, including an optional shortcut, When you enter the text message, you can change the...
- Page 53 Tap on Grid view to view the downloads. The Google Play™ downloads are displayed with the details such as Google Play™ is music, books, magazines, movies, TV the size, downloaded date etc. shows, and apps, available anywhere you go. List view Downloading Android™...
- Page 54 the action. • Switch view: You can switch calendar view to Day View, Week View, Month View or Agenda View. Google Calendar™ The Google Calendar helps you to set appointments, Alarm schedule reminders and alerts and repeat them if required. You can also view your saved tasks on a daily, You can set an alarm for a particular time.
- Page 55 Daylight Saving Time (DST). Sound Recorder • The local time in the home city is displayed in the You can record voice memos using the sound recorder. upper half of the screen. To access the sound recorder, tap Sound recorder ( located in All Apps screen ( •...
- Page 56 • FM recordings folder get automatically created when you record from FM radio. This is same as my recordings. • Tap the required song/memo to play.
- Page 57 About Google™ Search and Google Now™ Voice Search and Action Google Now gives you the right information at the right You can speak to your phone to search, get directions, time. Information at your fingertips. send messages and perform other tasks. To initiate the voice search, tap on the microphone ( Get updates on weather and traffic before you leave home.
- Page 58 Software. Sonim, and, to the extent that the Software contains material or code of a third party, such third party, shall be entitled third party beneficiaries of these terms.
- Page 59 WARNING: Changes or modifications made to this circuit different from that to which the receiver equipment not expressly approved by ECOM Instruments is connected. GmbH for compliance could void the user’s authority to • Consult the dealer or an experienced radio/TV operate the equipment.
- Page 60 AVERTISSEMENT: toute modification apportée à du récepteur. cet appareil sans l’accord exprès de conformité de • Branchez l’équipement sur une autre ligne ECOM Instruments GmbH. peut annuler l’autorisation électrique que celle utilisée pour le récepteur. d’utilisation accordée initialement pour cet appareil. •...
- Page 61 IC Statement This device complies with RSS-310 of Industry Canada (IC ID: 8311A-500055GR01). Operation is subject to the following two conditions: This device does not cause harmful interference. This device must accept any interference, including interference that may cause undesired operation of the device.
- Page 62 Règlement IC Le présent appareil est conforme aux CNR d’Industrie Canada applicables aux appareils radio exempts de licence (IC ID: 8311A-500055GR01). L’exploitation est autorisée aux deux conditions suivantes: L’appareil ne doit pas produire de brouillage, et L’utilisateur de l’appareil doit accepter tout brouillage radioélectrique subi, même si le brouillage est susceptible d’en compromettre le fonctionnement.
- Page 63 [Spanish] instruments GmbH declara comply with the RF exposure requirements in Europe. que el Sonim XP6 IS / ECOM Operations in the 5.15-5.25GHz band are restricted to Ex-Handy 09 model cumple indoor usage only.
- Page 64 Sonim XP6 IS / ECOM Ex-Handy 09 model megfelel a vonatkozó alapvetõ követelményeknek és az 1999/5/EC irányelv egyéb Countries Where Sonim XP6 IS / ECOM EX-Handy 09 Model is Sold elõírásainak. All countries in Europe and Middle East Asia. Română...
- Page 65 EC - Declaration of Conformity The EC-Declaration of Conformity is provided as a separate document in the sales kit. The latest version can be downloaded via www.ecom-ex.com on the respective product page.
- Page 66 Call accept/Send key 16 Deleting messages 49 Call barring 46 Device details 27 Adding a contact from phone screen 43 Calling from People 39 Dialing a call 43 From People 43 Add new contact 39 Call monitoring 45 Display caller ID 47 Airplane mode 31 Call settings 44 Display icons 19...
- Page 67 Screen lock 34 Back 23 End call 23 Optimizing power 26 Search bar 19 Navigation keys 23 Searching Contacts/people 41 Power On/Off 23 Security settings 34 Keypad for Sonim XP6 16 People 39 Sending SMS 48 Keypad functions 23 People/Contact settings 41...
- Page 68 Warranty 58 SMS settings 48 Wi-Fi hotspot 31 Sound recorder 55 WPS for router 29 System icons 19 XP6 IS / ECOM Ex-Handy 09 Box contents 14 Tethering and portable hotspot 31 Keypad layout 16 Text entry 52 Switching On 17...
Need help?
Do you have a question about the XP6 IS and is the answer not in the manual?
Questions and answers