Gaggenau CMP 250 Instruction Manual
Fully automatic espresso machine
Hide thumbs
Also See for CMP 250:
- Quick reference manual (7 pages) ,
- Instruction manual (32 pages) ,
- Installation instructions manual (28 pages)
Table of Contents
Advertisement
Advertisement
Table of Contents

Subscribe to Our Youtube Channel
Related Manuals for Gaggenau CMP 250


Summary of Contents for Gaggenau CMP 250
- Page 1 Gaggenau Instruction manual CMP 250 Fully Automatic Espresso Machine...
-
Page 2: Table Of Contents
Symbols Additional information on products, accessories, Colours and display replacement parts and services can be found at Additional information ( and ) www.gaggenau.com and in the online shop Accessories www.gaggenau-eshop.com Switching the appliance on and off Main switch Hibernate mode... -
Page 3: Important Safety Precautions
m Important safety precautions Please read carefully, follow and retain the Hazard due to magnetism! operating instructions. When passing on the The appliance contains permanent magnets appliance, enclose these instructions. which may affect electronic implants, e.g. heart pacemakers or insulin pumps. Persons wearing This appliance is designed for processing electronic implants must maintain a minimum normal household quantities in the home or... -
Page 4: Environmental Protection
Environmental protection Environmentally-friendly disposal Dispose of packaging in an environmentally-friendly manner. This appliance is labelled in accordance with European Directive 2012/19/EU concerning used electrical and electronic appliances (waste electrical and electronic equipment - WEEE). The guideline determines the framework for the return and recycling of used appliances as applicable throughout the EU. -
Page 5: Getting To Know The Appliance
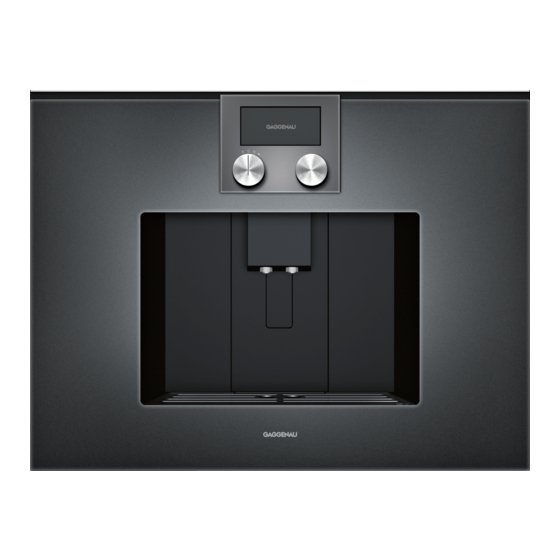
Getting to know the appliance Use this section to familiarise yourself with your new appliance. The control panel and the individual controls are explained here. You will also find information about the pull-out system and the accessories. Included in delivery... -
Page 6: Assembly And Components
Assembly and components Water tank with cover Display and controls Bean container Ground coffee drawer Grinding level adjustment Storage compartment for measuring spoon Brewing unit access door Storage compartment for quick reference guide Storage compartment for milk hose Coffee dispenser and milk frother, height-adjustable Shelf... -
Page 7: Display And Operating Controls
Display and operating controls Function selector positions Position Function Zero setting Light Beverage selection 3 - 10 Memory locations for individual beverages Service programmes/basic settings Symbols The following overview details the symbols that are the most used when operating the appliance. Control panel These areas are touch sensitive. -
Page 8: Colours And Display
Colours and display Accessories Colours The fully automatic espresso machine has trays to store accessories and the quick reference guide in the The different colours are used to guide the user in the appliance. These are on the right-hand side and are relevant setting situations. -
Page 9: Switching The Appliance On And Off
Notes ‒ In the basic settings, you can set whether the The main switch is used to switch the appliance on and Gaggenau logo is to be displayed during off. hibernation mode (see section Basic settings) If the appliance is switched off at the main switch, the ‒... -
Page 10: Starting The Appliance
Setting the water hardness Starting the appliance It is important to set the water hardness correctly, so that the appliance indicates accurately when the Note: Only use the appliance in frost-free areas. If the descaling programme should be run. The default water appliance was transported or stored at temperatures hardness is level 4. -
Page 11: Pulling Out The Appliance
Pulling out the appliance Water filter The appliance can be pulled out from the built-in unit. Operation with or without a water There are two options: filter ▯ Turn the function selector to or position 2 and touch the # symbol (the appliance must be You can use the appliance with or without a water filter. -
Page 12: Filling The Water Tank And The Bean Container
Rinsing the filter also activates the setting for the Filling the water tank and the bean "Change water filter" display. When the display "Please container change water filter" is shown, or at the latest after two months, the filter is no longer effective. It needs to be replaced for reasons of hygiene and so that the appliance does not experience a build-up of limescale Using your appliance, you can prepare coffee using... -
Page 13: Preparing Beverages
Aroma function Preparing beverages The longer the coffee is brewed, the more bitter substances and unwanted flavours are released. The taste and digestibility of the coffee is thus affected. Beverage selection Your appliance therefore has a special Aroma function for very strong coffee. After half the requested volume Notes has been prepared, coffee is ground and brewed once more, so that only the palatable and easily digestible... -
Page 14: Preparing Two Cups At The Same Time
Preparing coffee using ground coffee Set the strength using the rotary selector. The appliance must be switched on and the water tank must be filled. Turn the function selector to position 2. Pull out the appliance from the built-in unit (see section Pulling out the appliance Using the measuring spoon, fill the ground coffee... -
Page 15: Preparing A Coffee With Milk
Preparing a coffee with milk Notes While the beverage is dispensed, the & symbol is ‒ Risk of burns! displayed. Touch this symbol to stop the beverage being prepared. The milk system becomes very hot. After use, allow it to Using the ‡... -
Page 16: Preparing Hot Water
Preparing hot water Setting the grinding level Risk of burns! Risk of injury! The milk system becomes very hot. After use, allow it to Do not reach into the grinding unit. cool down first before touching it. Using the rotary selector for the grinding level, you can The appliance must be switched on and the water tank set your preferred fineness for the ground coffee. -
Page 17: Individual Beverages
Save with ™ or cancel with ' and exit the menu. Individual beverages Press to start. Depending on the beverage selected, the beans will be You can define and save instructions for up to eight ground first, then the milk prepared and finally the individual beverages. -
Page 18: Child Lock
Child lock The appliance has a childproof lock to prevent children operating it accidentally. Notes ‒ You need to set the childproof lock to "available" in the basic settings (see section entitled 'Basic settings'). ‒ If there is a power cut after the childproof lock has been activated, the childproof lock may be off when the power comes back on again. -
Page 19: Basic Settings
Level 1, 2, 3, 4, 5*, 6, 7, 8 Sets the display brightness Hibernate mode with logo*/without logo Hibernate mode display with or without GAGGENAU logo Display Reduced*/Standard If the 'Reduced' setting has been selected, only the most important information will be shown on the display after a short time. - Page 20 Language German* / French / Italian / Spanish / Select language for text display Portuguese / Dutch / Danish / Swedish Note: If the language is changed, the system / Norwegian / Finnish / Greek / Turkish restarts. This takes a few seconds. / Russian / Polish / Czech / Slovenian / The basic settings menu is also closed.
-
Page 21: Daily Maintenance And Cleaning
Clean the shelf with a commercially available Daily maintenance and cleaning limescale remover. Allow the limescale remover to briefly take effect and then rinse with water. Dry the shelf immediately. Daily maintenance Note: Do not put the shelf in the dishwasher. Immediately remove residues from the shelf to avoid stains. -
Page 22: Service Programmes
Press the red button, hold the brewing unit on the Service programmes recessed grips and carefully remove it. Every so often – the exact frequency depends on usage and water hardness – one of the following messages will appear in the display in place of the coffee selection: ▯... -
Page 23: Cleaning The Milk System
Cleaning the milk system Cleaning the milk system Open the flap on the coffee dispenser and pull out Risk of burns! the milk frother forwards. The milk system becomes very hot. After use, allow it to cool down first before touching it. Note: All components can also be cleaned in the dishwasher. -
Page 24: Cleaning
Cleaning Fill the empty water tank with lukewarm water up to the "calc" (0.5 l) mark and then dissolve two descaling tablets in this water. Duration: approx. 7 minutes Confirm using ™ and start by using Clean the brewing unit before the service programme starts (see section The descaling programme runs for about Cleaning the brewing unit... -
Page 25: Cleaning And Descaling
Cleaning and descaling 14 Empty and replace the drip tray. 15 Touch the ™ symbol. Duration: approx. 32 minutes The cleaning and descaling programme is finished. Touch the ™ symbol. If a filter is used, re-insert it now. The cleaning and descaling programme combines the The appliance is ready for operation. -
Page 26: Simple Troubleshooting
Simple troubleshooting Problem Cause Remedial action Display screen "Refill beans". Although Beans are not falling into the Change the type of coffee if necessary. Wipe the bean container is full, the appliance grinding unit (beans that are too out the empty bean container with a dry cloth. does not grind the coffee beans. - Page 27 Problem Cause Remedial action Display screen "Temperature too low". The system is too cold. Wait until the temperature has been reached. The display goes out. Display screen "Power fluctuations". Overvoltage or undervoltage in Wait for a few minutes. If the display does not the domestic installation.
- Page 28 Gaggenau Hausgeräte GmbH Carl-Wery-Straße 34 81739 München GERMANY www.gaggenau.com...
Need help?
Do you have a question about the CMP 250 and is the answer not in the manual?
Questions and answers