Advertisement
Advertisement

Related Manuals for Ceriatone Chupacabra HRP Series


Summary of Contents for Ceriatone Chupacabra HRP Series
- Page 1 Ceriatone Chupacabra HRP Series - 50W amplifier User’s Manual...
-
Page 2: Table Of Contents
Thank you for the purchase of your Ceriatone Chupacabra guitar amplifier! Here, we hope to explain how best to use your new amp. Table of Contents 1) About the Chupacabra…….…………………………………………………………………………………………page 2 2) Quick setup……………………………………………………………………………………………………………page 3 3) Front Panel controls………………………………………………………………………………………………….page 4 4) Rear Panel controls…………………………………………………………………………………………………..page 8... -
Page 3: Quick Setup
Rock on! - Nik S Azam 2) QUICK SETUP (for instant gratification) 1) Plug your guitar using a 1/4” instrument cable into the INPUT on the right of the front panel 2) Plug a suitable power cable from the Chupa’s rear panel MAINS cable inlet to your wall power receptacle 3) Plug the Chupa into your speaker cabinet using 1/4”... -
Page 4: Front Panel Controls
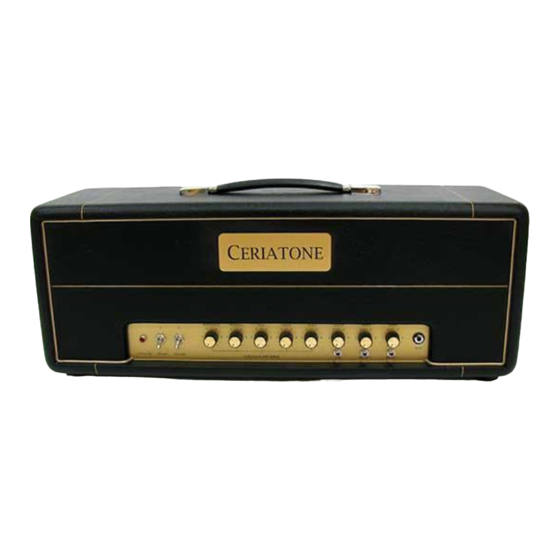
9) Set front panel STANDBY switch to “1” mode (down position) 10) ROCK!!!!!! 3) FRONT PANEL CONTROLS From left to right: 1) INDICATOR LED 2) POWER 2-way toggle switch 3) STANDBY 2-way toggle switch 4) RESONANCE control 5) PRESENCE control 6) BASS control 7) MIDDLE control 8) TREBLE control... - Page 5 16) INPUT ¼” instrument jack INDICATOR will illuminate when the Chupacabra is powered by turning the front panel POWER toggle switch to the ON position. If INDICATOR does not turn on, check your power cable connections, and then the fuse on the rear of the unit. POWER two-way toggle switch powers the Chupacabra on and off.
- Page 6 sound of original Plexis. The right position is our ‘80s voicing. This adds saturation and compression, and is reminiscent of ‘80s modded Plexis coming out of LA. This voicing is great for hard rock, thrash metal, etc. The left position is our modern voicing.
- Page 7 FOCUS control is a push/pull switch located on GAIN 1. With the control pushed in, it is defeated. Pulling out the GAIN 1 control engages FOCUS. FOCUS will reduce bottom end, reduce saturation, increase midrange, and accentuate pick attack. INPUT is a ¼” jack for instrument cables. Plug your guitar in here.
-
Page 8: Rear Panel Controls
4) REAR PANEL CONTROLS 1) FX SEND ¼” instrument jack 2) FX RETURN ¼” instrument jack 3) SPEAKERS ¼” speaker jacks (x2) 4) OUTPUT SELECTOR three-way rotary selector 5) BIAS TEST probe jacks (x3) 6) MAINS FUSE T2A slow blow fuse 7) HT FUSE T500mA fuse 8) MAINS IEC cable inlet FX SEND ¼”... - Page 9 SPEAKERS ¼” speaker cable jacks. Use a ¼” speaker cable to connect your speaker cabinet to the amplifier using these jacks. If you use one speaker cabinet, either jack is acceptable. NOTE – never turn your amplifier to OPERATE mode (“1” / DOWN position on STANDBY) without connecting the amplifier to a speaker cabinet or suitable dummy load! Failing to do so may damage your amplifier! OUTPUT SELECTOR three-way rotary selector.
-
Page 10: Tube Compliment And External Bias Jacks And Adjustment
5) TUBE COMPLIMENT AND EXTERNAL BIAS JACKS AND ADJUSTMENT Chupacabra 50W From left to right: V1 – JJ 12AX7/ECC83S (input stage 1 and gain stage 2) V2 – JJ 12AX7/ECC83S (gain stage 3 and tonestack driver) V3 – JJ 12AX7/ECC83S (phase inverter for power amplifier) V4 –... - Page 11 In this diagram, we have color coded five features for simplicity 1) Green arrow = red probe jack, V4 2) Yellow arrow = bias adjustment potentiometer shaft, V4 3) Black arrow = black probe jack, ground (“COM”) 4) Orange arrow = red probe jack, V5 5) Blue arrow = bias adjustment potentiometer shaft, V5 To measure your power tube bias, carefully follow these steps with the amplifier in OPERATE and connected to a speaker load (not doing so may damage your amplifier!):...
- Page 12 1) Turn on a digital multimeter (DMM), and set it to read millivolts (mV) in the 100mV range (this will vary from DMM to DMM) 2) Plug a black probe into the color-coded jack on your DMM, and do the same for a red probe 3) Insert the black probe tip into the black probe jack (black arrow).
- Page 13 You might wonder why your DMM is set to millivolts and not milliamps – simply, we have a 1 Ohm resistor placed between your probe jacks and ground to convert a current reading to a voltage reading. That way, a bias current of 36mA measures as 36mV on your DMM.
-
Page 14: Frequently Asked Questions
Again, bias at your own risk. Ceriatone Amplification is not responsible for any damages or injuries resulting from user biasing. 8) FREQUENTLY ASKED QUESTIONS How do I hook up this thing? - See Section 2, beginning on page 3. Is the FX loop series or parallel? Active or passive? - The FX loop is series, and is currently passive. - Page 15 - For best results, an effects loop interface like the C-lator or Klein-ulator should be used with the Chupa amplifiers. These units prevent impedance mismatching, as well as provide the ability to pad down the volume sent to the effects units hence preventing any overloading. Sometimes when I play with both BRIGHT switches engaged, the amp wants to feedback/squeal.
- Page 16 6L6GCs, modern 6V6s like Electro-Harmonix, JJ) may be possible, but please first consult Ceriatone Amplification or your local competent amplifier technician. What settings do you recommend? - See Section 2, Page 3. Yeah, I read that already. I love ‘80s hair metal. Can this amp do that? - Hell yeah! Put the GAIN controls at 12:00, both BRIGHT switches to the left.
- Page 17 Do I need to use a matched and balanced phase inverter? - It is not necessary. Feel free to experiment with different tubes (of the same type) in your Chupacabra, though! I’ve read that the components used in this type of amplifier are really important. What is inside my Chupacabra? - We use a combination of parts custom-made for us to our specifications (power transformer, output transformer, choke, high-temperature / low-ESR electrolytic capacitors) and those used in our British series (1/2W carbon composition resistors, 1W carbon film resistors, Mallory 150M polyester film capacitors, high-...
Need help?
Do you have a question about the Chupacabra HRP Series and is the answer not in the manual?
Questions and answers