Table of Contents
Advertisement
Advertisement
Table of Contents

Related Manuals for Janome 1600P


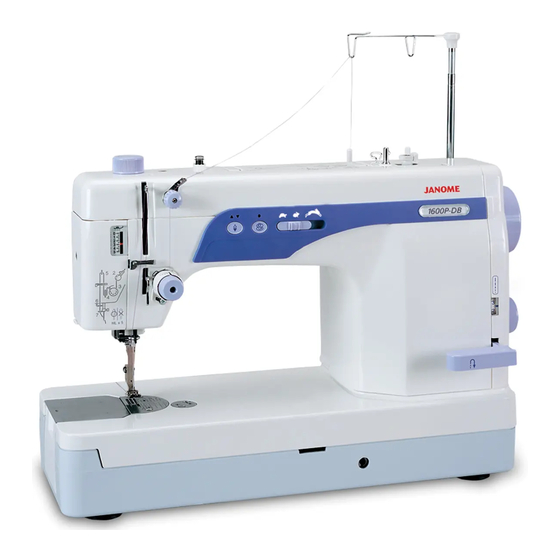
Summary of Contents for Janome 1600P
- Page 1 Servicing Manual 1600P, 1600-DB &1600-DBX...
-
Page 2: Table Of Contents
Check Spring Stroke ..................9 Pretension Dial ..................... 9 Knee Lifter Lever ..................10 Needle Stop Position .................. 11 Needle Threader (1600P only) ..............12 Replacing the Electronic Components Location of the Electronic Components ............. 13 Location of the Connectors ................ 14 Internal Wiring .................... -
Page 3: Replacing The External Parts
Replacing the External Parts To remove: 1. Face Plate Remove the setscrew (1) and washer (2). Re- move the face plate (3). 2. Top Cover Remove the 2 setscrews (4). Lift the top cover (5) and pull out the motor connector (6). -
Page 4: Mechanical Adjustment
Mechanical Adjustment 1. Needle Bar Height [1] Remove the face plate. [2] Turn the handwheel to bring the needle bar (1) to the lowest position. [3] Loosen the setscrew (2). Move the needle bar (1) up or down and match the upper hairline (3) with the bottom edge of the needle bar bushing (4). -
Page 5: Feed Dog Height
3. Feed Dog Height When the feed dog is fully raised the height should be 0.8 - 1.0 0.8 - 1.0 mm above the needle plate. [1] Set the stitch length dial at 6 (Maximum). Turn the hand wheel to bring the feed dog to the highest position. -
Page 6: Feed Cam Timing
5. Feed Cam Timing To Check: [1] Lower the needle bar by turning the handwheel until the point of the needle is 17.9 mm (for 1600P-DB/ DBX) or 17.5 mm (for 1600P) above the upper surface of the needle plate (1). -
Page 7: Feed Lifting Cam Timing
To check: [1] Lower the needle bar until the point of needle is level with the upper surface of the needle plate (1) (1600P- DB/DBX) or 0.4 mm below the needle plate (1600P). [2] The top of the feed dogs (2) should be 0 - 0.1 mm 0.4 mm... -
Page 8: Needle To Hook Timing
7. Needle to Hook Timing [1] Remove the needle plate. [2] Loosen the 3 setscrews (1). Pull out the hook race very slightly (less than 0.5 mm). [3] Raise the needle bar from the lowest position until the lower hairline (2) of the needle bar matches the edge of the needle bar bushing (3). -
Page 9: Hook Stopper Position
9. Hook Stopper Position [1] Remove the base, needle plate and feed dog. [2] Loosen the setscrew (1) and move the hook stopper (2) so that the center of the needle (3) is located between the center of the hook stopper (4) and outer side of the hook stopper spring (5). -
Page 10: Bobbin Winder Stopper
10. Bobbin Winder Stopper The amount of thread wound on the bobbin should be 16.5 - 19.5 mm in diameter. [1] Loosen the setscrew (1). Turn the bobbin winder stopper (2) to adjust the thread amount. - If the amount is too much, turn the stopper in the direction A. -
Page 11: Check Spring Stroke
12. Pre-tension Dial The standard position of the pretension dial is as follows: 4 mm 1600P and 1600P-DBX: The screw head (1) sinks 4 mm below the dial face. (Use the marking on the Gauge 767G-001 for 4 mm). 1600P and 1600P-DBX 1600P-DB: The screw head (1) is level with the dial face. -
Page 12: Knee Lifter Lever
13. Knee Lifter Lever The presser foot rises 7.5 mm when it is fully raised with the knee lifter. [1] Remove the base and lay the machine on its back. [2] Loosen the nut (1) on the knee lifter lever (2) slightly and turn the adjusting screw (3) to adjust the height. -
Page 13: Needle Stop Position
(3) at the same time. [2] Remove the top cover. [3] Lower the needle bar by turning the hand wheel until the needle point is 19.1 mm (for 1600P-DB/DBX) or 18.7 mm (for DP-1600P) above the upper surface of the needle plate (4). -
Page 14: Needle Threader (1600P Only)
15. Needle Threader (1600P only) To remove: [1] Remove the face plate. [2] Pull the threader (1) out from the threader shaft (2). To attach: [3] Align the groove (3) of the theader with the pin (4) on the threader shaft. Push the threader up until it snaps in place. -
Page 15: Replacing The Electronic Components
Upper shaft sensor Driving motor Lamp Machine socket Power transformer Circuit board-MS Arm lamp 1b. Location of the Electronic Components (1600P and 1600P-DBX) Slide volume Bobbin winder motor Bobbin winder switch Circuit board-A Circuit board-F Upper shaft sensor Driving motor... -
Page 16: Location Of The Connectors
(primary) Bobbin winder switch Power transformer Driving motor (secondary) Lamp Arm lamp 2b. Location of the Connectors (1600P and 1600P-DBX) NOTE: * only for 1600P and 1600-DBX Thread cutter switch* Power transformer Motor sensor (primary) Circuit borad-F Upper shaft sensor... -
Page 17: Internal Wiring
To prevent the internal wirings from contacting the moving parts or being caught in the joint of the external parts, the internal wirings should properly be routed and secured as illus- trated. NOTE: The item marked with * is applicable to 1600P and 1600-DBX only. Motor cord Motor sensor cord... -
Page 18: Circuit Board-A
4. Circuit Board-A To remove: [1] Remove the top cover. [2] Pull out connectors from the circuit board-A. Remove the cords from the cord clips (1). [3] Remove the setscrews (2) and the board-A case lid (3). [4] Pull out the connectors under the case lid. Remove setscrews (4) and circuit board-A. -
Page 19: Driving Motor
6. Driving Motor To remove: [1] Remove the belt cover and motor cover. [2] Pull out the motor sensor connector (1). [3] Pull out the motor connector (2), while pushing the connector lock (3). [4] Remove the nuts (4) and driving motor (5). NOTE: Do not disconnect the connectors by pulling on cord. -
Page 20: Driving Motor
6. Driving Motor (continued) To attach: [1] Install the driving motor (1) to the motor bracket (2) and attach the motor belt (3). Tighten the nuts (4) firmly. [2] Loosen the setscrews (5) slightly and move the motor up or down to adjust the motor belt tension. The belt should deflect 4 - 5 mm when applying 300 grams of load to the middle of the belt. -
Page 21: Power Transformer
7. Power Transformer [1] Remove the top cover and motor cover. [2] Remove the board-A case lid and pull out the trans- former connectors (primary and secondary) from the circuit board-A. [3] Remove the driving motor. [4] Remove the setscrew (1) and cord binder (2). [5] Remove the setscrews (3) and transformer (4). -
Page 22: Light Bulb
9. Light Bulb Light bulb inside of the face plate [1] Remove the face plate (1). [2] Pull out the light bulb (2) from the lamp socket (3). [3] Insert a new bulb and push it into the lamp socket. [4] Attach the face plate. -
Page 23: Adjustment Of The Thread Cutter Mechanism
Adjustment of the Thread Cutter Mechanism (1600P and 1600P-DBX only) 1. Static Cutter Blade [1] Remove the needle plate and base. [2] Make sure that the presser foot is raised. Lower the needle bar to the lowest position. Turn the hand wheel toward you until the tip of the needle levels with the presser foot. -
Page 24: Thread Cutter Blade
2. Thread Cutter Blade To replace: [1] Remove the needle plate, feed dog and base. [2] Remove the static cutter blade. Remove the hinge screw (1) and thread cutter blade (2). [3] Attach the new thread cutter blade and secure it with the hinge screw (1). -
Page 25: Thread Guide Plate
3. Thread Guide Plate [1] Remove the needle plate. [2] Loosen the flat screw (1) and adjust the position of the thread guide plate (2). [3] The left inner edge (3) of the thread guide plate should be approximately 1.4 mm from the center of the needle drop position (4) and the back inner edge 2.7 mm (5) of the thread guide plate should be approximately... -
Page 26: Needle To Cutter Cam Timing
[4] Continue to turn the handwheel until the thread drawing arm (4) starts to move to the right. The needle point should be 10.5 mm (1600P-DB/ DBX) or 10.9 mm (1600P) above the upper surface of the needle plate (5) when the thread drawing arm starts to move. -
Page 27: Thread Drawing Lever
[3] Turn the handwheel toward you to raise the needle bar from the lowest position until the needle point is 10.9 mm (1600P-DB/DBX) or 10.5 mm (1600P) above the upper surface of the needle plate. [4] Push the solenoid disk (3) fully to swing the thread drawing lever (4). -
Page 28: Auto Tension Release
6. Auto Tension Release [1] Turn the handwheel toward you to raise the needle bar until the needle point is just above the needle 1 mm plate. [2] Lower the presser foot. Set the tension dial at 4 and push the solenoid disk (1) fully to the right. -
Page 29: Thread Cutter Troubleshooting
Thread Cutter Troubleshooting (1600P and 1600P-DBX only) The needle thread is not The static cutter is dull. Replace or grind the static cutter blade. cut. The static cutter blade is Adjust the position of the static cutter blade (see page out of position.
Need help?
Do you have a question about the 1600P and is the answer not in the manual?
Questions and answers