Table of Contents
Advertisement
Advertisement
Table of Contents

Related Manuals for AirSep FreeStyle 5


Summary of Contents for AirSep FreeStyle 5
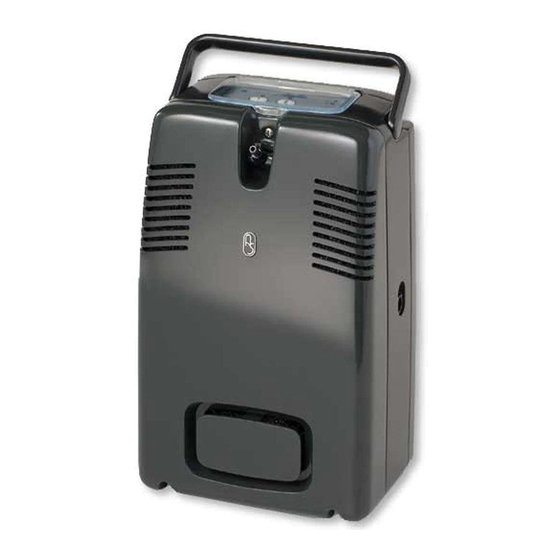
- Page 1 ™ FreeStyle 5 Portable Oxygen Concentrator Service Manual...
- Page 2 Expedited Product Warranty Check service is available at 800-482-2473 MN179-1 Rev D FreeStyle 5 Service Manual MN179-1 D...
-
Page 3: Table Of Contents
2.3.4 Discharged Battery 2.3.5 Battery Charging 2.3.6 Battery Fully Charged 2.3.7 Cannula Disconnect 2.3.8 Performance Warning 2.3.9 FreeStyle 5 Capacity Exceeded 2.3.10 General Malfunction Oxygen Concentration Test and Specification FreeStyle 5 Service Manual MN179-1 D i – table of contents... - Page 4 Maintenance Routine Maintenance 4.1.1 Air Intake / Gross Particle Filter 4.1.2 Product Filter Replacement 4.1.3 Compressor Servicing 4.1.4 Recording Maintenance Infection Control Cleaning and Preparing for New Patient Use ii – table of contents MN179-1 D FreeStyle 5 Service Manual...
- Page 5 Solenoid Valve Replacement Adsorbent Bed Replacement Feed/Waste Manifold Replacement 5.10 Measuring System Pressure 5.11 Circuit Board Replacement 5.12 Motor Controller Board Replacement 5.13 Control/Key Panel Replacement 5.14 Fan Replacement FreeStyle 5 Service Manual MN179-1 D iii – table of contents...
- Page 6 Section 6.0 Typical Pressure Profiles Pressure Profile Quadrant Section 7.0 Troubleshooting General Troubleshooting Troubleshooting Chart Section 8.0 Recommended Tools Tools for FreeStyle 5 Service and Maintenance...
-
Page 8: Introduction
AirSep Corporation immediately. ■ Check the operation of each FreeStyle 5 unit before delivery to a patient. Always operate the unit for a minimum of 10 minutes, and check that the oxygen concentration level is within specifications, as described in Section 5 of this manual. -
Page 9: Important Notice And Symbol Explanations
Important Notice and Symbol Explanations As you review both the FreeStyle 5 Patient Manual and this FreeStyle 5 Service Manual, pay special attention to the WARNING, CAUTION, and NOTE messages. They identify safety guidelines or other important information as follows: Warning –... -
Page 10: Definitions Of Symbols
Symbols can also permit easier comprehension of a concept within a restricted space. The following table is a list of symbols and definitions used with the FreeStyle 5 Portable Oxygen Concentrator. -
Page 11: Freestyle 5 Specifications
* Based on an atmospheric pressure of 14.7 psi (101 kPa) at 70°F (21°C) ** Operating outside of these specifications can limit the concentrator’s ability to meet Oxygen Concentration specifications at higher liter flow rates. MN179-1 FreeStyle 5 Service Manual Rev D... -
Page 12: Freestyle 5 Classifications
FCC Part 15, Subpart B – Class B Unintentional Radiators Method of cleaning and infection control allowed: Please refer to “Cleaning, Care, and Proper Maintenance” section of this FreeStyle 5 Patient Manual. Degree of safety of application in the presence of flammable anesthetic gases: Equipment not suited for such application. -
Page 13: 2.0 Operation Check And Test Of Oxygen Concentration
2.0 Operation Check and Test of Oxygen Concentration 2.1 Description of Operation Air enters the FreeStyle 5 Oxygen Concentrator through an external air intake / gross particle filter. This filtered air enters the compressor via a muffler that quiets the compressor’s suction sound. -
Page 14: Alarm System
1-5 settings on the keypad are pressed. After the alarm is turned off, connect the FreeStyle 5 unit to its AC or DC power supply or change to another source of oxygen immediately. When the FreeStyle 5 unit is connected to the AC or DC power supply, FreeStyle 5 operates and the internal battery recharges simultaneously. -
Page 15: Battery Charging
3 hours and 15 minutes. Depending upon the temperature of the FreeStyle 5 battery, it can take several minutes for the charging cycle to start after connecting to power. This is a normal condition and is intended for safe charging. -
Page 16: Battery Fully Charged
2.3.6 Battery Fully Charged When FreeStyle 5 is connected to an AC or DC outlet and is either in operation or is off, the green 100% battery gauge/indicators displays to indicate that the battery is fully charged. 2.3.7 Cannula Disconnect... -
Page 17: General Malfunction
2.3.10 General Malfunction If a general malfunction of the FreeStyle 5 unit occurs, Two ½ second alarms sound every 5 seconds, and the red light turns on. When this occurs, ALARM oxygen concentration is outside specifications. The patient should change to another source of oxygen and contact the Equipment Provider. -
Page 18: General Instructions
You, as the Equipment Provider, are responsible to ensure that each patient receives the FreeStyle 5 Patient Manual. Explain each step in the operation of the unit to the patient with reference to the patient manual. 3.1.1 Connecting to External Power When connecting the AC or DC power supply to the FreeStyle 5 unit, be certain to first properly align the power cord to this inlet. - Page 19 Use only the AirBelt power supply provided to charge AirBelt. The FreeStyle 5 AirBelt will completely recharge from its fully depleted state in approximately 3 ½ hours. While charging a fully discharged battery, the LED will continue to blink until 25% capacity is reached. The LED will then turn solid.
- Page 20 AirBelt does not need to be fully discharged before recharging. It is recommended to charge it after each use. If the AirBelt power supply remains connected when it is fully charged, the four LEDs will turn off within ½ hour. MN179-1 FreeStyle 5 Service Manual Rev D...
-
Page 21: Routine Maintenance By The Patient
The patient must clean this filter weekly, as described below. The filter may require daily cleaning if the FreeStyle 5 unit operates in a harsh environment, for example, a house heated by wood, kerosene, or oil, or one with excessive cigarette smoke. - Page 22 3.2.3 Nasal Cannula AirSep recommends a nasal cannula with 7 ft (2.1 m) of tubing, AirSep Part No. CU002-1 or suitable cannula. Other lengths of non-kinking / star channel cannula can be used for a total length of up to 25 ft (7.6 m) maximum.
-
Page 23: Equipment Provider Maintenance
(Refer to Section 3.2.1, “Cleaning the Air Intake / Gross Particle Filter,” of this manual.) The filter may require more frequent cleaning if the FreeStyle 5 unit operates in a harsh environment — a house heated by wood, kerosene, or oil, or one with excessive cooking or cigarette smoke. -
Page 24: Compressor Servicing
Be careful not to get any liquid into the interior of the unit. Next, clean the exterior with a common chemical disinfectant before any other patient uses the unit. Do not use liquid directly on the FreeStyle 5 unit to clean MN179-1 FreeStyle 5 Service Manual... -
Page 25: Service
Do not use liquid directly on the FreeStyle 5 unit to clean it. A list of undesirable chemical agents includes but is not limited to, the following, according to the plastics manufacturer: alcohol and alcohol-based products, concentrated chlorine-based products (ethylene chloride), and oil-based products (Pine-Sol, Lestoil). -
Page 26: Housing Removal
Removing Back Cover 1. Place unit on its front. 2. Locate the four screws securing the back cover. 3. Using a Phillips-head screwdriver, loosen and remove the screws. 4. Lift off back cover. Figure 5.2 MN179-1 FreeStyle 5 Service Manual Rev D... -
Page 27: Internal Battery Replacement
FreeStyle to external power. 6. Place front housing back on and fasten. 7. Plug the FreeStyle 5 AC or DC power supply to initialize and charge battery. MN179-1 FreeStyle 5 Service Manual... -
Page 28: Psa Removal
PSA Removal 1. Disconnect the FreeStyle 5 unit from the AC or DC outlet. 2. Remove the front housing. Remove the battery. Care must be taken when removing (J12) and (J14) connector. 4. Disconnect the 8-pin connector (J17) with multi-color wires from the circuit board. - Page 29 (See Figure 5.8.) Figure 5.8 7. Carefully disconnect the 1/8” OD tubing coming from the back of the unit to the limiting orifice. (See Figure 5.9.) Figure 5.9 MN179-1 FreeStyle 5 Service Manual Rev D...
- Page 30 10. Disconnect the 1/8” OD tube from the Y-connector or T connector (which is located at the back of the PSA system) that connects to the pressure transducer on the left side. Figure 5.12 MN179-1 FreeStyle 5 Service Manual Rev D...
- Page 31 Do not disconnect by pulling on the wires. (See Figure 5.13 and 5.14.) Figure 5.13 Figure 5.14 12. Carefully remove the complete PSA assembly from the center housing by pulling it upwards and slipping compressor molex connector through center section. (See Figure 5.15.) Figure 5.15 MN179-1 FreeStyle 5 Service Manual Rev D...
- Page 32 Remove the compressor plate by removing the two screws. (See Figure 5.16.) Figure 5.16 Remove the two mounts from the compressor. (See Figure 5.17.) Figure 5.17 MN179-1 FreeStyle 5 Service Manual Rev D...
-
Page 33: Compressor Replacement
5/32” Allen wrench. (See Figure 5.18.) Figure 5.18 2. Remove the compressor by pulling the compressor away from the PSA assembly. Care should be taken not to separate manifold from beds. (See Figure 5.19) Figure 5.19 MN179-1 FreeStyle 5 Service Manual Rev D... -
Page 34: Compressor Assembly Installation
Connect the new compressor to the PSA assembly, and tighten the bolt to a torque of 15 in- lbs. (See Figure 5.21.) Be sure the gasket is in place. Figure 5.21 5.5.2 Compressor Assembly Installation To install the new compressor assembly, perform the compressor removal procedure in reverse order. MN179-1 FreeStyle 5 Service Manual Rev D... -
Page 35: Product Manifold Replacement
1. Remove the PSA system per Section 5.4. 2. Disconnect the tubing from the barb on the product manifold. Figure 5.22 Figure 5.23 Figure 5.24 3. Remove the tie wraps that bundle the solenoid valve wire together. MN179-1 FreeStyle 5 Service Manual Rev D... - Page 36 Align new product manifold with the outlet of the sieve beds, and gently push manifold down into place. 7. Reconnect tubing to new product manifold. 8. Place center bolt through product manifold and tighten to 15 in-lbs. MN179-1 FreeStyle 5 Service Manual Rev D...
-
Page 37: Solenoid Valve Replacement
8. Fasten new valve using the two screws provided. 9. Re-bundle wires and tie-wrap. 10. Start FreeStyle 5 unit and leak test around the area where the o-rings are located on the valve. It may not be necessary to completely remove the PSA system assembly to replace the solenoid valve. -
Page 38: Adsorbent Bed Replacement
3. While holding the adsorbent beds, gently pull up on the product manifold to remove from top of product manifold. Figure 5.26 4. Pull upward on the adsorbent beds to remove from the feed/waste manifold. MN179-1 FreeStyle 5 Service Manual Rev D... - Page 39 9. Place center bolt through product manifold and tighten to 15 in-lbs. Figure 5.28 10. Reassemble FreeStyle 5, and leak test at bed connections MN179-1 FreeStyle 5 Service Manual Rev D...
-
Page 40: Feed/Waste Manifold Replacement
If not, remove fitting(s) from the compressor. 6. Place new feed/waste manifold onto compressor. Gently push manifold down until compressor fittings are seated into compressor head. Figure 5.30 MN179-1 FreeStyle 5 Service Manual Rev D... -
Page 41: Measuring System Pressure
After 10 seconds, the alarm will sound and the LEDs above each flow setting will illuminate. The unit will then start to automatically pulse in flow setting [5]. Reference Section 6.1 Pressure Profiles MN179-1 FreeStyle 5 Service Manual Rev D... -
Page 42: Circuit Board Replacement
4. Remove DC power input connector from location J13, pin 3 connector on circuit board. Figure 5.31 Disconnect control panel/keypad flex circuit from J9 & 10 Ziff (zero insertion force) connector by carefully lifting upward on the locking tab. Figure 5.32 Figure 5.33 MN179-1 FreeStyle 5 Service Manual Rev D... - Page 43 8. Remove cannula nozzle tubing by cutting tie-wrap (use small-size cutter). Carefully pull tubing from nozzle barb. Figure 5.34 Disconnect fan connector using needle-nose pliers, carefully pulling upward on fan connector housing at location J15 on main circuit board. Figure 5.35 MN179-1 FreeStyle 5 Service Manual Rev D...
- Page 44 Remove eight 4-20 self-tapping screws. Figure 5.36 11. Remove main circuit board from center section assembly. Figure 5.37 12. Replace main circuit board; reverse order of steps 1-12 MN179-1 FreeStyle 5 Service Manual Rev D...
-
Page 45: Motor Controller Board Replacement
Figure 5.39 4. Following alignment, view the replacement board from the side at an angle to make certain that the pins are aligned properly before seating the connector. MN179-1 FreeStyle 5 Service Manual Rev D... - Page 46 Figure 5.40 5. Gently press the board into place until properly seated Figure 5.41 MN179-1 FreeStyle 5 Service Manual Rev D...
- Page 47 5. Replace control panel/keypad with new control panel keypad. 6. Check control recessed area of enclosure center section to ensure plastic is clean and all adhesive backing and seal backing from new control panel keypad. MN179-1 FreeStyle 5 Service Manual Rev D...
- Page 48 9. Route the flex circuit from control panel keypad notched area of control panel enclosure section. Figure 5.45 10. Bend flex circuit 180 , being careful not to crease or fold the flex circuit. MN179-1 FreeStyle 5 Service Manual Rev D...
- Page 49 (zero insertion force) connectors, making sure that the flex circuit seats into the connectors. Carefully press the Ziff connector locking tabs in a downward direction. Ensure latch seats. Figure 5.48 Figure 5.47 13. Replace PSA system. MN179-1 FreeStyle 5 Service Manual Rev D...
-
Page 50: Fan Replacement
2. Remove internal battery per Section 5.3. Disconnect the Molex connector (J15) from the circuit board to the fan. Figure 5.49 4. Remove the four Phillips screws securing the fan to the center section. Figure 5.50 MN179-1 FreeStyle 5 Service Manual Rev D... - Page 51 Figure 5.51 Figure 5.52 6. Insert screws through each of the four corners of the fan. Secure with kep nut. Do not over tighten. 7. Connect Molex connector (J15) to the circuit board. MN179-1 FreeStyle 5 Service Manual Rev D...
- Page 52 The following pressure profiles illustrate the range of normal operating pressure at sea level. These are approximate pressures. A unit may be out of the range shown below and still be within specification, for example, in higher altitude environments. MN179-1 FreeStyle 5 Service Manual Rev D...
-
Page 53: Troubleshooting
[5]. A brief, continuous alarm sounds to indicate that the FreeStyle 5 has been turned on. The compressor will start to run, you must wait 10 seconds before proceeding to step 3. 3. Activate the test mode by pressing flow settings [1] and [5] simultaneously for 10 seconds. - Page 54 AC power supply is not properly connected to Check connection from the FreeStyle 5. AC adapter to FreeStyle 5. Defective AC power supply. Replace AC adapter. Unit does not turn on, and No power at DC outlet. Check fuse for DC outlet.
- Page 55 Replace battery. Note: Whenever storing Battery reached cycle life. FreeStyle 5 for an extended period of time, ensure that the battery the state of charge (SOC) is not depleted or stored at 100%. Both these conditions can result in unrecoverable capacity loss.
- Page 56 Unit does not deliver Cannula kinked or not properly Check cannula and the oxygen. connected. cannula connection. FreeStyle 5 is not turned on. Turn FreeStyle 5 on to the prescribed setting. Battery is dead. Replace battery. Defective AC or DC Replace AC or DC power power supply.
- Page 57 8.0 Recommended Tools Tools for FreeStyle 5 Service and Maintenance In additional to a pressure test gauge, the following tools are generally readily available for purchase in your local area, and can assist you in servicing and maintaining the FreeStyle 5 unit.
- Page 58 CAIRE Inc. 2200 Airport Industrial Dr., Ste 500 Ball Ground, GA 30107 www.chartindustries.com/RespiratoryHealthcare CAIRE reserves the right to discontinue its products, or change the prices, materials, equipment, quality, descriptions, specifications and/or, processes to its products at any time without prior notice and with no further obligation or consequence. All rights not expressly stated herein are reserved by us, as applicable.
Need help?
Do you have a question about the FreeStyle 5 and is the answer not in the manual?
Questions and answers