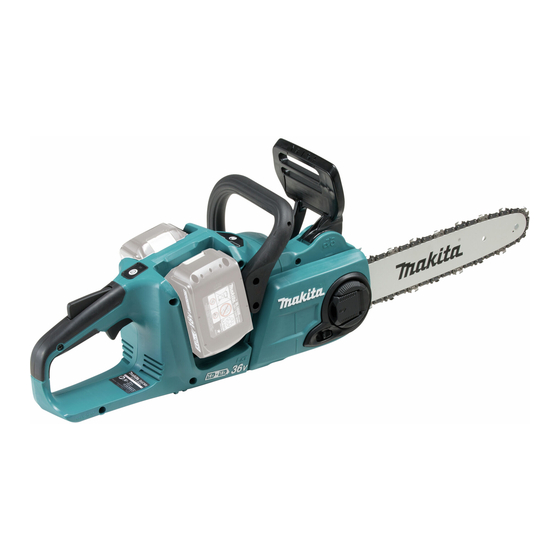
Makita DUC303 Instruction Manual
Cordless chain saw
Hide thumbs
Also See for DUC303:
- Instruction manual (145 pages) ,
- Instruction manual (136 pages) ,
- Instruction manual (21 pages)
Table of Contents
Advertisement
Quick Links
Download this manual
See also:
Instruction Manual
Advertisement
Table of Contents

Related Manuals for Makita DUC303


Summary of Contents for Makita DUC303
- Page 1 INSTRUCTION MANUAL Cordless Chain Saw DUC303 DUC353 DUC400 Read before use.
-
Page 2: Specifications
SPECIFICATIONS Model: DUC303 DUC353 DUC400 Overall length (without guide bar) 443 mm Rated voltage D.C. 36 V Standard battery cartridge BL1815N, BL1820, BL1820B, BL1830, BL1830B, BL1840, BL1840B, BL1850, BL1850B, BL1860B Net weight with 90PX 4.6 kg 4.7 kg 4.8 kg... -
Page 3: Safety Warnings
Noise tions for future reference. The typical A-weighted noise level determined accord- The term "power tool" in the warnings refers to your ing to EN60745: mains-operated (corded) power tool or battery-operated Model DUC303 (cordless) power tool. Sound pressure level (L ) : 87.7 dB(A) Work area safety Sound power level (L ) : 100.4 dB (A) - Page 4 Do not overreach. Keep proper footing and Service balance at all times. This enables better control Have your power tool serviced by a qualified of the power tool in unexpected situations. repair person using only identical replacement Dress properly. Do not wear loose clothing or parts.
- Page 5 12. Cut wood only. Do not use chain saw for purposes 15. Do not start the chain saw with the chain cover not intended. For example: do not use chain saw for being installed on it. Starting the chain saw with the cutting plastic, masonry or non-wood building materi- chain cover being installed on it may cause the chain als.
-
Page 6: Parts Description
Charge the battery cartridge with room tem- causing fires, personal injury and damage. It will perature at 10 °C - 40 °C (50 °F - 104 °F). Let also void the Makita warranty for the Makita tool and a hot battery cartridge cool down before charger. charging it. -
Page 7: Functional Description
Tool / battery protection system FUNCTIONAL DESCRIPTION The tool is equipped with a tool/battery protection sys- tem. This system automatically cuts off power to the motor to extend tool and battery life. The tool will auto- CAUTION: matically stop during operation if the tool or battery is Always be sure that the tool is placed under one of the following conditions. -
Page 8: Main Power Switch
Capacity indicator status Remaining NOTE: Depending on the conditions of use and the battery ambient temperature, the indication may differ slightly capacity from the actual capacity. Blinking Main power switch 50% to 100% WARNING: Always turn off the main power 20% to 50% switch when not in use. -
Page 9: Checking The Chain Brake
NOTICE: Do not pull the switch trigger hard with- out pressing the lock-off lever. This can cause switch breakage. To prevent the switch trigger from being accidentally pulled, a lock-off lever is provided. To start the tool, depress the lock-off lever and pull the switch trigger. Release the switch trigger to stop. - Page 10 ASSEMBLY CAUTION: Always be sure that the tool is switched off and the battery cartridge is removed before carrying out any work on the tool. CAUTION: Do not touch the saw chain with bare hands. Always wear gloves when handling the saw chain.
-
Page 11: Adjusting Saw Chain Tension
► 1 . Sprocket cover 2. Guide bar 3. Hole ► 1 . Lever 2. Sprocket cover Turn the lever clockwise fully and a quarter turn Lift up the guide bar tip slightly and adjust the back to keep looseness for adjusting the chain tension. chain tension. Turn the adjusting dial to the "-" direction to loosen, turn to the "+" direction to tighten. Tighten the Turn the adjusting dial to adjust the chain tension. -
Page 12: Operation
The oil delivery may otherwise be the handle. impaired. NOTICE: Use the saw chain oil exclusively for Makita chain saws or equivalent oil available in the market. NOTICE: Never use oil including dust and parti- cles or volatile oil. - Page 13 Bucking Rest the bottom edge of the chain saw body on the wood to be cut. Limbing CAUTION: Limbing may only be performed by trained persons. A hazard is presented by the risk With the saw chain running, saw into the wood of kickback. while using the rear handle to raise the saw and the front one to guide it.
- Page 14 When felling trees, follow the proceduers below: Cut a scarf as close to the ground as possible. First make the horizontal cut to a depth of 1/5 -1/3 of the trunk diameter. Do not make the scarf too large. Then make the diagonal cut. ► 1 . Felling area —...
-
Page 15: Maintenance
► 1 . Guide bar cover 2. Battery cover ► 1 . Cutter length 2. Distance between cutting edge and depth gauge 3. Minimum cutter length (3 mm) — All cutter length must be equal. Different cutter lengths prevent the saw chain from running MAINTENANCE smoothly and may cause the saw chain to break. —... -
Page 16: Cleaning The Guide Bar
— Sharpen the shortest cutter first. Then the length Cleaning the guide bar of this shortest cutter becomes the standard for all other cutters on the saw chain. Chips and sawdust will build up in the guide bar groove. — Guide the file as shown in the figure. They may clog the bar groove and impair the oil flow. Clean out the chips and sawdust every time when you sharpen or replace the saw chain. -
Page 17: Replacing The Sprocket
Always fit a new locking ring when replacing the sprocket. ► 1 . Slotted screwdriver 2. Oil discharge hole Insert the battery cartridge into the tool. Pull the ► 1 . Locking ring 2. Sprocket switch trigger to flow built-up dust or particles off the oil discharge hole by discharging chain oil. NOTICE: Make sure that the sprocket is installed Remove the battery cartridge from the tool. -
Page 18: Instructions For Periodic Maintenance
Chain Check the oil lubrication feed rate. Switch trigger Inspection. Lock-off lever Inspection. Oil tank cap Check tightness. Chain catcher Inspection. Screws and Inspection. nuts To maintain product SAFETY and RELIABILITY, be performed by Makita Authorized or Factory Service repairs, any other maintenance or adjustment should Centers, always using Makita replacement parts. 18 ENGLISH... -
Page 19: Troubleshooting
CAUTION: These accessories or attachments NOTE: Some items in the list may be included in the are recommended for use with your Makita tool tool package as standard accessories. They may specified in this manual. The use of any other differ from country to country. - Page 20 Makita Europe N.V. Jan-Baptist Vinkstraat 2, 3070 Kortenberg, Belgium Makita Corporation 3-11-8, Sumiyoshi-cho, Anjo, Aichi 446-8502 Japan 885537-222 www.makita.com 20160808...
Need help?
Do you have a question about the DUC303 and is the answer not in the manual?
Questions and answers