Sharp MX-M365N User Manual
Hide thumbs
Also See for MX-M365N:
- Service manual (315 pages) ,
- Quick start manual (28 pages) ,
- Specifications (8 pages)
Advertisement
Quick Links
Download this manual
See also:
Quick Manual
USER'S MANUAL | MX-M365N/MX-M465N/MX-M565N USER'S ...
http://siica.sharpusa.com/portals/0/downloads/Manuals/MX-M365N-M...
Digital multifunctional system MX-M365N/MX-M465N/MX-M565N
PRINTING ALL CATEGORIES
1 of 1441
3/17/2016 7:14 AM
Advertisement

Related Manuals for Sharp MX-M365N


Summary of Contents for Sharp MX-M365N
- Page 1 USER'S MANUAL | MX-M365N/MX-M465N/MX-M565N USER'S ... http://siica.sharpusa.com/portals/0/downloads/Manuals/MX-M365N-M... Digital multifunctional system MX-M365N/MX-M465N/MX-M565N PRINTING ALL CATEGORIES 1 of 1441 3/17/2016 7:14 AM...
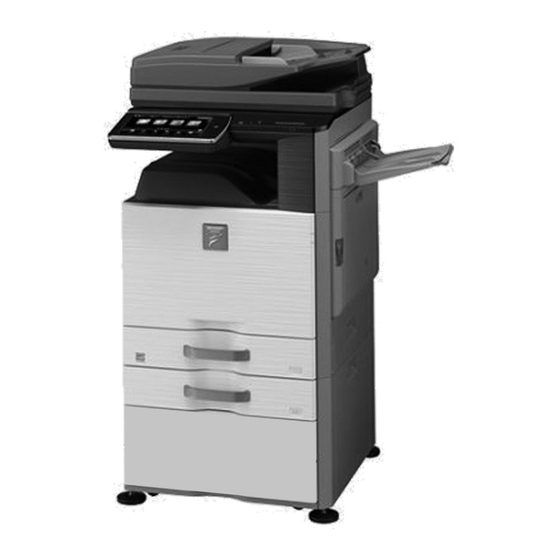
- Page 2 USER'S MANUAL | MX-M365N/MX-M465N/MX-M565N USER'S ... http://siica.sharpusa.com/portals/0/downloads/Manuals/MX-M365N-M... EXTERIOR This section describes the names and functions of the respective parts on the exterior of the machine. Tap the name to make its details pop up. Automatic document feeder This automatically feeds and scans multiple originals.
- Page 3 USER'S MANUAL | MX-M365N/MX-M465N/MX-M565N USER'S ... http://siica.sharpusa.com/portals/0/downloads/Manuals/MX-M365N-M... Paper pass unit This unit sends printed paper to the finisher (large stacker), saddle finisher or saddle finisher (large stacker), or functions as a relay between the machine and the finisher (large stacker), saddle finisher or saddle finisher (large stacker).
- Page 4 USER'S MANUAL | MX-M365N/MX-M465N/MX-M565N USER'S ... http://siica.sharpusa.com/portals/0/downloads/Manuals/MX-M365N-M... Store paper in this tray. TRAY 3 - 4 (STAND/500&2000 SHEET PAPER DRAWER) Tray 4 (when a stand/500&2000 sheet paper drawer is installed) Store paper in this tray. TRAY 3 - 4 (STAND/500&2000 SHEET PAPER DRAWER) Punch module This is used to punch holes in output.
- Page 5 USER'S MANUAL | MX-M365N/MX-M465N/MX-M565N USER'S ... http://siica.sharpusa.com/portals/0/downloads/Manuals/MX-M365N-M... * Optional 5 of 1441 3/17/2016 7:14 AM...
- Page 6 USER'S MANUAL | MX-M365N/MX-M465N/MX-M565N USER'S ... http://siica.sharpusa.com/portals/0/downloads/Manuals/MX-M365N-M... UPPER SIDE This section describes the names and functions of the respective parts inside the machine. Toner cartridge This cartridge contains toner. When the toner in a cartridge runs out, replace with new one.
- Page 7 USER'S MANUAL | MX-M365N/MX-M465N/MX-M565N USER'S ... http://siica.sharpusa.com/portals/0/downloads/Manuals/MX-M365N-M... Toner collection container This container collects excess toner that remains after printing. REPLACING THE TONER COLLECTION CONTAINER A service technician collects replaced toner collection containers. Toner collection container release lever Press up this lever when you need to release the toner collection container lock to replace the toner collection container.
- Page 8 USER'S MANUAL | MX-M365N/MX-M465N/MX-M565N USER'S ... http://siica.sharpusa.com/portals/0/downloads/Manuals/MX-M365N-M... 8 of 1441 3/17/2016 7:14 AM...
- Page 9 USER'S MANUAL | MX-M365N/MX-M465N/MX-M565N USER'S ... http://siica.sharpusa.com/portals/0/downloads/Manuals/MX-M365N-M... This section describes the names and functions of the respective parts on the upper side of the machine. Tap the name to make its details pop up. Document feeding cover Open this cover to remove an original misfeed or clean the paper feed roller.
- Page 10 USER'S MANUAL | MX-M365N/MX-M465N/MX-M565N USER'S ... http://siica.sharpusa.com/portals/0/downloads/Manuals/MX-M365N-M... SIDE AND BACK This section describes the names and functions of the respective parts on the side and back of the machine. USB port (A type) This is used to connect a USB device such as a USB memory device to the machine.
- Page 11 USER'S MANUAL | MX-M365N/MX-M465N/MX-M565N USER'S ... http://siica.sharpusa.com/portals/0/downloads/Manuals/MX-M365N-M... When the fax expansion kit is installed. Extension phone jack When the fax function of the machine is used, an extension phone can be connected to this jack. Telephone line jack When the fax function of the machine is used, the telephone line is connected to this jack.
- Page 12 USER'S MANUAL | MX-M365N/MX-M465N/MX-M565N USER'S ... http://siica.sharpusa.com/portals/0/downloads/Manuals/MX-M365N-M... OPERATION PANEL This section describes the names and functions of the respective parts of the operation panel. Touch panel Messages and keys appear on the touch panel display. Operate the machine by directly tapping the displayed keys.
- Page 13 USER'S MANUAL | MX-M365N/MX-M465N/MX-M565N USER'S ... http://siica.sharpusa.com/portals/0/downloads/Manuals/MX-M365N-M... [Home Screen] button Use your finger to touch the [Home Screen] button. If you use a pen or other tool to touch the button, it may not operate properly. Risk of malfunctioning if you use with jewelry or other accessories.
- Page 14 USER'S MANUAL | MX-M365N/MX-M465N/MX-M565N USER'S ... http://siica.sharpusa.com/portals/0/downloads/Manuals/MX-M365N-M... PERIPHERAL DEVICES Peripheral devices can be installed on the machine to increase its range of functionality. The peripheral devices are generally optional. However, some models include certain peripheral devices as standard equipment. (As of August 2013)
- Page 15 USER'S MANUAL | MX-M365N/MX-M465N/MX-M565N USER'S ... http://siica.sharpusa.com/portals/0/downloads/Manuals/MX-M365N-M... FINISHER (LARGE STACKER) MX-FN11 Output device that enables the use of the staple function and offset function. To install, a stand/5 00/2x500/3x500/500&2000 sheet paper drawer is required. SADDLE FINISHER MX-FN10 Output device that enables use of the staple fun ction, offset function and pamphlet copy function .
- Page 16 This software efficiently scans a large number of ol 1 License Kit documents and materials when used in conjuncti on with Sharp OSA. The number of licenses can Sharp OSA Network Scanner To MX-UN05A be set from 1 to 100. Please consult your dealer ol 5 License Kit for details.
- Page 17 USER'S MANUAL | MX-M365N/MX-M465N/MX-M565N USER'S ... http://siica.sharpusa.com/portals/0/downloads/Manuals/MX-M365N-M... FINISHER Overview This device outputs sorted paper while staggering each set of paper. As needed, it staples each set. To punch holes in printed paper, install an optional hole punch module. Function names...
- Page 18 USER'S MANUAL | MX-M365N/MX-M465N/MX-M565N USER'S ... http://siica.sharpusa.com/portals/0/downloads/Manuals/MX-M365N-M... Use this lever to remove the staple case. Tap the name to make its details pop up. A finisher cannot be installed simultaneously with a saddle finisher. Exercise caution when you turn on the power and when printing is taking place, as the output tray may move up and down.
- Page 19 USER'S MANUAL | MX-M365N/MX-M465N/MX-M565N USER'S ... http://siica.sharpusa.com/portals/0/downloads/Manuals/MX-M365N-M... Open the cover. While pressing the lever over to the left, slide the finisher to the left until it stops. Gently slide the finisher until it stops. Lower the staple case release lever and remove the staple case.
- Page 20 USER'S MANUAL | MX-M365N/MX-M465N/MX-M565N USER'S ... http://siica.sharpusa.com/portals/0/downloads/Manuals/MX-M365N-M... Insert a new staple cartridge into the staple case as shown. Push the staple cartridge in until it clicks into place. Replace the staple case. Push the staple case in until it clicks into place.
- Page 21 USER'S MANUAL | MX-M365N/MX-M465N/MX-M565N USER'S ... http://siica.sharpusa.com/portals/0/downloads/Manuals/MX-M365N-M... Close the cover. Make a proof copy in staple sort function to verify that stapling takes place correctly. Make a proof copy in staple sort function to verify that stapling takes place correctly.
- Page 22 USER'S MANUAL | MX-M365N/MX-M465N/MX-M565N USER'S ... http://siica.sharpusa.com/portals/0/downloads/Manuals/MX-M365N-M... FINISHER (LARGE STACKER) Overview This device outputs sorted paper while staggering each set of paper. As needed, it staples each set. To punch holes in printed paper, install an optional hole punch module.
- Page 23 USER'S MANUAL | MX-M365N/MX-M465N/MX-M565N USER'S ... http://siica.sharpusa.com/portals/0/downloads/Manuals/MX-M365N-M... A paper pass unit is required to install a finisher (large stacker) as well as a stand/500/2x500 /3x500/500&2000 sheet paper drawer. Do not place heavy objects on the finisher (large stacker) or press down on the finisher (large stacker).
- Page 24 USER'S MANUAL | MX-M365N/MX-M465N/MX-M565N USER'S ... http://siica.sharpusa.com/portals/0/downloads/Manuals/MX-M365N-M... Operation Replacing the cartridge Open the front cover. Squeeze the green parts of the staple case and pull the case up and then out. Remove the empty staple cartridge. Press the lock button to release the staple case cover and then remove the staple cartridge.
- Page 25 USER'S MANUAL | MX-M365N/MX-M465N/MX-M565N USER'S ... http://siica.sharpusa.com/portals/0/downloads/Manuals/MX-M365N-M... Pull the seal that holds the staples straight out. Push the staple case firmly back in. Push the staple case in until it clicks into place. Close the front cover. Make a test print or copy in staple sort mode to verify that stapling takes place correctly.
- Page 26 USER'S MANUAL | MX-M365N/MX-M465N/MX-M565N USER'S ... http://siica.sharpusa.com/portals/0/downloads/Manuals/MX-M365N-M... SADDLE FINISHER Overview This includes the offset function that outputs sorted paper while staggering each set of paper, the staple sort function that staples each set of prints, the saddle stitch function that automatically staples the center of the sheets and folds the sheets in half, and the paper folding function that folds paper in half.
- Page 27 USER'S MANUAL | MX-M365N/MX-M465N/MX-M565N USER'S ... http://siica.sharpusa.com/portals/0/downloads/Manuals/MX-M365N-M... A paper pass unit is required to install a saddle finisher as well as a stand/500 /2x500/3x500/500&2000 sheet paper drawer. Do not place heavy objects on the saddle finisher or press down on the saddle finisher.
- Page 28 USER'S MANUAL | MX-M365N/MX-M465N/MX-M565N USER'S ... http://siica.sharpusa.com/portals/0/downloads/Manuals/MX-M365N-M... Saddle stitch unit Staple cartridge (approx. 2000 staples per cartridge x three cartridges) AR-SC3 Saddle finisher maintenance When the staple cartridge runs out of staples, a message will appear in the operation panel. Follow the operation procedure to replace the staple cartridge.
- Page 29 USER'S MANUAL | MX-M365N/MX-M465N/MX-M565N USER'S ... http://siica.sharpusa.com/portals/0/downloads/Manuals/MX-M365N-M... While pulling the lever, slide the saddle finisher to the left until it stops. Gently slide the finisher until it stops. Lower the staple case release lever and remove the staple case. Pull the staple case out to the right.
- Page 30 USER'S MANUAL | MX-M365N/MX-M465N/MX-M565N USER'S ... http://siica.sharpusa.com/portals/0/downloads/Manuals/MX-M365N-M... Insert a new staple cartridge into the staple case as shown. Push the staple cartridge in until it clicks into place. Replace the staple case. Push the staple case in until it clicks into place.
- Page 31 USER'S MANUAL | MX-M365N/MX-M465N/MX-M565N USER'S ... http://siica.sharpusa.com/portals/0/downloads/Manuals/MX-M365N-M... Close the front cover. Make a proof copy in staple sort function to verify that stapling takes place correctly. Replacing the staple cartridge (saddle stitch unit) Before starting this procedure, remove all output from the output tray of the saddle finisher.
- Page 32 USER'S MANUAL | MX-M365N/MX-M465N/MX-M565N USER'S ... http://siica.sharpusa.com/portals/0/downloads/Manuals/MX-M365N-M... Remove the empty staple cartridge. Load new staple cartridges. Remove the cover from each staple cartridge and then install the cartridge. Close the side cover. 32 of 1441 3/17/2016 7:14 AM...
- Page 33 USER'S MANUAL | MX-M365N/MX-M465N/MX-M565N USER'S ... http://siica.sharpusa.com/portals/0/downloads/Manuals/MX-M365N-M... SADDLE FINISHER (LARGE STACKER) Overview This includes the offset function that outputs sorted paper while staggering each set of paper, the staple sort function that staples each set of prints, the saddle stitch function that automatically staples the center of the sheets and folds the sheets in half, and the paper folding function that folds paper in half.
- Page 34 USER'S MANUAL | MX-M365N/MX-M465N/MX-M565N USER'S ... http://siica.sharpusa.com/portals/0/downloads/Manuals/MX-M365N-M... A paper pass unit is required to install a saddle finisher (large stacker) as well as a stand/500 /2x500/3x500/500&2000 sheet paper drawer. Do not place heavy objects on the saddle finisher (large stacker) or press down on the saddle finisher (large stacker).
- Page 35 USER'S MANUAL | MX-M365N/MX-M465N/MX-M565N USER'S ... http://siica.sharpusa.com/portals/0/downloads/Manuals/MX-M365N-M... Saddle finisher (large stacker) maintenance When the staple cartridge runs out of staples, a message will appear in the operation panel. Follow the operation procedure to replace the staple cartridge. Operation Replacing the staple cartridge (finisher unit)
- Page 36 USER'S MANUAL | MX-M365N/MX-M465N/MX-M565N USER'S ... http://siica.sharpusa.com/portals/0/downloads/Manuals/MX-M365N-M... Insert a new staple cartridge into the staple case. Push the staple cartridge in until it clicks into place. Do not remove the seal from the cartridge before inserting the cartridge into the case.
- Page 37 USER'S MANUAL | MX-M365N/MX-M465N/MX-M565N USER'S ... http://siica.sharpusa.com/portals/0/downloads/Manuals/MX-M365N-M... Make a proof copy in staple sort function to verify that stapling takes place correctly. Replacing the staple cartridge (saddle stitch unit) Before starting this procedure, remove all output from the output tray of the saddle finisher (large stacker).
- Page 38 USER'S MANUAL | MX-M365N/MX-M465N/MX-M565N USER'S ... http://siica.sharpusa.com/portals/0/downloads/Manuals/MX-M365N-M... Grasp the left and right side of each empty staple cartridge and remove the cartridges. Load new staple cartridges. Replace both staple cartridges. Remove the cover from each staple cartridge and then install the cartridge.
- Page 39 USER'S MANUAL | MX-M365N/MX-M465N/MX-M565N USER'S ... http://siica.sharpusa.com/portals/0/downloads/Manuals/MX-M365N-M... Make a test print or copy using the saddle stitch function to verify that stapling takes place correctly. 39 of 1441 3/17/2016 7:14 AM...
- Page 40 USER'S MANUAL | MX-M365N/MX-M465N/MX-M565N USER'S ... http://siica.sharpusa.com/portals/0/downloads/Manuals/MX-M365N-M... PUNCH MODULE Overview This device can be installed on a finisher or saddle finisher to punch holes in paper to be output. Discarding punch waste Punch waste from punched holes is collected in the punch waste box.
- Page 41 USER'S MANUAL | MX-M365N/MX-M465N/MX-M565N USER'S ... http://siica.sharpusa.com/portals/0/downloads/Manuals/MX-M365N-M... left until it stops. Gently slide the finisher until it stops. Grasp the punch waste box handle, gently pull out the box, and discard the punch waste. Discard the punch waste in a plastic bag or other container, taking care not to let the waste scatter.
- Page 42 USER'S MANUAL | MX-M365N/MX-M465N/MX-M565N USER'S ... http://siica.sharpusa.com/portals/0/downloads/Manuals/MX-M365N-M... While pressing the lever over to the left, slide the finisher to the left until it stops. Gently slide the finisher until it stops. Close the cover. Finisher (large stacker) installed Open the front cover of the punch module.
- Page 43 USER'S MANUAL | MX-M365N/MX-M465N/MX-M565N USER'S ... http://siica.sharpusa.com/portals/0/downloads/Manuals/MX-M365N-M... Pull out the punch waste box and discard the punch waste. Discard the punch waste in a plastic bag or other container, taking care not to let the waste scatter. Replace the punch waste box.
- Page 44 USER'S MANUAL | MX-M365N/MX-M465N/MX-M565N USER'S ... http://siica.sharpusa.com/portals/0/downloads/Manuals/MX-M365N-M... Saddle finisher installed Open the front cover. Pull out the punch waste box and discard the punch waste. Discard the punch waste in a plastic bag or other container, taking care not to let the waste scatter.
- Page 45 USER'S MANUAL | MX-M365N/MX-M465N/MX-M565N USER'S ... http://siica.sharpusa.com/portals/0/downloads/Manuals/MX-M365N-M... Close the front cover. Saddle finisher (large stacker) installed Open the front cover of the punch module. Pull out the punch waste box and discard the punch waste. Discard the punch waste in a plastic bag or other container, taking care not to let the waste scatter.
- Page 46 USER'S MANUAL | MX-M365N/MX-M465N/MX-M565N USER'S ... http://siica.sharpusa.com/portals/0/downloads/Manuals/MX-M365N-M... Replace the punch waste box. If the punch waste box is not replaced properly, printing will not be possible using the punch function. Close the cover of the punch module. 46 of 1441...
- Page 47 USER'S MANUAL | MX-M365N/MX-M465N/MX-M565N USER'S ... http://siica.sharpusa.com/portals/0/downloads/Manuals/MX-M365N-M... TOUCH TYPES In addition to tapping, equivalent to conventional touching, the touch panel of the machine can be operated by long touching, flicking and sliding. Operation types Operation on respective screens Key (tapping)
- Page 48 USER'S MANUAL | MX-M365N/MX-M465N/MX-M565N USER'S ... http://siica.sharpusa.com/portals/0/downloads/Manuals/MX-M365N-M... Flicking Flick the panel to scroll a preview image quic kly. Dragging Drag (slide your finger touching the panel in a random direction) to replace a page in the ori ginal during preview.
- Page 49 USER'S MANUAL | MX-M365N/MX-M465N/MX-M565N USER'S ... http://siica.sharpusa.com/portals/0/downloads/Manuals/MX-M365N-M... Pinch Touch the screen with two fingers and move them toward each other. This is used to redu ce the browser and preview display. Spread Touch the screen with two fingers and move them away from each other.
- Page 50 USER'S MANUAL | MX-M365N/MX-M465N/MX-M565N USER'S ... http://siica.sharpusa.com/portals/0/downloads/Manuals/MX-M365N-M... List (tapping, sliding and flicking) A. Tap to select an item. The selected item changes to a different color. B. Drag the bar up and down. It appears when the item does not fit in the screen.
- Page 51 USER'S MANUAL | MX-M365N/MX-M465N/MX-M565N USER'S ... http://siica.sharpusa.com/portals/0/downloads/Manuals/MX-M365N-M... Tab (tapping) A. Tap a tab to switch what is displayed. Preview screen (Double tapping/ Pinch/ Spread) A. When a preview screen is "pinched", the screen image is reduced. When "spread", the image is enlarged.
- Page 52 USER'S MANUAL | MX-M365N/MX-M465N/MX-M565N USER'S ... http://siica.sharpusa.com/portals/0/downloads/Manuals/MX-M365N-M... 52 of 1441 3/17/2016 7:14 AM...
- Page 53 USER'S MANUAL | MX-M365N/MX-M465N/MX-M565N USER'S ... http://siica.sharpusa.com/portals/0/downloads/Manuals/MX-M365N-M... HOME SCREEN Overview Pressing the [Home Screen] button on the operation panel displays the home screen on the touch panel. The home screen displays the keys for selecting modes or functions. For procedures for adding and deleting shortcut keys, see the operational steps.
- Page 54 USER'S MANUAL | MX-M365N/MX-M465N/MX-M565N USER'S ... http://siica.sharpusa.com/portals/0/downloads/Manuals/MX-M365N-M... Forward error data exists. Eco mode is enabled. Received data exists. A maintenance notification is issu Received confidential fax data exis A USB device is installed. Received data is held. Remote operation is in progress.
- Page 55 USER'S MANUAL | MX-M365N/MX-M465N/MX-M565N USER'S ... http://siica.sharpusa.com/portals/0/downloads/Manuals/MX-M365N-M... Changing mode from the mode display Tap the mode switching key, and then operate in the mode display. Tap on the mode display. Tap for any mode desired. In image send mode, tap to change mode.
- Page 56 USER'S MANUAL | MX-M365N/MX-M465N/MX-M565N USER'S ... http://siica.sharpusa.com/portals/0/downloads/Manuals/MX-M365N-M... The screen changes to edit home mode. After editing the shortcut keys in the home screen, tap the [Exit Home Edit Mode] key on the action panel. Home Edit Mode is exited and you return to the home screen.
- Page 57 USER'S MANUAL | MX-M365N/MX-M465N/MX-M565N USER'S ... http://siica.sharpusa.com/portals/0/downloads/Manuals/MX-M365N-M... Delete a shortcut key Tap the shortcut key you want to delete in home edit mode. Tap the [Delete Key] key on the action panel. A confirmation screen appears. 57 of 1441 3/17/2016 7:14 AM...
- Page 58 USER'S MANUAL | MX-M365N/MX-M465N/MX-M565N USER'S ... http://siica.sharpusa.com/portals/0/downloads/Manuals/MX-M365N-M... Tap the [Yes] key. The selected shortcut key is deleted from the home screen. After tapping the shortcut key you want to delete in step 1, you can also delete the shortcut key by dragging it to the trash can.
- Page 59 USER'S MANUAL | MX-M365N/MX-M465N/MX-M565N USER'S ... http://siica.sharpusa.com/portals/0/downloads/Manuals/MX-M365N-M... Tap the place where you want to move the shortcut key. The selected shortcut key moves. Changing the name of a shortcut key In home edit mode, tap the shortcut key whose name you want to change.
- Page 60 USER'S MANUAL | MX-M365N/MX-M465N/MX-M565N USER'S ... http://siica.sharpusa.com/portals/0/downloads/Manuals/MX-M365N-M... Returning the shortcut keys to the default layout In home edit mode, tap the [Return Layout to Factory Default] key on the action panel. A confirmation screen appears. Tap the [Reset] key. The shortcut keys return to the default layout.
- Page 61 USER'S MANUAL | MX-M365N/MX-M465N/MX-M565N USER'S ... http://siica.sharpusa.com/portals/0/downloads/Manuals/MX-M365N-M... 61 of 1441 3/17/2016 7:14 AM...
- Page 62 USER'S MANUAL | MX-M365N/MX-M465N/MX-M565N USER'S ... http://siica.sharpusa.com/portals/0/downloads/Manuals/MX-M365N-M... PREVIEW SCREEN Overview In the preview screen, you can view output images or images stored in the machine using the touch panel. Keys used in the preview screen This changes the mode to edit mode. Pages of the original can be changed, rotated, or deleted.
- Page 63 USER'S MANUAL | MX-M365N/MX-M465N/MX-M565N USER'S ... http://siica.sharpusa.com/portals/0/downloads/Manuals/MX-M365N-M... This displays pages in a 3D view. The display position of an image can be moved by dragging it while it is enlarged. To enlarge an image, double-tap it when the preview image is displayed by page.
- Page 64 USER'S MANUAL | MX-M365N/MX-M465N/MX-M565N USER'S ... http://siica.sharpusa.com/portals/0/downloads/Manuals/MX-M365N-M... To undo the deletion, tap . To redo the deletion, tap Tap the [Edit End] key Moving a page In the preview screen, tap to switch to edit mode Tap the page you want to move...
- Page 65 USER'S MANUAL | MX-M365N/MX-M465N/MX-M565N USER'S ... http://siica.sharpusa.com/portals/0/downloads/Manuals/MX-M365N-M... Drag to move the page You can also move the page by tapping the [Move the Page] key on the action panel and then tapping of the destination. Tap the [Edit End] key...
- Page 66 USER'S MANUAL | MX-M365N/MX-M465N/MX-M565N USER'S ... http://siica.sharpusa.com/portals/0/downloads/Manuals/MX-M365N-M... You can also rotate the page by tapping the [Rotate 180 Degrees] key on the action panel. Tap the [Edit End] key Setting chapter inserts When Multi Shot or 2-Sided is specified, you can move a page marked with to the first page.
- Page 67 USER'S MANUAL | MX-M365N/MX-M465N/MX-M565N USER'S ... http://siica.sharpusa.com/portals/0/downloads/Manuals/MX-M365N-M... panel. To cancel the Chapter Inserts setting: displayed on the page, or select the page and tap the [Cancel Chapter Inserts of Selected Page.] key on the action panel. Tap the [Edit End] key...
- Page 68 USER'S MANUAL | MX-M365N/MX-M465N/MX-M565N USER'S ... http://siica.sharpusa.com/portals/0/downloads/Manuals/MX-M365N-M... Follow the on-screen instructions to specify the erase range Specify the erase range and then tap the [Execute] key. To delete the image outside the selected range, tap the [Reverse Erase Range] key on the action panel.
- Page 69 USER'S MANUAL | MX-M365N/MX-M465N/MX-M565N USER'S ... http://siica.sharpusa.com/portals/0/downloads/Manuals/MX-M365N-M... As necessary, repeat the steps to specify the erase range and the pages to which it is applied Tap the [Exit] key Changing the settings Tapping the tab on the left of the screen allows you to change the color mode and other settings.
- Page 70 USER'S MANUAL | MX-M365N/MX-M465N/MX-M565N USER'S ... http://siica.sharpusa.com/portals/0/downloads/Manuals/MX-M365N-M... 70 of 1441 3/17/2016 7:14 AM...
- Page 71 USER'S MANUAL | MX-M365N/MX-M465N/MX-M565N USER'S ... http://siica.sharpusa.com/portals/0/downloads/Manuals/MX-M365N-M... OPERATION OF FREQUENTLY USED KEYS Numeric keys [Start] key [STOP] key ([Cancel Copy] key) [CA] key Numeric keys Tap a number to enter it. To clear the entered number, tap the [C] key.
- Page 72 USER'S MANUAL | MX-M365N/MX-M465N/MX-M565N USER'S ... http://siica.sharpusa.com/portals/0/downloads/Manuals/MX-M365N-M... Tap to stop a print or send job. In copy mode, the [Cancel Copy] key is displayed. [CA] key Tap to cancel all settings and restore the initial status in each mode. 72 of 1441...
- Page 73 USER'S MANUAL | MX-M365N/MX-M465N/MX-M565N USER'S ... http://siica.sharpusa.com/portals/0/downloads/Manuals/MX-M365N-M... ACTION PANEL Overview Recommended functions are displayed on the action panel when you configure functions in each mode. From the action panel, you can configure functions or combine the configured function with a function displayed on the action panel.
- Page 74 USER'S MANUAL | MX-M365N/MX-M465N/MX-M565N USER'S ... http://siica.sharpusa.com/portals/0/downloads/Manuals/MX-M365N-M... CONFIRMATION SCREEN FOR FAVORITE MENUS AND SETTINGS When you register frequently used functions you have configured for copying or image sending in Favorite, you can quickly call them. Operation Registering a function in Favorite...
- Page 75 USER'S MANUAL | MX-M365N/MX-M465N/MX-M565N USER'S ... http://siica.sharpusa.com/portals/0/downloads/Manuals/MX-M365N-M... Favorites can be registered or edited only by authenticated users and administrators. Unauthenticated users can call and use the favorites registered by administrators. Settings for calling Favorites and permitting/prohibiting editing can be configured in "User Control"→"Authority Group List"...
- Page 76 USER'S MANUAL | MX-M365N/MX-M465N/MX-M565N USER'S ... http://siica.sharpusa.com/portals/0/downloads/Manuals/MX-M365N-M... TURNING ON THE POWER This section describes how to turn on/off the machine's power and how to restart the machine. Operate two power switches: the main power switch inside the front cover, located in the lower left corner, and the [Power] button on the operation panel.
- Page 77 USER'S MANUAL | MX-M365N/MX-M465N/MX-M565N USER'S ... http://siica.sharpusa.com/portals/0/downloads/Manuals/MX-M365N-M... If the machine is left for a long time with the main power having been turned off prior to the [Power] button is turned off, abnormal noises, degraded image quality or other problems may result.
- Page 78 USER'S MANUAL | MX-M365N/MX-M465N/MX-M565N USER'S ... http://siica.sharpusa.com/portals/0/downloads/Manuals/MX-M365N-M... TYPES OF JOB STATUS SCREENS When you tap the job status display, the job status screen appears. Tap it again to return to the previous mode. The job status screen is divided into the following four tabs, enabling you to select a job list by tapping a desired tab.
- Page 79 USER'S MANUAL | MX-M365N/MX-M465N/MX-M565N USER'S ... http://siica.sharpusa.com/portals/0/downloads/Manuals/MX-M365N-M... Jobs move among the lists according to the processing status, from Spool, Job Queue and Complete, in that order. To switch the job list display to the display by processing status, tap the [Spool], [Job Queue] or [Complete] key as desired.
- Page 80 USER'S MANUAL | MX-M365N/MX-M465N/MX-M565N USER'S ... http://siica.sharpusa.com/portals/0/downloads/Manuals/MX-M365N-M... STOPPING/DELETING A JOB IN PROGRESS OR RESERVED Tap the job status display and tap the tab for the job that you wish to stop or delete. Tap the [Job Queue] key. When you wish to stop a print job being sent from the computer, tap the [Spool] key.
- Page 81 USER'S MANUAL | MX-M365N/MX-M465N/MX-M565N USER'S ... http://siica.sharpusa.com/portals/0/downloads/Manuals/MX-M365N-M... PRIORITY PROCESSING OF A RESERVED JOB Overview This function gives priority to processing of copied, faxed or image send jobs arising later to jobs already in a queue for printing or sending. Priority processing operation varies, as follows, depending on the job type.
- Page 82 USER'S MANUAL | MX-M365N/MX-M465N/MX-M565N USER'S ... http://siica.sharpusa.com/portals/0/downloads/Manuals/MX-M365N-M... If a job in progress is a "broadcast transmission job" or a "serial polling job", the selected job will be preferentially transmitted between destinations of the broadcast transmission or serial polling jobs. However, if the priority job is a "broadcast transmission job" or a "serial polling job", it will be executed after the fax job in progress is completed.
- Page 83 USER'S MANUAL | MX-M365N/MX-M465N/MX-M565N USER'S ... http://siica.sharpusa.com/portals/0/downloads/Manuals/MX-M365N-M... CHECKING A RESERVED JOB OR THE JOB IN PROGRESS Tap the job status display and tap the tab for the job whose contents you wish to check. Tap the [Job Queue] key. Tap the job whose contents you wish to check and then tap the [Check Details of Selected Job] key on the action panel.
- Page 84 USER'S MANUAL | MX-M365N/MX-M465N/MX-M565N USER'S ... http://siica.sharpusa.com/portals/0/downloads/Manuals/MX-M365N-M... CHECKING COMPLETED JOBS To check completed jobs, you need to be using document filing. DOCUMENT FILING SAVING AND USING PRINT FILES(FORCE RETENTION/DOCUMENT FILING) Tap the job status display and tap the tab for the job whose contents you wish to check.
- Page 85 USER'S MANUAL | MX-M365N/MX-M465N/MX-M565N USER'S ... http://siica.sharpusa.com/portals/0/downloads/Manuals/MX-M365N-M... READING THE JOB LIST The meaning of each job icon and message displayed in "Status" is as follows: Icons indicating the job type Messages displayed in "Status" Icons indicating the job type Print job (RGB/CMYK)
- Page 86 USER'S MANUAL | MX-M365N/MX-M465N/MX-M565N USER'S ... http://siica.sharpusa.com/portals/0/downloads/Manuals/MX-M365N-M... Display Status "Printing" Print job in progress "Copying" Copy job in progress "Connecting" Connecting "Sending" Sending "Receiving" Receiving "Tel" Speaking with the other party using an extension telephone "Stopped" The job has been stopped.
- Page 87 USER'S MANUAL | MX-M365N/MX-M465N/MX-M565N USER'S ... http://siica.sharpusa.com/portals/0/downloads/Manuals/MX-M365N-M... Completed job Display Status "OK" Normal termination "Send OK" Transmission was completed. [In Memory] Reception completed but the fax has not been printed. The received data (each page) has not been printed or forwarded. (The received data has not been deleted.)
- Page 88 USER'S MANUAL | MX-M365N/MX-M465N/MX-M565N USER'S ... http://siica.sharpusa.com/portals/0/downloads/Manuals/MX-M365N-M... "E-mail received" E-mail other than Internet fax received "Rejected" A fax was sent from a party that has been blocked by the a nti junk fax function. "NGxxxxxx" Transmission/reception was not successful because a co mmunication error occurred (a 6-digit error code appears in xxxxxx.)
- Page 89 USER'S MANUAL | MX-M365N/MX-M465N/MX-M565N USER'S ... http://siica.sharpusa.com/portals/0/downloads/Manuals/MX-M365N-M... AUTHENTICATION BY USER NUMBER Overview The following procedure is used to log in using a user number received from the administrator of the machine. When starting the machine, the login screen appears. When controlled by user number If an incorrect user number is entered three times in a row: If "A Warning when Login Fails"...
- Page 90 USER'S MANUAL | MX-M365N/MX-M465N/MX-M565N USER'S ... http://siica.sharpusa.com/portals/0/downloads/Manuals/MX-M365N-M... To limit the number of pages that a user can use: In "Setting mode", select [User Control] → [Page Limit Group List]. To hide the number of pages that can be used after login: In "Setting mode", disable [User Control] →...
- Page 91 USER'S MANUAL | MX-M365N/MX-M465N/MX-M565N USER'S ... http://siica.sharpusa.com/portals/0/downloads/Manuals/MX-M365N-M... 91 of 1441 3/17/2016 7:14 AM...
- Page 92 USER'S MANUAL | MX-M365N/MX-M465N/MX-M565N USER'S ... http://siica.sharpusa.com/portals/0/downloads/Manuals/MX-M365N-M... AUTHENTICATION BY LOGIN NAME/PASSWORD Overview This method enables users to log in using a login name and password received from the administrator of the machine or the administrator of the LDAP server. When starting the machine, the login screen appears.
- Page 93 USER'S MANUAL | MX-M365N/MX-M465N/MX-M565N USER'S ... http://siica.sharpusa.com/portals/0/downloads/Manuals/MX-M365N-M... When LDAP authentication is used, the [E-mail Address] key may appear, depending on the authentication method. Tap the [E-mail Address] text box and enter your e-mail address. To store a user name: In "Setting mode", select [User Control] → [User List].
- Page 94 USER'S MANUAL | MX-M365N/MX-M465N/MX-M565N USER'S ... http://siica.sharpusa.com/portals/0/downloads/Manuals/MX-M365N-M... LDAP authentication is used when the administrator of the server provides LDAP service on the LAN (local area network). Enter the password. Enter the password from the soft keyboard. When the external keyboard is installed, the external keyboard can be entered the text.
- Page 95 USER'S MANUAL | MX-M365N/MX-M465N/MX-M565N USER'S ... http://siica.sharpusa.com/portals/0/downloads/Manuals/MX-M365N-M... When registering the LDAP server, change the information for [Authenticate to:] as required. When selecting from the User List screen: The LDAP server you are connecting to has been registered upon user registration, and so the target server to which authentication should be directed appears when the login name is selected.
- Page 96 USER'S MANUAL | MX-M365N/MX-M465N/MX-M565N USER'S ... http://siica.sharpusa.com/portals/0/downloads/Manuals/MX-M365N-M... When you have finished using the machine and are ready to log out, tap [Logout]. 96 of 1441 3/17/2016 7:14 AM...
- Page 97 USER'S MANUAL | MX-M365N/MX-M465N/MX-M565N USER'S ... http://siica.sharpusa.com/portals/0/downloads/Manuals/MX-M365N-M... NAMES AND FUNCTIONS OF SOFT KEYBOARD KEYS Display the soft keyboard to register the name of a file, program, folder or user. The soft keyboard shown here is an image for your reference. Different keys may be enabled depending on the actual situation and condition under which you enter characters.
- Page 98 USER'S MANUAL | MX-M365N/MX-M465N/MX-M565N USER'S ... http://siica.sharpusa.com/portals/0/downloads/Manuals/MX-M365N-M... ECO FUNCTIONS These functions help save power consumption by managing operations of sections prone to high power consumption. The machine provides two power-saving modes. AUTO POWER SHUT- If no operations are taking place, this mode turns off the power to the oper...
- Page 99 USER'S MANUAL | MX-M365N/MX-M465N/MX-M565N USER'S ... http://siica.sharpusa.com/portals/0/downloads/Manuals/MX-M365N-M... Setting values applied by each mode is as follows. Energy Save Normal Mode Eco Mode Eco Scan On(Sending Modes Only) On(All Modes Except Copy) Auto Power Shut-Off Timer Change transition time by tim Fix transition time.:On(...
- Page 100 USER'S MANUAL | MX-M365N/MX-M465N/MX-M565N USER'S ... http://siica.sharpusa.com/portals/0/downloads/Manuals/MX-M365N-M... PREHEAT MODE This mode lowers the temperature of the fusing unit and makes the machine wait in low power consumption state. Preheat mode will activate when the set duration of time elapses in waiting status without executing a job.
- Page 101 USER'S MANUAL | MX-M365N/MX-M465N/MX-M565N USER'S ... http://siica.sharpusa.com/portals/0/downloads/Manuals/MX-M365N-M... AUTO POWER SHUT-OFF TIMER This mode turns off the power to the operation panel and the fusing unit, and makes the machine wait in the lowest power consumption state. Auto Power Shut-Off Timer will activate when the set duration of time elapses in waiting status without executing a job.
- Page 102 USER'S MANUAL | MX-M365N/MX-M465N/MX-M565N USER'S ... http://siica.sharpusa.com/portals/0/downloads/Manuals/MX-M365N-M... To set display of the message: Set in [Energy Save] → [Power Management Setting] → [Display message for delay of entry into Preheat Mode / Auto Power Shutoff] in " Setting mode (administrators) ".
- Page 103 USER'S MANUAL | MX-M365N/MX-M465N/MX-M565N USER'S ... http://siica.sharpusa.com/portals/0/downloads/Manuals/MX-M365N-M... AS SOON AS THE REMOTE JOB IS FINISHED, ENTER AUTO POWER SHUT OFF MODE. Printing or outputting received fax data in Auto Power Shut-Off Timer turns on the power, and then the machine returns to Auto Power Shut-Off Timer immediately after completing the print job.
- Page 104 USER'S MANUAL | MX-M365N/MX-M465N/MX-M565N USER'S ... http://siica.sharpusa.com/portals/0/downloads/Manuals/MX-M365N-M... ECO SCAN Non-print jobs such as sending a scanned original are performed with the fusing unit turned off. To set Eco scan: In "Setting mode", select [Energy Save] → [Eco Scan Setting]. 104 of 1441...
- Page 105 USER'S MANUAL | MX-M365N/MX-M465N/MX-M565N USER'S ... http://siica.sharpusa.com/portals/0/downloads/Manuals/MX-M365N-M... POWER ON/OFF SCHEDULING FUNCTION Use this function to set the times for turning the power on and off for the machine to reduce power consumption. Setting Power ON/OFF Scheduling Function In "Setting mode", select [Energy Save] → [Power ON/OFF Schedule Setting].
- Page 106 USER'S MANUAL | MX-M365N/MX-M465N/MX-M565N USER'S ... http://siica.sharpusa.com/portals/0/downloads/Manuals/MX-M365N-M... POWER MANAGEMENT SETTING This function controls transition to Auto Power Shut-Off mode optimally for the use frequency by analyzing the usage of the machine during a certain time period. To enable the power management setting: In "Setting mode", select [Energy Save] →...
- Page 107 USER'S MANUAL | MX-M365N/MX-M465N/MX-M565N USER'S ... http://siica.sharpusa.com/portals/0/downloads/Manuals/MX-M365N-M... SPECIFIC DATE OPERATION SETTINGS Overview When you must have the machine perform exceptionally many print jobs or other special operation on a certain day, you can specify the day as a "Specific Date" and define an energy saving pattern only for that day.
- Page 108 USER'S MANUAL | MX-M365N/MX-M465N/MX-M565N USER'S ... http://siica.sharpusa.com/portals/0/downloads/Manuals/MX-M365N-M... NAMES AND LOCATIONS OF TRAYS 108 of 1441 3/17/2016 7:14 AM...
- Page 109 USER'S MANUAL | MX-M365N/MX-M465N/MX-M565N USER'S ... http://siica.sharpusa.com/portals/0/downloads/Manuals/MX-M365N-M... THE DEFINITION OF "R" IN PAPER SIZE To indicate the landscape setting, "R" is added to the end of the name of a paper size enabled for both landscape and portrait settings. Paper that can be set either in the portrait or land...
- Page 110 Various type of paper are commercially available, some of which cannot be used on the machine. Before using any paper, consult the dealer or SHARP Service Department. The image quality and toner fusibility of paper may change due to ambient conditions, operating conditions, and paper characteristics, resulting in image quality inferior to that of Sharp standard paper.
- Page 111 Recycled paper, colored paper and pre-punched paper must meet the same specifications as plain paper. Before using any paper, consult the dealer or SHARP Service Department. Types of paper that can be set in each tray For detailed information on the sizes and types of paper that can be loaded into each tray of the machine, see "SPECIFICATIONS"...
- Page 112 USER'S MANUAL | MX-M365N/MX-M465N/MX-M565N USER'S ... http://siica.sharpusa.com/portals/0/downloads/Manuals/MX-M365N-M... Thin p mitt aper Permitted Permitted Permitted Pre-p mitt rinted Recyc Permitted Permitted Permitted le Pap mitt Permitted Permitted Permitted Letter mitt head Pre-p Permitted Permitted Permitted unche mitt Permitted Permitted Permitted Color...
- Page 113 USER'S MANUAL | MX-M365N/MX-M465N/MX-M565N USER'S ... http://siica.sharpusa.com/portals/0/downloads/Manuals/MX-M365N-M... Envel mitt "Heavy paper 1" is heavy paper up to 110 lbs. index (220 g/m ), "Heavy paper 2" is heavy paper up to 140 lbs. index (256 g/m ), and "Heavy paper 3" is heavy paper up to 110 lbs.
- Page 114 USER'S MANUAL | MX-M365N/MX-M465N/MX-M565N USER'S ... http://siica.sharpusa.com/portals/0/downloads/Manuals/MX-M365N-M... Stapled paper Damp paper Curled paper Paper whose print side or reverse side has been already printed on by another printer or multifunction device. Paper with a wave-like pattern due to moisture absorption...
- Page 115 USER'S MANUAL | MX-M365N/MX-M465N/MX-M565N USER'S ... http://siica.sharpusa.com/portals/0/downloads/Manuals/MX-M365N-M... LOADING PAPER INTO A TRAY Overview Loading paper to Tray 1 - 4 (when a stand/500/2x500/3x500 sheet paper drawer is installed. Tray 2 when a Stand/500&2000 sheet paper drawer is installed) A maximum of 500 sheets of paper from size 5-1/2" x 8-1/2"R to 11" x 17" (A5R to A3) can be loaded into trays 1 and 4.
- Page 116 USER'S MANUAL | MX-M365N/MX-M465N/MX-M565N USER'S ... http://siica.sharpusa.com/portals/0/downloads/Manuals/MX-M365N-M... match the longitudinal and transversal dimensions of the paper to be loaded. The guide plates A and B are slidable. Slide each guide plate while squeezing its lock lever to adjust to the paper size.
- Page 117 USER'S MANUAL | MX-M365N/MX-M465N/MX-M565N USER'S ... http://siica.sharpusa.com/portals/0/downloads/Manuals/MX-M365N-M... TRAY 3 - 4 (STAND/500&2000 SHEET PAPER DRAWER) Overview A maximum of 1,150 sheets of 8-1/2" × 11" (A4) paper can be loaded into tray 3. A maximum of 850 sheets of 8-1/2" × 11" (A4) paper can be loaded into tray 4.
- Page 118 USER'S MANUAL | MX-M365N/MX-M465N/MX-M565N USER'S ... http://siica.sharpusa.com/portals/0/downloads/Manuals/MX-M365N-M... and cause a misfeed. Lower the feed roller, and gently push the paper tray into the machine Push the tray firmly all the way into the machine. 118 of 1441 3/17/2016 7:14 AM...
- Page 119 The tray can hold up to 3500 sheets of 8.5" x 11"size paper (21 lbs or 80 g/m When changing the paper size, contact your dealer or SHARP Service Department. Do not place heavy objects on the tray or press down on the tray.
- Page 120 USER'S MANUAL | MX-M365N/MX-M465N/MX-M565N USER'S ... http://siica.sharpusa.com/portals/0/downloads/Manuals/MX-M365N-M... Place the paper in the center of the paper table. Load the paper with the print side facing down. The stack must not be higher than the indicator line (maximum of 3500 sheets).
- Page 121 Inserting transparency film Loading envelopes When using plain paper other than Sharp standard paper or special media other than SHARP-recommended transparency film, or when printing on the reverse side of paper that has been printed on one side, load paper one sheet at a time.
- Page 122 USER'S MANUAL | MX-M365N/MX-M465N/MX-M565N USER'S ... http://siica.sharpusa.com/portals/0/downloads/Manuals/MX-M365N-M... Loading tab paper To print on tab paper, load tab paper into the bypass tray with the print side facing down. Use only tab paper that is made of paper. Tab paper made of a material other than paper (film, etc.) cannot be used.
- Page 123 USER'S MANUAL | MX-M365N/MX-M465N/MX-M565N USER'S ... http://siica.sharpusa.com/portals/0/downloads/Manuals/MX-M365N-M... Loading envelopes When inserting envelopes in the bypass tray, place them aligned to the left side in the orientation shown below. Loading envelopes Only the front side of envelopes can be printed or copied on. Place the front side facing down.
- Page 124 The effect of asperity surfaces of embossed paper may affect the print quality depending on the type of embossed paper. For more information, consult the dealer or "SHARP Service Department". Some labels may have to be loaded into the bypass tray in the specified orientation.
- Page 125 USER'S MANUAL | MX-M365N/MX-M465N/MX-M565N USER'S ... http://siica.sharpusa.com/portals/0/downloads/Manuals/MX-M365N-M... Do not place heavy objects on the bypass tray or press down on the tray. When loading paper larger than 8-1/2" x 11"R or A4R, pull out the extension guide. Pull the extension guide all the way out.
- Page 126 USER'S MANUAL | MX-M365N/MX-M465N/MX-M565N USER'S ... http://siica.sharpusa.com/portals/0/downloads/Manuals/MX-M365N-M... For "Letter Head" and "Pre-Printed", set the paper with the print side up. However, when [Disabling of Duplex] is enabled, set the print side in the same orientation as in the regular mode (facing down).
- Page 127 USER'S MANUAL | MX-M365N/MX-M465N/MX-M565N USER'S ... http://siica.sharpusa.com/portals/0/downloads/Manuals/MX-M365N-M... Move the fusing unit pressure adjusting levers (two) to the lower pressure position as shown. Close the right side cover. 127 of 1441 3/17/2016 7:14 AM...
- Page 128 USER'S MANUAL | MX-M365N/MX-M465N/MX-M565N USER'S ... http://siica.sharpusa.com/portals/0/downloads/Manuals/MX-M365N-M... Return the lever to the normal position when finished feeding envelopes. The fusing unit is hot. Take care not to burn yourself when operating the fusing unit pressure adjusting levers. Be sure to return the levers to the "normal pressure position" before printing or copying on paper other than envelopes.
- Page 129 USER'S MANUAL | MX-M365N/MX-M465N/MX-M565N USER'S ... http://siica.sharpusa.com/portals/0/downloads/Manuals/MX-M365N-M... LOADING PAPER INTO THE LONG PAPER FEEDING TRAY The steps for attaching the optional long paper feeding tray to the bypass tray are explained below. Extend the auxiliary guide of the long paper feeding tray.
- Page 130 USER'S MANUAL | MX-M365N/MX-M465N/MX-M565N USER'S ... http://siica.sharpusa.com/portals/0/downloads/Manuals/MX-M365N-M... 130 of 1441 3/17/2016 7:14 AM...
- Page 131 USER'S MANUAL | MX-M365N/MX-M465N/MX-M565N USER'S ... http://siica.sharpusa.com/portals/0/downloads/Manuals/MX-M365N-M... SELECTING A PROCEDURE FOR PLACING THE ORIGINAL DEPENDING ON THE TYPE AND STATUS OF THE ORIGINAL Place the original in the automatic document feeder. Depending the type and status of the original, use the document glass. Follow the instructions to select the method for placing the original.
- Page 132 USER'S MANUAL | MX-M365N/MX-M465N/MX-M565N USER'S ... http://siica.sharpusa.com/portals/0/downloads/Manuals/MX-M365N-M... Original with two or three filing holes Place the original so that the punched edge does not fall on the feed slot of the document feeder tray. Specify the orientation of the original using [Original Setting].
- Page 133 USER'S MANUAL | MX-M365N/MX-M465N/MX-M565N USER'S ... http://siica.sharpusa.com/portals/0/downloads/Manuals/MX-M365N-M... AUTOMATIC DOCUMENT FEEDER Overview This section explains how to place originals in the automatic document feeder. Place originals of different sizes together, if needed, in the automatic document feeder. In that case, use the "Others" function in each mode to set mixed size originals.
- Page 134 USER'S MANUAL | MX-M365N/MX-M465N/MX-M565N USER'S ... http://siica.sharpusa.com/portals/0/downloads/Manuals/MX-M365N-M... Minimum original size Maximum original size Standard size Standard size (Minimum size that can be automatically detect (Maximum size that can be automatically detect 5-1/2" (longitudinal) x 8-1/2" (transversal) 11" (longitudinal) x 17" (transversal)
- Page 135 USER'S MANUAL | MX-M365N/MX-M465N/MX-M565N USER'S ... http://siica.sharpusa.com/portals/0/downloads/Manuals/MX-M365N-M... Make sure that there is no original on the document glass. Place the original. Up to 150 sheets can be inserted. After scanning is finished on the automatic document feeder, remove originals from the original exit tray.
- Page 136 USER'S MANUAL | MX-M365N/MX-M465N/MX-M565N USER'S ... http://siica.sharpusa.com/portals/0/downloads/Manuals/MX-M365N-M... DOCUMENT GLASS Overview This section describes the steps for setting the original on the document glass. Close the automatic document feeder slowly. Abruptly closing the automatic document feeder may damage it. Take care that your fingers are not pinched when closing the automatic document feeder.
- Page 137 USER'S MANUAL | MX-M365N/MX-M465N/MX-M565N USER'S ... http://siica.sharpusa.com/portals/0/downloads/Manuals/MX-M365N-M... 11-5/8" (longitudinal) x 17" (transversal) 297 mm (longitudinal) x 432 mm (transversal) When the original is a non-standard size, see the appropriate explanation below for the mode you are using. - COPY "SPECIFYING THE ORIGINAL SIZE"...
- Page 138 USER'S MANUAL | MX-M365N/MX-M465N/MX-M565N USER'S ... http://siica.sharpusa.com/portals/0/downloads/Manuals/MX-M365N-M... When placing a non-standard size original on the document glass, the size can be detected easily if a blank sheet of 8-1/2" x 11" (A4), 5-1/2" x 8-1/2" (B5), or other standard size paper is placed on top of the original.
- Page 139 USER'S MANUAL | MX-M365N/MX-M465N/MX-M565N USER'S ... http://siica.sharpusa.com/portals/0/downloads/Manuals/MX-M365N-M... ADDRESS BOOK "Contacts" and "Group" can be stored in the address book. For a contact, more than one address can be stored, including fax, e-mail, Internet fax and direct SMTP addresses. Registering addresses stored as "Contacts" as well as directly entered addresses as "Group"...
- Page 140 USER'S MANUAL | MX-M365N/MX-M465N/MX-M565N USER'S ... http://siica.sharpusa.com/portals/0/downloads/Manuals/MX-M365N-M... ADDRESS BOOK SCREEN To display the address book, tap the [Address Book] key on the base screen in image send mode such as fax, e-mail, or Internet fax. You can also display it by tapping the [Address Book] icon on the Home screen.
- Page 141 USER'S MANUAL | MX-M365N/MX-M465N/MX-M565N USER'S ... http://siica.sharpusa.com/portals/0/downloads/Manuals/MX-M365N-M... Narrowing by category Tap the [Search by Category] key to select a category on the screen that appears. After selection, tap The "Contacts" and "Group" in the selected category appear on a list.
- Page 142 USER'S MANUAL | MX-M365N/MX-M465N/MX-M565N USER'S ... http://siica.sharpusa.com/portals/0/downloads/Manuals/MX-M365N-M... The "Contacts" and "Group" for the selected job appear on a list. The narrowed-down condition is displayed under the [Search by Job Type] key. Narrowing by index Search by alphabet to narrow down addresses.
- Page 143 USER'S MANUAL | MX-M365N/MX-M465N/MX-M565N USER'S ... http://siica.sharpusa.com/portals/0/downloads/Manuals/MX-M365N-M... tap the [Start Search] key. The search results are listed. For example, if [Item] is [Name], search with a keyword "SH" lists contacts and groups starting with "SH". Displaying in the order of search numbers Tapping the [Switch Display] key displays a list in ascending order, descending order, or in the order of search numbers.
- Page 144 USER'S MANUAL | MX-M365N/MX-M465N/MX-M565N USER'S ... http://siica.sharpusa.com/portals/0/downloads/Manuals/MX-M365N-M... STORING ADDRESSES THROUGH DIRECT ENTRY Store new names or addresses in the address book by directly entering them. Operation In the address book screen, tap the [Register/Edit Address] key on the action panel, or tap the [Register/Edit Address in Address Book] icon in the home screen.
- Page 145 USER'S MANUAL | MX-M365N/MX-M465N/MX-M565N USER'S ... http://siica.sharpusa.com/portals/0/downloads/Manuals/MX-M365N-M... SETTING THE SCOPE FOR PUBLICIZING CONTACTS AND GROUPS Tap the [Enter Address Directly] key on the action panel. Enter an address by tapping the [E-mail], [Fax], [Internet Fax] or [Direct SMTP] tab. Check [Set to the address as usually used] to set that address as the preferred over the others if two or more addresses are stored for "Contacts".
- Page 146 USER'S MANUAL | MX-M365N/MX-M465N/MX-M565N USER'S ... http://siica.sharpusa.com/portals/0/downloads/Manuals/MX-M365N-M... Tap the [Finish Direct Input.] key on the action panel Tap the [End Registration] key on the action panel If [Set as Default used] is not checked for any address, a confirmation screen is displayed to ask you whether to select the default address.
- Page 147 USER'S MANUAL | MX-M365N/MX-M465N/MX-M565N USER'S ... http://siica.sharpusa.com/portals/0/downloads/Manuals/MX-M365N-M... STORING ADDRESSES THROUGH GLOBAL ADDRESS SEARCH Overview Store the results of searching the global address book as new addresses in the address book. Global address search requires an LDAP server. Operation In the address book screen, tap the [Register/Edit Address] key on the action panel, or tap the [Register/Edit Address in Address Book] icon in the home screen.
- Page 148 USER'S MANUAL | MX-M365N/MX-M465N/MX-M565N USER'S ... http://siica.sharpusa.com/portals/0/downloads/Manuals/MX-M365N-M... If user authentication is enabled, the tab for address publication setting appears. Setting address publication enables stored "Contacts" and "Group" to be shared within a specified group or stored as personal contacts that only you are allowed to access.
- Page 149 USER'S MANUAL | MX-M365N/MX-M465N/MX-M565N USER'S ... http://siica.sharpusa.com/portals/0/downloads/Manuals/MX-M365N-M... Select one address from the search result list and tap the [Enter] key on the action panel. To check address information, select the address and tap the [Confirm Address Information] key on the action panel.
- Page 150 USER'S MANUAL | MX-M365N/MX-M465N/MX-M565N USER'S ... http://siica.sharpusa.com/portals/0/downloads/Manuals/MX-M365N-M... STORING ADDRESSES FROM FAX OR IMAGE SEND LOGS Overview As a new registration, add an address you have entered via fax or image send operations to the address book. FTP and desktop addresses cannot be stored in the address book from transmission logs.
- Page 151 USER'S MANUAL | MX-M365N/MX-M465N/MX-M565N USER'S ... http://siica.sharpusa.com/portals/0/downloads/Manuals/MX-M365N-M... Tap the [End Registration] key on the action panel The address is registered in the address book and the transmission log screen is restored. If [Set as Default used] is not checked for any address, a confirmation screen is displayed to ask you whether to select the default address.
- Page 152 USER'S MANUAL | MX-M365N/MX-M465N/MX-M565N USER'S ... http://siica.sharpusa.com/portals/0/downloads/Manuals/MX-M365N-M... STORING GROUPS Register "Group" by selecting addresses from those already stored as "Contacts". In this case of registration, only reference to addresses already stored takes place, and so, the total number of registered addresses (maximum 6000) in the address book does not increase.
- Page 153 USER'S MANUAL | MX-M365N/MX-M465N/MX-M565N USER'S ... http://siica.sharpusa.com/portals/0/downloads/Manuals/MX-M365N-M... On the contact list, tap the "Group" containing the address to be registered, and then tap the [Display Details] key on the action panel. If you have selected more than one address, tap the [Show Details of Address Selected Next] key on the action panel.
- Page 154 USER'S MANUAL | MX-M365N/MX-M465N/MX-M565N USER'S ... http://siica.sharpusa.com/portals/0/downloads/Manuals/MX-M365N-M... Repeat steps 5 and 6 to register addresses. After address registration is completed, tap the [Enter and Return.] key on the action panel. Tap the [End Registration] key on the action panel 154 of 1441...
- Page 155 USER'S MANUAL | MX-M365N/MX-M465N/MX-M565N USER'S ... http://siica.sharpusa.com/portals/0/downloads/Manuals/MX-M365N-M... EDITING/DELETING ADDRESSES IN ADDRESS BOOK You can edit or delete "Contacts" or "Group" information stored in the address book as well as addresses listed under "Contacts" and "Group". Editing/deleting contacts and groups Editing/deleting addresses...
- Page 156 USER'S MANUAL | MX-M365N/MX-M465N/MX-M565N USER'S ... http://siica.sharpusa.com/portals/0/downloads/Manuals/MX-M365N-M... Editing a "Contacts" or "Group" You can change basic information such as names and categories and also you can add addresses. STORING CONTACTS STORING ADDRESSES FROM FAX OR IMAGE SEND LOGS STORING GROUPS You can change the publicity scope.
- Page 157 USER'S MANUAL | MX-M365N/MX-M465N/MX-M565N USER'S ... http://siica.sharpusa.com/portals/0/downloads/Manuals/MX-M365N-M... Tap the [Registered Address Review] key on the action panel. Select an address from the list of registered addresses and tap the [Edit] key on the action panel. To delete an address, tap the [Delete] key on the action panel.
- Page 158 USER'S MANUAL | MX-M365N/MX-M465N/MX-M565N USER'S ... http://siica.sharpusa.com/portals/0/downloads/Manuals/MX-M365N-M... You cannot edit or delete an address for a job in a job queue. Edit an address. After editing, tap the [Enter and Return.] key on the action panel. You can only edit addresses in the network folder on the edit screen. (The Add New screen cannot be displayed.)
- Page 159 USER'S MANUAL | MX-M365N/MX-M465N/MX-M565N USER'S ... http://siica.sharpusa.com/portals/0/downloads/Manuals/MX-M365N-M... SETTING THE SCOPE FOR PUBLICIZING CONTACTS AND GROUPS Overview "Contacts" and "Group" stored in the address book can be shared within a specified group or stored as personal contacts that only you are allowed to access.
- Page 160 USER'S MANUAL | MX-M365N/MX-M465N/MX-M565N USER'S ... http://siica.sharpusa.com/portals/0/downloads/Manuals/MX-M365N-M... Check that the [User List] is checked and your user name is selected. After the settings are completed, tap If you have logged in as the administrator, select any user name desired from the user list.
- Page 161 USER'S MANUAL | MX-M365N/MX-M465N/MX-M565N USER'S ... http://siica.sharpusa.com/portals/0/downloads/Manuals/MX-M365N-M... Tap the [Organization/Group] tab and select a user group to which you want to open addresses. After the settings are completed, tap To register a user group: In "Setting mode", select [User Control] → [User Group List].
- Page 162 USER'S MANUAL | MX-M365N/MX-M465N/MX-M565N USER'S ... http://siica.sharpusa.com/portals/0/downloads/Manuals/MX-M365N-M... BILLING CODE Overview A billing code, which is added to a recorded job log when a print or send job has been executed, is used to perform billing processing. Billing codes are classified into two types: main code and sub code. A billing code is recorded in the job log when it is entered and a print or send job is executed.
- Page 163 USER'S MANUAL | MX-M365N/MX-M465N/MX-M565N USER'S ... http://siica.sharpusa.com/portals/0/downloads/Manuals/MX-M365N-M... Enable use of billing code To enable use of the billing code, select "Setting Mode (Administrator)" - [Billing Code Setting] - [Administration Settings], then set [Use Billing Code] to [Enable]. Collecting billing codes Select [Job Log Operation] of "Setting Mode (Web version)"...
- Page 164 USER'S MANUAL | MX-M365N/MX-M465N/MX-M565N USER'S ... http://siica.sharpusa.com/portals/0/downloads/Manuals/MX-M365N-M... USING A BILLING CODE Overview If the use of billing code is enabled in "Setting Mode (Administrator", the billing code entry window is displayed at the time of mode transition (at the time of printing/sending in document filing mode).
- Page 165 USER'S MANUAL | MX-M365N/MX-M465N/MX-M565N USER'S ... http://siica.sharpusa.com/portals/0/downloads/Manuals/MX-M365N-M... When not specifying a billing code Tap the [No Use of Billing Code] key. To select the previously used billing code (at the time of user authentication) Tap the [Use Previously-Used Billing Code.] key on the action panel at the time of user authentication;...
- Page 166 USER'S MANUAL | MX-M365N/MX-M465N/MX-M565N USER'S ... http://siica.sharpusa.com/portals/0/downloads/Manuals/MX-M365N-M... returns the screen to the billing code entry window. To check the details of the main code Tap the [Display Details] key on the action panel. The detail window is displayed. Check the details, then tap Tap the [Select from List] key of the sub code.
- Page 167 USER'S MANUAL | MX-M365N/MX-M465N/MX-M565N USER'S ... http://siica.sharpusa.com/portals/0/downloads/Manuals/MX-M365N-M... When not specifying a billing code Tap the [No Use of Billing Code] key. The use code is set to the main code. Tap the text box of [Sub Code], then enter the sub code.
- Page 168 USER'S MANUAL | MX-M365N/MX-M465N/MX-M565N USER'S ... http://siica.sharpusa.com/portals/0/downloads/Manuals/MX-M365N-M... REGISTERING A NEW BILLING CODE Overview Register a new billing code. A billing code can be registered not only from the billing code entry window but also from "Setting Mode". To register a billing code from Setting Mode Select "Setting Mode"...
- Page 169 USER'S MANUAL | MX-M365N/MX-M465N/MX-M565N USER'S ... http://siica.sharpusa.com/portals/0/downloads/Manuals/MX-M365N-M... Tap the [Add/Edit Billing Code] key on the action panel Tap the [Add New] key on the action panel. To return to the billing code selection window Tap the text box of [Main Code], then type in the main code.
- Page 170 USER'S MANUAL | MX-M365N/MX-M465N/MX-M565N USER'S ... http://siica.sharpusa.com/portals/0/downloads/Manuals/MX-M365N-M... Tap the text box of [Main Code Name], then type in the main code name. Specify the code name using up to 32 double- or single-byte characters. If necessary, select the share range of billing code.
- Page 171 USER'S MANUAL | MX-M365N/MX-M465N/MX-M565N USER'S ... http://siica.sharpusa.com/portals/0/downloads/Manuals/MX-M365N-M... To cancel the setting Tap the [Clear] key on the action panel. This cancels the registered public destination and returns the screen to the previous window. To continuously register other billing codes, tap [Register Next Billing Code.].
- Page 172 USER'S MANUAL | MX-M365N/MX-M465N/MX-M565N USER'S ... http://siica.sharpusa.com/portals/0/downloads/Manuals/MX-M365N-M... EDITING OR DELETING THE REGISTERED BILLING CODE Overview You can change or delete the registered billing code. Editing a billing code Deleting a billing code The billing code can also be edited or deleted from "Setting Mode".
- Page 173 USER'S MANUAL | MX-M365N/MX-M465N/MX-M565N USER'S ... http://siica.sharpusa.com/portals/0/downloads/Manuals/MX-M365N-M... Tap and select the main code to be edited, then tap the [Edit] key on the action panel. To return to the billing code selection window Edit the main code as required For information on how to correct the code, refer to steps 4 to 7 in "REGISTERING A NEW...
- Page 174 USER'S MANUAL | MX-M365N/MX-M465N/MX-M565N USER'S ... http://siica.sharpusa.com/portals/0/downloads/Manuals/MX-M365N-M... To return to the billing code entry window Tap the [CA] key. Deleting a billing code When the billing code entry window is displayed, tap the [Select from List] key of the main code.
- Page 175 USER'S MANUAL | MX-M365N/MX-M465N/MX-M565N USER'S ... http://siica.sharpusa.com/portals/0/downloads/Manuals/MX-M365N-M... To return to the billing code selection window When the confirmation message appears, tap the [Delete] key. 175 of 1441 3/17/2016 7:14 AM...
- Page 176 USER'S MANUAL | MX-M365N/MX-M465N/MX-M565N USER'S ... http://siica.sharpusa.com/portals/0/downloads/Manuals/MX-M365N-M... REMOTE OPERATION OF THE MACHINE Overview Remotely operate the machine on your computer. You can operate the machine from the same panel as the machine's operation panel that is displayed on your PC, with the same feel as operating in front of the machine.
- Page 177 USER'S MANUAL | MX-M365N/MX-M465N/MX-M565N USER'S ... http://siica.sharpusa.com/portals/0/downloads/Manuals/MX-M365N-M... Start the VNC viewer. Enter the IP address of the machine in the "Server" entry box. Check with the administrator of the machine for its IP address. Click the [OK] button. Follow the prompts on the operation panel of the machine to permit the connection.
- Page 178 USER'S MANUAL | MX-M365N/MX-M465N/MX-M565N USER'S ... http://siica.sharpusa.com/portals/0/downloads/Manuals/MX-M365N-M... BROWSING WEB PAGES ON THE TOUCH PANEL When the [Web Browse] key is displayed on the home screen, tapping the key will allow you to access the Internet and displays Web pages on the touch panel.
- Page 179 USER'S MANUAL | MX-M365N/MX-M465N/MX-M565N USER'S ... http://siica.sharpusa.com/portals/0/downloads/Manuals/MX-M365N-M... Opens the print dialog. Print Depending on the Web page, part of the page may not be printed. In this case, open the [Print] menu and set the [Only Display Ar ea] checkbox to in the [Option] tab to print the display are a on the touch panel.
- Page 180 USER'S MANUAL | MX-M365N/MX-M465N/MX-M565N USER'S ... http://siica.sharpusa.com/portals/0/downloads/Manuals/MX-M365N-M... Changes the settings of SSL communication to be used. Security - SSL SSL is a protocol that enables the encryption of information tran smitted over a network. Encrypting data makes it possible to tra nsmit and receive sensitive information safely.
- Page 181 USER'S MANUAL | MX-M365N/MX-M465N/MX-M565N USER'S ... http://siica.sharpusa.com/portals/0/downloads/Manuals/MX-M365N-M... Menu List to display the menu list. The following shows the items of the menu list. Fits the PDF page to the width of the view area. Fit Width Displays a whole PDF page.
- Page 182 USER'S MANUAL | MX-M365N/MX-M465N/MX-M565N USER'S ... http://siica.sharpusa.com/portals/0/downloads/Manuals/MX-M365N-M... The following lists the specifications of the Web browsing feature provided in the MFP. Items Specification Supported protocols HTTP (1.0/1.1), HTTPS HTML Parts of HTML 5, HTML 4.01, XHTML 1.1, XHTMLBasic 1.1, XML 1.1 1.0, 2.0, 3.0...
- Page 183 Overview This module enables you to link the machine with a scanner application and other standard applications. Set a standard application in "Setting mode" and "Sharp OSA". To set a standard application in "Setting mode": In "Setting mode", select [Application Settings] → [External Applications Settings] →...
- Page 184 USER'S MANUAL | MX-M365N/MX-M465N/MX-M565N USER'S ... http://siica.sharpusa.com/portals/0/downloads/Manuals/MX-M365N-M... Connect the machine to the standard application. The message "Connecting to the external application." appears while the machine communicates with the standard application. 184 of 1441 3/17/2016 7:14 AM...
- Page 185 USER'S MANUAL | MX-M365N/MX-M465N/MX-M565N USER'S ... http://siica.sharpusa.com/portals/0/downloads/Manuals/MX-M365N-M... EXTERNAL ACCOUNT The external account module enables you to use an "external account application" for centralized account management of a n MFP on a network. External account application setup Operation in external account mode An "external account application"...
- Page 186 To return to the previous screen, tap a mode select key. To enable external authentication mode: In "Setting mode", select [System Settings] → [Sharp OSA Settings] → [External Account Setting] and enable the [Enable Authentication by External Server] checkbox.
- Page 187 USER'S MANUAL | MX-M365N/MX-M465N/MX-M565N USER'S ... http://siica.sharpusa.com/portals/0/downloads/Manuals/MX-M365N-M... To enable external count mode: In "Setting mode", select [System Settings] → [Sharp OSA Settings] → [External Account Setting] and enable the [External Account Control] setting alone. 187 of 1441 3/17/2016 7:14 AM...
- Page 188 USER'S MANUAL | MX-M365N/MX-M465N/MX-M565N USER'S ... http://siica.sharpusa.com/portals/0/downloads/Manuals/MX-M365N-M... CARD SOLUTION KIT This section explains the settings and login procedure for CAC authentication using the MX-EC50 (Card Solution Kit), and the functions that can be accessed used when using CAC authentication. SETTING PROCEDURE...
- Page 189 USER'S MANUAL | MX-M365N/MX-M465N/MX-M565N USER'S ... http://siica.sharpusa.com/portals/0/downloads/Manuals/MX-M365N-M... Go to the machine's Web page by placing the machine's IP address into the browser. Log in as an administrator. Click [User Control], [Authority Group List] in the Web page menu. Then select [Add].
- Page 190 USER'S MANUAL | MX-M365N/MX-M465N/MX-M565N USER'S ... http://siica.sharpusa.com/portals/0/downloads/Manuals/MX-M365N-M... machine, however if administrator requires network authentication (for example LDAP) then "Authentication Settings" needs to change to "Network Authentication". Setup the Network Authentication parameters (for example LDAP). Click the [Submit] button to save the settings.
- Page 191 USER'S MANUAL | MX-M365N/MX-M465N/MX-M565N USER'S ... http://siica.sharpusa.com/portals/0/downloads/Manuals/MX-M365N-M... Create another Authority group name. Example: "Site Guest Authority". Set the proper privileges. To prevent non CAC users from scanning, change the related items to "Prohibited" as shown. Image Send E-mail: Prohibited FTP: Prohibited...
- Page 192 USER'S MANUAL | MX-M365N/MX-M465N/MX-M565N USER'S ... http://siica.sharpusa.com/portals/0/downloads/Manuals/MX-M365N-M... Next click [User Control], [Default Settings] in the Web page menu. Set the "Device Account Mode Setting". Set the "User Authentication" drop down box to "Enable". Check [Authenticate a User Common Access Card (CAC)].
- Page 193 USER'S MANUAL | MX-M365N/MX-M465N/MX-M565N USER'S ... http://siica.sharpusa.com/portals/0/downloads/Manuals/MX-M365N-M... Settings E-mail to Self Only Specify whether or not "Scan to Self" is enabled. Specify whether or not "Scan to Site" is enabled. This setting can on Allow Site E-mail Address ly be enabled when an LDAP server has been registered and "E-mail to Self Only"...
- Page 194 USER'S MANUAL | MX-M365N/MX-M465N/MX-M565N USER'S ... http://siica.sharpusa.com/portals/0/downloads/Manuals/MX-M365N-M... E-mail", in which an e-mail signature is appended to e-mail messages, OFF in the e-mail function. Encrypt E-mail: If this is selected, users cannot set the "Encrypt E-mail", in which the e-mail messages are encrypted, OFF in e-mail function.
- Page 195 USER'S MANUAL | MX-M365N/MX-M465N/MX-M565N USER'S ... http://siica.sharpusa.com/portals/0/downloads/Manuals/MX-M365N-M... this is selected. PKI Certificate Check: Specify whether or not PKI certificate authentication is performed in addition to domain user authentication. Specify whether or not the user certificate is validated by the spec Certificate Validation Option ified OCSP server.
- Page 196 USER'S MANUAL | MX-M365N/MX-M465N/MX-M565N USER'S ... http://siica.sharpusa.com/portals/0/downloads/Manuals/MX-M365N-M... Follow the steps below to configure OCSP validation. Install all certificates in the trust chain of the CA certificate that issued the user certificate. On your computer, prepare the certificate file that you wish to install.
- Page 197 . The usual base screen will appear, however, the functions that can be used are restricted (depending on the machine / group settings). To use authentication by CAC card, consult your dealer or nearest SHARP Service Department. If users without a CAC are permitted to use the multifunction machine in the system settings, a message screen will appear upon selecting a function, which is not permitted.
- Page 198 USER'S MANUAL | MX-M365N/MX-M465N/MX-M565N USER'S ... http://siica.sharpusa.com/portals/0/downloads/Manuals/MX-M365N-M... [User Control] → [User Count] → [CAC Configuration Settings] in the Web page menu. (Administrator rights are required.) For details, see "CAC Configuration Settings" . Login by CAC card Make sure that the CAC card reader is correctly connected to the machine and then perform authentication.
- Page 199 USER'S MANUAL | MX-M365N/MX-M465N/MX-M565N USER'S ... http://siica.sharpusa.com/portals/0/downloads/Manuals/MX-M365N-M... performed based on the information in the card. LDAP authentication can be used if an LDAP service is provided on your LAN (local area network) by your server administrator. To perform authentication using an LDAP server, the LDAP server used for authentication must be set in the system settings (administrator).
- Page 200 USER'S MANUAL | MX-M365N/MX-M465N/MX-M565N USER'S ... http://siica.sharpusa.com/portals/0/downloads/Manuals/MX-M365N-M... MACHINE FUNCTIONS WHEN CAC AUTHENTICATION IS USED Printing When CAC authentication is used and "Force Retention" in the CAC configuration settings is enabled, all print jobs are held. Enter your CAC user name (Use all characters (up to 32 characters) before the @ from your e-mail address) in "User Name"...
- Page 201 USER'S MANUAL | MX-M365N/MX-M465N/MX-M565N USER'S ... http://siica.sharpusa.com/portals/0/downloads/Manuals/MX-M365N-M... operation. For details, see the Operation Guide, "SENDING AN IMAGE IN SCAN MODE" . However if "Scan to Self" or "Scan to Site" function was set by the administrator, regular image send functions (fax mode, USB memory mode, Internet fax mode, PC scan mode, data entry mode) are disabled.
- Page 202 USER'S MANUAL | MX-M365N/MX-M465N/MX-M565N USER'S ... http://siica.sharpusa.com/portals/0/downloads/Manuals/MX-M365N-M... (1) Message area This shows the send mode and destination address. When "Scan to Self" is used: My E-mail Address When "Scan to Site" is used: Site E-mail Address (2) [Sign E-mail] key Tap to enable Sign E-mail.
- Page 203 USER'S MANUAL | MX-M365N/MX-M465N/MX-M565N USER'S ... http://siica.sharpusa.com/portals/0/downloads/Manuals/MX-M365N-M... When "Sign E-mail" and "Encrypt E-mail" are enabled, addresses specified as destinations can be checked by means of icons in the Address Review screen. Address for which only Sign E-mail is enabled: Address for which only Encrypt E-mail is enabled:...
- Page 204 USER'S MANUAL | MX-M365N/MX-M465N/MX-M565N USER'S ... http://siica.sharpusa.com/portals/0/downloads/Manuals/MX-M365N-M... and cannot be selected. FILE SEARCH AND RETRIEVAL File manipulation When "Scan to Self" or "Scan to Site" is enabled in "E-mail Setting" in the system settings (administrator), the only option that can be used when "Send" is selected for the operation is "Scan to Self"...
- Page 205 USER'S MANUAL | MX-M365N/MX-M465N/MX-M565N USER'S ... http://siica.sharpusa.com/portals/0/downloads/Manuals/MX-M365N-M... If you need to clear all memory and saved files for example at the end of life please follow these steps: Log in as an administrator. Select [System settings]. Select [Data Clearing Settings].
- Page 206 USER'S MANUAL | MX-M365N/MX-M465N/MX-M565N USER'S ... http://siica.sharpusa.com/portals/0/downloads/Manuals/MX-M365N-M... REMOVING MISFEEDS Overview If a paper misfeed occurs, the "Paper Jam" message will appear in the touch panel and printing and scanning will stop. In this event, tap the [Check how to remove misfeeds] key in the touch panel.
- Page 207 USER'S MANUAL | MX-M365N/MX-M465N/MX-M565N USER'S ... http://siica.sharpusa.com/portals/0/downloads/Manuals/MX-M365N-M... SELECTING COPY MODE Follow the steps below to change from the Home Screen or each mode to copy mode. Operation Changing modes from the Home Screen Tap the [Copy] mode icon The initial copy mode screen is displayed.
- Page 208 USER'S MANUAL | MX-M365N/MX-M465N/MX-M565N USER'S ... http://siica.sharpusa.com/portals/0/downloads/Manuals/MX-M365N-M... BASE SCREEN OF COPY MODE The displayed contents of the above screen will vary depending on the devices installed. 208 of 1441 3/17/2016 7:14 AM...
- Page 209 USER'S MANUAL | MX-M365N/MX-M465N/MX-M565N USER'S ... http://siica.sharpusa.com/portals/0/downloads/Manuals/MX-M365N-M... COPYING SEQUENCE First, tap the [Copy] icon on the home screen to enter the Copy mode. SELECTING COPY MODE Place the original. Place the original in the document feeder tray of the automatic document feeder, or on the document glass.
- Page 210 USER'S MANUAL | MX-M365N/MX-M465N/MX-M565N USER'S ... http://siica.sharpusa.com/portals/0/downloads/Manuals/MX-M365N-M... Start copying. Tap the [Start] key. When making only one set of copies, you do not need to specify the number of copies. To make two or more sets of copies: Tap the copies display key to specify the number of copies.
- Page 211 USER'S MANUAL | MX-M365N/MX-M465N/MX-M565N USER'S ... http://siica.sharpusa.com/portals/0/downloads/Manuals/MX-M365N-M... COPY PREVIEW If you tap the [Preview] key before scanning the original, you can check the status of the scanned image in the preview screen. While viewing the preview screen, you can adjust the exposure and configure the preview in your image.
- Page 212 USER'S MANUAL | MX-M365N/MX-M465N/MX-M565N USER'S ... http://siica.sharpusa.com/portals/0/downloads/Manuals/MX-M365N-M... CHECKING THE ORIGINAL SIZE Check the size of the placed original on the display of the [Original] key. If the original size is set to [Auto], the automatically detected size (standard size ) is displayed on the [Original] key.
- Page 213 USER'S MANUAL | MX-M365N/MX-M465N/MX-M565N USER'S ... http://siica.sharpusa.com/portals/0/downloads/Manuals/MX-M365N-M... AB-1 A3, A4, A4R, A5, B4, B5, B5R 8-1/2" x 11", 8-1/2" x 14", 11" x 17", A3 , A4, A4R, A5, B4, B5, B5R AB-2 A3, A4, A4R, A5, B5, B5R, 216 mm x 33 8-1/2"...
- Page 214 USER'S MANUAL | MX-M365N/MX-M465N/MX-M565N USER'S ... http://siica.sharpusa.com/portals/0/downloads/Manuals/MX-M365N-M... Document Glass Document feeder tray Automatic copy image rotation (Rotation Copy) If the orientation is different between the original and paper, the original image will be automatically rotated 90 degrees to match the paper.
- Page 215 USER'S MANUAL | MX-M365N/MX-M465N/MX-M565N USER'S ... http://siica.sharpusa.com/portals/0/downloads/Manuals/MX-M365N-M... SELECTING THE PAPER TRAY FOR COPYING Overview The machine is set to automatically select a tray that has the same size of paper as the size of the placed original (automatic paper tray selection).
- Page 216 USER'S MANUAL | MX-M365N/MX-M465N/MX-M565N USER'S ... http://siica.sharpusa.com/portals/0/downloads/Manuals/MX-M365N-M... You can also call the [Paper Select] screen by tapping the machine image on the base screen. After the settings are completed, tap To automatically select the tray: Tap the [CA] key. 216 of 1441...
- Page 217 USER'S MANUAL | MX-M365N/MX-M465N/MX-M565N USER'S ... http://siica.sharpusa.com/portals/0/downloads/Manuals/MX-M365N-M... USING THE AUTOMATIC DOCUMENT FEEDER FOR COPYING Place the original in the document feeder tray of the automatic document feeder, and tap the [Preview] key. AUTOMATIC DOCUMENT FEEDER Check the paper to be used.
- Page 218 USER'S MANUAL | MX-M365N/MX-M465N/MX-M565N USER'S ... http://siica.sharpusa.com/portals/0/downloads/Manuals/MX-M365N-M... To make two or more sets of copies: Tap the copies display key to specify the number of copies. 218 of 1441 3/17/2016 7:14 AM...
- Page 219 USER'S MANUAL | MX-M365N/MX-M465N/MX-M565N USER'S ... http://siica.sharpusa.com/portals/0/downloads/Manuals/MX-M365N-M... USING THE DOCUMENT GLASS FOR COPYING Place the original on the document glass, and tap the [Preview] key. DOCUMENT GLASS Set the next original, and tap the [Additionally Scan] key to scan the original.
- Page 220 USER'S MANUAL | MX-M365N/MX-M465N/MX-M565N USER'S ... http://siica.sharpusa.com/portals/0/downloads/Manuals/MX-M365N-M... To make two or more sets of copies: Tap the copies display key to specify the number of copies. 220 of 1441 3/17/2016 7:14 AM...
- Page 221 USER'S MANUAL | MX-M365N/MX-M465N/MX-M565N USER'S ... http://siica.sharpusa.com/portals/0/downloads/Manuals/MX-M365N-M... USING THE AUTOMATIC DOCUMENT FEEDER FOR 2-SIDED COPYING Overview To make 2-sided copies, configure the 2-sided copy settings before scanning the original. Dual-side copy helps to save paper. Operation Tap the [2-Sided Copy] key, and select the type of 2-sided copy.
- Page 222 USER'S MANUAL | MX-M365N/MX-M465N/MX-M565N USER'S ... http://siica.sharpusa.com/portals/0/downloads/Manuals/MX-M365N-M... To make 2-sided copies of a 1-sided portrait original placed horizontally, or to invert the reverse side with respect to the front side when copying a 2-sided original, set the [Rotate back face 180 deg] checkbox to Place the original in the automatic document feeder, and tap the [Preview] key.
- Page 223 USER'S MANUAL | MX-M365N/MX-M465N/MX-M565N USER'S ... http://siica.sharpusa.com/portals/0/downloads/Manuals/MX-M365N-M... Depending on the size of the placed original, there may be cases where the same size of paper as the original is not selected automatically. In this event, change the paper size manually.
- Page 224 USER'S MANUAL | MX-M365N/MX-M465N/MX-M565N USER'S ... http://siica.sharpusa.com/portals/0/downloads/Manuals/MX-M365N-M... USING THE DOCUMENT GLASS FOR 2-SIDED COPYING Overview Dual-side copy helps to save paper. To change the default 2-sided copy mode: In "Setting mode", select [System Settings] → [Copy Settings] → [Initial Status Settings] →...
- Page 225 USER'S MANUAL | MX-M365N/MX-M465N/MX-M565N USER'S ... http://siica.sharpusa.com/portals/0/downloads/Manuals/MX-M365N-M... Place the original on the document glass, and tap the [Preview] key. DOCUMENT GLASS The [2-Sided->2-Sided] key and [1-Sided->2-Sided] key cannot be used when copying from the document glass. Set the next original, and tap the [Additional Scan] key to scan the original.
- Page 226 USER'S MANUAL | MX-M365N/MX-M465N/MX-M565N USER'S ... http://siica.sharpusa.com/portals/0/downloads/Manuals/MX-M365N-M... When making only one set of copies, you do not need to specify the number of copies. To make two or more sets of copies: Tap the copies display key to specify the number of copies.
- Page 227 USER'S MANUAL | MX-M365N/MX-M465N/MX-M565N USER'S ... http://siica.sharpusa.com/portals/0/downloads/Manuals/MX-M365N-M... INTERRUPT COPY Overview This function suspends a job in progress, and preferentially prints the original specified with interrupt copy. When you need to make an urgent copy and the machine is busy with a long copy run or other job, use interrupt copy.
- Page 228 USER'S MANUAL | MX-M365N/MX-M465N/MX-M565N USER'S ... http://siica.sharpusa.com/portals/0/downloads/Manuals/MX-M365N-M... Place the original. Place the original in the document feeder tray of the automatic document feeder, or on the document glass. AUTOMATIC DOCUMENT FEEDER DOCUMENT GLASS Configure copy settings. To cancel interrupt copy, tap the [Cancel] key.
- Page 229 USER'S MANUAL | MX-M365N/MX-M465N/MX-M565N USER'S ... http://siica.sharpusa.com/portals/0/downloads/Manuals/MX-M365N-M... SEND DATA WHILE COPYING Overview This function allows you to send a fax while making a copy, send an e-mail with an image attached, or save data in the network folder. You need to store the destination in the address book in advance.
- Page 230 USER'S MANUAL | MX-M365N/MX-M465N/MX-M565N USER'S ... http://siica.sharpusa.com/portals/0/downloads/Manuals/MX-M365N-M... After you have selected the recipient, tap the [Enter Address] key. You cannot use the soft keyboard to enter an address. If you cannot find the recipient in the address book, enter it in the address book.
- Page 231 USER'S MANUAL | MX-M365N/MX-M465N/MX-M565N USER'S ... http://siica.sharpusa.com/portals/0/downloads/Manuals/MX-M365N-M... After the copy, you cannot preview the settings before transmission. 231 of 1441 3/17/2016 7:14 AM...
- Page 232 USER'S MANUAL | MX-M365N/MX-M465N/MX-M565N USER'S ... http://siica.sharpusa.com/portals/0/downloads/Manuals/MX-M365N-M... AUTOMATIC ADJUSTMENT OF EXPOSURE AND ORIGINAL TYPE Automatic exposure adjustment operates by default to automatically adjust the exposure level as appropriate for the original being copied. ("Auto" is displayed.) This function automatically adjusts the image during copying to obtain the most suitable copy.
- Page 233 USER'S MANUAL | MX-M365N/MX-M465N/MX-M565N USER'S ... http://siica.sharpusa.com/portals/0/downloads/Manuals/MX-M365N-M... MANUAL ADJUSTMENT OF EXPOSURE AND ORIGINAL TYPE Overview This section explains how to select the original type depending on the original to be copied or manually adjust the exposure. To change the default exposure: In "Setting mode", select [System Settings] →...
- Page 234 USER'S MANUAL | MX-M365N/MX-M465N/MX-M565N USER'S ... http://siica.sharpusa.com/portals/0/downloads/Manuals/MX-M365N-M... Item Description Text Use this mode for regular text documents. Text/Printed Photo This mode provides the best balance for copying an original which contai ns both text and printed photographs, such as a magazine or catalogue.
- Page 235 USER'S MANUAL | MX-M365N/MX-M465N/MX-M565N USER'S ... http://siica.sharpusa.com/portals/0/downloads/Manuals/MX-M365N-M... Guidelines for the exposure level when [Text] is selected for "Original Image Type" 1 to 2: Dark originals such as a newspaper 3: Normal density originals 4 to 5: Originals written in pencil or light colored text...
- Page 236 USER'S MANUAL | MX-M365N/MX-M465N/MX-M565N USER'S ... http://siica.sharpusa.com/portals/0/downloads/Manuals/MX-M365N-M... AUTOMATIC RATIO SELECTION Overview This section explains how to automatically select the appropriate ratio to meet the paper size when manually changing the paper tray to make a copy on paper that has a size different from the original.
- Page 237 USER'S MANUAL | MX-M365N/MX-M465N/MX-M565N USER'S ... http://siica.sharpusa.com/portals/0/downloads/Manuals/MX-M365N-M... Tap the [Auto Image] key on the action panel. The reduction or enlargement ratio is automatically selected based on the original size and the selected paper size. The automatically selected ratio will appear in the ratio display.
- Page 238 USER'S MANUAL | MX-M365N/MX-M465N/MX-M565N USER'S ... http://siica.sharpusa.com/portals/0/downloads/Manuals/MX-M365N-M... MANUAL RATIO SELECTION Overview This section explains how to specify any ratio when making a copy on paper that has a size different from the original or changing the image size for copying.
- Page 239 USER'S MANUAL | MX-M365N/MX-M465N/MX-M565N USER'S ... http://siica.sharpusa.com/portals/0/downloads/Manuals/MX-M365N-M... When the automatic document feeder is used, the vertical and horizontal ratio selection ranges are both between 25% to 200%. To return the ratio to 100%: Tap the [Copy Ratio] key to display the ratio menu, and then tap the [100%] key.
- Page 240 USER'S MANUAL | MX-M365N/MX-M465N/MX-M565N USER'S ... http://siica.sharpusa.com/portals/0/downloads/Manuals/MX-M365N-M... There are two setting screens. Use the [Other Ratio] key to switch between the screens. To quickly set the area, first specify a value close to the desired value by the numeric keys, then adjust it with Up to two frequently used ratio values can be added to the preset ratio key, respectively for enlargement and reduction.
- Page 241 USER'S MANUAL | MX-M365N/MX-M465N/MX-M565N USER'S ... http://siica.sharpusa.com/portals/0/downloads/Manuals/MX-M365N-M... Specify the original size (paper size of the loaded original) and the copy size (paper size of the output result). After the settings are completed, tap In the preview screen, check whether or not settings produce the required results.
- Page 242 USER'S MANUAL | MX-M365N/MX-M465N/MX-M565N USER'S ... http://siica.sharpusa.com/portals/0/downloads/Manuals/MX-M365N-M... Tap the [by Size] key of the [Zoom] tab. Specify the image size (dimensions of the image to be enlarged or reduced) and the output size (dimensions of the enlarged and reduced images).
- Page 243 USER'S MANUAL | MX-M365N/MX-M465N/MX-M565N USER'S ... http://siica.sharpusa.com/portals/0/downloads/Manuals/MX-M365N-M... If you have entered an incorrect size: Tap the [C] key, and then enter the correct size. To cancel all settings: Tap the [CA] key. 243 of 1441 3/17/2016 7:14 AM...
- Page 244 USER'S MANUAL | MX-M365N/MX-M465N/MX-M565N USER'S ... http://siica.sharpusa.com/portals/0/downloads/Manuals/MX-M365N-M... ENLARGING/REDUCING THE LENGTH AND WIDTH SEPARATELY Overview This section explains how to individually specify the horizontal and vertical copy ratios. When 50% is selected for the horizontal ratio and 70% is selected for the vertical ratio The following two methods can be used to specify the ratio.
- Page 245 USER'S MANUAL | MX-M365N/MX-M465N/MX-M565N USER'S ... http://siica.sharpusa.com/portals/0/downloads/Manuals/MX-M365N-M... Using the preset ratio key Tap the [Copy Ratio] key, and then tap the [XY Zoom] key. Tap the [X] key, and set the X (horizontal) ratio. To quickly set the ratio, first specify a value close to the desired one, then adjust...
- Page 246 USER'S MANUAL | MX-M365N/MX-M465N/MX-M565N USER'S ... http://siica.sharpusa.com/portals/0/downloads/Manuals/MX-M365N-M... Specify the X and Y dimensions of the image size and those of the output size. Tap the area of image size and output size, and enter the sizes using the numeric keys.
- Page 247 USER'S MANUAL | MX-M365N/MX-M465N/MX-M565N USER'S ... http://siica.sharpusa.com/portals/0/downloads/Manuals/MX-M365N-M... SPECIFYING THE ORIGINAL SIZE Overview When the original size is a non-standard size or is not detected correctly, manually specify the original size. Set an original size before scanning the original. Operation Specifying an inch original size...
- Page 248 USER'S MANUAL | MX-M365N/MX-M465N/MX-M565N USER'S ... http://siica.sharpusa.com/portals/0/downloads/Manuals/MX-M365N-M... Specifying an AB original size Tap the [Original] key. Tap the [AB] tab. Tap the appropriate original size key. After the settings are completed, tap Specifying a non-standard original size Tap the [Original] key.
- Page 249 USER'S MANUAL | MX-M365N/MX-M465N/MX-M565N USER'S ... http://siica.sharpusa.com/portals/0/downloads/Manuals/MX-M365N-M... It is convenient to use to finely adjust the entered size. Tap the [Execute] key. On the base screen, check that the specified size is displayed on the [Original] key. After the settings are completed, tap...
- Page 250 USER'S MANUAL | MX-M365N/MX-M465N/MX-M565N USER'S ... http://siica.sharpusa.com/portals/0/downloads/Manuals/MX-M365N-M... STORING FREQUENTLY USED ORIGINAL SIZES Overview Store the frequently used non-standard original sizes. This section explains how to store, retrieve, change, and delete non-standard original sizes. The stored original size will be retained even if the main power is turned off.
- Page 251 USER'S MANUAL | MX-M365N/MX-M465N/MX-M565N USER'S ... http://siica.sharpusa.com/portals/0/downloads/Manuals/MX-M365N-M... Tap a key ) for storing a custom original size. Tap a key that does not show a size. To edit or clear a previously stored key: Tap the key that you want to edit or clear. The following screen will appear.
- Page 252 USER'S MANUAL | MX-M365N/MX-M465N/MX-M565N USER'S ... http://siica.sharpusa.com/portals/0/downloads/Manuals/MX-M365N-M... It is convenient to use to finely adjust the entered size. Tap the [Execute] key. After the settings are completed, tap the key, and check that the key of the size stored on the original screen is added properly. After you have checked it, To cancel the operation Tap the [CA] key.
- Page 253 USER'S MANUAL | MX-M365N/MX-M465N/MX-M565N USER'S ... http://siica.sharpusa.com/portals/0/downloads/Manuals/MX-M365N-M... 253 of 1441 3/17/2016 7:14 AM...
- Page 254 USER'S MANUAL | MX-M365N/MX-M465N/MX-M565N USER'S ... http://siica.sharpusa.com/portals/0/downloads/Manuals/MX-M365N-M... MAKING COPIES USING THE BYPASS TRAY Overview In addition to plain paper, the bypass tray allows you to make copies on transparency film, envelopes, tab paper, and other special media. For detailed information on paper that can be loaded into the bypass tray, see "APPLICABLE PAPER...
- Page 255 USER'S MANUAL | MX-M365N/MX-M465N/MX-M565N USER'S ... http://siica.sharpusa.com/portals/0/downloads/Manuals/MX-M365N-M... Place the original and tap the [Preview] key. Place the original in the document feeder tray of the automatic document feeder, or on the document glass. AUTOMATIC DOCUMENT FEEDER DOCUMENT GLASS Tap the [Start] key to start copying.
- Page 256 USER'S MANUAL | MX-M365N/MX-M465N/MX-M565N USER'S ... http://siica.sharpusa.com/portals/0/downloads/Manuals/MX-M365N-M... SPECIFYING A TYPE AND SIZE OF PAPER LOADED ON BYPASS TRAY Tap the [Paper Select] key, and tap the bypass tray key. SELECTING THE PAPER TRAY FOR COPYING You can also call the [Paper Select] screen by tapping the machine image on the base screen.
- Page 257 USER'S MANUAL | MX-M365N/MX-M465N/MX-M565N USER'S ... http://siica.sharpusa.com/portals/0/downloads/Manuals/MX-M365N-M... [Direct Entry] key: Tap this key to enter a numeric value for the size of the loaded paper. After the settings are completed, tap To directly enter a paper size Tap the [Inch] key to set a paper size in inches, or tap the [AB] key to set it in millimeters.
- Page 258 USER'S MANUAL | MX-M365N/MX-M465N/MX-M565N USER'S ... http://siica.sharpusa.com/portals/0/downloads/Manuals/MX-M365N-M... SORT/GROUP SETTING Overview This section explains how to select the sorting method when outputting the scanned original. Enables the sort mode when the original is placed in the automatic document feeder, and ena bles the group mode when the original is placed on the document glass.
- Page 259 USER'S MANUAL | MX-M365N/MX-M465N/MX-M565N USER'S ... http://siica.sharpusa.com/portals/0/downloads/Manuals/MX-M365N-M... Selecting the Offset check box outputs the sorted paper sheets while shifting them set by set to enable the user to easily remove each set from the output tray. To change the output tray, tap the [Output Tray] key, and select the output destination.
- Page 260 USER'S MANUAL | MX-M365N/MX-M465N/MX-M565N USER'S ... http://siica.sharpusa.com/portals/0/downloads/Manuals/MX-M365N-M... STAPLE SORT SETTING Overview This function staples sorted copies and delivers them to the tray. Binding Edge Process image Does not staple. 1 staple in back 1 staple in front 2 Staples 260 of 1441...
- Page 261 USER'S MANUAL | MX-M365N/MX-M465N/MX-M565N USER'S ... http://siica.sharpusa.com/portals/0/downloads/Manuals/MX-M365N-M... Pamphlet Copy You can view staple positions on the "PREVIEW SCREEN". A finisher or saddle finisher is required to use the staple sort function. A saddle finisher is required to use the saddle stitch function.
- Page 262 USER'S MANUAL | MX-M365N/MX-M465N/MX-M565N USER'S ... http://siica.sharpusa.com/portals/0/downloads/Manuals/MX-M365N-M... Saddle stitch Tap the [Staple Sort] key. Select [Pamphlet Copy]. Configure binding edge and cover settings. MAKING COPIES IN PAMPHLET FORMAT After the settings are completed, tap and check that the [Pamphlet Copy] key is enabled on the staple sort screen.
- Page 263 USER'S MANUAL | MX-M365N/MX-M465N/MX-M565N USER'S ... http://siica.sharpusa.com/portals/0/downloads/Manuals/MX-M365N-M... PUNCH SETTING Overview This function punches copies and outputs them to the tray. You can select paper size of 7-1/4" x 10-1/2"R to 11" x 17" (A4, A3) for punching. You can view punch positions on the "PREVIEW...
- Page 264 USER'S MANUAL | MX-M365N/MX-M465N/MX-M565N USER'S ... http://siica.sharpusa.com/portals/0/downloads/Manuals/MX-M365N-M... Selecting the Offset check box outputs the sorted paper sheets while shifting them set by set to enable the user to easily remove each set from the output tray. To change the output tray, tap the [Output Tray] key, and select the output destination.
- Page 265 USER'S MANUAL | MX-M365N/MX-M465N/MX-M565N USER'S ... http://siica.sharpusa.com/portals/0/downloads/Manuals/MX-M365N-M... COPYING MULTIPLE ORIGINALS AS A SINGLE PAGE (2IN1) Overview This function copies multiple original pages onto a single sheet of paper in a uniform layout. Select 2in1 to copy two original pages onto one sheet, 4in1 to copy four original pages onto one sheet, or 8in1 to copy eight original pages onto one sheet.
- Page 266 USER'S MANUAL | MX-M365N/MX-M465N/MX-M565N USER'S ... http://siica.sharpusa.com/portals/0/downloads/Manuals/MX-M365N-M... Place the original and tap the [Preview] key. Place the original in the document feeder tray of the automatic document feeder, or on the document glass. AUTOMATIC DOCUMENT FEEDER DOCUMENT GLASS When using the document glass to scan multiple original pages, change the original and tap the [Additionally Scan] key.
- Page 267 USER'S MANUAL | MX-M365N/MX-M465N/MX-M565N USER'S ... http://siica.sharpusa.com/portals/0/downloads/Manuals/MX-M365N-M... Check whether or not settings produce the required results. To cancel all settings: Tap the [CA] key. Tap the [Start] key to start copying. When making only one set of copies, you do not need to specify the number of copies.
- Page 268 USER'S MANUAL | MX-M365N/MX-M465N/MX-M565N USER'S ... http://siica.sharpusa.com/portals/0/downloads/Manuals/MX-M365N-M... COPYING EACH FACING PAGE OF A BOUND DOCUMENT (DUAL PAGE COPY) Overview This function copies the left and right half of an original successively. This function is useful when making copies of the facing pages of a book or other bound document.
- Page 269 USER'S MANUAL | MX-M365N/MX-M465N/MX-M565N USER'S ... http://siica.sharpusa.com/portals/0/downloads/Manuals/MX-M365N-M... DOCUMENT GLASS Selects 8-1/2" x 11" (A4) size paper. SELECTING THE PAPER TRAY FOR COPYING Check the preview image in the preview screen. Check whether or not settings produce the required results. To cancel all settings: Tap the [CA] key.
- Page 270 USER'S MANUAL | MX-M365N/MX-M465N/MX-M565N USER'S ... http://siica.sharpusa.com/portals/0/downloads/Manuals/MX-M365N-M... COPYING BOTH SIDES OF A CARD AS A SINGLE PAGE (CARD SHOT) Overview This function copies the front and reverse sides of a card on one sheet, not on separate sheets. This function is convenient for making copies for identification purposes and helps save paper.
- Page 271 USER'S MANUAL | MX-M365N/MX-M465N/MX-M565N USER'S ... http://siica.sharpusa.com/portals/0/downloads/Manuals/MX-M365N-M... Tap the [On] key, and specify the original size as required. Tap the areas displaying width and height sizes respectively, and enter the sizes using the numeric keys. To quickly set the size, first specify a value close to the desired ratio...
- Page 272 USER'S MANUAL | MX-M365N/MX-M465N/MX-M565N USER'S ... http://siica.sharpusa.com/portals/0/downloads/Manuals/MX-M365N-M... Place a card face up on the document glass, and tap the [Additional Scan] key to scan the reverse side. Copy settings cannot be changed when scanning additional pages. Check the preview image in the preview screen.
- Page 273 USER'S MANUAL | MX-M365N/MX-M465N/MX-M565N USER'S ... http://siica.sharpusa.com/portals/0/downloads/Manuals/MX-M365N-M... REPEATING THE SAME IMAGE ON ONE SHEET (REPEAT LAYOUT) Overview This function copies multiple same original images on one sheet. You can set any of the following three (3) types of repeat copy.
- Page 274 USER'S MANUAL | MX-M365N/MX-M465N/MX-M565N USER'S ... http://siica.sharpusa.com/portals/0/downloads/Manuals/MX-M365N-M... Repeat Layout must be specified before scanning the original. If the copy ratio automatically obtained in [Fixed Repeat] exceeds 25 to 400%, it will result in an error. Select the number of faces to repeat again.
- Page 275 USER'S MANUAL | MX-M365N/MX-M465N/MX-M565N USER'S ... http://siica.sharpusa.com/portals/0/downloads/Manuals/MX-M365N-M... Place the original and tap the [Preview] key. Place the original in the document feeder tray of the automatic document feeder, or on the document glass. AUTOMATIC DOCUMENT FEEDER DOCUMENT GLASS Check the preview image in the preview screen.
- Page 276 USER'S MANUAL | MX-M365N/MX-M465N/MX-M565N USER'S ... http://siica.sharpusa.com/portals/0/downloads/Manuals/MX-M365N-M... Copy by specifying a repeat count (Fixed Repeat) Tap the [Others] key, and then tap the [Repeat Layout] key. Tap the [Fixed Repeat] key. Tap the [Original] and [Paper Select] keys to select an original size and a paper size, respectively.
- Page 277 USER'S MANUAL | MX-M365N/MX-M465N/MX-M565N USER'S ... http://siica.sharpusa.com/portals/0/downloads/Manuals/MX-M365N-M... Place the original and tap the [Preview] key. Place the original in the document feeder tray of the automatic document feeder, or on the document glass. AUTOMATIC DOCUMENT FEEDER DOCUMENT GLASS Check the preview image in the preview screen.
- Page 278 USER'S MANUAL | MX-M365N/MX-M465N/MX-M565N USER'S ... http://siica.sharpusa.com/portals/0/downloads/Manuals/MX-M365N-M... Tap the [Paper Select] key and select a paper size. After the settings are completed, tap and [Back] keys in sequence. When you tap the [Original sizes up to 3" x 5" (130 mm x 90 mm)] key on the [Original] screen, you can select the A4 paper size only.
- Page 279 USER'S MANUAL | MX-M365N/MX-M465N/MX-M565N USER'S ... http://siica.sharpusa.com/portals/0/downloads/Manuals/MX-M365N-M... To make two or more copies, tap the copies display key to set a number of copies. 279 of 1441 3/17/2016 7:14 AM...
- Page 280 USER'S MANUAL | MX-M365N/MX-M465N/MX-M565N USER'S ... http://siica.sharpusa.com/portals/0/downloads/Manuals/MX-M365N-M... MAKING COPIES IN PAMPHLET FORMAT (PAMPHLET COPY) Overview Copies made by "Pamphlet Copy" can be folded at the center to create a booklet. This function is convenient for arranging copies into an attractive booklet or pamphlet.
- Page 281 USER'S MANUAL | MX-M365N/MX-M465N/MX-M565N USER'S ... http://siica.sharpusa.com/portals/0/downloads/Manuals/MX-M365N-M... To make pamphlet copies of a book or other bound original, use the book copy function. When Pamphlet Copy is selected, 2-sided copying mode is automatically selected. When settings are selected that prevent 2-sided copying, the pamphlet copy function cannot be used.
- Page 282 USER'S MANUAL | MX-M365N/MX-M465N/MX-M565N USER'S ... http://siica.sharpusa.com/portals/0/downloads/Manuals/MX-M365N-M... Operation Place the original and tap the [Preview] key. Place the original in the document feeder tray of the automatic document feeder, or on the document glass. AUTOMATIC DOCUMENT FEEDER DOCUMENT GLASS If the originals are 2-sided, place them in the document feeder tray.
- Page 283 USER'S MANUAL | MX-M365N/MX-M465N/MX-M565N USER'S ... http://siica.sharpusa.com/portals/0/downloads/Manuals/MX-M365N-M... To change the cover input tray: Tap the [Paper Tray] key to display the tray selection screen. Tap the cover input tray on the tray selection screen. For more information, see "SELECTING THE PAPER TRAY FOR COPYING".
- Page 284 USER'S MANUAL | MX-M365N/MX-M465N/MX-M565N USER'S ... http://siica.sharpusa.com/portals/0/downloads/Manuals/MX-M365N-M... COPYING MULTIPLE ORIGINALS ON EACH PAMPHLET COPY PAGE (PAMPHLET COPY 2IN1/4IN1) Overview This function copies two or four original pages equally on one page of pamphlet copy paper. This function is convenient for arranging minimum number of copies into an attractive booklet or pamphlet format.
- Page 285 USER'S MANUAL | MX-M365N/MX-M465N/MX-M565N USER'S ... http://siica.sharpusa.com/portals/0/downloads/Manuals/MX-M365N-M... Place the original in the document feeder tray of the automatic document feeder, or on the document glass. AUTOMATIC DOCUMENT FEEDER DOCUMENT GLASS If the originals are 2-sided, place them in the document feeder tray.
- Page 286 USER'S MANUAL | MX-M365N/MX-M465N/MX-M565N USER'S ... http://siica.sharpusa.com/portals/0/downloads/Manuals/MX-M365N-M... For more information, see "SELECTING THE PAPER TRAY FOR COPYING". To make a copy on a cover sheet, check the [Make Copy on Cover (Duplex)] box so that appears. If the cover will be copied on, label sheets, transparency film, and tab paper cannot be used.
- Page 287 USER'S MANUAL | MX-M365N/MX-M465N/MX-M565N USER'S ... http://siica.sharpusa.com/portals/0/downloads/Manuals/MX-M365N-M... Check the preview image in the preview screen. Check whether or not settings produce the required results. To cancel all settings: Tap the [CA] key. Tap the [Start] key to start copying. When making only one set of copies, you do not need to specify the number of copies.
- Page 288 USER'S MANUAL | MX-M365N/MX-M465N/MX-M565N USER'S ... http://siica.sharpusa.com/portals/0/downloads/Manuals/MX-M365N-M... COPYING A PAMPHLET (BOOK COPY) Overview This function makes a copy of the two facing pages of an open book or other bound document. Copies made with this function can be folded at the center to create a booklet.
- Page 289 USER'S MANUAL | MX-M365N/MX-M465N/MX-M565N USER'S ... http://siica.sharpusa.com/portals/0/downloads/Manuals/MX-M365N-M... When settings are selected that prevent 2-sided copying, the book copy function cannot be used. Operation Place the original on the document glass. Place the opened pages of the "front and last sheets".
- Page 290 USER'S MANUAL | MX-M365N/MX-M465N/MX-M565N USER'S ... http://siica.sharpusa.com/portals/0/downloads/Manuals/MX-M365N-M... To change the cover input tray: Tap the [Paper Tray] key to display the tray selection screen. Tap the cover input tray on the tray selection screen. For more information, see "SELECTING THE PAPER TRAY FOR COPYING".
- Page 291 USER'S MANUAL | MX-M365N/MX-M465N/MX-M565N USER'S ... http://siica.sharpusa.com/portals/0/downloads/Manuals/MX-M365N-M... Check the preview image in the preview screen. Check whether or not settings produce the required results. To cancel all settings: Tap the [CA] key. Tap the [Original Scan End] key to start copying.
- Page 292 USER'S MANUAL | MX-M365N/MX-M465N/MX-M565N USER'S ... http://siica.sharpusa.com/portals/0/downloads/Manuals/MX-M365N-M... SPLITTING A PAMPHLET ORIGINAL BY PAGE (BOOK DIVIDE) Overview This function splits a saddle-stitch original such as a catalogue or a pamphlet page by page, and copies in sequence. Book Divide must be specified before scanning the original.
- Page 293 USER'S MANUAL | MX-M365N/MX-M465N/MX-M565N USER'S ... http://siica.sharpusa.com/portals/0/downloads/Manuals/MX-M365N-M... To cancel the Book Divide setting: Tap the [Off] key. Place the original in the automatic document feeder, and tap the [Preview] key. Remove saddle stitches from the original. AUTOMATIC DOCUMENT FEEDER Check the preview image in the preview screen.
- Page 294 USER'S MANUAL | MX-M365N/MX-M465N/MX-M565N USER'S ... http://siica.sharpusa.com/portals/0/downloads/Manuals/MX-M365N-M... Tap the copies display key to specify the number of copies. 294 of 1441 3/17/2016 7:14 AM...
- Page 295 USER'S MANUAL | MX-M365N/MX-M465N/MX-M565N USER'S ... http://siica.sharpusa.com/portals/0/downloads/Manuals/MX-M365N-M... SKIPPING BLANK PAGES IN AN ORIGINAL (BLANK PAGE SKIP) Overview If the scanned original contains blank pages, this function skips them to copy only non-blank pages. The machine detects blank pages, enabling you to skip useless copies without checking an original.
- Page 296 USER'S MANUAL | MX-M365N/MX-M465N/MX-M565N USER'S ... http://siica.sharpusa.com/portals/0/downloads/Manuals/MX-M365N-M... Tap the [Others] key, and tap the [Blank Page Skip] key. Tap the [Skip Blank Page] or [Skip Blank and Back Shadow] key. To cancel the Blank Page Skip setting: Tap the [Off] key.
- Page 297 USER'S MANUAL | MX-M365N/MX-M465N/MX-M565N USER'S ... http://siica.sharpusa.com/portals/0/downloads/Manuals/MX-M365N-M... 297 of 1441 3/17/2016 7:14 AM...
- Page 298 USER'S MANUAL | MX-M365N/MX-M465N/MX-M565N USER'S ... http://siica.sharpusa.com/portals/0/downloads/Manuals/MX-M365N-M... REDUCING THE IMAGE QUALITY FOR TONER SAVING This function minimizes toner consumption when making copies such as in-house resources, which are not affected even if the image quality is reduced slightly. The toner saving level can be selected from up to three levels.
- Page 299 USER'S MANUAL | MX-M365N/MX-M465N/MX-M565N USER'S ... http://siica.sharpusa.com/portals/0/downloads/Manuals/MX-M365N-M... WHITENING FAINT COLORS IN THE IMAGE (SUPPRESS BACKGROUND) Overview Suppresses light background areas of originals. Suppress Background must be specified before scanning the original. Operation Tap the [Others] key, and tap the [Suppress Background] key.
- Page 300 USER'S MANUAL | MX-M365N/MX-M465N/MX-M565N USER'S ... http://siica.sharpusa.com/portals/0/downloads/Manuals/MX-M365N-M... Place the original and tap the [Preview] key. Place the original in the document feeder tray of the automatic document feeder, or on the document glass. AUTOMATIC DOCUMENT FEEDER DOCUMENT GLASS Check the preview image in the preview screen.
- Page 301 USER'S MANUAL | MX-M365N/MX-M465N/MX-M565N USER'S ... http://siica.sharpusa.com/portals/0/downloads/Manuals/MX-M365N-M... MAKING A PROOF COPY (PROOF COPY) Overview This function makes a proof copy before printing the specified number of copies. Check the preview image with a proof copy. If necessary, change the setting. Using this function stores the scanned original in the machine, saving you the trouble of re-scanning the original in the changed setting.
- Page 302 USER'S MANUAL | MX-M365N/MX-M465N/MX-M565N USER'S ... http://siica.sharpusa.com/portals/0/downloads/Manuals/MX-M365N-M... If the [End] key is tapped to execute printing of the remaining sets while the machine is printing another job, the remaining sets will be printed after all previously reserved jobs are completed.
- Page 303 USER'S MANUAL | MX-M365N/MX-M465N/MX-M565N USER'S ... http://siica.sharpusa.com/portals/0/downloads/Manuals/MX-M365N-M... Up to 999 copies (sets) can be set. If an incorrect number of copies is set Tap the [C] key, and enter the correct number. Tap the [Start] key. Make only one set of copies.
- Page 304 USER'S MANUAL | MX-M365N/MX-M465N/MX-M565N USER'S ... http://siica.sharpusa.com/portals/0/downloads/Manuals/MX-M365N-M... CHECKING THE NUMBER OF SCANNED ORIGINAL SHEETS (ORIGINAL COUNT) Overview This function counts the number of scanned original sheets, and displays the result before making a copy. By allowing you to check the number of original sheets that were scanned, this helps reduce the occurrence of copy mistakes.
- Page 305 USER'S MANUAL | MX-M365N/MX-M465N/MX-M565N USER'S ... http://siica.sharpusa.com/portals/0/downloads/Manuals/MX-M365N-M... The number that is displayed is the number of scanned original sheets, not the number of scanned original pages. For example, when 2-sided copying is performed using one original, the number "1" will appear to indicate that one original sheet was scanned, not "2"...
- Page 306 USER'S MANUAL | MX-M365N/MX-M465N/MX-M565N USER'S ... http://siica.sharpusa.com/portals/0/downloads/Manuals/MX-M365N-M... USING TWO MACHINES TO REDUCE THE COPY TIME (TANDEM COPY) Overview This function shares a copy job half-and-half between two machines connected to the network, enabling the reduction of the copy time. Master machine and slave machine The master machine performs only scanning, and a slave machine registered in the master machine performs only printing without scanning the original.
- Page 307 USER'S MANUAL | MX-M365N/MX-M465N/MX-M565N USER'S ... http://siica.sharpusa.com/portals/0/downloads/Manuals/MX-M365N-M... network administrator. If the master machine and slave machine will switch roles, configure the IP address of the master machine in the slave machine. The same port number can be used for both machines.
- Page 308 USER'S MANUAL | MX-M365N/MX-M465N/MX-M565N USER'S ... http://siica.sharpusa.com/portals/0/downloads/Manuals/MX-M365N-M... and tap the [Additional Scan] key. AUTOMATIC DOCUMENT FEEDER DOCUMENT GLASS Tap the [Others] key, and tap the [Tandem Copy] key. A checkmark appears on the icon. After the settings are completed, tap the [Back] key.
- Page 309 USER'S MANUAL | MX-M365N/MX-M465N/MX-M565N USER'S ... http://siica.sharpusa.com/portals/0/downloads/Manuals/MX-M365N-M... To cancel Tandem Copy: Tap the [STOP] keys on both the master and slave machines. 309 of 1441 3/17/2016 7:14 AM...
- Page 310 USER'S MANUAL | MX-M365N/MX-M465N/MX-M565N USER'S ... http://siica.sharpusa.com/portals/0/downloads/Manuals/MX-M365N-M... PADDING UNAUTHORIZED COPY PREVENTION DATA (PATTERN PRINT) Overview Characters to prevent unauthorized copying such as pre-set or customized text are placed as invisible characters in a background pattern. When an output sheet with a pattern print is copied, the hidden characters will appear.
- Page 311 USER'S MANUAL | MX-M365N/MX-M465N/MX-M565N USER'S ... http://siica.sharpusa.com/portals/0/downloads/Manuals/MX-M365N-M... Place the original and tap the [Preview] key. Place the original in the document feeder tray of the automatic document feeder, or on the document glass. AUTOMATIC DOCUMENT FEEDER DOCUMENT GLASS Tap the [Others] key, and tap the [Pattern Print] key.
- Page 312 USER'S MANUAL | MX-M365N/MX-M465N/MX-M565N USER'S ... http://siica.sharpusa.com/portals/0/downloads/Manuals/MX-M365N-M... Tapping the [Function Rev.] key displays the settings of the [Print Contents Setting] tab. Check the preview image in the preview screen. The pattern print preview may slightly differ from the actual pattern and exposure as the preview is used for simple pattern checking.
- Page 313 USER'S MANUAL | MX-M365N/MX-M465N/MX-M565N USER'S ... http://siica.sharpusa.com/portals/0/downloads/Manuals/MX-M365N-M... FORCIBLY PRINTING TRACEABLE INFORMATION (TRACKING INFORMATION PRINT) This function forcibly prints the pre-specified traceable information to prevent an unauthorized copy. To configure print settings: In "Setting mode", select [Security Settings] → [Tracking Information Print].
- Page 314 USER'S MANUAL | MX-M365N/MX-M465N/MX-M565N USER'S ... http://siica.sharpusa.com/portals/0/downloads/Manuals/MX-M365N-M... ADDING MARGINS (MARGIN SHIFT) Overview This function shifts the copy image right, left or down to adjust the margin. This is convenient when you wish to bind the copies with a string or in a binder.
- Page 315 USER'S MANUAL | MX-M365N/MX-M465N/MX-M565N USER'S ... http://siica.sharpusa.com/portals/0/downloads/Manuals/MX-M365N-M... Rotation copy cannot be used in combination with the margin shift function. To change the default margin shift setting: In "Setting mode", select [System Settings] → [Copy Settings] → [Copy Setting] → [Initial Margin Shift Setting].
- Page 316 USER'S MANUAL | MX-M365N/MX-M465N/MX-M565N USER'S ... http://siica.sharpusa.com/portals/0/downloads/Manuals/MX-M365N-M... After the settings are completed, tap and [Back] keys in sequence. To cancel the margin shift setting: Tap the [Off] key. To cancel all settings: Tap the [CA] key. Check the preview image in the preview screen.
- Page 317 USER'S MANUAL | MX-M365N/MX-M465N/MX-M565N USER'S ... http://siica.sharpusa.com/portals/0/downloads/Manuals/MX-M365N-M... ERASING PERIPHERAL SHADOWS FOR COPYING (ERASE) Overview The erase function is used to erase shadows around the edges of copies that occur when copying thick originals or books. If a ratio setting is used in combination with an erase setting, the erase width will change according to the selected ratio.
- Page 318 USER'S MANUAL | MX-M365N/MX-M465N/MX-M565N USER'S ... http://siica.sharpusa.com/portals/0/downloads/Manuals/MX-M365N-M... If a ratio setting is used in combination with an erase setting, the erase width will change according to the selected ratio. If the erase width setting is 1" (20 mm) and the image is reduced to 50%, the erase width will be 1/2"...
- Page 319 USER'S MANUAL | MX-M365N/MX-M465N/MX-M565N USER'S ... http://siica.sharpusa.com/portals/0/downloads/Manuals/MX-M365N-M... checkboxes are set to If the [Specify Frame+Center] key is tapped, all the checkboxes are set to Specify the erase edge on the reverse side when erasing edges of one to three sides of Up, Down, Left, and Right on the front side to scan a 2-sided original.
- Page 320 USER'S MANUAL | MX-M365N/MX-M465N/MX-M565N USER'S ... http://siica.sharpusa.com/portals/0/downloads/Manuals/MX-M365N-M... Check the preview image in the preview screen. Check whether or not settings produce the required results. To cancel all settings: Tap the [CA] key. Tap the [Start] key to start copying. When making only one set of copies, you do not need to specify the number of copies.
- Page 321 USER'S MANUAL | MX-M365N/MX-M465N/MX-M565N USER'S ... http://siica.sharpusa.com/portals/0/downloads/Manuals/MX-M365N-M... COPYING 11" x 17" (A3) ORIGINALS WITH NO EDGE CUT-OFF (12" X 18" (A3) FULL BLEED COPY) Overview This feature lets you copy an entire 11" x 17" (A3) size original at full size with no image cut-off at the edges.
- Page 322 USER'S MANUAL | MX-M365N/MX-M465N/MX-M565N USER'S ... http://siica.sharpusa.com/portals/0/downloads/Manuals/MX-M365N-M... Place the original and tap the [Preview] key. DOCUMENT GLASS Check the preview image in the preview screen. Check whether or not settings produce the required results. To cancel all settings: Tap the [CA] key.
- Page 323 USER'S MANUAL | MX-M365N/MX-M465N/MX-M565N USER'S ... http://siica.sharpusa.com/portals/0/downloads/Manuals/MX-M365N-M... COPYING IN THE CENTER OF THE PAPER (CENTERING) Overview This function centers the copied image on the paper. This lets you place the image in the center of the paper when the original size is smaller than the paper size or when the image is reduced.
- Page 324 USER'S MANUAL | MX-M365N/MX-M465N/MX-M565N USER'S ... http://siica.sharpusa.com/portals/0/downloads/Manuals/MX-M365N-M... AUTOMATIC DOCUMENT FEEDER DOCUMENT GLASS Check the preview image in the preview screen. Check whether or not settings produce the required results. To cancel all settings: Tap the [CA] key. Tap the [Start] key to start copying.
- Page 325 USER'S MANUAL | MX-M365N/MX-M465N/MX-M565N USER'S ... http://siica.sharpusa.com/portals/0/downloads/Manuals/MX-M365N-M... SPECIFYING A PAPER POSITION (POSITION IMAGE) Overview This function moves the scanned original to a specified position to make a copy. You can make a copy in any desired position as you can fine adjust the position.
- Page 326 USER'S MANUAL | MX-M365N/MX-M465N/MX-M565N USER'S ... http://siica.sharpusa.com/portals/0/downloads/Manuals/MX-M365N-M... you can set sides 1 and 2 separately. After the settings are completed, tap and [Back] keys in sequence. To cancel the Position Image setting: Tap the [Clear] key. Place the original and tap the [Preview] key.
- Page 327 USER'S MANUAL | MX-M365N/MX-M465N/MX-M565N USER'S ... http://siica.sharpusa.com/portals/0/downloads/Manuals/MX-M365N-M... To make two or more sets of copies: Tap the copies display key to specify the number of copies. 327 of 1441 3/17/2016 7:14 AM...
- Page 328 USER'S MANUAL | MX-M365N/MX-M465N/MX-M565N USER'S ... http://siica.sharpusa.com/portals/0/downloads/Manuals/MX-M365N-M... COLLECTIVELY SCANNING A LARGE NUMBER OF ORIGINALS (JOB BUILD) Overview This function divides the originals into sets and feeds each set through the automatic document feeder one set at a time when copying a very large number of originals.
- Page 329 USER'S MANUAL | MX-M365N/MX-M465N/MX-M565N USER'S ... http://siica.sharpusa.com/portals/0/downloads/Manuals/MX-M365N-M... will be impeded. Delete unnecessary files from the Quick File Folder. The Job Build mode cannot be combined with other functions. Dual Page Copy Book Copy Card shot Multi-Page Enlargement 12" x 18" (A3) full bleed copy...
- Page 330 USER'S MANUAL | MX-M365N/MX-M465N/MX-M565N USER'S ... http://siica.sharpusa.com/portals/0/downloads/Manuals/MX-M365N-M... Change copy settings as required. When changing copy settings (Copy exposure, paper size/type etc.), tap the [Change the settings of the original to be scanned next] key. For more information, see "Changing the copy settings for each set of originals".
- Page 331 USER'S MANUAL | MX-M365N/MX-M465N/MX-M565N USER'S ... http://siica.sharpusa.com/portals/0/downloads/Manuals/MX-M365N-M... Changing the copy settings for each set of originals As necessary, change copy settings for each set of originals. Perform the steps below before scanning the next original in step 4 above. Tap [Change the settings of the original to be scanned next] on the action panel, and set the checkbox to Change copy settings.
- Page 332 USER'S MANUAL | MX-M365N/MX-M465N/MX-M565N USER'S ... http://siica.sharpusa.com/portals/0/downloads/Manuals/MX-M365N-M... SCANNING ORIGINALS OF DIFFERENT SIZES (MIXED SIZE ORIGINAL) Overview This feature copies originals in different sizes at the same time even when 8-1/2" x 14" (B4) size originals are mixed with 11" x 17" (A3) size originals.
- Page 333 USER'S MANUAL | MX-M365N/MX-M465N/MX-M565N USER'S ... http://siica.sharpusa.com/portals/0/downloads/Manuals/MX-M365N-M... Same Width Different Width Use this setting for originals that are diff Use this setting when the originals are different sizes erent sizes but have sides that are the s and do not have sides that are the same length. This s ame length.
- Page 334 USER'S MANUAL | MX-M365N/MX-M465N/MX-M565N USER'S ... http://siica.sharpusa.com/portals/0/downloads/Manuals/MX-M365N-M... Tap the [Others] key, and tap the [Mixed Size Original] key. Tap the [Same Width] key or the [Different Width] key as appropriate for the originals. After the settings are completed, tap and [Back] keys in sequence.
- Page 335 USER'S MANUAL | MX-M365N/MX-M465N/MX-M565N USER'S ... http://siica.sharpusa.com/portals/0/downloads/Manuals/MX-M365N-M... To make two or more sets of copies: Tap the copies display key to specify the number of copies. 335 of 1441 3/17/2016 7:14 AM...
- Page 336 USER'S MANUAL | MX-M365N/MX-M465N/MX-M565N USER'S ... http://siica.sharpusa.com/portals/0/downloads/Manuals/MX-M365N-M... SCANNING THIN ORIGINALS (SLOW SCAN MODE) Overview When you wish to scan thin originals using the automatic document feeder, you can use this function, which helps prevent thin originals from misfeeding. Slow Scan Mode must be specified before scanning the original.
- Page 337 USER'S MANUAL | MX-M365N/MX-M465N/MX-M565N USER'S ... http://siica.sharpusa.com/portals/0/downloads/Manuals/MX-M365N-M... feeder, and tap the [Preview] key. AUTOMATIC DOCUMENT FEEDER If the originals are inserted with too much force, they may crumple and misfeed. Tap the [Start] key to start copying. When making only one set of copies, you do not need to specify the number of copies.
- Page 338 USER'S MANUAL | MX-M365N/MX-M465N/MX-M565N USER'S ... http://siica.sharpusa.com/portals/0/downloads/Manuals/MX-M365N-M... ADJUSTING RESOLUTION WHEN SCANNING (RESOLUTION) This function adjusts the resolution when scanning the original, enabling the high-quality output or speed-priority output according to the application. Resolution must be specified before scanning the original.
- Page 339 USER'S MANUAL | MX-M365N/MX-M465N/MX-M565N USER'S ... http://siica.sharpusa.com/portals/0/downloads/Manuals/MX-M365N-M... copies. To make two or more sets of copies: Tap the copies display key to specify the number of copies. 339 of 1441 3/17/2016 7:14 AM...
- Page 340 USER'S MANUAL | MX-M365N/MX-M465N/MX-M565N USER'S ... http://siica.sharpusa.com/portals/0/downloads/Manuals/MX-M365N-M... PRINTING DATES, PAGE NUMBERS, AND WATERMARKS (STAMP) Overview This function prints information such as the date or stamp, which is not shown on the original, on copies. You can print the following five types of information.
- Page 341 USER'S MANUAL | MX-M365N/MX-M465N/MX-M565N USER'S ... http://siica.sharpusa.com/portals/0/downloads/Manuals/MX-M365N-M... Depending on the size of the paper, some printed content may be cut off or shifted out of position. When [Stamp] is combined with other functions: Combined functi Resulting copies on name Margin Shift Together with the image, the stamp content is shifted the amount of the marg in width.
- Page 342 USER'S MANUAL | MX-M365N/MX-M465N/MX-M565N USER'S ... http://siica.sharpusa.com/portals/0/downloads/Manuals/MX-M365N-M... The format of the [Text] tab can be entered using pre-set text or soft keyboard. Setting using the [Text] tab When you tap the tab, the display tab is switched. Tap a key of the desired print position.
- Page 343 USER'S MANUAL | MX-M365N/MX-M465N/MX-M565N USER'S ... http://siica.sharpusa.com/portals/0/downloads/Manuals/MX-M365N-M... When making only one set of copies, you do not need to specify the number of copies. To make two or more sets of copies: Tap the copies display key to specify the number of copies.
- Page 344 USER'S MANUAL | MX-M365N/MX-M465N/MX-M565N USER'S ... http://siica.sharpusa.com/portals/0/downloads/Manuals/MX-M365N-M... 344 of 1441 3/17/2016 7:14 AM...
- Page 345 USER'S MANUAL | MX-M365N/MX-M465N/MX-M565N USER'S ... http://siica.sharpusa.com/portals/0/downloads/Manuals/MX-M365N-M... ADDING A REGISTERED IMAGE TO AN ORIGINAL (CUSTOM IMAGE) Overview This function adds an image registered in the machine to an original to make a copy. There are following two types of custom images.
- Page 346 USER'S MANUAL | MX-M365N/MX-M465N/MX-M565N USER'S ... http://siica.sharpusa.com/portals/0/downloads/Manuals/MX-M365N-M... A different custom image cannot be specified for each page. If an image runs off of the specified paper depending on the registered size or position, the excess will not be copied. Custom Image can be combined with Tandem Copy.
- Page 347 USER'S MANUAL | MX-M365N/MX-M465N/MX-M565N USER'S ... http://siica.sharpusa.com/portals/0/downloads/Manuals/MX-M365N-M... A3 Wide Paper Makes a stamp copy as normal. Centering Makes a stamp copy as normal without centering. Stamp Makes a stamp copy on the Stamp menu. Photo Repeat Cannot be combined. Multi-Page Enla Cannot be combined.
- Page 348 USER'S MANUAL | MX-M365N/MX-M465N/MX-M565N USER'S ... http://siica.sharpusa.com/portals/0/downloads/Manuals/MX-M365N-M... For custom stamp Print Page Specify a page(s) for stamp copy. First Page or All Pages Print Position Specify a position for stamp copy. ORIGINAL PLA Specify the original orientation. CEMENT ORIE NTATION 2-Sided Original Specify the binding edge for 2-sided original.
- Page 349 USER'S MANUAL | MX-M365N/MX-M465N/MX-M565N USER'S ... http://siica.sharpusa.com/portals/0/downloads/Manuals/MX-M365N-M... Originals Specify the original orientation. Specify the binding edge for 2-sided original. Book or Tablet 349 of 1441 3/17/2016 7:14 AM...
- Page 350 USER'S MANUAL | MX-M365N/MX-M465N/MX-M565N USER'S ... http://siica.sharpusa.com/portals/0/downloads/Manuals/MX-M365N-M... Angle Specify the corner of the image. 0 degrees, -90 degrees, 90 de grees, or 180 degrees After the settings are completed, tap and [Back] keys in sequence. To cancel the Custom Image setting: Tap the [Off] key.
- Page 351 USER'S MANUAL | MX-M365N/MX-M465N/MX-M565N USER'S ... http://siica.sharpusa.com/portals/0/downloads/Manuals/MX-M365N-M... INSERTING COVERS IN COPIES (COVERS/INSERTS) Overview This function inserts a different type of paper into the pages corresponding to the front and back covers of a copy job. It is helpful when you want to change cover paper to make resources look better.
- Page 352 USER'S MANUAL | MX-M365N/MX-M465N/MX-M565N USER'S ... http://siica.sharpusa.com/portals/0/downloads/Manuals/MX-M365N-M... 1-sided copying of 1-sided originals Setting conditions for each cover Resulting copies Front cover Back cover Not copied Not copied Inserts cover sheets at the beginning and end of copi 1-sided copy Not copied...
- Page 353 USER'S MANUAL | MX-M365N/MX-M465N/MX-M565N USER'S ... http://siica.sharpusa.com/portals/0/downloads/Manuals/MX-M365N-M... Inserts a front cover at the beginning of copies, and makes a 2-sided copy on the fifth and sixth original pa ges for back cover. 1-sided copy 1-sided copy Makes a 1-sided copy on the first original page for fro nt cover, and also makes a 1-sided copy on the sixth original page for back cover.
- Page 354 USER'S MANUAL | MX-M365N/MX-M465N/MX-M565N USER'S ... http://siica.sharpusa.com/portals/0/downloads/Manuals/MX-M365N-M... 1-sided copy Not copied Makes a 1-sided copy on the first original page for fro nt cover, and also makes a 1-sided copy on the sixth original page. Inserts cover sheets at the end of copie...
- Page 355 USER'S MANUAL | MX-M365N/MX-M465N/MX-M565N USER'S ... http://siica.sharpusa.com/portals/0/downloads/Manuals/MX-M365N-M... 2-SIDED COPY 1-sided copy Makes a 2-sided copy on the first and second original pages for front cover, and also makes a 1-sided copy on the sixth original page for back cover. A 1-sided c opy is made on the fifth original page.
- Page 356 USER'S MANUAL | MX-M365N/MX-M465N/MX-M565N USER'S ... http://siica.sharpusa.com/portals/0/downloads/Manuals/MX-M365N-M... Makes a 2-sided copy on the first and second original pages for front cover, and inserts a back cover at the end of copies. Not copied 1-sided copy Inserts a front cover at the beginning of copies, and makes a 1-sided copy on the sixth original page for ba ck cover.
- Page 357 USER'S MANUAL | MX-M365N/MX-M465N/MX-M565N USER'S ... http://siica.sharpusa.com/portals/0/downloads/Manuals/MX-M365N-M... 2-SIDED COPY 2-SIDED COPY Makes a 2-sided copy on the first and second original pages for front cover, and also makes a 2-sided copy on the fifth and sixth original pages for back cover.
- Page 358 USER'S MANUAL | MX-M365N/MX-M465N/MX-M565N USER'S ... http://siica.sharpusa.com/portals/0/downloads/Manuals/MX-M365N-M... Not copied 2-SIDED COPY Inserts a front cover at the beginning of copies, and makes a 2-sided copy on the fifth and sixth original pa ges for back cover. 1-sided copy 1-sided copy...
- Page 359 USER'S MANUAL | MX-M365N/MX-M465N/MX-M565N USER'S ... http://siica.sharpusa.com/portals/0/downloads/Manuals/MX-M365N-M... perform the procedure to select covers/inserts. One sheet can be inserted for each of front and back covers. When performing 2-sided copying of 2-sided originals, an insertion sheet cannot be inserted between the front and reverse sides of an original.
- Page 360 USER'S MANUAL | MX-M365N/MX-M465N/MX-M565N USER'S ... http://siica.sharpusa.com/portals/0/downloads/Manuals/MX-M365N-M... Tap the [Change] key, and configure copy setting of a front cover sheet. When only inserting a cover, tap the [Do not copy] key. To change the cover input tray: Tap the [Paper Tray Settings] key to display the input tray setting screen. On the input tray setting screen, tap the [Paper Tray] key of [Front Cover] or [Back Cover].
- Page 361 USER'S MANUAL | MX-M365N/MX-M465N/MX-M565N USER'S ... http://siica.sharpusa.com/portals/0/downloads/Manuals/MX-M365N-M... Tap the [Start] key to start copying. When making only one set of copies, you do not need to specify the number of copies. To make two or more sets of copies: Tap the copies display key to specify the number of copies.
- Page 362 USER'S MANUAL | MX-M365N/MX-M465N/MX-M565N USER'S ... http://siica.sharpusa.com/portals/0/downloads/Manuals/MX-M365N-M... INSERTING INSERTION SHEETS IN COPIES (COVERS/INSERTS) Overview This function inserts a sheet of paper into a specific page as an insertion sheet. There are two types of insertion sheets. Insertion positions can be specified.
- Page 363 USER'S MANUAL | MX-M365N/MX-M465N/MX-M565N USER'S ... http://siica.sharpusa.com/portals/0/downloads/Manuals/MX-M365N-M... Resulting copies Insertion sheet setting conditi Insert an insertion sheet in 1-sided co Insert an insertion sheet in 2 py mode. -sided copy mode. Not copied Inserts an insertion sheet between the se cond and third pages of copies.
- Page 364 USER'S MANUAL | MX-M365N/MX-M465N/MX-M565N USER'S ... http://siica.sharpusa.com/portals/0/downloads/Manuals/MX-M365N-M... 1-sided copy * The fourth original page is not copied. Makes a 1-sided copy of the third original page on an insertion sheet. 2-SIDED COPY Makes a 2-sided copy of the third and four th original pages on an insertion sheet.
- Page 365 USER'S MANUAL | MX-M365N/MX-M465N/MX-M565N USER'S ... http://siica.sharpusa.com/portals/0/downloads/Manuals/MX-M365N-M... feeder, and tap the [Preview] key. AUTOMATIC DOCUMENT FEEDER Tap the [Others] key, and then tap the [Covers/Inserts] key. Tap the [Insertion Sheet] tab. Tap the insert page display key. The Insertion Type B settings are the same as the Insertion Type A settings.
- Page 366 USER'S MANUAL | MX-M365N/MX-M465N/MX-M565N USER'S ... http://siica.sharpusa.com/portals/0/downloads/Manuals/MX-M365N-M... Tap the [CA] key. Tap the [Change] key. When only inserting insertion sheet A, tap the [Make No Copy] key. When making a copy on insertion sheet A, tap the [Simplex] or [2-Sided Copy] key.
- Page 367 USER'S MANUAL | MX-M365N/MX-M465N/MX-M565N USER'S ... http://siica.sharpusa.com/portals/0/downloads/Manuals/MX-M365N-M... After the settings are completed, tap Check the preview image in the preview screen. Check whether or not settings produce the required results. To cancel all settings: Tap the [CA] key. Tap the [Start] key to start copying.
- Page 368 USER'S MANUAL | MX-M365N/MX-M465N/MX-M565N USER'S ... http://siica.sharpusa.com/portals/0/downloads/Manuals/MX-M365N-M... CHECKING, EDITING, AND DELETING THE PAGE LAYOUT OF COVERS AND INSERTION SHEETS (PAGE LAYOUT) The editing contents are different between the registered covers and insertion sheets as shown below. For the cover, you can change settings such as the paper type, copy/do not copy, 1-Sided, and 2-Sided.
- Page 369 USER'S MANUAL | MX-M365N/MX-M465N/MX-M565N USER'S ... http://siica.sharpusa.com/portals/0/downloads/Manuals/MX-M365N-M... editing, tap the [Modify] key. Change cover or insertion sheet settings. For the cover, you can change the copy mode. You can change the page number you want to insert an insert sheet into.
- Page 370 USER'S MANUAL | MX-M365N/MX-M465N/MX-M565N USER'S ... http://siica.sharpusa.com/portals/0/downloads/Manuals/MX-M365N-M... INSERTING INSERTION SHEETS IN BETWEEN TRANSPARENCY FILMS (TRANSPARENCY INSERTS) Overview When copying on transparency film, the sheets may stick together due to static electricity. The transparency inserts function can be used to automatically insert a sheet of paper between each sheet of transparency film, making the sheets easy to handle.
- Page 371 USER'S MANUAL | MX-M365N/MX-M465N/MX-M565N USER'S ... http://siica.sharpusa.com/portals/0/downloads/Manuals/MX-M365N-M... Place the original and tap the [Preview] key. Place the original in the document feeder tray of the automatic document feeder, or on the document glass. AUTOMATIC DOCUMENT FEEDER DOCUMENT GLASS Tap the [Others] key, and tap the [Transparency Inserts] key.
- Page 372 USER'S MANUAL | MX-M365N/MX-M465N/MX-M565N USER'S ... http://siica.sharpusa.com/portals/0/downloads/Manuals/MX-M365N-M... Check the preview image in the preview screen. Check whether or not settings produce the required results. To cancel all settings: Tap the [CA] key. Tap the [Start] key to start copying. When making only one set of copies, you do not need to specify the number of copies.
- Page 373 USER'S MANUAL | MX-M365N/MX-M465N/MX-M565N USER'S ... http://siica.sharpusa.com/portals/0/downloads/Manuals/MX-M365N-M... COPYING CAPTIONS ONTO TAB PAPER (TAB COPY) Overview Load a tab sheet in the bypass tray, and make a copy on a tab. Prepare appropriate originals for tab captions. Relation between the originals and the tab paper...
- Page 374 USER'S MANUAL | MX-M365N/MX-M465N/MX-M565N USER'S ... http://siica.sharpusa.com/portals/0/downloads/Manuals/MX-M365N-M... Originals Placing the originals Loading tab paper Tab Copy must be specified before scanning the original. To change the default image shift width for tab copying: In "Setting mode", select [System Settings] → [Copy Settings] → [Copy Setting] →...
- Page 375 USER'S MANUAL | MX-M365N/MX-M465N/MX-M565N USER'S ... http://siica.sharpusa.com/portals/0/downloads/Manuals/MX-M365N-M... After the settings are completed, tap and [Back] keys in sequence. To cancel the tag copy setting: Tap the [Off] key. Load the tab paper. When using the bypass tray, place the paper with the print side down.
- Page 376 USER'S MANUAL | MX-M365N/MX-M465N/MX-M565N USER'S ... http://siica.sharpusa.com/portals/0/downloads/Manuals/MX-M365N-M... AUTOMATIC DOCUMENT FEEDER DOCUMENT GLASS Check the preview image in the preview screen. Check whether or not settings produce the required results. To cancel all settings: Tap the [CA] key. Tap the [Start] key to start copying.
- Page 377 USER'S MANUAL | MX-M365N/MX-M465N/MX-M565N USER'S ... http://siica.sharpusa.com/portals/0/downloads/Manuals/MX-M365N-M... MAKING A POSTER-SIZED COPY (MULTI-PAGE ENLARGEMENT) Overview This function separately copies an enlarged original image on multiple sheets. Multi-Page Enlargement must be specified before scanning the original. Place an original on the document glass.
- Page 378 USER'S MANUAL | MX-M365N/MX-M465N/MX-M565N USER'S ... http://siica.sharpusa.com/portals/0/downloads/Manuals/MX-M365N-M... Select the [AB] or [Inch] tab to meet the original size for multi-page enlargement, and tap the key that meets the original size. Tapping the key of the original size displays the keys that show the available enlargement size, copy paper size, and number of sheets.
- Page 379 USER'S MANUAL | MX-M365N/MX-M465N/MX-M565N USER'S ... http://siica.sharpusa.com/portals/0/downloads/Manuals/MX-M365N-M... Check the preview image in the preview screen. Check whether or not settings produce the required results. Tap the [Start] key to start copying. When making only one set of copies, you do not need to specify the number of copies.
- Page 380 USER'S MANUAL | MX-M365N/MX-M465N/MX-M565N USER'S ... http://siica.sharpusa.com/portals/0/downloads/Manuals/MX-M365N-M... COPYING WITH MIRROR IMAGE (MIRROR IMAGE) Overview This function makes copies by inverting the original into a mirror image. Specify the Mirror Image before scanning an original. Operation Tap the [Others] key, and tap the [Mirror Image] key.
- Page 381 USER'S MANUAL | MX-M365N/MX-M465N/MX-M565N USER'S ... http://siica.sharpusa.com/portals/0/downloads/Manuals/MX-M365N-M... Check whether or not settings produce the required results. Tap the [Start] key to start copying. When making only one set of copies, you do not need to specify the number of copies.
- Page 382 USER'S MANUAL | MX-M365N/MX-M465N/MX-M565N USER'S ... http://siica.sharpusa.com/portals/0/downloads/Manuals/MX-M365N-M... REVERSING WHITE AND BLACK IN A COPY (B/W REVERSE) Overview This function reverses black and white in a copy to create a negative image. Originals with large black areas (which use a large amount of toner) can be copied using Black/White Reverse to reduce toner consumption.
- Page 383 USER'S MANUAL | MX-M365N/MX-M465N/MX-M565N USER'S ... http://siica.sharpusa.com/portals/0/downloads/Manuals/MX-M365N-M... AUTOMATIC DOCUMENT FEEDER DOCUMENT GLASS Check the preview image in the preview screen. Check whether or not settings produce the required results. To cancel all settings: Tap the [CA] key. Tap the [Start] key to start copying.
- Page 384 USER'S MANUAL | MX-M365N/MX-M465N/MX-M565N USER'S ... http://siica.sharpusa.com/portals/0/downloads/Manuals/MX-M365N-M... ADJUSTING THE SHARPNESS OF AN IMAGE (SHARPNESS) Overview This function adjusts the sharpness to make a sharper or softer image. Sharpness must be specified before scanning the original. Operation Tap the [Others] key, and tap the [Sharpness] key.
- Page 385 USER'S MANUAL | MX-M365N/MX-M465N/MX-M565N USER'S ... http://siica.sharpusa.com/portals/0/downloads/Manuals/MX-M365N-M... Place the original and tap the [Preview] key. Place the original in the document feeder tray of the automatic document feeder, or on the document glass. AUTOMATIC DOCUMENT FEEDER DOCUMENT GLASS To cancel all settings: Tap the [CA] key.
- Page 386 USER'S MANUAL | MX-M365N/MX-M465N/MX-M565N USER'S ... http://siica.sharpusa.com/portals/0/downloads/Manuals/MX-M365N-M... COPY JOBS When you tap the job status display, jobs are displayed in a list. To check the status of a copy job, tap the [Print] tab. When you wish to stop or delete jobs or to perform priority processing, see the following...
- Page 387 USER'S MANUAL | MX-M365N/MX-M465N/MX-M565N USER'S ... http://siica.sharpusa.com/portals/0/downloads/Manuals/MX-M365N-M... STORING A PROGRAM Overview This function collectively stores copy settings as one program. The stored program can be retrieved using an easy operation. For information about how to retrieve a program, see "RETRIEVING A PROGRAM".
- Page 388 USER'S MANUAL | MX-M365N/MX-M465N/MX-M565N USER'S ... http://siica.sharpusa.com/portals/0/downloads/Manuals/MX-M365N-M... Tap the [Start] key. Considerable time is required to copy the dr The settings are stored in a program, so they can b awings each month because the above setti e selected by the touch of a key. This is simple and ngs must be selected.
- Page 389 USER'S MANUAL | MX-M365N/MX-M465N/MX-M565N USER'S ... http://siica.sharpusa.com/portals/0/downloads/Manuals/MX-M365N-M... Name the program, and tap the [OK] key. A registration completion message appears. Select whether or not to register the program in home page or bookmark. If user authentication is enabled, a shortcut of the program is registered in the user's home page or bookmark.
- Page 390 USER'S MANUAL | MX-M365N/MX-M465N/MX-M565N USER'S ... http://siica.sharpusa.com/portals/0/downloads/Manuals/MX-M365N-M... The number of copies cannot be stored. 390 of 1441 3/17/2016 7:14 AM...
- Page 391 USER'S MANUAL | MX-M365N/MX-M465N/MX-M565N USER'S ... http://siica.sharpusa.com/portals/0/downloads/Manuals/MX-M365N-M... RETRIEVING A PROGRAM Tap [Call Program] key on the action panel. Tap the key of the program you want to retrieve. Select a program key, and tap the [Add to Bookmark] or [Register in Home] key on the action panel.
- Page 392 USER'S MANUAL | MX-M365N/MX-M465N/MX-M565N USER'S ... http://siica.sharpusa.com/portals/0/downloads/Manuals/MX-M365N-M... DELETING AND RENAMING A PROGRAM Overview This section explains how to delete copy settings in a program and rename a program. A program that is already stored cannot be deleted. When [System Settings] in "Setting mode" →[Copy Settings] → [Copy Setting] →...
- Page 393 USER'S MANUAL | MX-M365N/MX-M465N/MX-M565N USER'S ... http://siica.sharpusa.com/portals/0/downloads/Manuals/MX-M365N-M... Tap the key of the program you want to delete, and tap the [Delete] key. Renaming a program Tap [Call Program] key on the action panel. Tap the [Change Name] key on the action panel.
- Page 394 USER'S MANUAL | MX-M365N/MX-M465N/MX-M565N USER'S ... http://siica.sharpusa.com/portals/0/downloads/Manuals/MX-M365N-M... PRINTER FUNCTION OF THE MACHINE The machine is equipped with a printing function as standard. To enable printing from your computer, a printer driver must be installed. See the table below to determine which printer driver to use in your environment.
- Page 395 USER'S MANUAL | MX-M365N/MX-M465N/MX-M565N USER'S ... http://siica.sharpusa.com/portals/0/downloads/Manuals/MX-M365N-M... "3. SETUP IN A MACINTOSH ENVIRONMENT" in the Software Setup Guide. 395 of 1441 3/17/2016 7:14 AM...
- Page 396 USER'S MANUAL | MX-M365N/MX-M465N/MX-M565N USER'S ... http://siica.sharpusa.com/portals/0/downloads/Manuals/MX-M365N-M... PRINTING IN A WINDOWS ENVIRONMENT Overview The menu used to execute printing may vary depending on the application. The button that is used to open the printer driver properties window (usually [Property] or [Print Settings]) may vary depending on the application.
- Page 397 USER'S MANUAL | MX-M365N/MX-M465N/MX-M565N USER'S ... http://siica.sharpusa.com/portals/0/downloads/Manuals/MX-M365N-M... Select the printer driver for the machine and click the [Preferences] button. If the printer drivers appear as a list, select the name of the printer driver to be used from the list.
- Page 398 USER'S MANUAL | MX-M365N/MX-M465N/MX-M565N USER'S ... http://siica.sharpusa.com/portals/0/downloads/Manuals/MX-M365N-M... Click the [OK] button to execute printing. 398 of 1441 3/17/2016 7:14 AM...
- Page 399 USER'S MANUAL | MX-M365N/MX-M465N/MX-M565N USER'S ... http://siica.sharpusa.com/portals/0/downloads/Manuals/MX-M365N-M... PRINTING IN A MACINTOSH ENVIRONMENT Overview The menu used to execute printing may vary depending on the application. The machine name that normally appears in the "Printer" menu is [SCxxxxxx]. ("xxxxxx" is a sequence of characters that varies depending on the machine model.)
- Page 400 USER'S MANUAL | MX-M365N/MX-M465N/MX-M565N USER'S ... http://siica.sharpusa.com/portals/0/downloads/Manuals/MX-M365N-M... Select [Print] from the [File] menu. Make sure that the correct printer is selected. Select the print settings and click the [Print] button. In Mac OS X 10.4, click next to [Copies & Pages] and select the settings that you wish to configure from the pull-down menu.
- Page 401 USER'S MANUAL | MX-M365N/MX-M465N/MX-M565N USER'S ... http://siica.sharpusa.com/portals/0/downloads/Manuals/MX-M365N-M... screen will appear. In Mac OS X 10.5, 10.6, 10.7, and 10.8 if the settings do not appear, click next to the printer name. 401 of 1441 3/17/2016 7:14 AM...
- Page 402 USER'S MANUAL | MX-M365N/MX-M465N/MX-M565N USER'S ... http://siica.sharpusa.com/portals/0/downloads/Manuals/MX-M365N-M... PRINTING IN A WINDOWS ENVIRONMENT (WHEN USER AUTHENTICATION IS USED) Overview The user information (such as login name and password) that must be entered varies depending on the authentication method being used, so check with the administrator of the machine before printing.
- Page 403 USER'S MANUAL | MX-M365N/MX-M465N/MX-M565N USER'S ... http://siica.sharpusa.com/portals/0/downloads/Manuals/MX-M365N-M... Click the [Job Handling] tab. Enter your user information. When authentication is carried out using the login name/password, click the [Login Name] and [Password] checkboxes so that the checkmark appears, and enter your login name and password. Enter the password using 1 to 32 characters.
- Page 404 USER'S MANUAL | MX-M365N/MX-M465N/MX-M565N USER'S ... http://siica.sharpusa.com/portals/0/downloads/Manuals/MX-M365N-M... characters. The entered job name will appear as a file name on the touch panel of the machine. If you do not enter a job name, the file name set in the application will appear.
- Page 405 USER'S MANUAL | MX-M365N/MX-M465N/MX-M565N USER'S ... http://siica.sharpusa.com/portals/0/downloads/Manuals/MX-M365N-M... PRINTING IN A MACINTOSH ENVIRONMENT (WHEN USER AUTHENTICATION IS USED) Overview The user information (such as login name and password) that must be entered varies depending on the authentication method being used, so check with the administrator of the machine before printing.
- Page 406 USER'S MANUAL | MX-M365N/MX-M465N/MX-M565N USER'S ... http://siica.sharpusa.com/portals/0/downloads/Manuals/MX-M365N-M... In Mac OS X 10.5, 10.6, 10.7, and 10.8, select [Job Handling] and click the [Login] tab. Enter the user name and job name as necessary. Enter your user name using up to 32 characters. The entered user name will appear on the touch panel of the machine.
- Page 407 USER'S MANUAL | MX-M365N/MX-M465N/MX-M565N USER'S ... http://siica.sharpusa.com/portals/0/downloads/Manuals/MX-M365N-M... Click the [Print] button. In Mac OS X, you can click the (lock) button after entering your login name and password, or user number, to simplify operation the next time you wish to print based on the same user authentication.
- Page 408 USER'S MANUAL | MX-M365N/MX-M465N/MX-M565N USER'S ... http://siica.sharpusa.com/portals/0/downloads/Manuals/MX-M365N-M... PAPER FEEDING IN A WINDOWS ENVIRONMENT Before printing, check the paper sizes, paper types, and paper remaining in the machine's trays. To check the most recent tray information, click the [Tray Status] button in [Paper Selection] on the [Paper] tab.
- Page 409 USER'S MANUAL | MX-M365N/MX-M465N/MX-M565N USER'S ... http://siica.sharpusa.com/portals/0/downloads/Manuals/MX-M365N-M... selecting [System Settings] in "Setting mode" → [Printer Settings] → [Default Settings] → [Bypass Tray Settings] is enabled, printing will not take place if the paper size or paper type specified in the printer driver is different from the paper size or paper type specified in the settings of the bypass tray.
- Page 410 USER'S MANUAL | MX-M365N/MX-M465N/MX-M565N USER'S ... http://siica.sharpusa.com/portals/0/downloads/Manuals/MX-M365N-M... PAPER FEEDING IN A MACINTOSH ENVIRONMENT This section explains the [Paper Feed] settings in the print settings window. When [Auto Select] is selected: A tray that is set for plain or recycled paper (only plain paper in the factory default setting) of the size specified in "Paper Size"...
- Page 411 USER'S MANUAL | MX-M365N/MX-M465N/MX-M565N USER'S ... http://siica.sharpusa.com/portals/0/downloads/Manuals/MX-M365N-M... [Bypass Tray Settings] → [Exclude Bypass-Tray from Auto Paper Select]. 411 of 1441 3/17/2016 7:14 AM...
- Page 412 USER'S MANUAL | MX-M365N/MX-M465N/MX-M565N USER'S ... http://siica.sharpusa.com/portals/0/downloads/Manuals/MX-M365N-M... PRINTING ON ENVELOPES IN A WINDOWS ENVIRONMENT Overview The bypass tray can be used for envelope printing. For the types of paper that can be used in the bypass tray, see "APPLICABLE PAPER TYPES".
- Page 413 USER'S MANUAL | MX-M365N/MX-M465N/MX-M565N USER'S ... http://siica.sharpusa.com/portals/0/downloads/Manuals/MX-M365N-M... Select [Envelope] from the "Paper Type" menu. Set the paper type of the bypass tray to [Envelope] and load an envelope into the bypass tray. 413 of 1441 3/17/2016 7:14 AM...
- Page 414 USER'S MANUAL | MX-M365N/MX-M465N/MX-M565N USER'S ... http://siica.sharpusa.com/portals/0/downloads/Manuals/MX-M365N-M... PRINTING ON ENVELOPES IN A MACINTOSH ENVIRONMENT Overview The bypass tray can be used for envelope printing. For the types of paper that can be used in the bypass tray, see "APPLICABLE PAPER TYPES".
- Page 415 USER'S MANUAL | MX-M365N/MX-M465N/MX-M565N USER'S ... http://siica.sharpusa.com/portals/0/downloads/Manuals/MX-M365N-M... Select [Paper Feed] in the print settings window. Select [Bypass Tray (Envelope)] from the "All pages from" menu. Set the paper type of the bypass tray to [Envelope] and load an envelope into the bypass tray.
- Page 416 USER'S MANUAL | MX-M365N/MX-M465N/MX-M565N USER'S ... http://siica.sharpusa.com/portals/0/downloads/Manuals/MX-M365N-M... VIEWING PRINTER DRIVER HELP Overview When you want to view the explanations of the settings of the printer driver in a Windows environment, display the Help window of the printer driver. Pop-up help Help can be displayed for a setting by clicking the setting and pressing the [F1] key.
- Page 417 USER'S MANUAL | MX-M365N/MX-M465N/MX-M565N USER'S ... http://siica.sharpusa.com/portals/0/downloads/Manuals/MX-M365N-M... 417 of 1441 3/17/2016 7:14 AM...
- Page 418 USER'S MANUAL | MX-M365N/MX-M465N/MX-M565N USER'S ... http://siica.sharpusa.com/portals/0/downloads/Manuals/MX-M365N-M... SAVING SETTINGS AT THE TIME OF PRINTING Overview Settings configured on each of the tabs at the time of printing can be saved as user settings. Saving frequently used settings or complex settings under an assigned name makes it easy to select those settings the next time you need to use them.
- Page 419 USER'S MANUAL | MX-M365N/MX-M465N/MX-M565N USER'S ... http://siica.sharpusa.com/portals/0/downloads/Manuals/MX-M365N-M... button. 419 of 1441 3/17/2016 7:14 AM...
- Page 420 USER'S MANUAL | MX-M365N/MX-M465N/MX-M565N USER'S ... http://siica.sharpusa.com/portals/0/downloads/Manuals/MX-M365N-M... USING SAVED SETTINGS Overview You can specify the saved user settings through just one click to apply frequently used settings or complicated settings to your printing. Operation Select the machine's printer driver from the print window of the application, and click the [Detail] button.
- Page 421 USER'S MANUAL | MX-M365N/MX-M465N/MX-M565N USER'S ... http://siica.sharpusa.com/portals/0/downloads/Manuals/MX-M365N-M... CHANGING THE PRINTER DRIVER DEFAULT SETTINGS Overview You can change the default settings of the printer driver. Changes you have made in the printer driver properties window when you execute printing from the application are returned to the default settings specified here when you exit the application.
- Page 422 USER'S MANUAL | MX-M365N/MX-M465N/MX-M565N USER'S ... http://siica.sharpusa.com/portals/0/downloads/Manuals/MX-M365N-M... In Windows Vista, click the [Organize] menu, and then click [Properties]. In Windows XP/Server 2003, click the [File] menu, and then click [Properties]. Click the [Default Settings] button on the [General] tab. In Windows XP/Server 2003/Vista, click the [Printing Preferences] button on the [General] tab.
- Page 423 USER'S MANUAL | MX-M365N/MX-M465N/MX-M565N USER'S ... http://siica.sharpusa.com/portals/0/downloads/Manuals/MX-M365N-M... SELECTING THE RESOLUTION Overview The following three selections are available for "Print Mode" (resolution): Normal: This mode is suitable for printing data such as regular text or a table. High Quality: The print quality of photos and text is high.
- Page 424 USER'S MANUAL | MX-M365N/MX-M465N/MX-M565N USER'S ... http://siica.sharpusa.com/portals/0/downloads/Manuals/MX-M365N-M... 2-SIDED PRINTING Overview The machine can print on both sides of the paper. This function is useful for many purposes, and is particularly convenient when you want to create a simple pamphlet. 2-sided printing also helps conserve paper.
- Page 425 USER'S MANUAL | MX-M365N/MX-M465N/MX-M565N USER'S ... http://siica.sharpusa.com/portals/0/downloads/Manuals/MX-M365N-M... [Compatibility] button on the [Advanced] tab and select the mode from "2-Sided Printing Mode". Macintosh Select [Layout] and select [Long-edged binding] or [Short-edged binding]. 425 of 1441 3/17/2016 7:14 AM...
- Page 426 USER'S MANUAL | MX-M365N/MX-M465N/MX-M565N USER'S ... http://siica.sharpusa.com/portals/0/downloads/Manuals/MX-M365N-M... FITTING THE PRINT IMAGE TO THE PAPER Overview This function automatically enlarges or reduces the print image to match the size of the paper loaded in the machine. This function is convenient when enlarging a letter or A4 size document to ledger or A3 size to make it easier to view, or when printing a document on paper that is different in size from the original document.
- Page 427 USER'S MANUAL | MX-M365N/MX-M465N/MX-M565N USER'S ... http://siica.sharpusa.com/portals/0/downloads/Manuals/MX-M365N-M... Macintosh Select [Paper Handling] and check the paper size for the print image (for example: Letter). To change the print image size, use the "Paper Size" menu that appears when [Page Setup] is selected.
- Page 428 USER'S MANUAL | MX-M365N/MX-M465N/MX-M565N USER'S ... http://siica.sharpusa.com/portals/0/downloads/Manuals/MX-M365N-M... PRINTING MULTIPLE PAGES ON ONE PAGE Overview This function reduces the print image and prints multiple pages on a single sheet of paper. You can print only the first page in the original size and print multiple reduced pages on the subsequent sheets.
- Page 429 USER'S MANUAL | MX-M365N/MX-M465N/MX-M565N USER'S ... http://siica.sharpusa.com/portals/0/downloads/Manuals/MX-M365N-M... In a Macintosh environment, the page orders are displayed as selections. In a Macintosh environment, the number of pages that can be printed on a single sheet is 2, 4, 6, 9, or 16. Printing 8 pages on one sheet is not supported.
- Page 430 USER'S MANUAL | MX-M365N/MX-M465N/MX-M565N USER'S ... http://siica.sharpusa.com/portals/0/downloads/Manuals/MX-M365N-M... Printing only the first page in the original size (for PCL6 only) Click the [Special Modes] tab. Select [Layout Print] and click the [Settings] button. Select [N-Up w/o 1st Page]. In "N-Up Printing", select the number of images per sheet and click the [OK] button.
- Page 431 USER'S MANUAL | MX-M365N/MX-M465N/MX-M565N USER'S ... http://siica.sharpusa.com/portals/0/downloads/Manuals/MX-M365N-M... 431 of 1441 3/17/2016 7:14 AM...
- Page 432 USER'S MANUAL | MX-M365N/MX-M465N/MX-M565N USER'S ... http://siica.sharpusa.com/portals/0/downloads/Manuals/MX-M365N-M... PRINTING WHILE SKIPPING BLANK PAGES Overview If the scanned original contains blank pages, the blank pages are skipped during printing. The machine detects blank pages and does not print them. This eliminates unnecessary printing without you having to check for blank pages before printing.
- Page 433 USER'S MANUAL | MX-M365N/MX-M465N/MX-M565N USER'S ... http://siica.sharpusa.com/portals/0/downloads/Manuals/MX-M365N-M... 433 of 1441 3/17/2016 7:14 AM...
- Page 434 USER'S MANUAL | MX-M365N/MX-M465N/MX-M565N USER'S ... http://siica.sharpusa.com/portals/0/downloads/Manuals/MX-M365N-M... STAPLING OUTPUT/PUNCHING HOLES IN OUTPUT Overview Staple function The staple function staples the output. To create materials with a more sophisticated appearance, the staple function can be used in combination with 2-sided printing.
- Page 435 USER'S MANUAL | MX-M365N/MX-M465N/MX-M565N USER'S ... http://siica.sharpusa.com/portals/0/downloads/Manuals/MX-M365N-M... Left Right A finisher or saddle finisher is required to use the staple function. To use the punch function, install a punch module in the finisher or saddle finisher. For the maximum number of sheets that can be stapled, see "SPECIFICATIONS"...
- Page 436 USER'S MANUAL | MX-M365N/MX-M465N/MX-M565N USER'S ... http://siica.sharpusa.com/portals/0/downloads/Manuals/MX-M365N-M... For the punch function, click the [Punch] checkbox so that the checkmark appears. Macintosh Select [Printer Features] and select "Binding Edge". Select the staple function or the punch function. Select the number of staples. For the punch function, click the [Punch] checkbox so that the checkmark appears.
- Page 437 USER'S MANUAL | MX-M365N/MX-M465N/MX-M565N USER'S ... http://siica.sharpusa.com/portals/0/downloads/Manuals/MX-M365N-M... CREATE A STAPLED PAMPHLET (PAMPHLET COPY/SADDLE STITCH) Overview The pamphlet function prints on the front and back of each sheet of paper so that the sheets can be folded and bound to create a pamphlet.
- Page 438 USER'S MANUAL | MX-M365N/MX-M465N/MX-M565N USER'S ... http://siica.sharpusa.com/portals/0/downloads/Manuals/MX-M365N-M... When [Multiple Pamphlet Style (Actual Size)] is selected, paper twice the size specified in the application is used for printing. When [Multiple Pamphlet Style (2-Up)] is selected, the paper size specified in the application is reduced as done in the 2-Up mode, and paper of the size specified in the application is used for printing.
- Page 439 USER'S MANUAL | MX-M365N/MX-M465N/MX-M565N USER'S ... http://siica.sharpusa.com/portals/0/downloads/Manuals/MX-M365N-M... PRINTING WITH MARGIN SHIFT SETTING (MARGIN) Overview This function shifts the print image to increase the margin at the left, the right, or the top of the paper. If a finisher or saddle finisher is installed, the staple and punch functions of the machine can also be used together.
- Page 440 USER'S MANUAL | MX-M365N/MX-M465N/MX-M565N USER'S ... http://siica.sharpusa.com/portals/0/downloads/Manuals/MX-M365N-M... Macintosh Select [Printer Features] and select "Binding Edge". Select "Margin Shift". 440 of 1441 3/17/2016 7:14 AM...
- Page 441 USER'S MANUAL | MX-M365N/MX-M465N/MX-M565N USER'S ... http://siica.sharpusa.com/portals/0/downloads/Manuals/MX-M365N-M... CREATE A LARGE POSTER (POSTER PRINTING) Overview One page of print data is enlarged and printed using multiple sheets of paper (4 sheets (2 x 2), 9 sheets (3 x 3) or 16 sheets (4 x 4)). The sheets can then be attached together to create a large poster.
- Page 442 USER'S MANUAL | MX-M365N/MX-M465N/MX-M565N USER'S ... http://siica.sharpusa.com/portals/0/downloads/Manuals/MX-M365N-M... 442 of 1441 3/17/2016 7:14 AM...
- Page 443 USER'S MANUAL | MX-M365N/MX-M465N/MX-M565N USER'S ... http://siica.sharpusa.com/portals/0/downloads/Manuals/MX-M365N-M... ADJUST PRINT POSITION ON ODD AND EVEN PAGES SEPARATELY (PRINT POSITION) Overview This function sets different print positions (margins) separately for odd and even pages and prints the pages. This function is available in a Windows environment.
- Page 444 USER'S MANUAL | MX-M365N/MX-M465N/MX-M565N USER'S ... http://siica.sharpusa.com/portals/0/downloads/Manuals/MX-M365N-M... 444 of 1441 3/17/2016 7:14 AM...
- Page 445 USER'S MANUAL | MX-M365N/MX-M465N/MX-M565N USER'S ... http://siica.sharpusa.com/portals/0/downloads/Manuals/MX-M365N-M... ROTATING THE PRINT IMAGE 180 DEGREES (ROTATE 180 DEGREES) Overview This feature rotates the image 180 degrees so that it can be printed correctly on paper that can be loaded in only one orientation (such as envelopes or paper with punch holes).
- Page 446 USER'S MANUAL | MX-M365N/MX-M465N/MX-M565N USER'S ... http://siica.sharpusa.com/portals/0/downloads/Manuals/MX-M365N-M... Macintosh Select [Page Setup] from the [File] menu and click the button. Click the [OK] button. 446 of 1441 3/17/2016 7:14 AM...
- Page 447 USER'S MANUAL | MX-M365N/MX-M465N/MX-M565N USER'S ... http://siica.sharpusa.com/portals/0/downloads/Manuals/MX-M365N-M... ENLARGING/REDUCING THE PRINT IMAGE (ZOOM SETTING/ENLARGE OR REDUCE) Overview This function enlarges or reduces the image to a selected percentage. When using the PS printer driver (Windows), you can set the width and length percentages separately to change the proportion of the image (XY Zoom).
- Page 448 USER'S MANUAL | MX-M365N/MX-M465N/MX-M565N USER'S ... http://siica.sharpusa.com/portals/0/downloads/Manuals/MX-M365N-M... Macintosh Select [Page Setup] from the [File] menu and enter the ratio (%). Click the [OK] button. 448 of 1441 3/17/2016 7:14 AM...
- Page 449 USER'S MANUAL | MX-M365N/MX-M465N/MX-M565N USER'S ... http://siica.sharpusa.com/portals/0/downloads/Manuals/MX-M365N-M... ADJUST THE LINE THICKNESS (LINE THICKNESS) Overview This function increases the thickness of the entire line when the print lines are not clear in CAD or other special applications. When the data includes lines of varying widths, you can print all lines at the minimum width as necessary.
- Page 450 USER'S MANUAL | MX-M365N/MX-M465N/MX-M565N USER'S ... http://siica.sharpusa.com/portals/0/downloads/Manuals/MX-M365N-M... 450 of 1441 3/17/2016 7:14 AM...
- Page 451 USER'S MANUAL | MX-M365N/MX-M465N/MX-M565N USER'S ... http://siica.sharpusa.com/portals/0/downloads/Manuals/MX-M365N-M... PRINT A MIRROR-IMAGE (MIRROR-IMAGE REVERSE/VISUAL EFFECTS) Overview The image is reversed to create a mirror image. This function is conveniently used to print a design for a woodblock print or other printing medium.
- Page 452 USER'S MANUAL | MX-M365N/MX-M465N/MX-M565N USER'S ... http://siica.sharpusa.com/portals/0/downloads/Manuals/MX-M365N-M... Macintosh This function can not be used in Mac OS X 10.4/10.5. Select [Layout] Select a mirror image setting. If you wish to reverse the image horizontally, select [Flip horizontally] checkbox If you wish to reverse the image vertically, select [Reverse page orientation]...
- Page 453 USER'S MANUAL | MX-M365N/MX-M465N/MX-M565N USER'S ... http://siica.sharpusa.com/portals/0/downloads/Manuals/MX-M365N-M... ADJUST THE BRIGHTNESS AND CONTRAST OF THE IMAGE (IMAGE ADJUSTMENT SETTINGS) Overview This function adjusts the brightness and contrast in the print settings when a photo or other image is printed. This function makes simple corrections even if image editing software is not installed on your computer.
- Page 454 USER'S MANUAL | MX-M365N/MX-M465N/MX-M565N USER'S ... http://siica.sharpusa.com/portals/0/downloads/Manuals/MX-M365N-M... PRINTING FAINT TEXT AND LINES IN BLACK (TEXT TO BLACK/VECTOR TO BLACK) Overview When printing a color image, text and lines that are drawn in faint colors are printed in black. This function allows you to bring out color text and lines that are faint and difficult to see.
- Page 455 USER'S MANUAL | MX-M365N/MX-M465N/MX-M565N USER'S ... http://siica.sharpusa.com/portals/0/downloads/Manuals/MX-M365N-M... 455 of 1441 3/17/2016 7:14 AM...
- Page 456 USER'S MANUAL | MX-M365N/MX-M465N/MX-M565N USER'S ... http://siica.sharpusa.com/portals/0/downloads/Manuals/MX-M365N-M... ADDING A WATERMARK TO PRINTED PAGES (WATERMARK) Overview This function adds faint shadow-like text as a watermark in the background of the printed image. The size, exposure, and angle of the watermark text can be adjusted.
- Page 457 USER'S MANUAL | MX-M365N/MX-M465N/MX-M565N USER'S ... http://siica.sharpusa.com/portals/0/downloads/Manuals/MX-M365N-M... Macintosh Select [Watermarks]. Click the [Watermark] checkbox and configure watermark settings. Configure detailed watermark settings such as selection of the text and editing of the font. Adjust the size and angle of the text by dragging the slide bar...
- Page 458 USER'S MANUAL | MX-M365N/MX-M465N/MX-M565N USER'S ... http://siica.sharpusa.com/portals/0/downloads/Manuals/MX-M365N-M... PRINTING AN IMAGE OVER THE PRINT DATA (IMAGE STAMP) Overview This function prints a bitmap or JPEG image stored on your PC over the print data. This function prints a frequently used image or an icon of your own creation as if it is stamped on the print data.
- Page 459 USER'S MANUAL | MX-M365N/MX-M465N/MX-M565N USER'S ... http://siica.sharpusa.com/portals/0/downloads/Manuals/MX-M365N-M... 459 of 1441 3/17/2016 7:14 AM...
- Page 460 USER'S MANUAL | MX-M365N/MX-M465N/MX-M565N USER'S ... http://siica.sharpusa.com/portals/0/downloads/Manuals/MX-M365N-M... OVERLAY A FIXED FORM ON THE PRINT DATA (OVERLAYS) Overview This function overlays data on a fixed form you have prepared. By creating table rulings or a decorative frame in an application different from that of the text file and registering the data as an overlay file, an attractive print result can be easily obtained without the need for complex manipulations.
- Page 461 USER'S MANUAL | MX-M365N/MX-M465N/MX-M565N USER'S ... http://siica.sharpusa.com/portals/0/downloads/Manuals/MX-M365N-M... The file will be created when the settings are completed and printing is started. When printing is started, a confirmation message will appear. The overlay file will not be created until the [Yes] button is clicked.
- Page 462 USER'S MANUAL | MX-M365N/MX-M465N/MX-M565N USER'S ... http://siica.sharpusa.com/portals/0/downloads/Manuals/MX-M365N-M... PRINTING SPECIFIC PAGES ON DIFFERENT PAPER (DIFFERENT PAPER) Overview In a Windows environment The front and back covers and specified pages of a document are printed on paper that is different from the other pages.
- Page 463 USER'S MANUAL | MX-M365N/MX-M465N/MX-M565N USER'S ... http://siica.sharpusa.com/portals/0/downloads/Manuals/MX-M365N-M... Select the insertion position, paper source, and printing method from the corresponding menus. Click the [Add] button and your settings will appear in "Information". When you have finished selecting settings, click the [Save] button in "Custom Settings"...
- Page 464 USER'S MANUAL | MX-M365N/MX-M465N/MX-M565N USER'S ... http://siica.sharpusa.com/portals/0/downloads/Manuals/MX-M365N-M... Select [Printer Features] and select [Different Paper]. Select the cover insertion settings. Select the print setting, paper tray, and paper type for the front and back covers. 464 of 1441 3/17/2016 7:14 AM...
- Page 465 USER'S MANUAL | MX-M365N/MX-M465N/MX-M565N USER'S ... http://siica.sharpusa.com/portals/0/downloads/Manuals/MX-M365N-M... ADDING INSERTS WHEN PRINTING ON TRANSPARENCY FILM (TRANSPARENCY INSERTS) Overview When transparency film is used for printing, this function prevents the sheets of transparency film from sticking together by inserting a sheet of paper between each sheet of film.
- Page 466 USER'S MANUAL | MX-M365N/MX-M465N/MX-M565N USER'S ... http://siica.sharpusa.com/portals/0/downloads/Manuals/MX-M365N-M... Macintosh Select [Printer Features]. Select [Transparency Inserts] in [Feature Sets]. Select the transparency insert settings. When [Print] is selected from "Transparency Inserts", the same content as that printed on the transparency film is also printed on the insert. Select the paper source and type if needed.
- Page 467 USER'S MANUAL | MX-M365N/MX-M465N/MX-M565N USER'S ... http://siica.sharpusa.com/portals/0/downloads/Manuals/MX-M365N-M... tray. 467 of 1441 3/17/2016 7:14 AM...
- Page 468 USER'S MANUAL | MX-M365N/MX-M465N/MX-M565N USER'S ... http://siica.sharpusa.com/portals/0/downloads/Manuals/MX-M365N-M... PRINTING A CARBON COPY (CARBON COPY) Overview This function prints an additional copy of the print image on paper that is of the same size but from a different paper tray. For example, if carbon copy print is selected when plain paper is loaded into tray 1 and colored paper is loaded into tray 2, a print result similar to a carbon copy slip is obtained with a single selection of the print command.
- Page 469 USER'S MANUAL | MX-M365N/MX-M465N/MX-M565N USER'S ... http://siica.sharpusa.com/portals/0/downloads/Manuals/MX-M365N-M... Select the tray for the first copy from "Top Copy", and then select the tray for the carbon copy from "Carbon Copy". When the bypass tray is selected, be sure to select the "Paper Type".
- Page 470 USER'S MANUAL | MX-M365N/MX-M465N/MX-M565N USER'S ... http://siica.sharpusa.com/portals/0/downloads/Manuals/MX-M365N-M... PRINTING TEXT ON TABS OF TAB PAPER (TAB PAPER SETTINGS/TAB PAPER PRINT) Overview There are two methods of printing on the tabs of tab paper: "Tab Paper Settings" and "Tab Paper Print". Tab Paper Settings...
- Page 471 USER'S MANUAL | MX-M365N/MX-M465N/MX-M565N USER'S ... http://siica.sharpusa.com/portals/0/downloads/Manuals/MX-M365N-M... These functions are available in a Windows environment. Tab paper must be loaded into the bypass tray. Operation Windows Tab Paper Settings When you have finished preparing the data to be printed on tab papers in an application, take the following steps: Click the [Advanced] tab and click the [Tab Paper Settings] button.
- Page 472 USER'S MANUAL | MX-M365N/MX-M465N/MX-M565N USER'S ... http://siica.sharpusa.com/portals/0/downloads/Manuals/MX-M365N-M... Tab Paper Print (for PCL6 only) Open the data into which you wish to insert tab paper, and then select the settings. Click the [Special Modes] tab. Select [Tab Paper Print] and click the [Settings] button.
- Page 473 USER'S MANUAL | MX-M365N/MX-M465N/MX-M565N USER'S ... http://siica.sharpusa.com/portals/0/downloads/Manuals/MX-M365N-M... 473 of 1441 3/17/2016 7:14 AM...
- Page 474 USER'S MANUAL | MX-M365N/MX-M465N/MX-M565N USER'S ... http://siica.sharpusa.com/portals/0/downloads/Manuals/MX-M365N-M... TWO-SIDED PRINTING WITH SPECIFIC PAGES PRINTED ON THE FRONT SIDE (CHAPTER INSERTS) Overview This function prints specific pages on the front side of the paper. When you specify a page (such as a chapter cover page) to be printed on the front side of the paper, it is printed on the front side of the next sheet even if it would normally be printed on the reverse side of the paper.
- Page 475 USER'S MANUAL | MX-M365N/MX-M465N/MX-M565N USER'S ... http://siica.sharpusa.com/portals/0/downloads/Manuals/MX-M365N-M... the [Add] button. Your settings will appear in "Information". When you have finished selecting settings, click the [Save] button in "User Settings" to save the settings. 475 of 1441 3/17/2016 7:14 AM...
- Page 476 USER'S MANUAL | MX-M365N/MX-M465N/MX-M565N USER'S ... http://siica.sharpusa.com/portals/0/downloads/Manuals/MX-M365N-M... FOLDING PRINTED PAPER IN HALF (FOLD) Overview This function folds printed paper in half when a saddle finisher is installed on the machine. You can choose whether the output is folded inward or outward.
- Page 477 USER'S MANUAL | MX-M365N/MX-M465N/MX-M565N USER'S ... http://siica.sharpusa.com/portals/0/downloads/Manuals/MX-M365N-M... Macintosh Select [Printer Features]. Select [Paper Folding Settings] and select the desired folding method. 477 of 1441 3/17/2016 7:14 AM...
- Page 478 USER'S MANUAL | MX-M365N/MX-M465N/MX-M565N USER'S ... http://siica.sharpusa.com/portals/0/downloads/Manuals/MX-M365N-M... INSERT PRESET DATA BEFORE OR AFTER EACH PAGE (PAGE INTERLEAVE) Overview This function inserts a preset data item into every page during printing. You can easily create documents with opened page spread that is made up of text on the left-hand page and a memo space on the right-hand page.
- Page 479 USER'S MANUAL | MX-M365N/MX-M465N/MX-M565N USER'S ... http://siica.sharpusa.com/portals/0/downloads/Manuals/MX-M365N-M... Set the overlay data to be inserted, and set its insertion position. 479 of 1441 3/17/2016 7:14 AM...
- Page 480 USER'S MANUAL | MX-M365N/MX-M465N/MX-M565N USER'S ... http://siica.sharpusa.com/portals/0/downloads/Manuals/MX-M365N-M... PRINT THE SAME IMAGE IN TILE PATTERN (REPEAT PRINT) Overview This function prints the same image in tile pattern on a sheet. This is useful for producing name cards and stickers. This function is available in a Windows environment.
- Page 481 USER'S MANUAL | MX-M365N/MX-M465N/MX-M565N USER'S ... http://siica.sharpusa.com/portals/0/downloads/Manuals/MX-M365N-M... 481 of 1441 3/17/2016 7:14 AM...
- Page 482 USER'S MANUAL | MX-M365N/MX-M465N/MX-M565N USER'S ... http://siica.sharpusa.com/portals/0/downloads/Manuals/MX-M365N-M... PRINTING PATTERN DATA (HIDDEN PATTERN PRINT) Overview This function prints pattern data such as "DO NOT COPY" behind the print data. If paper with pattern data is duplicated, the pattern data emerges in the background, which will help to prevent information from being leaked through unauthorized document copying.
- Page 483 USER'S MANUAL | MX-M365N/MX-M465N/MX-M565N USER'S ... http://siica.sharpusa.com/portals/0/downloads/Manuals/MX-M365N-M... "Hidden Pattern Print" is a function provided for the purpose of deterring unauthorized printing. It does not guarantee the prevention of information leakage. Text may not be completely hidden on an output sheet with a pattern print under certain machine conditions.
- Page 484 USER'S MANUAL | MX-M365N/MX-M465N/MX-M565N USER'S ... http://siica.sharpusa.com/portals/0/downloads/Manuals/MX-M365N-M... CHANGING THE RENDERING METHOD AND PRINTING JPEG IMAGES (PROCESS JPEG IMAGES USING THE DRIVER) Overview In some situations, a document containing a JPEG image may not be printed correctly. This can be solved by changing the way the JPEG image is rendered.
- Page 485 USER'S MANUAL | MX-M365N/MX-M465N/MX-M565N USER'S ... http://siica.sharpusa.com/portals/0/downloads/Manuals/MX-M365N-M... 485 of 1441 3/17/2016 7:14 AM...
- Page 486 USER'S MANUAL | MX-M365N/MX-M465N/MX-M565N USER'S ... http://siica.sharpusa.com/portals/0/downloads/Manuals/MX-M365N-M... PRINTING AT A PSEUDO-ENHANCED RESOLUTION (SMOOTHING) Overview Resolution enhancement techniques (RETs) are used to smoothen the outlines of images. The images are printed at a pseudo-enhanced resolution. This function is available in a Windows environment.
- Page 487 USER'S MANUAL | MX-M365N/MX-M465N/MX-M565N USER'S ... http://siica.sharpusa.com/portals/0/downloads/Manuals/MX-M365N-M... 487 of 1441 3/17/2016 7:14 AM...
- Page 488 USER'S MANUAL | MX-M365N/MX-M465N/MX-M565N USER'S ... http://siica.sharpusa.com/portals/0/downloads/Manuals/MX-M365N-M... USING TWO MACHINES TO PRINT A LARGE PRINT JOB (TANDEM PRINT) Overview To use this function, two machines that can perform tandem printing are required. Two machines connected to the same network are used to run a large copy job in parallel.
- Page 489 USER'S MANUAL | MX-M365N/MX-M465N/MX-M565N USER'S ... http://siica.sharpusa.com/portals/0/downloads/Manuals/MX-M365N-M... Click the [Advanced] tab. Click the [Tandem Print] checkbox so that the checkmark appears. The tandem print function can be used only when the printer driver has been installed using "Custom Installation" with [LPR Direct Print (Specify Address/Auto Search)] selected and with the [Yes] checkbox selected for "Do you want to use the tandem print function?".
- Page 490 USER'S MANUAL | MX-M365N/MX-M465N/MX-M565N USER'S ... http://siica.sharpusa.com/portals/0/downloads/Manuals/MX-M365N-M... SAVING AND USING PRINT FILES (FORCE RETENTION/DOCUMENT FILING) Overview This function stores a print job as a file on the machine's hard drive, allowing the job to be printed from the touch panel when needed. The location for storing a file can be selected to prevent the file from being mixed together with files of other users.
- Page 491 USER'S MANUAL | MX-M365N/MX-M465N/MX-M565N USER'S ... http://siica.sharpusa.com/portals/0/downloads/Manuals/MX-M365N-M... For the procedure for printing files stored on the machine's hard drive, see "FILE PRINTING" in "DOCUMENT FILING". When printing from a PC, you can set a password (5 to 8 digits) to maintain the confidentiality of information in a stored file.
- Page 492 USER'S MANUAL | MX-M365N/MX-M465N/MX-M565N USER'S ... http://siica.sharpusa.com/portals/0/downloads/Manuals/MX-M365N-M... the folder. When [Quick File] is selected, "Retention Settings" will be set to [Hold After Print]. When [Quick File] is selected, the password entered in "Retention Settings" is cleared. If necessary, you can select the data format from CMYK and RGB for data to be stored in the machine.
- Page 493 USER'S MANUAL | MX-M365N/MX-M465N/MX-M565N USER'S ... http://siica.sharpusa.com/portals/0/downloads/Manuals/MX-M365N-M... When [Quick File] is selected, "Retention Settings" will be set to [Hold After Print]. When [Quick File] is selected, the password entered in "Retention Settings" is cleared. If necessary, you can select the data format from CMYK and RGB for data to be stored in the machine.
- Page 494 USER'S MANUAL | MX-M365N/MX-M465N/MX-M565N USER'S ... http://siica.sharpusa.com/portals/0/downloads/Manuals/MX-M365N-M... AUTOMATICALLY PRINT ALL STORED DATA Overview When user authentication is enabled on the machine, all retained (stored) print jobs of the user who logs in are automatically printed. After all jobs are printed, the stored jobs are deleted.
- Page 495 USER'S MANUAL | MX-M365N/MX-M465N/MX-M565N USER'S ... http://siica.sharpusa.com/portals/0/downloads/Manuals/MX-M365N-M... The print files stored in the quick file folder, main folder, and custom folder will be printed automatically and then deleted. 495 of 1441 3/17/2016 7:14 AM...
- Page 496 USER'S MANUAL | MX-M365N/MX-M465N/MX-M565N USER'S ... http://siica.sharpusa.com/portals/0/downloads/Manuals/MX-M365N-M... PRINTING AND SENDING SIMULTANEOUSLY Overview This function prints data created in an application from the machine and simultaneously sends the data to the addresses stored in the machine. This function allows you to complete two tasks, printing and sending, with one operation from the printer driver.
- Page 497 USER'S MANUAL | MX-M365N/MX-M465N/MX-M565N USER'S ... http://siica.sharpusa.com/portals/0/downloads/Manuals/MX-M365N-M... list. If you wish to send the data to all addresses, click the [Add All] button. To delete an address from the "Destination" list, select the address and click the [Delete] button. If you wish to delete all addresses, click the [Delete All] button.
- Page 498 USER'S MANUAL | MX-M365N/MX-M465N/MX-M565N USER'S ... http://siica.sharpusa.com/portals/0/downloads/Manuals/MX-M365N-M... 498 of 1441 3/17/2016 7:14 AM...
- Page 499 USER'S MANUAL | MX-M365N/MX-M465N/MX-M565N USER'S ... http://siica.sharpusa.com/portals/0/downloads/Manuals/MX-M365N-M... EXTENSION OF PRINTABLE FILES When you do not have the printer driver installed on your PC, or when the application used to open a file that you wish to print is not available, you can print directly to the machine without using the printer driver.
- Page 500 USER'S MANUAL | MX-M365N/MX-M465N/MX-M565N USER'S ... http://siica.sharpusa.com/portals/0/downloads/Manuals/MX-M365N-M... DIRECTLY PRINTING A FILE ON AN FTP SERVER Overview When an FTP server is configured, you can directly select and print files on the FTP server from the touch panel of the machine. This function eliminates the need for downloading the files from the FTP server to your PC and sending print jobs from the PC to the machine.
- Page 501 USER'S MANUAL | MX-M365N/MX-M465N/MX-M565N USER'S ... http://siica.sharpusa.com/portals/0/downloads/Manuals/MX-M365N-M... icon appears to the left of keys of files that can be printed. icon is displayed to the left of keys of folders on the FTP server. To display a folder or a file in a folder, tap this key.
- Page 502 USER'S MANUAL | MX-M365N/MX-M465N/MX-M565N USER'S ... http://siica.sharpusa.com/portals/0/downloads/Manuals/MX-M365N-M... DIRECTLY PRINTING A FILE IN USB MEMORY Overview Files in a USB memory device connected to the machine are printed from the operation panel of the machine without using the printer driver. When the printer driver of the machine is not installed on your PC, you can copy a file into a commercially available USB memory device and connect the device to the machine to print the file directly.
- Page 503 USER'S MANUAL | MX-M365N/MX-M465N/MX-M565N USER'S ... http://siica.sharpusa.com/portals/0/downloads/Manuals/MX-M365N-M... icon is displayed to the left of keys of folders in the USB memory device. To display a folder or a file in a folder, tap this key. A total of 100 keys of files and folders can be displayed.
- Page 504 USER'S MANUAL | MX-M365N/MX-M465N/MX-M565N USER'S ... http://siica.sharpusa.com/portals/0/downloads/Manuals/MX-M365N-M... DIRECTLY PRINTING A FILE IN A NETWORK FOLDER Overview You can specify and print a file in a network folder from the touch panel of the machine. Even if the network folder is not registered, you can access the network folder by directly entering or referring to the path to the folder in the workgroup.
- Page 505 USER'S MANUAL | MX-M365N/MX-M465N/MX-M565N USER'S ... http://siica.sharpusa.com/portals/0/downloads/Manuals/MX-M365N-M... If a screen appears prompting you to enter a user name and password, check with your server administrator and enter the appropriate user name and password. When you tap the [Direct Input of Folder Path] key, a screen appears to allow direct input of the network folder path.
- Page 506 USER'S MANUAL | MX-M365N/MX-M465N/MX-M565N USER'S ... http://siica.sharpusa.com/portals/0/downloads/Manuals/MX-M365N-M... A total of 100 keys of files and folders can be displayed. to move up one folder level. To return to the network folder selection screen, tap Tap the [File or Folder Name] key to change the order of the files and folders displayed on the screen.
- Page 507 USER'S MANUAL | MX-M365N/MX-M465N/MX-M565N USER'S ... http://siica.sharpusa.com/portals/0/downloads/Manuals/MX-M365N-M... Referring to the network folder path Tap the key of the workgroup that you wish to access in step 3 of "Printing a file in the network folder you have configured in the machine's settings".
- Page 508 USER'S MANUAL | MX-M365N/MX-M465N/MX-M565N USER'S ... http://siica.sharpusa.com/portals/0/downloads/Manuals/MX-M365N-M... Tap the icon and enter a keyword to search for a workgroup, server, or network folder. To enter text, see "NAMES AND FUNCTIONS OF SOFT KEYBOARD KEYS". Up to 100 workgroups, 100 servers, and 100 network folders are displayed.
- Page 509 USER'S MANUAL | MX-M365N/MX-M465N/MX-M565N USER'S ... http://siica.sharpusa.com/portals/0/downloads/Manuals/MX-M365N-M... SUBMIT PRINT JOB By selecting [Document Operations] → [Submit Print Job] from "Setting Mode (Web version)" and specifying a file, you can directly print the file without using the printer driver. In addition to a file on your PC, this procedure can be used to print any file that can be accessed from your PC, such as a file on another PC connected to the same network.
- Page 510 USER'S MANUAL | MX-M365N/MX-M465N/MX-M565N USER'S ... http://siica.sharpusa.com/portals/0/downloads/Manuals/MX-M365N-M... FTP PRINT You can print a file from your PC by simply dragging and dropping the file onto the FTP server of the machine. To perform FTP print: In "Setting mode", select [Application Settings] → [Setting for Print from the PC], set [FTP Print] to [Valid], and then configure the port number.
- Page 511 USER'S MANUAL | MX-M365N/MX-M465N/MX-M565N USER'S ... http://siica.sharpusa.com/portals/0/downloads/Manuals/MX-M365N-M... E-MAIL PRINT If you configure your e-mail account in the machine, the machine periodically checks your mail server and automatically prints received e-mail attachments without using the printer driver. To perform e-mail print: In "Setting mode", select [Application Settings] →...
- Page 512 USER'S MANUAL | MX-M365N/MX-M465N/MX-M565N USER'S ... http://siica.sharpusa.com/portals/0/downloads/Manuals/MX-M365N-M... Account Number ACCOUNTNUMBER Number (5 to 8 digits) File Type LANGUAGE PCL, PCLXL, POSTSCRIPT, PDF, TIFF, JPG, XPS Paper PAPER Paper that can be used (LETTER, A4, or others) DOCUMENT FILING FILE OFF, ON...
- Page 513 USER'S MANUAL | MX-M365N/MX-M465N/MX-M565N USER'S ... http://siica.sharpusa.com/portals/0/downloads/Manuals/MX-M365N-M... PRINTING AN ENCRYPTED PDF FILE Overview PDF encryption is used to protect a PDF file by requiring the entry of a password to print or edit the file. To directly print an encrypted PDF file on an FTP server or in a USB memory device, etc.
- Page 514 USER'S MANUAL | MX-M365N/MX-M465N/MX-M565N USER'S ... http://siica.sharpusa.com/portals/0/downloads/Manuals/MX-M365N-M... Enter the password (32 characters or less) and tap the [Yes] key. When both a master password and a user password (which is used to open the file) have been set, enter the master password.
- Page 515 USER'S MANUAL | MX-M365N/MX-M465N/MX-M565N USER'S ... http://siica.sharpusa.com/portals/0/downloads/Manuals/MX-M365N-M... CHANGING TO ANOTHER PAPER SIZE AND PRINTING WHEN PAPER RUNS OUT Overview If printing stops because the machine ran out of paper, or if the size of paper specified in the printer driver is not loaded in the machine, a message will appear in the touch panel.
- Page 516 USER'S MANUAL | MX-M365N/MX-M465N/MX-M565N USER'S ... http://siica.sharpusa.com/portals/0/downloads/Manuals/MX-M365N-M... PRINTER JOBS When you tap the job status display, jobs are displayed in a list. To check the status of a printer job, tap the [Print] tab. When you wish to stop or delete jobs or to perform priority processing, see the following...
- Page 517 USER'S MANUAL | MX-M365N/MX-M465N/MX-M565N USER'S ... http://siica.sharpusa.com/portals/0/downloads/Manuals/MX-M365N-M... REGISTERING A CUSTOM IMAGE Overview This function registers images used as custom images from the printer driver to the machine. This function is available in a Windows environment. This function can be used when the PCL6 printer driver is used.
- Page 518 USER'S MANUAL | MX-M365N/MX-M465N/MX-M565N USER'S ... http://siica.sharpusa.com/portals/0/downloads/Manuals/MX-M365N-M... 518 of 1441 3/17/2016 7:14 AM...
- Page 519 USER'S MANUAL | MX-M365N/MX-M465N/MX-M565N USER'S ... http://siica.sharpusa.com/portals/0/downloads/Manuals/MX-M365N-M... SPECIFYING A BILLING CODE USING THE PRINTER DRIVER Overview You can enter a billing code using the printer of the machine. When using the printer, you can only enter a billing code by directly typing it in.
- Page 520 USER'S MANUAL | MX-M365N/MX-M465N/MX-M565N USER'S ... http://siica.sharpusa.com/portals/0/downloads/Manuals/MX-M365N-M... In Windows Vista, click the [Organize] menu, then click [Properties]. In Windows XP/Server 2003, click the [File] menu, then click [Properties]. Click the [Configuration] tab, then click the [Printing Policy] button. Set the [Billing Code] check box to , then click the [OK] button.
- Page 521 USER'S MANUAL | MX-M365N/MX-M465N/MX-M565N USER'S ... http://siica.sharpusa.com/portals/0/downloads/Manuals/MX-M365N-M... Operation Windows Start printing Enter the main code and sub code, then click the [OK] button. To retain the specified billing code, set [Always Use This Billing Code] to 521 of 1441 3/17/2016 7:14 AM...
- Page 522 USER'S MANUAL | MX-M365N/MX-M465N/MX-M565N USER'S ... http://siica.sharpusa.com/portals/0/downloads/Manuals/MX-M365N-M... If you select "Setting Mode (Administrator)" - [Billing Code Setting] - [Administration Settings] and set [Use Billing Code] to Enable, the specified billing code is disabled, and it is not recorded in the job log.
- Page 523 USER'S MANUAL | MX-M365N/MX-M465N/MX-M565N USER'S ... http://siica.sharpusa.com/portals/0/downloads/Manuals/MX-M365N-M... PRINTER DRIVER SPECIFICATIONS LIST Windows PP Macintosh P Function PCL6 Frequently used fu Copies 1-999 1-999 1-999 1-999 nctions Orientation Number 2, 4, 6, 8, 9, or 2, 4, 6, 8, 9, or...
- Page 524 USER'S MANUAL | MX-M365N/MX-M465N/MX-M565N USER'S ... http://siica.sharpusa.com/portals/0/downloads/Manuals/MX-M365N-M... Margin Shift 0 inch to 1.2 i 0 inch to 1.2 i Poster Print Print Positio Rotate 180 Degrees Zoom/XY Z Line Width S ettings Mirror Image Special functions Different Pa Transparenc y Inserts...
- Page 525 USER'S MANUAL | MX-M365N/MX-M465N/MX-M565N USER'S ... http://siica.sharpusa.com/portals/0/downloads/Manuals/MX-M365N-M... Hidden Patt ern Print Use driver t o render JP Smoothing Tandem Prin Retention Document F iling Print and se Disable Blan k Page Print Image Adjus tment Text To Bla ck/Vector T...
- Page 526 USER'S MANUAL | MX-M365N/MX-M465N/MX-M565N USER'S ... http://siica.sharpusa.com/portals/0/downloads/Manuals/MX-M365N-M... de Selection Toner Save Font Selectable Bitmap, True Downloadabl Type, Graphic e Font Other functions Auto Config uration User Authe ntication *1 The specifications of each function in Windows PPD and Macintosh PPD vary depending on the operating system version and the application.
- Page 527 USER'S MANUAL | MX-M365N/MX-M465N/MX-M565N USER'S ... http://siica.sharpusa.com/portals/0/downloads/Manuals/MX-M365N-M... BEFORE USING THE MACHINE AS A FAX Connect to the telephone line. Insert the plug on one end of the telephone line cord into the telephone line jack (LINE) of the machine as shown, and insert the other plug into a wall telephone jack.
- Page 528 USER'S MANUAL | MX-M365N/MX-M465N/MX-M565N USER'S ... http://siica.sharpusa.com/portals/0/downloads/Manuals/MX-M365N-M... If the fax function will be used, and, in particular, if reception or timer transmission will take place at night, do not turn the main power off. Set the telephone line type. The machine's dial mode setting must be set to match the type of telephone line you are using.
- Page 529 USER'S MANUAL | MX-M365N/MX-M465N/MX-M565N USER'S ... http://siica.sharpusa.com/portals/0/downloads/Manuals/MX-M365N-M... In "Setting mode", select [System Settings] → [Image Send Settings] → [Operation Settings] → [Own Number and Name Set] → [Sender Data Registration]. Storing destination addresses for each scan mode in the address book It is convenient to store addresses in the address book before using Fax mode.
- Page 530 USER'S MANUAL | MX-M365N/MX-M465N/MX-M565N USER'S ... http://siica.sharpusa.com/portals/0/downloads/Manuals/MX-M365N-M... SELECTING FAX MODE You can select the fax mode from the Home Screen or from each operation mode as follows: Operation Changing modes from the Home Screen Tap the [Fax] mode icon The initial screen of fax mode is displayed.
- Page 531 USER'S MANUAL | MX-M365N/MX-M465N/MX-M565N USER'S ... http://siica.sharpusa.com/portals/0/downloads/Manuals/MX-M365N-M... BASE SCREEN OF FAX MODE 531 of 1441 3/17/2016 7:14 AM...
- Page 532 USER'S MANUAL | MX-M365N/MX-M465N/MX-M565N USER'S ... http://siica.sharpusa.com/portals/0/downloads/Manuals/MX-M365N-M... FAX TRANSMISSION SEQUENCE First, tap the [Fax] icon on the home screen to enter fax mode. SELECTING FAX MODE Place the original. Place the original in the document feeder tray of the automatic document feeder, or on the document glass.
- Page 533 USER'S MANUAL | MX-M365N/MX-M465N/MX-M565N USER'S ... http://siica.sharpusa.com/portals/0/downloads/Manuals/MX-M365N-M... Configure the scan settings. Specify the original scan size, exposure, resolution, etc. IMAGE SETTINGS If necessary, you can refer to the following functions for the setting. SENDING ORIGINALS COLLECTIVELY SCANNING ORIGINALS AUTOMATICALLY SCANNING BOTH SIDES OF AN ORIGINAL(2-SIDED ORIGINAL)
- Page 534 USER'S MANUAL | MX-M365N/MX-M465N/MX-M565N USER'S ... http://siica.sharpusa.com/portals/0/downloads/Manuals/MX-M365N-M... Send the original. Tap the [Start] key. You can check the preview image by tapping the [Preview] key before tapping the [Start] key. After you have scanned an original by tapping the [Preview] key, tap the [Additional Scan] key to scan the next original.
- Page 535 USER'S MANUAL | MX-M365N/MX-M465N/MX-M565N USER'S ... http://siica.sharpusa.com/portals/0/downloads/Manuals/MX-M365N-M... [Start] key to start transmission. 04-015.htm 535 of 1441 3/17/2016 7:14 AM...
- Page 536 USER'S MANUAL | MX-M365N/MX-M465N/MX-M565N USER'S ... http://siica.sharpusa.com/portals/0/downloads/Manuals/MX-M365N-M... ENTERING A DESTINATION NUMBER USING THE NUMERIC KEYS Tap numeric keys to enter the destination fax number. If you want to enter a pause between digits of the number: The [Pause] key appears on the numeric keys when the destination fax number is entered.
- Page 537 USER'S MANUAL | MX-M365N/MX-M465N/MX-M565N USER'S ... http://siica.sharpusa.com/portals/0/downloads/Manuals/MX-M365N-M... RETRIEVING A DESTINATION NUMBER FROM AN ADDRESS BOOK Overview A destination fax number is retrieved by simply tapping the one-touch key of that destination on the address book screen. (One-touch dialing) It is also possible to store multiple fax numbers in a one-touch key, allowing you to retrieve all the numbers by simply tapping the key.
- Page 538 USER'S MANUAL | MX-M365N/MX-M465N/MX-M565N USER'S ... http://siica.sharpusa.com/portals/0/downloads/Manuals/MX-M365N-M... Tap the [Address Book] key. Tap a one-touch key of contact or group that includes the fax destination. The destinations displayed on the list can be narrowed with categories, job types, indexes, and keywords.
- Page 539 USER'S MANUAL | MX-M365N/MX-M465N/MX-M565N USER'S ... http://siica.sharpusa.com/portals/0/downloads/Manuals/MX-M365N-M... To retrieve a destination by using a search number, tap the [Call Search Number] key on the action panel. USING A SEARCH NUMBER TO RETRIEVE A DESTINATION To retrieve a destination from a global address book, tap the [Global Address Search] key on the action panel.
- Page 540 USER'S MANUAL | MX-M365N/MX-M465N/MX-M565N USER'S ... http://siica.sharpusa.com/portals/0/downloads/Manuals/MX-M365N-M... THE SELECTED DESTINATIONS Overview When multiple destinations have been selected, you can display and check the destinations. You can also delete a destination (cancel selection of the destination) if necessary. Operation Tap the [Confirm Address] key on the action panel.
- Page 541 USER'S MANUAL | MX-M365N/MX-M465N/MX-M565N USER'S ... http://siica.sharpusa.com/portals/0/downloads/Manuals/MX-M365N-M... USING A SEARCH NUMBER TO RETRIEVE A DESTINATION The search number can be used to specify a destination stored in an address book. Tap the [Call Search Number] key. Enter a search number (4 digits) using the numeric keys and tap When the search number is entered, the stored address is retrieved and specified as a destination.
- Page 542 USER'S MANUAL | MX-M365N/MX-M465N/MX-M565N USER'S ... http://siica.sharpusa.com/portals/0/downloads/Manuals/MX-M365N-M... RETRIEVING A DESTINATION NUMBER FROM A GLOBAL ADDRESS BOOK Overview If an LDAP server is configured in the setting mode (Web version), you can search for the desired destination in the global address book and obtain the fax number when performing a fax transmission.
- Page 543 USER'S MANUAL | MX-M365N/MX-M465N/MX-M565N USER'S ... http://siica.sharpusa.com/portals/0/downloads/Manuals/MX-M365N-M... of [Item], and select an item to be searched from [Name] or [Address/Number]. How to search Enter the search characters (maximum of 64 characters). The system will look for names starting with the entered letters.
- Page 544 USER'S MANUAL | MX-M365N/MX-M465N/MX-M565N USER'S ... http://siica.sharpusa.com/portals/0/downloads/Manuals/MX-M365N-M... USING A TRANSMISSION LOG TO RESEND Overview Select a destination from a transmission log and resend the data. The destinations of the most recent 50 transmissions by fax, Scan to E-mail, and/or Internet fax are stored. One of these can be selected to resend to that destination. The destinations of the FTP/Desktop transmission and Scan to Network Folder are also shown in the transmission log.
- Page 545 USER'S MANUAL | MX-M365N/MX-M465N/MX-M565N USER'S ... http://siica.sharpusa.com/portals/0/downloads/Manuals/MX-M365N-M... To cancel the resend setting: Tap the highlighted key. When you select the destination and tap the [Register New Address in Address Book], the destination can be stored in the address book. This is convenient if you have entered a destination directly.
- Page 546 USER'S MANUAL | MX-M365N/MX-M465N/MX-M565N USER'S ... http://siica.sharpusa.com/portals/0/downloads/Manuals/MX-M365N-M... SENDING BY CHAIN DIALING Number sequences entered using the numeric keys and/or one-touch keys can be linked together with pauses and dialed as a single number. For example when dialing an international number, tap the [Pause] key between the identification number of an international telephone service company (e.g., "001") and the...
- Page 547 USER'S MANUAL | MX-M365N/MX-M465N/MX-M565N USER'S ... http://siica.sharpusa.com/portals/0/downloads/Manuals/MX-M365N-M... FAX TRANSMISSION METHODS The methods that can be used to send a fax from the machine are described below. Select the method that best suits your needs. To fax a large number of sheet originals:...
- Page 548 USER'S MANUAL | MX-M365N/MX-M465N/MX-M565N USER'S ... http://siica.sharpusa.com/portals/0/downloads/Manuals/MX-M365N-M... will stop. When the transmission is finished, the scanned original pages are cleared from memory. However, when the document filing function is used, the transmitted fax is stored. QUICK FILE FILE You can also send a fax by placing originals in both the automatic document feeder and on the document glass.
- Page 549 USER'S MANUAL | MX-M365N/MX-M465N/MX-M565N USER'S ... http://siica.sharpusa.com/portals/0/downloads/Manuals/MX-M365N-M... Place the original on the document glass. USING THE DOCUMENT GLASS FOR TRANSMISSION Quick On Line Sending is not available when a fax is being sent from the document glass. When the document glass is used, multiple original pages cannot be scanned at a time.
- Page 550 USER'S MANUAL | MX-M365N/MX-M465N/MX-M565N USER'S ... http://siica.sharpusa.com/portals/0/downloads/Manuals/MX-M365N-M... When transmission in direct transmission mode ends, the mode automatically changes back to memory transmission mode. In direct transmission mode, the [Preview] key cannot be used for transmission. 550 of 1441 3/17/2016 7:14 AM...
- Page 551 USER'S MANUAL | MX-M365N/MX-M465N/MX-M565N USER'S ... http://siica.sharpusa.com/portals/0/downloads/Manuals/MX-M365N-M... ORIGINAL PLACEMENT ORIENTATION When an 8-1/2" x 11" (A4) original is placed in vertical orientation ( ), the image is automatically rotated 90 degrees and transmitted in horizontal orientation ( ) (Rotation Sending).
- Page 552 USER'S MANUAL | MX-M365N/MX-M465N/MX-M565N USER'S ... http://siica.sharpusa.com/portals/0/downloads/Manuals/MX-M365N-M... AUTOMATIC REDUCTION OF THE TRANSMITTED IMAGE If the width of the transmitted image is larger than the width of the paper in the receiving machine, the image will be automatically reduced to fit the receiving machine's paper width.
- Page 553 USER'S MANUAL | MX-M365N/MX-M465N/MX-M565N USER'S ... http://siica.sharpusa.com/portals/0/downloads/Manuals/MX-M365N-M... TRANSMITTABLE ORIGINAL SIZES The following original sizes can be transmitted Minimum original size Maximum original size Using the automatic document f 5-1/8" (height) x 5-1/2" (wid 11-5/8" (height) x 39-3/8" (wi eeder...
- Page 554 USER'S MANUAL | MX-M365N/MX-M465N/MX-M565N USER'S ... http://siica.sharpusa.com/portals/0/downloads/Manuals/MX-M365N-M... THE SIZE OF THE PLACED ORIGINAL When a standard size original is placed, the original size is automatically detected and displayed in "Scan Size" in the base screen. SPECIFYING THE ORIGINAL SCAN SIZE IN PAPER SIZE...
- Page 555 USER'S MANUAL | MX-M365N/MX-M465N/MX-M565N USER'S ... http://siica.sharpusa.com/portals/0/downloads/Manuals/MX-M365N-M... A3, A4, A4R, A5, B4, B5, B5R AB-2 A3, A4, A4R, A5, B5, B5R, 8-1/2" x 11", 11" x 17", A3, A4, A4R, A 216 mm x 330 mm (8-1/2" x13") 5, B4, B5, B5R, 8-1/2" x 13" (216 mm x...
- Page 556 USER'S MANUAL | MX-M365N/MX-M465N/MX-M565N USER'S ... http://siica.sharpusa.com/portals/0/downloads/Manuals/MX-M365N-M... WHEN THE LINE IS BUSY If the line is busy when you send a fax, transmission will be attempted again automatically after a preset interval. This function only operates in memory transmission mode. In direct transmission mode or manual transmission mode, the transmission will be canceled.
- Page 557 USER'S MANUAL | MX-M365N/MX-M465N/MX-M565N USER'S ... http://siica.sharpusa.com/portals/0/downloads/Manuals/MX-M365N-M... WHEN A COMMUNICATION ERROR OCCURS If a communication error occurs or the other fax machine does not answer the call within a preset period of time, transmission will automatically be attempted again after a preset interval This function only operates in memory transmission mode.
- Page 558 USER'S MANUAL | MX-M365N/MX-M465N/MX-M565N USER'S ... http://siica.sharpusa.com/portals/0/downloads/Manuals/MX-M365N-M... FAX DEST. CONFIRMATION MODE This mode displays a destination confirmation message when a fax is sent to prevent accidental transmission to the wrong destination. Set it in setting mode. If a fax is sent while this function is enabled, an address confirmation message will appear when the [Start] key is tapped.
- Page 559 USER'S MANUAL | MX-M365N/MX-M465N/MX-M565N USER'S ... http://siica.sharpusa.com/portals/0/downloads/Manuals/MX-M365N-M... recently sent to] key, or [Global Address Search] key Tap the [Start] key to display the confirmation message. Tap the [OK] key, re-enter the destination using the numeric keys, and tap the [Send Confirmation] key.
- Page 560 USER'S MANUAL | MX-M365N/MX-M465N/MX-M565N USER'S ... http://siica.sharpusa.com/portals/0/downloads/Manuals/MX-M365N-M... CHECKING THE IMAGE TO BE TRANSMITTED Check the image that will be sent in the touch panel before transmission. If you tap the [Preview] key before scanning the original, you can check the status of the scanned image in the preview screen.
- Page 561 USER'S MANUAL | MX-M365N/MX-M465N/MX-M565N USER'S ... http://siica.sharpusa.com/portals/0/downloads/Manuals/MX-M365N-M... USING THE AUTOMATIC DOCUMENT FEEDER FOR TRANSMISSION Overview Storing scanned originals in machine's memory before transmitting them is called "Memory TX". This section explains how to scan the original through the automatic document feeder and send the data by the memory transmission function.
- Page 562 USER'S MANUAL | MX-M365N/MX-M465N/MX-M565N USER'S ... http://siica.sharpusa.com/portals/0/downloads/Manuals/MX-M365N-M... THE SELECTED DESTINATIONS USING A SEARCH NUMBER TO RETRIEVE A DESTINATION RETRIEVING A DESTINATION NUMBER FROM A GLOBAL ADDRESS BOOK USING A TRANSMISSION LOG TO RESEND SENDING BY CHAIN DIALING Tap the [Start] key to begin transmission.
- Page 563 USER'S MANUAL | MX-M365N/MX-M465N/MX-M565N USER'S ... http://siica.sharpusa.com/portals/0/downloads/Manuals/MX-M365N-M... USING THE AUTOMATIC DOCUMENT FEEDER FOR FAXING IN DIRECT TX MODE Overview Sending a scanned original without saving it in the machine's memory is called "Direct TX". This section explains how to scan the original through the automatic document feeder and directly send it.
- Page 564 USER'S MANUAL | MX-M365N/MX-M465N/MX-M565N USER'S ... http://siica.sharpusa.com/portals/0/downloads/Manuals/MX-M365N-M... Specify the destination fax number. ENTERING A DESTINATION NUMBER USING THE NUMERIC KEYS RETRIEVING A DESTINATION NUMBER FROM AN ADDRESS BOOK THE SELECTED DESTINATIONS USING A SEARCH NUMBER TO RETRIEVE A DESTINATION RETRIEVING A DESTINATION NUMBER FROM A GLOBAL ADDRESS...
- Page 565 USER'S MANUAL | MX-M365N/MX-M465N/MX-M565N USER'S ... http://siica.sharpusa.com/portals/0/downloads/Manuals/MX-M365N-M... USING THE DOCUMENT GLASS FOR TRANSMISSION Overview Storing scanned originals in machine's memory before transmitting them is called "Memory TX". This section explains how to scan the original placed on the document glass and send the data by the memory transmission function.
- Page 566 USER'S MANUAL | MX-M365N/MX-M465N/MX-M565N USER'S ... http://siica.sharpusa.com/portals/0/downloads/Manuals/MX-M365N-M... USING A SEARCH NUMBER TO RETRIEVE A DESTINATION RETRIEVING A DESTINATION NUMBER FROM A GLOBAL ADDRESS BOOK USING A TRANSMISSION LOG TO RESEND SENDING BY CHAIN DIALING If you have another page to scan, change pages and then tap the [Start] key.
- Page 567 USER'S MANUAL | MX-M365N/MX-M465N/MX-M565N USER'S ... http://siica.sharpusa.com/portals/0/downloads/Manuals/MX-M365N-M... scanning automatically ends and the transmission is reserved. The [Change Setting] key can be tapped, if necessary, to change the exposure, resolution, scan size, and send size for each original page scanned. However, when "2in1"...
- Page 568 USER'S MANUAL | MX-M365N/MX-M465N/MX-M565N USER'S ... http://siica.sharpusa.com/portals/0/downloads/Manuals/MX-M365N-M... USING THE DOCUMENT GLASS TO SEND A FAX IN DIRECT TX MODE Overview Sending a scanned original without saving it in the machine's memory is called "Direct TX". This section explains how to scan the original placed on the document glass and directly send data.
- Page 569 USER'S MANUAL | MX-M365N/MX-M465N/MX-M565N USER'S ... http://siica.sharpusa.com/portals/0/downloads/Manuals/MX-M365N-M... Place the original on the document glass. DOCUMENT GLASS When faxing a multi-page original, scan each page in order starting from the first page. Specify the destination fax number, and tap the [Send Directly] key on the action panel.
- Page 570 USER'S MANUAL | MX-M365N/MX-M465N/MX-M565N USER'S ... http://siica.sharpusa.com/portals/0/downloads/Manuals/MX-M365N-M... finished. When the previous transmission is completed, the direct transmission will begin. While the direct transmission is waiting, you can only check the job status. JOB STATUS SCREEN To cancel scanning the original: Tap the [Cancel Scan] key.
- Page 571 USER'S MANUAL | MX-M365N/MX-M465N/MX-M565N USER'S ... http://siica.sharpusa.com/portals/0/downloads/Manuals/MX-M365N-M... TRANSMISSION USING THE SPEAKER Overview When the speaker is used to dial, the fax is sent after the number is dialed and the connection is established. If a person answers, you will be able to hear his or her voice, but you will not be able to speak.
- Page 572 USER'S MANUAL | MX-M365N/MX-M465N/MX-M565N USER'S ... http://siica.sharpusa.com/portals/0/downloads/Manuals/MX-M365N-M... Volume] key or use key to adjust the volume of the speaker. Specify the destination fax number. ENTERING A DESTINATION NUMBER USING THE NUMERIC KEYS RETRIEVING A DESTINATION NUMBER FROM AN ADDRESS BOOK...
- Page 573 USER'S MANUAL | MX-M365N/MX-M465N/MX-M565N USER'S ... http://siica.sharpusa.com/portals/0/downloads/Manuals/MX-M365N-M... SENDING THE SAME FAX TO MULTIPLE DESTINATIONS (BROADCAST TRANSMISSION) Overview You can send a fax to multiple destinations in a single operation when, for example, sending a report to branch offices in different regions. This function is called "Broadcasting".
- Page 574 USER'S MANUAL | MX-M365N/MX-M465N/MX-M565N USER'S ... http://siica.sharpusa.com/portals/0/downloads/Manuals/MX-M365N-M... Broadcast transmission is available only for memory transmission. If this function is combined with "Timer Transmission", broadcast transmission can be performed at any time, such as at night. A broadcast transmission can also be used in combination with other convenient functions.
- Page 575 USER'S MANUAL | MX-M365N/MX-M465N/MX-M565N USER'S ... http://siica.sharpusa.com/portals/0/downloads/Manuals/MX-M365N-M... destination using the numeric keys, tap before entering the next destination. can be omitted before or after a destination entered using a one-touch key. However, if "Be sure to press Next Address Key ( ) before selecting the next address"...
- Page 576 USER'S MANUAL | MX-M365N/MX-M465N/MX-M565N USER'S ... http://siica.sharpusa.com/portals/0/downloads/Manuals/MX-M365N-M... [Read-End] key. A beep will sound to indicate that scanning and transmission have ended. 576 of 1441 3/17/2016 7:14 AM...
- Page 577 USER'S MANUAL | MX-M365N/MX-M465N/MX-M565N USER'S ... http://siica.sharpusa.com/portals/0/downloads/Manuals/MX-M365N-M... RESENDING TO UNSUCCESSFUL BROADCAST TRANSMISSION DESTINATIONS Overview The results of a completed broadcast transmission can be checked in the job status screen. If transmission to any of the destinations failed, resend the fax to those destinations.
- Page 578 USER'S MANUAL | MX-M365N/MX-M465N/MX-M565N USER'S ... http://siica.sharpusa.com/portals/0/downloads/Manuals/MX-M365N-M... After tapping the [Sending Failed] tab, tap the [Resending to all unsuccessful transmission destinations] key on the action panel to resend the image. The steps to follow after the [Resending to all unsuccessful transmission destinations] key is tapped differ depending on whether or not the document filing function is used.
- Page 579 USER'S MANUAL | MX-M365N/MX-M465N/MX-M565N USER'S ... http://siica.sharpusa.com/portals/0/downloads/Manuals/MX-M365N-M... SENDING A FAX DIRECTLY FROM A COMPUTER (PC-Fax) A file on a computer can be sent via the machine as a fax (PC-Fax function). Faxes are sent using the PC-Fax function in the same way that documents are printed. Select the PC-Fax driver as the printer driver for your computer and then select the Print command in the application.
- Page 580 USER'S MANUAL | MX-M365N/MX-M465N/MX-M565N USER'S ... http://siica.sharpusa.com/portals/0/downloads/Manuals/MX-M365N-M... AUTOMATICALLY SCANNING BOTH SIDES OF AN ORIGINAL (2-SIDED ORIGINAL) Overview The automatic document feeder will automatically scan both sides of the document. 2-sided scanning automatically turns off after transmission has ended. 2-sided scanning is not possible when direct transmission or speaker transmission is performed.
- Page 581 USER'S MANUAL | MX-M365N/MX-M465N/MX-M565N USER'S ... http://siica.sharpusa.com/portals/0/downloads/Manuals/MX-M365N-M... Tap the [Image Orientation] key with the same orientation as the placed original. If this setting is not correct, a suitable image may not be transmitted. After the settings are completed, tap To cancel 2-sided scanning: Tap the [2-sided original type Tablet] key or the [2-sided original type Book] key that has been forcibly displayed and cancel the display.
- Page 582 USER'S MANUAL | MX-M365N/MX-M465N/MX-M565N USER'S ... http://siica.sharpusa.com/portals/0/downloads/Manuals/MX-M365N-M... AUTO DETECTION When the original is placed, its size is automatically detected. The size of the placed original is indicated as the "Scan Size", and the size to be transmitted is indicated as the "Send size" in the base screen.
- Page 583 USER'S MANUAL | MX-M365N/MX-M465N/MX-M565N USER'S ... http://siica.sharpusa.com/portals/0/downloads/Manuals/MX-M365N-M... SPECIFYING THE ORIGINAL SCAN SIZE IN PAPER SIZE Overview When the original size is not standard (inch size or non-standard size) or is not detected correctly, manually specify the original size. When [Long Size] is selected, the 2-sided scanning setting and send size cannot be changed.
- Page 584 USER'S MANUAL | MX-M365N/MX-M465N/MX-M565N USER'S ... http://siica.sharpusa.com/portals/0/downloads/Manuals/MX-M365N-M... If you are sending a long original, tap the [Long Size] key. Use the automatic document feeder to scan a long original. The maximum width that can be scanned is 39-3/8" (1,000 mm) (the maximum height is 11-5/8" (297 mm)).
- Page 585 USER'S MANUAL | MX-M365N/MX-M465N/MX-M565N USER'S ... http://siica.sharpusa.com/portals/0/downloads/Manuals/MX-M365N-M... SPECIFYING THE ORIGINAL SCAN SIZE USING NUMERIC VALUES Overview When scanning a non-standard size original such as a postcard, specify the original size by numeric values after placing the original. The width can be from 1" to 17" (25 mm to 432 mm), and the height can be from 1"...
- Page 586 USER'S MANUAL | MX-M365N/MX-M465N/MX-M565N USER'S ... http://siica.sharpusa.com/portals/0/downloads/Manuals/MX-M365N-M... Tap the [OK] key. After the settings are completed, tap twice. On the base screen, check that the specified size is displayed on the [Original] key. To cancel the specified size settings: Tap the [Auto] key.
- Page 587 USER'S MANUAL | MX-M365N/MX-M465N/MX-M565N USER'S ... http://siica.sharpusa.com/portals/0/downloads/Manuals/MX-M365N-M... SPECIFYING THE SEND SIZE OF THE IMAGE Overview Tap this key to specify the send size as a paper size. If the specified send size is larger than the scan size, the image will be enlarged. If the specified send size is smaller than the scan size, the image will be reduced.
- Page 588 USER'S MANUAL | MX-M365N/MX-M465N/MX-M565N USER'S ... http://siica.sharpusa.com/portals/0/downloads/Manuals/MX-M365N-M... Tap the "Image Orientation" key with the same orientation as the original image. If this setting is not correct, a suitable image may not be transmitted. After the settings are completed, tap To configure the default setting of image orientation, select [System Settings] in "Setting mode", then [Image Send Settings] →...
- Page 589 USER'S MANUAL | MX-M365N/MX-M465N/MX-M565N USER'S ... http://siica.sharpusa.com/portals/0/downloads/Manuals/MX-M365N-M... CHANGING THE EXPOSURE Overview The exposure can be changed to suit the darkness of the original. When using the automatic document feeder, the exposure setting cannot be changed once scanning has begun. (However, when "Job Build" or "Preview Setting" in "Others"...
- Page 590 USER'S MANUAL | MX-M365N/MX-M465N/MX-M565N USER'S ... http://siica.sharpusa.com/portals/0/downloads/Manuals/MX-M365N-M... 590 of 1441 3/17/2016 7:14 AM...
- Page 591 USER'S MANUAL | MX-M365N/MX-M465N/MX-M565N USER'S ... http://siica.sharpusa.com/portals/0/downloads/Manuals/MX-M365N-M... CHANGING THE RESOLUTION Overview The resolution can be specified to match the characteristics of the original, such as text or photo, the size of the text, and the darkness of the image. Resolution settings...
- Page 592 USER'S MANUAL | MX-M365N/MX-M465N/MX-M565N USER'S ... http://siica.sharpusa.com/portals/0/downloads/Manuals/MX-M365N-M... Tap the [Resolution] key. Tap the key of the desired resolution. When your original is a photograph or has gradations of color (such as a color original), and you wish to produce a clearer image than [Fine], [Super Fine], or [Ultra Fine] used alone, set the [Half Tone] checkbox to Halftone cannot be selected when [Standard] is used.
- Page 593 USER'S MANUAL | MX-M365N/MX-M465N/MX-M565N USER'S ... http://siica.sharpusa.com/portals/0/downloads/Manuals/MX-M365N-M... RECEIVING A FAX AUTOMATICALLY Overview When the reception mode is set to "Auto Reception", the machine will receive and print faxes automatically. When fax reception is in progress, it is possible to reserve a transmission by performing the transmission in memory transmission mode.
- Page 594 USER'S MANUAL | MX-M365N/MX-M465N/MX-M565N USER'S ... http://siica.sharpusa.com/portals/0/downloads/Manuals/MX-M365N-M... The machine rings and fax reception begins automatically. A beep sounds when reception ends. The faxes are printed automatically. If a password entry screen appears: A password is registered to print the received fax data. When the correct password is entered, the received fax is printed.
- Page 595 USER'S MANUAL | MX-M365N/MX-M465N/MX-M565N USER'S ... http://siica.sharpusa.com/portals/0/downloads/Manuals/MX-M365N-M... RECEIVING A FAX MANUALLY Overview A fax can be received manually using the touch panel (manually). When answering the telephone by tapping the [Speaker] key, you will be able to hear the voice of the caller, but you will not be able to speak.
- Page 596 USER'S MANUAL | MX-M365N/MX-M465N/MX-M565N USER'S ... http://siica.sharpusa.com/portals/0/downloads/Manuals/MX-M365N-M... Tap the [Manual Reception] key to receive a fax. 596 of 1441 3/17/2016 7:14 AM...
- Page 597 USER'S MANUAL | MX-M365N/MX-M465N/MX-M565N USER'S ... http://siica.sharpusa.com/portals/0/downloads/Manuals/MX-M365N-M... PRINTING A PASSWORD-PROTECTED (HOLD SETTING FOR RECEIVED DATA PRINT) Enable this setting to have faxes received and stored in memory without being printed. To print the faxes, a password must be entered. When this function is used, a password entry screen appears in the touch panel when a fax is received.
- Page 598 USER'S MANUAL | MX-M365N/MX-M465N/MX-M565N USER'S ... http://siica.sharpusa.com/portals/0/downloads/Manuals/MX-M365N-M... When the received data is transferred to other machine, data stored in memory is also transferred. At that time, the same password entry screen will appear as for printing. Forwarding will not take place unless the password is entered.
- Page 599 USER'S MANUAL | MX-M365N/MX-M465N/MX-M565N USER'S ... http://siica.sharpusa.com/portals/0/downloads/Manuals/MX-M365N-M... PRINTING RECEIVED DATA AT A SPECIFIED TIME You can start printing the received data at a specified time. For stress-free printing, you should avoid printing large numbers of pages at peak times during the day, and when you do not urgently need to print.
- Page 600 USER'S MANUAL | MX-M365N/MX-M465N/MX-M565N USER'S ... http://siica.sharpusa.com/portals/0/downloads/Manuals/MX-M365N-M... If Hold Setting for Received Data Print is enabled, this function is not available. To print received data at the specified time: In "Setting mode", select [System Settings] → [Image Send Settings] → [Operation Settings] →...
- Page 601 USER'S MANUAL | MX-M365N/MX-M465N/MX-M565N USER'S ... http://siica.sharpusa.com/portals/0/downloads/Manuals/MX-M365N-M... CHECKING THE IMAGE BEFORE PRINTING Overview Check the image of received data on the touch panel before printing. This function is available when [System Settings] → [Operation Settings] → [Preview Setting] → [Received Data Image Check Setting] is enabled in "Setting mode".
- Page 602 USER'S MANUAL | MX-M365N/MX-M465N/MX-M565N USER'S ... http://siica.sharpusa.com/portals/0/downloads/Manuals/MX-M365N-M... The received data is listed. You can also display the received data list by tapping the job status display and tapping the [Check Received Data] key on the action panel of Job Status screen.
- Page 603 USER'S MANUAL | MX-M365N/MX-M465N/MX-M565N USER'S ... http://siica.sharpusa.com/portals/0/downloads/Manuals/MX-M365N-M... SAVING RECEIVED DATA To store the sender fax number as a number for "Allow/Reject Number Setting", tap the [Store to Unwanted Fax] key and, in the confirmation message screen, tap the [Store] key.
- Page 604 USER'S MANUAL | MX-M365N/MX-M465N/MX-M565N USER'S ... http://siica.sharpusa.com/portals/0/downloads/Manuals/MX-M365N-M... To delete the entire received data file, tap [Delete] on the Action Panel. 604 of 1441 3/17/2016 7:14 AM...
- Page 605 USER'S MANUAL | MX-M365N/MX-M465N/MX-M565N USER'S ... http://siica.sharpusa.com/portals/0/downloads/Manuals/MX-M365N-M... FORWARDING RECEIVED FAXES (FAX DATA FORWARD) Overview When the machine cannot print because it is out of paper or out of toner, received faxes can be forwarded to another previously stored fax machine.
- Page 606 USER'S MANUAL | MX-M365N/MX-M465N/MX-M565N USER'S ... http://siica.sharpusa.com/portals/0/downloads/Manuals/MX-M365N-M... Tap the [Fax Settings] key. Tap the [Execute] key in [Forward Received Data] to begin forwarding. If a password entry screen appears, the "Hold Setting for Received Data Print" has been enabled. Enter the password using the numeric keys to begin forwarding.
- Page 607 USER'S MANUAL | MX-M365N/MX-M465N/MX-M565N USER'S ... http://siica.sharpusa.com/portals/0/downloads/Manuals/MX-M365N-M... FORWARDING RECEIVED DATA TO PRESET DESTINATIONS (INBOUND ROUTING SETTINGS) Overview You can have received faxes automatically forwarded to a fax address, Internet fax address, e-mail address, file server address, desktop address, or network folder address.
- Page 608 USER'S MANUAL | MX-M365N/MX-M465N/MX-M565N USER'S ... http://siica.sharpusa.com/portals/0/downloads/Manuals/MX-M365N-M... This function cannot be used for faxes received by confidential reception. When faxes forwarded using this function are printed at the forwarding destination, the date and time of reception cannot be printed on the faxes.
- Page 609 USER'S MANUAL | MX-M365N/MX-M465N/MX-M565N USER'S ... http://siica.sharpusa.com/portals/0/downloads/Manuals/MX-M365N-M... error box of forwarding received data] key on the action panel * To perform this operation, the user must have [Access to Fax Data] permission. Click [Sender Number/Address Registration] in the [Inbound Routing Settings] menu in the "Setting mode".
- Page 610 USER'S MANUAL | MX-M365N/MX-M465N/MX-M565N USER'S ... http://siica.sharpusa.com/portals/0/downloads/Manuals/MX-M365N-M... Select [Forward to All Forward Destinations] or [Forward based on the Conditions of Forward Destination 1-3]. Select the sender whose faxes will be forwarded. To forward all received data, select [Forward All Received Data].
- Page 611 USER'S MANUAL | MX-M365N/MX-M465N/MX-M565N USER'S ... http://siica.sharpusa.com/portals/0/downloads/Manuals/MX-M365N-M... If the Internet fax address is selected as a recipient, data is forwarded in TIFF regardless of the specified format. If a fax number is selected as a recipient, the file format is ignored.
- Page 612 USER'S MANUAL | MX-M365N/MX-M465N/MX-M565N USER'S ... http://siica.sharpusa.com/portals/0/downloads/Manuals/MX-M365N-M... forwarding table. The forwarding permission settings that appear here are linked to the forwarding conditions set in step 10. If you wish to use different forwarding conditions than those set in step 10, set the forwarding permission settings.
- Page 613 USER'S MANUAL | MX-M365N/MX-M465N/MX-M565N USER'S ... http://siica.sharpusa.com/portals/0/downloads/Manuals/MX-M365N-M... SAVING RECEIVED FAXES TO THE MACHINE'S HARD DISK (INBOUND ROUTING) Received faxes can be saved to the machine's hard disk. Saved faxes can be viewed on a computer. Set PDF, TIFF (multi) or TIFF (signal) for the saved faxes. You can also receive notification of the storage result or storage folder by E-mail.
- Page 614 USER'S MANUAL | MX-M365N/MX-M465N/MX-M565N USER'S ... http://siica.sharpusa.com/portals/0/downloads/Manuals/MX-M365N-M... Settings]. (Administrator rights required.) Data that can be saved are received faxes and received Internet faxes. Confidential reception and polling reception faxes cannot be saved. Depending on the setting, received faxes that cannot be saved because of the file number limit or other reason are either printed or saved in the inbound routing error box.
- Page 615 USER'S MANUAL | MX-M365N/MX-M465N/MX-M565N USER'S ... http://siica.sharpusa.com/portals/0/downloads/Manuals/MX-M365N-M... FORWARDING RECEIVED DATA MANUALLY Overview Received faxes can be forwarded manually after receipt. This function is available when [System Settings] → [Operation Settings] → [Preview Setting] → [Received Data Image Check Setting] is enabled in "Setting mode".
- Page 616 USER'S MANUAL | MX-M365N/MX-M465N/MX-M565N USER'S ... http://siica.sharpusa.com/portals/0/downloads/Manuals/MX-M365N-M... When you select a single received data only, you can tap the [Check Image] key on the action panel and check the image on the preview screen. To store the sender fax number as a number for "Allow/Reject Number Setting", tap the [Store to Unwanted Fax] key and, in the confirmation message screen, tap the [Store] key.
- Page 617 USER'S MANUAL | MX-M365N/MX-M465N/MX-M565N USER'S ... http://siica.sharpusa.com/portals/0/downloads/Manuals/MX-M365N-M... SAVING RECEIVED DATA Overview You can save received faxes in the document filing folder. This function is available when [System Settings] → [Operation Settings] → [Preview Setting] → [Received Data Image Check Setting] is enabled in "Setting mode".
- Page 618 USER'S MANUAL | MX-M365N/MX-M465N/MX-M565N USER'S ... http://siica.sharpusa.com/portals/0/downloads/Manuals/MX-M365N-M... Tap the key of the received data you wish to save, and tap the [File] key on the action panel to show a list of received data. The list view or thumbnails view can be changed depending on the setting mode.
- Page 619 USER'S MANUAL | MX-M365N/MX-M465N/MX-M565N USER'S ... http://siica.sharpusa.com/portals/0/downloads/Manuals/MX-M365N-M... STORING FAX OPERATIONS (PROGRAM) Overview This function collectively stores various settings as one program. The stored program can be retrieved using an easy operation. For example, suppose that the same 8-1/2" x 11" (A4) size documents are distributed to branch offices in various regions once a month.
- Page 620 USER'S MANUAL | MX-M365N/MX-M465N/MX-M565N USER'S ... http://siica.sharpusa.com/portals/0/downloads/Manuals/MX-M365N-M... n selecting the settings. to the stored settings so there are no chances for mistakes. To configure a program: Tap the [Store Program - Set Current Store] key that appears on the action panel when you operate any mode screens.
- Page 621 USER'S MANUAL | MX-M365N/MX-M465N/MX-M565N USER'S ... http://siica.sharpusa.com/portals/0/downloads/Manuals/MX-M365N-M... Configure additional settings. For the called program, additionally configure the following settings: Image settings: Original scan size Send size Others: Timer Transmission, Card Shot, File, Quick File, Own Name Select, Transaction Report Some settings cannot be added depending on the contents of the called program.
- Page 622 USER'S MANUAL | MX-M365N/MX-M465N/MX-M565N USER'S ... http://siica.sharpusa.com/portals/0/downloads/Manuals/MX-M365N-M... SENDING TWO PAGES AS A SINGLE PAGE (Multi Shot) Overview Reduce two original pages to the equal size and sent them as a single page. This function is convenient when you have a large number of original pages and wish to reduce the number of pages sent.
- Page 623 USER'S MANUAL | MX-M365N/MX-M465N/MX-M565N USER'S ... http://siica.sharpusa.com/portals/0/downloads/Manuals/MX-M365N-M... Place the original. Place the original in the document feeder tray of the automatic document feeder, or on the document glass. AUTOMATIC DOCUMENT FEEDER DOCUMENT GLASS Enter the destination fax number. ENTERING A DESTINATION NUMBER USING THE NUMERIC KEYS...
- Page 624 USER'S MANUAL | MX-M365N/MX-M465N/MX-M565N USER'S ... http://siica.sharpusa.com/portals/0/downloads/Manuals/MX-M365N-M... Tap the [Start] key to start scanning of the original. If you inserted the original pages in the document feeder tray, all pages are scanned. A beep will sound to indicate that scanning and transmission have ended.
- Page 625 USER'S MANUAL | MX-M365N/MX-M465N/MX-M565N USER'S ... http://siica.sharpusa.com/portals/0/downloads/Manuals/MX-M365N-M... SENDING BOTH SIDES OF A CARD AS A SINGLE PAGE (CARD SHOT) Overview Send the front and reverse sides of a card as a single page, without the need to send each side separately.
- Page 626 USER'S MANUAL | MX-M365N/MX-M465N/MX-M565N USER'S ... http://siica.sharpusa.com/portals/0/downloads/Manuals/MX-M365N-M... DOCUMENT GLASS Enter the destination fax number. ENTERING A DESTINATION NUMBER USING THE NUMERIC KEYS RETRIEVING A DESTINATION NUMBER FROM AN ADDRESS BOOK THE SELECTED DESTINATIONS USING A SEARCH NUMBER TO RETRIEVE A DESTINATION...
- Page 627 USER'S MANUAL | MX-M365N/MX-M465N/MX-M565N USER'S ... http://siica.sharpusa.com/portals/0/downloads/Manuals/MX-M365N-M... To enlarge or reduce the images to fit the paper based on the entered original size, set the [Fit to Send Size] checkbox to After selecting Card Shot, tap the [Original] key in the base screen to change the original scan size or the send size.
- Page 628 USER'S MANUAL | MX-M365N/MX-M465N/MX-M565N USER'S ... http://siica.sharpusa.com/portals/0/downloads/Manuals/MX-M365N-M... Tap the [Read-End] key. If you will continue by scanning the front of the card, you can tap the [Change Setting] key to change the exposure, resolution, scan size, and send size. 628 of 1441...
- Page 629 USER'S MANUAL | MX-M365N/MX-M465N/MX-M565N USER'S ... http://siica.sharpusa.com/portals/0/downloads/Manuals/MX-M365N-M... SENDING A LARGE NUMBER OF PAGES (JOB BUILD) Overview This function lets you separate an original consisting of numerous pages into sets, scan each set using the automatic document feeder, and transmit the pages in a single transmission.
- Page 630 USER'S MANUAL | MX-M365N/MX-M465N/MX-M565N USER'S ... http://siica.sharpusa.com/portals/0/downloads/Manuals/MX-M365N-M... Place the original in the document feeder tray of the automatic document feeder. Multiple originals can be placed in the document feeder tray. The stack of originals must not be higher than the indicator line on the tray.
- Page 631 USER'S MANUAL | MX-M365N/MX-M465N/MX-M565N USER'S ... http://siica.sharpusa.com/portals/0/downloads/Manuals/MX-M365N-M... Tap the [Preview] key to check the preview of an image before sending a fax. For more information, see "CHECKING THE IMAGE TO BE TRANSMITTED". Place the next set of originals and tap the [Additionally Scan] key.
- Page 632 USER'S MANUAL | MX-M365N/MX-M465N/MX-M565N USER'S ... http://siica.sharpusa.com/portals/0/downloads/Manuals/MX-M365N-M... SENDING ORIGINALS OF DIFFERENT SIZES (MIXED SIZE ORIGINAL) Overview This feature lets you scan and transmit originals of different sizes at the same time; for example, 8-1/2" x 14" (B4) size originals mixed together with 11" x 17" (A3) size originals.
- Page 633 USER'S MANUAL | MX-M365N/MX-M465N/MX-M565N USER'S ... http://siica.sharpusa.com/portals/0/downloads/Manuals/MX-M365N-M... Place originals in the automatic document feeder. Insert the originals with the corners aligned together in the far left corner of the document feeder tray. AUTOMATIC DOCUMENT FEEDER Enter the destination fax number.
- Page 634 USER'S MANUAL | MX-M365N/MX-M465N/MX-M565N USER'S ... http://siica.sharpusa.com/portals/0/downloads/Manuals/MX-M365N-M... next original. Tap the [Start] key to start sending an image. For more information, see "CHECKING THE IMAGE TO BE TRANSMITTED". However, settings for this function cannot be changed in the preview screen.
- Page 635 USER'S MANUAL | MX-M365N/MX-M465N/MX-M565N USER'S ... http://siica.sharpusa.com/portals/0/downloads/Manuals/MX-M365N-M... SENDING AN ORIGINAL AS TWO SEPARATE PAGES (DUAL PAGE SCAN) Overview The left and right sides of an original can be transmitted as two separate pages. This function is useful when you wish to fax the left and right pages of a book or other bound document as separate pages.
- Page 636 USER'S MANUAL | MX-M365N/MX-M465N/MX-M565N USER'S ... http://siica.sharpusa.com/portals/0/downloads/Manuals/MX-M365N-M... Align the center of the original with the appropriate size mark Enter the destination fax number. ENTERING A DESTINATION NUMBER USING THE NUMERIC KEYS RETRIEVING A DESTINATION NUMBER FROM AN ADDRESS BOOK THE SELECTED DESTINATIONS...
- Page 637 USER'S MANUAL | MX-M365N/MX-M465N/MX-M565N USER'S ... http://siica.sharpusa.com/portals/0/downloads/Manuals/MX-M365N-M... To cancel the Dual Page Scan setting: Tap the [Dual Page Scan] key to clear the checkmark. Tap the [Start] key to start scanning of the original. Tap the [Preview] key to check the preview of an image before sending a fax. For more information, see "CHECKING THE IMAGE TO BE...
- Page 638 USER'S MANUAL | MX-M365N/MX-M465N/MX-M565N USER'S ... http://siica.sharpusa.com/portals/0/downloads/Manuals/MX-M365N-M... SPLITTING A PAMPHLET BY PAGE AND TRANSMITTING THE PAGES SUCCESSIVELY (BOOK DIVIDE) Overview The opened pages of a saddle-stitch pamphlet are split by page according to actual page order. When using this function, you do not need to sort the original pages to be sent.
- Page 639 USER'S MANUAL | MX-M365N/MX-M465N/MX-M565N USER'S ... http://siica.sharpusa.com/portals/0/downloads/Manuals/MX-M365N-M... USING A SEARCH NUMBER TO RETRIEVE A DESTINATION RETRIEVING A DESTINATION NUMBER FROM A GLOBAL ADDRESS BOOK USING A TRANSMISSION LOG TO RESEND SENDING BY CHAIN DIALING Tap the [Others] key, and tap the [Book Divide] key.
- Page 640 USER'S MANUAL | MX-M365N/MX-M465N/MX-M565N USER'S ... http://siica.sharpusa.com/portals/0/downloads/Manuals/MX-M365N-M... ERASING PERIPHERAL SHADOWS ON THE IMAGE (ERASE) Overview The erase function is used to erase shadows on images produced when scanning thick originals or books. This function erases the parts of the image where shadows tend to form, but does not detect shadows and erase only the shadows.
- Page 641 USER'S MANUAL | MX-M365N/MX-M465N/MX-M565N USER'S ... http://siica.sharpusa.com/portals/0/downloads/Manuals/MX-M365N-M... If a ratio setting is used in combination with an erase setting, the erase width will change according to the selected ratio. This function erases the parts of the image where shadows tend to form, but does not detect shadows and erase only the shadows.
- Page 642 USER'S MANUAL | MX-M365N/MX-M465N/MX-M565N USER'S ... http://siica.sharpusa.com/portals/0/downloads/Manuals/MX-M365N-M... BOOK USING A TRANSMISSION LOG TO RESEND SENDING BY CHAIN DIALING Tap the [Others] key, and tap the [Erase] key. Tap the checkbox of the edge that you wish to erase, and specify the erase position.
- Page 643 USER'S MANUAL | MX-M365N/MX-M465N/MX-M565N USER'S ... http://siica.sharpusa.com/portals/0/downloads/Manuals/MX-M365N-M... To quickly set the area, first specify a value close to the desired value by the numeric keys, then adjust it with After the settings are completed, tap , and [Back] keys in sequence.
- Page 644 USER'S MANUAL | MX-M365N/MX-M465N/MX-M565N USER'S ... http://siica.sharpusa.com/portals/0/downloads/Manuals/MX-M365N-M... SENDING A THIN ORIGINAL (SLOW SCAN MODE) Overview Use this function when you wish to scan thin originals using the automatic document feeder. This function helps prevent thin originals from misfeeding. When slow scan mode is selected, 2-sided scanning is not possible.
- Page 645 USER'S MANUAL | MX-M365N/MX-M465N/MX-M565N USER'S ... http://siica.sharpusa.com/portals/0/downloads/Manuals/MX-M365N-M... ENTERING A DESTINATION NUMBER USING THE NUMERIC KEYS RETRIEVING A DESTINATION NUMBER FROM AN ADDRESS BOOK THE SELECTED DESTINATIONS USING A SEARCH NUMBER TO RETRIEVE A DESTINATION RETRIEVING A DESTINATION NUMBER FROM A GLOBAL ADDRESS...
- Page 646 USER'S MANUAL | MX-M365N/MX-M465N/MX-M565N USER'S ... http://siica.sharpusa.com/portals/0/downloads/Manuals/MX-M365N-M... CHECKING THE NUMBER OF SCANNED ORIGINAL SHEETS BEFORE TRANSMISSION (ORIGINAL COUNT) Overview Count the number of scanned original sheets and display the count before transmission. Checking the number of scanned original sheets before transmission helps prevent transmission mistakes.
- Page 647 USER'S MANUAL | MX-M365N/MX-M465N/MX-M565N USER'S ... http://siica.sharpusa.com/portals/0/downloads/Manuals/MX-M365N-M... To cancel the Original Count setting: Tap the [Original Count] key to clear the checkmark. Tap the [Start] key to start scanning of the original. Tap the [Preview] key to preview the output image before sending a fax. After you have scanned an original by tapping the [Preview] key, tap the [Additional Scan] key to scan the next original.
- Page 648 USER'S MANUAL | MX-M365N/MX-M465N/MX-M565N USER'S ... http://siica.sharpusa.com/portals/0/downloads/Manuals/MX-M365N-M... [Read-End] key has been tapped. If the displayed number of original sheets is different from the actual number of sheets: Tap the [Cancel] key and then tap the [OK] key in the message screen to clear all scanned data.
- Page 649 USER'S MANUAL | MX-M365N/MX-M465N/MX-M565N USER'S ... http://siica.sharpusa.com/portals/0/downloads/Manuals/MX-M365N-M... STAMPING SCANNED ORIGINALS (VERIFICATION STAMP) Overview This function stamps each original that is scanned using the automatic document feeder, allowing you to verify that all originals were correctly scanned. To use the verification stamp function, the optional stamp unit must be installed.
- Page 650 USER'S MANUAL | MX-M365N/MX-M465N/MX-M565N USER'S ... http://siica.sharpusa.com/portals/0/downloads/Manuals/MX-M365N-M... THE SELECTED DESTINATIONS USING A SEARCH NUMBER TO RETRIEVE A DESTINATION RETRIEVING A DESTINATION NUMBER FROM A GLOBAL ADDRESS BOOK USING A TRANSMISSION LOG TO RESEND SENDING BY CHAIN DIALING Tap the [Others] key, and tap the [Verification Stamp] key.
- Page 651 USER'S MANUAL | MX-M365N/MX-M465N/MX-M565N USER'S ... http://siica.sharpusa.com/portals/0/downloads/Manuals/MX-M365N-M... CALLING A FAX MACHINE AND INITIATING RECEPTION (POLLING) Overview When you connect to another machine and receive a document from it, this is called "Polling". The document reception from another machine is called "Polling Reception".
- Page 652 USER'S MANUAL | MX-M365N/MX-M465N/MX-M565N USER'S ... http://siica.sharpusa.com/portals/0/downloads/Manuals/MX-M365N-M... night or when you are not present. (Only one timer polling reception can be set.) Operation Tap the [Others] key, and tap the [Polling] key. A checkmark appears on the icon. After the settings are completed, tap the [Back] key.
- Page 653 USER'S MANUAL | MX-M365N/MX-M465N/MX-M565N USER'S ... http://siica.sharpusa.com/portals/0/downloads/Manuals/MX-M365N-M... used. Tap the [Start] key to initiate fax reception. Your machine will call the other machine and initiate reception of the fax. 653 of 1441 3/17/2016 7:14 AM...
- Page 654 USER'S MANUAL | MX-M365N/MX-M465N/MX-M565N USER'S ... http://siica.sharpusa.com/portals/0/downloads/Manuals/MX-M365N-M... INITIATING POLLING RECEPTION MANUALLY Overview Use the manual polling reception when you must start polling after listening to a recorded greeting, such as when using a fax information service. Make sure there is no original in the machine when using the polling reception function.
- Page 655 USER'S MANUAL | MX-M365N/MX-M465N/MX-M565N USER'S ... http://siica.sharpusa.com/portals/0/downloads/Manuals/MX-M365N-M... one-touch key for which an address other than fax number is stored cannot be used. After tapping the [Speaker] key, you can tap the [Speaker Volume] key to adjust the volume of the speaker.
- Page 656 USER'S MANUAL | MX-M365N/MX-M465N/MX-M565N USER'S ... http://siica.sharpusa.com/portals/0/downloads/Manuals/MX-M365N-M... ADDING YOUR SENDER INFORMATION TO FAXES (FAX OWN NUMBER SENDING) Your sender information (date, time, sender name, sender fax number or destination name, number of pages) is automatically added to the top of each fax page you transmit.
- Page 657 USER'S MANUAL | MX-M365N/MX-M465N/MX-M565N USER'S ... http://siica.sharpusa.com/portals/0/downloads/Manuals/MX-M365N-M... If you intend to use own number sending, be sure to configure this information. To add the number of pages to be transmitted: In "Setting mode", select [System Settings] → [Image Send Settings] → [Fax] →...
- Page 658 USER'S MANUAL | MX-M365N/MX-M465N/MX-M565N USER'S ... http://siica.sharpusa.com/portals/0/downloads/Manuals/MX-M365N-M... TEMPORARILY CHANGING THE SENDER INFORMATION (OWN NAME SELECT) Overview You can temporarily change sender information to be used in the own number sending by selecting from data stored separately. The function is released when the transmission with the changed sender information ends.
- Page 659 USER'S MANUAL | MX-M365N/MX-M465N/MX-M565N USER'S ... http://siica.sharpusa.com/portals/0/downloads/Manuals/MX-M365N-M... Tap the [Others] key, and tap the [Own Name Select] key. Tap the sender information key to specify the sender information used for own number sending. After the settings are completed, tap To cancel the sender information settings: Tap the [Clear] key.
- Page 660 USER'S MANUAL | MX-M365N/MX-M465N/MX-M565N USER'S ... http://siica.sharpusa.com/portals/0/downloads/Manuals/MX-M365N-M... For more information, see "CHECKING THE IMAGE TO BE TRANSMITTED". 660 of 1441 3/17/2016 7:14 AM...
- Page 661 USER'S MANUAL | MX-M365N/MX-M465N/MX-M565N USER'S ... http://siica.sharpusa.com/portals/0/downloads/Manuals/MX-M365N-M... SPECIFYING THE TIME FOR COMMUNICATION (TIMER) Overview Specify a time at which a transmission or broadcast transmission will automatically take place. Transmission begins automatically at the specified time. This function is helpful when you wish to perform reserved, broadcast or other transmissions during your absence or at night or other times when telephone rates are low.
- Page 662 USER'S MANUAL | MX-M365N/MX-M465N/MX-M565N USER'S ... http://siica.sharpusa.com/portals/0/downloads/Manuals/MX-M365N-M... operation will begin after that transmission is finished. Only one timer polling operation can be stored at once. To receive data from multiple destinations by polling, specify Timer for serial polling. Settings selected for a timer transmission (exposure, resolution, other functions, etc.) are automatically cleared after the transmission is finished.
- Page 663 USER'S MANUAL | MX-M365N/MX-M465N/MX-M565N USER'S ... http://siica.sharpusa.com/portals/0/downloads/Manuals/MX-M365N-M... Tap the [Others] key, and tap the [Timer] key. Tap the [On] key. Specify the date. Specify the time (hour and minute) in 24-hour format. Tap the areas displaying the hour and minute respectively, and enter the values using the numeric keys.
- Page 664 USER'S MANUAL | MX-M365N/MX-M465N/MX-M565N USER'S ... http://siica.sharpusa.com/portals/0/downloads/Manuals/MX-M365N-M... If you inserted the original pages in the document feeder tray, all pages are scanned. A beep will sound to indicate that scanning has ended, and the machine stands by for transmission. If you placed the original on the document glass, scan each page one at a time.
- Page 665 USER'S MANUAL | MX-M365N/MX-M465N/MX-M565N USER'S ... http://siica.sharpusa.com/portals/0/downloads/Manuals/MX-M365N-M... CHANGING THE PRINT SETTINGS FOR THE TRANSACTION REPORT (TRANSACTION REPORT) Overview A transaction report is automatically printed out to alert you when a transmission fails or when a broadcast transmission is performed. The transaction report contains a description of the transmission (date, start time, name of other party, time required, number of pages, result, etc.).
- Page 666 USER'S MANUAL | MX-M365N/MX-M465N/MX-M565N USER'S ... http://siica.sharpusa.com/portals/0/downloads/Manuals/MX-M365N-M... Enter the destination fax number. ENTERING A DESTINATION NUMBER USING THE NUMERIC KEYS RETRIEVING A DESTINATION NUMBER FROM AN ADDRESS BOOK THE SELECTED DESTINATIONS USING A SEARCH NUMBER TO RETRIEVE A DESTINATION RETRIEVING A DESTINATION NUMBER FROM A GLOBAL ADDRESS...
- Page 667 USER'S MANUAL | MX-M365N/MX-M465N/MX-M565N USER'S ... http://siica.sharpusa.com/portals/0/downloads/Manuals/MX-M365N-M... "Always Print": A transaction report is printed no matter whether the transmission succeeds or fails. "Print at Error": A transaction report is printed when transmission fails. "Do not Print": Do not print a transaction report.
- Page 668 USER'S MANUAL | MX-M365N/MX-M465N/MX-M565N USER'S ... http://siica.sharpusa.com/portals/0/downloads/Manuals/MX-M365N-M... SENDING A FAX WHEN ANOTHER MACHINE POLLS YOUR MACHINE (POLLING MEMORY) Sending a document that has been scanned into memory when another machine polls your machine is called "Polling Memory". Prior to polling, the document that will be faxed to the other machine must be scanned into a polling memory box.
- Page 669 USER'S MANUAL | MX-M365N/MX-M465N/MX-M565N USER'S ... http://siica.sharpusa.com/portals/0/downloads/Manuals/MX-M365N-M... RESTRICTING POLLING ACCESS (POLLING SECURITY SETTING) The following explains "Polling Security Setting", a feature restricting other machines that can use polling memory. When a machine requests fax transmission, you can only allow the machine to use polling memory if its programmed sender fax number matches a fax number stored in your machine as a polling passcode number.
- Page 670 USER'S MANUAL | MX-M365N/MX-M465N/MX-M565N USER'S ... http://siica.sharpusa.com/portals/0/downloads/Manuals/MX-M365N-M... SCANNING A DOCUMENT INTO POLLING MEMORY Overview Follow these steps to scan a document into the memory box for polling transmission (Public Box). If another document remains in the memory box (Public Box), the newly scanned document is added to the previous document.
- Page 671 USER'S MANUAL | MX-M365N/MX-M465N/MX-M565N USER'S ... http://siica.sharpusa.com/portals/0/downloads/Manuals/MX-M365N-M... Tap the [Polling Memory] tab. Tap the [Public Box] key from the folder list. Tap the [Change Number of Times] key on the action panel. Tap the [Once] key or [Unlimited] key to specify the number of times.
- Page 672 USER'S MANUAL | MX-M365N/MX-M465N/MX-M565N USER'S ... http://siica.sharpusa.com/portals/0/downloads/Manuals/MX-M365N-M... CHECKING THE DOCUMENT IN THE PUBLIC Overview You can check the document stored in the machine's memory box (public box) for memory polling. To perform this operation, the user must have [Access to Fax Data] permission.
- Page 673 USER'S MANUAL | MX-M365N/MX-M465N/MX-M565N USER'S ... http://siica.sharpusa.com/portals/0/downloads/Manuals/MX-M365N-M... DELETING A DOCUMENT FROM THE PUBLIC Overview Delete a document from the memory box (public box) when it is no longer required. To perform this operation, the user must have [Access to Fax Data] permission.
- Page 674 USER'S MANUAL | MX-M365N/MX-M465N/MX-M565N USER'S ... http://siica.sharpusa.com/portals/0/downloads/Manuals/MX-M365N-M... To cancel deleting the document: Tap the [No] key. 674 of 1441 3/17/2016 7:14 AM...
- Page 675 USER'S MANUAL | MX-M365N/MX-M465N/MX-M565N USER'S ... http://siica.sharpusa.com/portals/0/downloads/Manuals/MX-M365N-M... F-CODE COMMUNICATION This function allows the machine to communicate with other machines that also support F-code. It enables exchange of confidential documents (confidential communication), retrieval (polling) and distribution (polling memory) of information, distribution of information to multiple destinations (relay broadcast transmission) with other machines that support F-code communication.
- Page 676 USER'S MANUAL | MX-M365N/MX-M465N/MX-M565N USER'S ... http://siica.sharpusa.com/portals/0/downloads/Manuals/MX-M365N-M... the receiving machine, reception will not take place. The products of other manufacturers may use different terms for "sub-address" and "passcode". If you need to contact the operator of another machine regarding sub-addresses and passcodes, refer to the terms used by the ITU-T in the table below.
- Page 677 USER'S MANUAL | MX-M365N/MX-M465N/MX-M565N USER'S ... http://siica.sharpusa.com/portals/0/downloads/Manuals/MX-M365N-M... CREATING MEMORY BOXES IN THE MACHINE FOR F-CODE COMMUNICATION Before the F-code communication function can be used, special memory boxes must be created in "Setting mode". Set the box name and F-code (sub-address and passcode) in each memory box, and store them.
- Page 678 USER'S MANUAL | MX-M365N/MX-M465N/MX-M565N USER'S ... http://siica.sharpusa.com/portals/0/downloads/Manuals/MX-M365N-M... F-CODE DIALING When performing an F-code operation, the F-code (sub-address and passcode) is appended to the fax number that is dialed. Check the F-code (sub-address and passcode) stored in the memory box in the other machine before you perform an F-code transmission.
- Page 679 USER'S MANUAL | MX-M365N/MX-M465N/MX-M565N USER'S ... http://siica.sharpusa.com/portals/0/downloads/Manuals/MX-M365N-M... F-CODE CONFIDENTIAL TRANSMISSION By sending a fax to an F-code memory box (confidential) stored in the receiving machine (your machine or the other machine), the sender can direct the transmission specifically to the user of the box.
- Page 680 USER'S MANUAL | MX-M365N/MX-M465N/MX-M565N USER'S ... http://siica.sharpusa.com/portals/0/downloads/Manuals/MX-M365N-M... CONFIDENTIAL TRANSMISSION USING F-CODES Overview Send a fax to a destination fax number after adding the F-code (sub-address and passcode). If necessary, the F-code confidential transmission can be used in combination with a broadcast transmission or timer transmission.
- Page 681 USER'S MANUAL | MX-M365N/MX-M465N/MX-M565N USER'S ... http://siica.sharpusa.com/portals/0/downloads/Manuals/MX-M365N-M... If the sub-address and passcode are already registered, you can select a one-touch key as well. If the passcode is omitted for the memory box of destination machine, you can skip Steps (4) and (5).
- Page 682 There is no way to use the machine to check a print passcode that has been specified. Exercise care not to forget the passcode. Should you forget or need to verify the passcode, contact your dealer or nearest SHARP Service Department. Operation The machine rings and the fax is received.
- Page 683 USER'S MANUAL | MX-M365N/MX-M465N/MX-M565N USER'S ... http://siica.sharpusa.com/portals/0/downloads/Manuals/MX-M365N-M... action panel. Tap the key of the memory box containing the confidential fax. " " appears in the keys of memory boxes that have received faxes. The keys of memory boxes that have not received faxes are grayed out and cannot be tapped.
- Page 684 USER'S MANUAL | MX-M365N/MX-M465N/MX-M565N USER'S ... http://siica.sharpusa.com/portals/0/downloads/Manuals/MX-M365N-M... 684 of 1441 3/17/2016 7:14 AM...
- Page 685 USER'S MANUAL | MX-M365N/MX-M465N/MX-M565N USER'S ... http://siica.sharpusa.com/portals/0/downloads/Manuals/MX-M365N-M... POLLING RECEPTION USING F-CODES Overview This function enables your machine to call another machine and initiate reception of a fax stored in an F-code memory box (polling memory) in the other machine. During the polling operation, your machine must correctly specify the F-code (sub-address and passcode) configured in the other machine.
- Page 686 USER'S MANUAL | MX-M365N/MX-M465N/MX-M565N USER'S ... http://siica.sharpusa.com/portals/0/downloads/Manuals/MX-M365N-M... Polling multiple machines (serial polling) is not possible. Make sure there is no original in the machine when using the F-code for the polling reception function. The polling reception using the F-code cannot be registered as a "favorite" item.
- Page 687 USER'S MANUAL | MX-M365N/MX-M465N/MX-M565N USER'S ... http://siica.sharpusa.com/portals/0/downloads/Manuals/MX-M365N-M... Tap the [Start] key. Your machine will call the other machine and initiate reception of the fax. 687 of 1441 3/17/2016 7:14 AM...
- Page 688 USER'S MANUAL | MX-M365N/MX-M465N/MX-M565N USER'S ... http://siica.sharpusa.com/portals/0/downloads/Manuals/MX-M365N-M... SCANNING A DOCUMENT INTO A MEMORY BOX FOR F-CODE POLLING TRANSMISSION Overview When your machine receives a transmission request from another machine, this function sends a fax stored in an F-code memory box (polling memory) in your machine to that machine.
- Page 689 USER'S MANUAL | MX-M365N/MX-M465N/MX-M565N USER'S ... http://siica.sharpusa.com/portals/0/downloads/Manuals/MX-M365N-M... In "Setting mode", select [System Settings] → [F-Code Memory Box]. Operation Place the original. Place the original in the document feeder tray of the automatic document feeder, or on the document glass. AUTOMATIC DOCUMENT FEEDER DOCUMENT GLASS Tap the [Others] key, and tap the [Memory Box] key.
- Page 690 USER'S MANUAL | MX-M365N/MX-M465N/MX-M565N USER'S ... http://siica.sharpusa.com/portals/0/downloads/Manuals/MX-M365N-M... have scanned an original by tapping the [Preview] key, tap the [Additional Scan] key to scan the next original. Tap the [Start] key to start sending an image. For more information, see "CHECKING THE IMAGE TO BE TRANSMITTED".
- Page 691 USER'S MANUAL | MX-M365N/MX-M465N/MX-M565N USER'S ... http://siica.sharpusa.com/portals/0/downloads/Manuals/MX-M365N-M... CHECKING THE DOCUMENT IN THE F-CODE MEMORY POLLING BOX Overview You can check the document stored in the F-code memory polling box. A document in a memory box cannot be printed while the document is being transmitted.
- Page 692 USER'S MANUAL | MX-M365N/MX-M465N/MX-M565N USER'S ... http://siica.sharpusa.com/portals/0/downloads/Manuals/MX-M365N-M... DELETING A DOCUMENT STORED FOR F-CODE POLLING TRANSMISSION Overview Delete the document stored in an F-code memory polling box in order to be able to store a new document. A document in a memory box cannot be deleted while the document is being transmitted.
- Page 693 USER'S MANUAL | MX-M365N/MX-M465N/MX-M565N USER'S ... http://siica.sharpusa.com/portals/0/downloads/Manuals/MX-M365N-M... Tap the [No] key. 693 of 1441 3/17/2016 7:14 AM...
- Page 694 USER'S MANUAL | MX-M365N/MX-M465N/MX-M565N USER'S ... http://siica.sharpusa.com/portals/0/downloads/Manuals/MX-M365N-M... RELAY REQUEST TRANSMISSION USING F-CODES Overview This function sends a fax to an F-code relay broadcast memory box in another machine and have that machine relay the fax to multiple destination machines. When the destination machines are far from your machine, sending the fax to a relay machine that is close to the destination machines can help reduce telephone charges.
- Page 695 USER'S MANUAL | MX-M365N/MX-M465N/MX-M565N USER'S ... http://siica.sharpusa.com/portals/0/downloads/Manuals/MX-M365N-M... It is not necessary for the destination machines to support F-code communication. Your machine (the machine that requests a relay broadcast transmission) only bears the cost of sending the fax to the relay machine. The relay machine bears the cost of sending the fax to each of the destination machines.
- Page 696 USER'S MANUAL | MX-M365N/MX-M465N/MX-M565N USER'S ... http://siica.sharpusa.com/portals/0/downloads/Manuals/MX-M365N-M... If the sub-address and passcode are stored in the one-touch key, it is not necessary to take steps 3 to 5. Go to step 6. Tap the [Sub Address] key. Enter "/". Enter the sub-address using the numeric keys.
- Page 697 USER'S MANUAL | MX-M365N/MX-M465N/MX-M565N USER'S ... http://siica.sharpusa.com/portals/0/downloads/Manuals/MX-M365N-M... RELAY BROADCAST TRANSMISSION USING F-CODES When your machine receives an F-code relay request transmission, the fax is received and stored in an F-code relay broadcast memory box in your machine. Your machine then relays the fax to each of the destination machines programmed in the memory box.
- Page 698 USER'S MANUAL | MX-M365N/MX-M465N/MX-M565N USER'S ... http://siica.sharpusa.com/portals/0/downloads/Manuals/MX-M365N-M... Prior to carrying out the operation, inform the requesting party, who you will communicate with using F-code relay request transmission, of the sub-address and passcode of the F-code relay broadcast memory box in your machine Program the destination machines in the F-code relay broadcast memory box when you create the box in your machine.
- Page 699 USER'S MANUAL | MX-M365N/MX-M465N/MX-M565N USER'S ... http://siica.sharpusa.com/portals/0/downloads/Manuals/MX-M365N-M... CONNECTING AN EXTENSION TELEPHONE You can connect an existing telephone to the machine. The telephone can be used for voice calls and to start fax reception on the machine. Connect the extension telephone as shown below. As an example, you can make a phone call using the existing phone, speak to the other party, and then press the [START] key to fax an original that has been placed to that party.
- Page 700 USER'S MANUAL | MX-M365N/MX-M465N/MX-M565N USER'S ... http://siica.sharpusa.com/portals/0/downloads/Manuals/MX-M365N-M... RECEIVING A FAX AFTER ANSWERING A CALL ON THE EXTENSION TELEPHONE (REMOTE RECEPTION) Overview Follow the steps below if you need to start fax reception after answering a call and speaking on the extension telephone.
- Page 701 USER'S MANUAL | MX-M365N/MX-M465N/MX-M565N USER'S ... http://siica.sharpusa.com/portals/0/downloads/Manuals/MX-M365N-M... Replace the receiver. The machine beeps when reception ends. 701 of 1441 3/17/2016 7:14 AM...
- Page 702 USER'S MANUAL | MX-M365N/MX-M465N/MX-M565N USER'S ... http://siica.sharpusa.com/portals/0/downloads/Manuals/MX-M365N-M... FAX JOBS When you tap the job status display, jobs are displayed in a list. To confirm the fax job status, tap the mode display and select the fax. When you wish to stop or delete jobs or to perform priority processing, see the following...
- Page 703 USER'S MANUAL | MX-M365N/MX-M465N/MX-M565N USER'S ... http://siica.sharpusa.com/portals/0/downloads/Manuals/MX-M365N-M... COMPLETED FAX TRANSMISSION/RECEPTION JOBS A usual transmission job moves to the job list when transmission is completed. Then the status field displays "Send OK". However, received faxes, timer transmission faxes, retries, fax forwarding, and other fax jobs are displayed in the job status screen as follows: Fax reception jobs When a fax is being received, the status field displays "Receiving"...
- Page 704 USER'S MANUAL | MX-M365N/MX-M465N/MX-M565N USER'S ... http://siica.sharpusa.com/portals/0/downloads/Manuals/MX-M365N-M... reception is completed, the status changes to "Waiting". Received Internet fax is printed When reception is completed, the status field displays "In Memory" in the completed job list. After the fax is printed, the status changes to "Received". Then a job is added for which the status field displays "Waiting"...
- Page 705 USER'S MANUAL | MX-M365N/MX-M465N/MX-M565N USER'S ... http://siica.sharpusa.com/portals/0/downloads/Manuals/MX-M365N-M... PRINTING IMAGE SENDING ACTIVITY REPORTS You can have the machine print a log of recent image sending activity (date, name of other party, time required, result, etc.). The Image Sending Activity Report contains useful information such as the types of errors that occurred.
- Page 706 USER'S MANUAL | MX-M365N/MX-M465N/MX-M565N USER'S ... http://siica.sharpusa.com/portals/0/downloads/Manuals/MX-M365N-M... INFORMATION APPEARING IN THE RESULT COLUMN Error types and other information are printed in the result column of transaction and activity reports. When a transaction or activity report is printed, check the result of the transaction in the result column and take action as needed.
- Page 707 USER'S MANUAL | MX-M365N/MX-M465N/MX-M565N USER'S ... http://siica.sharpusa.com/portals/0/downloads/Manuals/MX-M365N-M... onnection when polled because no data was in memory. NO F-CODE POLL The other machine refused an F-code polling operation, or your machine brok e the connection when polled because no data was in its F-code memory polli ng box.
- Page 708 USER'S MANUAL | MX-M365N/MX-M465N/MX-M565N USER'S ... http://siica.sharpusa.com/portals/0/downloads/Manuals/MX-M365N-M... USES OF THE NETWORK SCANNER The network scanner allows you to create an image file from the original data scanned by the machine, and send the file over a network to a PC, FTP server, or other destinations. If necessary, it scans the original using a TWAIN-compliant application on your PC.
- Page 709 USER'S MANUAL | MX-M365N/MX-M465N/MX-M565N USER'S ... http://siica.sharpusa.com/portals/0/downloads/Manuals/MX-M365N-M... Internet fax mode The scanned file is sent as an Internet fax. Internet faxes are received if necessary. The machine supports Direct SMTP, which lets you directly send Internet faxes within your company without using a mail server.
- Page 710 USER'S MANUAL | MX-M365N/MX-M465N/MX-M565N USER'S ... http://siica.sharpusa.com/portals/0/downloads/Manuals/MX-M365N-M... BEFORE USING THE NETWORK SCANNER To use the machine as a network scanner, you must store sender information, configure server settings, store destinations in the address book, and perform other required operations. Make sure the main power switch is in the "...
- Page 711 USER'S MANUAL | MX-M365N/MX-M465N/MX-M565N USER'S ... http://siica.sharpusa.com/portals/0/downloads/Manuals/MX-M365N-M... Settings] to disable the [Disabling of Clock Adjustment] setting. Storing sender information Before using Scan to E-mail Store a default sender name in "Sender Name" and a reply e-mail address in "Reply E-mail Address". These will be used in the case when a sender is not selected.
- Page 712 USER'S MANUAL | MX-M365N/MX-M465N/MX-M565N USER'S ... http://siica.sharpusa.com/portals/0/downloads/Manuals/MX-M365N-M... Storing destination addresses for each scan mode in the address book You can send an image by directly entering an address when using Scan to Image. It is convenient to previously store addresses in the address book.
- Page 713 USER'S MANUAL | MX-M365N/MX-M465N/MX-M565N USER'S ... http://siica.sharpusa.com/portals/0/downloads/Manuals/MX-M365N-M... STORING DESTINATIONS FOR SCAN TO DESKTOP To store your computer in the machine as a destination for Scan to Desktop, Network Scanner Tool must be installed from the "Sharpdesk/Network Scanner Utilities" CD-ROM that accompanies the machine.
- Page 714 USER'S MANUAL | MX-M365N/MX-M465N/MX-M565N USER'S ... http://siica.sharpusa.com/portals/0/downloads/Manuals/MX-M365N-M... BEFORE SENDING TO A DIRECT SMTP ADDRESS The machine supports Direct SMTP, which lets you directly send Internet faxes within your company without using a mail server. For the procedure for storing the Direct SMTP address in the address book, see "STORING...
- Page 715 USER'S MANUAL | MX-M365N/MX-M465N/MX-M565N USER'S ... http://siica.sharpusa.com/portals/0/downloads/Manuals/MX-M365N-M... To set the number of recall attempts and the interval between attempts when a transmission fails due to an error: In "Setting mode", select [System Settings] → [Image Send Settings] → [Internet Fax Settings] →...
- Page 716 USER'S MANUAL | MX-M365N/MX-M465N/MX-M565N USER'S ... http://siica.sharpusa.com/portals/0/downloads/Manuals/MX-M365N-M... SELECTING NETWORK SCANNER MODE You can select the network scanner mode from the Home Screen or from each operation mode as follows: Operation Changing modes from the Home Screen Tap the icon indicating the network scanner mode Tap one of [E-mail], [FTP/Desktop], [Network Folder], and [Internet Fax].
- Page 717 USER'S MANUAL | MX-M365N/MX-M465N/MX-M565N USER'S ... http://siica.sharpusa.com/portals/0/downloads/Manuals/MX-M365N-M... BASE SCREEN OF EACH MODE This section explains the keys on a base screen, taking as an example the E-mail base screen. Several methods are available in the Image Send mode, including Scan to E-mail and Scan to FTP.
- Page 718 USER'S MANUAL | MX-M365N/MX-M465N/MX-M565N USER'S ... http://siica.sharpusa.com/portals/0/downloads/Manuals/MX-M365N-M... IMAGE SEND SEQUENCE First, to place the machine in a desired image send mode, tap the appropriate icon in the Home screen. SELECTING NETWORK SCANNER MODE Place the original. Place the original in the document feeder tray of the automatic document feeder, or on the document glass.
- Page 719 USER'S MANUAL | MX-M365N/MX-M465N/MX-M565N USER'S ... http://siica.sharpusa.com/portals/0/downloads/Manuals/MX-M365N-M... USING A TRANSMISSION LOG TO RESEND Configure the scan settings. Specify the original scan size, exposure, file format, and other items. If necessary, you can refer to the following functions for the setting.
- Page 720 USER'S MANUAL | MX-M365N/MX-M465N/MX-M565N USER'S ... http://siica.sharpusa.com/portals/0/downloads/Manuals/MX-M365N-M... Send the original. Tap the [Start] key. You can check the preview of an image by tapping the [Preview] key. When the original is placed on the document glass: Repeat the placing original and transmission procedures until all originals have been sent.
- Page 721 USER'S MANUAL | MX-M365N/MX-M465N/MX-M565N USER'S ... http://siica.sharpusa.com/portals/0/downloads/Manuals/MX-M365N-M... TRANSMITTABLE ORIGINAL SIZES The following original sizes can be transmitted Minimum original size Maximum original size Using the automatic document f 5-1/8" (height) x 5-1/2" (wid 11-5/8" (height) x 39-3/8" (wi eeder...
- Page 722 USER'S MANUAL | MX-M365N/MX-M465N/MX-M565N USER'S ... http://siica.sharpusa.com/portals/0/downloads/Manuals/MX-M365N-M... THE SIZE OF THE PLACED ORIGINAL When a standard size original is placed, the original size is automatically detected and displayed in "Scan Size" on the base screen. SPECIFYING THE ORIGINAL SCAN SIZE IN PAPER SIZE SPECIFYING THE ORIGINAL SCAN SIZE USING NUMERIC VALUES When an original of 8-1/2"...
- Page 723 USER'S MANUAL | MX-M365N/MX-M465N/MX-M565N USER'S ... http://siica.sharpusa.com/portals/0/downloads/Manuals/MX-M365N-M... 8-1/2"x11", 8-1/2"x11"R, 5-1/2"x8-1 2" x 8-1/2", A4, A3 /2" Inch-3 11"x17", 8-1/2"x13-2/5" (216 mm x 34 11" x 17", 8-1/2" x 13-2/5" (216 mm x 0 mm), 340 mm), 8-1/2" x 11", 8-1/2" x 11"R, 8-1/2"x11", 8-1/2"x11"R, 5-1/2"x8-1...
- Page 724 USER'S MANUAL | MX-M365N/MX-M465N/MX-M565N USER'S ... http://siica.sharpusa.com/portals/0/downloads/Manuals/MX-M365N-M... RETRIEVING A DESTINATION FROM AN ADDRESS BOOK Overview In the address book screen, simply tap the one-touch key of a registered destination to retrieve the destination. If necessary, store multiple destinations in a one-touch key. Tapping the key will retrieve all the stored destinations.
- Page 725 USER'S MANUAL | MX-M365N/MX-M465N/MX-M565N USER'S ... http://siica.sharpusa.com/portals/0/downloads/Manuals/MX-M365N-M... Tap the one-touch key of contact or group that has a destination. The destinations displayed on the list can be narrowed with categories, job types, indexes, and keywords. A list can be displayed in the order of the search numbers.
- Page 726 USER'S MANUAL | MX-M365N/MX-M465N/MX-M565N USER'S ... http://siica.sharpusa.com/portals/0/downloads/Manuals/MX-M365N-M... To retrieve a destination from a global address book, tap the [Global Address Search] key on the action panel. RETRIEVING A DESTINATION FROM A GLOBAL ADDRESS BOOK To check the entered destinations, tap the [Confirm Address] key on the action panel.
- Page 727 USER'S MANUAL | MX-M365N/MX-M465N/MX-M565N USER'S ... http://siica.sharpusa.com/portals/0/downloads/Manuals/MX-M365N-M... VIEWING A LIST OF THE SELECTED DESTINATIONS Overview When multiple destinations have been selected, you can display and check the destinations. You can also delete a destination from the list (cancel selection of the destination).
- Page 728 USER'S MANUAL | MX-M365N/MX-M465N/MX-M565N USER'S ... http://siica.sharpusa.com/portals/0/downloads/Manuals/MX-M365N-M... Tap the key of the destination that you wish to cancel, and tap the [OK] key. 728 of 1441 3/17/2016 7:14 AM...
- Page 729 USER'S MANUAL | MX-M365N/MX-M465N/MX-M565N USER'S ... http://siica.sharpusa.com/portals/0/downloads/Manuals/MX-M365N-M... USING A SEARCH NUMBER TO RETRIEVE A DESTINATION Tap the [Call Search Number] key. Enter a search number (4 digits) using the numeric keys and tap When the search number is entered, the stored address is retrieved and specified as a destination.
- Page 730 USER'S MANUAL | MX-M365N/MX-M465N/MX-M565N USER'S ... http://siica.sharpusa.com/portals/0/downloads/Manuals/MX-M365N-M... ENTERING AN ADDRESS MANUALLY In the base screen of a mode, tap [Text Box] On the base screen of Internet Fax, tap [Text Box] to display the screen you want to select the address type. Tap either the [Internet Fax] or [Direct SMTP] key.
- Page 731 USER'S MANUAL | MX-M365N/MX-M465N/MX-M565N USER'S ... http://siica.sharpusa.com/portals/0/downloads/Manuals/MX-M365N-M... SPECIFYING A NETWORK FOLDER Tap the [Browse] key in the network folder entry screen. To directly enter a folder, tap the [Path Imput to Folder] key. The soft keyboard is displayed. If a user name and password are required, check with the administrator of the server and enter the user name and password.
- Page 732 USER'S MANUAL | MX-M365N/MX-M465N/MX-M565N USER'S ... http://siica.sharpusa.com/portals/0/downloads/Manuals/MX-M365N-M... Tap the key of the network folder. After the settings are completed, tap . You will return to the screen of step 1. Tap the [OK] key again to accept the destination. 732 of 1441...
- Page 733 USER'S MANUAL | MX-M365N/MX-M465N/MX-M565N USER'S ... http://siica.sharpusa.com/portals/0/downloads/Manuals/MX-M365N-M... RETRIEVING A DESTINATION FROM A GLOBAL ADDRESS BOOK Overview When an LDAP server is configured in the "Setting mode (Web version)", look up an address in a global address book and retrieve the destination address for Scan to E-mail or Internet fax transmission (excluding Direct SMTP addresses).
- Page 734 USER'S MANUAL | MX-M365N/MX-M465N/MX-M565N USER'S ... http://siica.sharpusa.com/portals/0/downloads/Manuals/MX-M365N-M... Input Keyword] to enter the initial of destination, then tap the [Start Search] key. The search results will appear after a brief interval. How to search Enter the search characters (maximum of 64 characters). The system will look for names starting with the entered letters.
- Page 735 USER'S MANUAL | MX-M365N/MX-M465N/MX-M565N USER'S ... http://siica.sharpusa.com/portals/0/downloads/Manuals/MX-M365N-M... To check the destination information: Tap the one-touch key of the target destination, and then tap the [Confirm Destination Information] key. Tap to close the address information screen. 735 of 1441 3/17/2016 7:14 AM...
- Page 736 USER'S MANUAL | MX-M365N/MX-M465N/MX-M565N USER'S ... http://siica.sharpusa.com/portals/0/downloads/Manuals/MX-M365N-M... USING A TRANSMISSION LOG TO RESEND Overview Select a destination from a transmission log and resend the data. The destinations of the most recent 50 transmissions by Scan to E-mail, Internet fax (including Direct SMTP addresses), and/or fax are stored. Select one of these to resend to that destination.
- Page 737 USER'S MANUAL | MX-M365N/MX-M465N/MX-M565N USER'S ... http://siica.sharpusa.com/portals/0/downloads/Manuals/MX-M365N-M... To cancel the resend setting: Tap the highlighted key. When you select the destination and tap the [Register New Address in Address Book], the destination can be stored in the address book. This is convenient if you have entered a destination directly.
- Page 738 USER'S MANUAL | MX-M365N/MX-M465N/MX-M565N USER'S ... http://siica.sharpusa.com/portals/0/downloads/Manuals/MX-M365N-M... SENDING AN IMAGE IN SCAN MODE Overview An image can be sent in scan mode (Scan to E-mail, Scan to FTP, Scan to Desktop, and Scan to Network Folder). If the memory becomes full while the originals are being scanned, a message will appear and scanning will stop.
- Page 739 USER'S MANUAL | MX-M365N/MX-M465N/MX-M565N USER'S ... http://siica.sharpusa.com/portals/0/downloads/Manuals/MX-M365N-M... To place a large portrait-oriented original, place it as shown in the figure titled "Landscape orientation" and specify the placement orientation in step 5. Place 5-1/2" x 8-1/2" (A5) size originals in portrait (vertical) orientation ( ).
- Page 740 USER'S MANUAL | MX-M365N/MX-M465N/MX-M565N USER'S ... http://siica.sharpusa.com/portals/0/downloads/Manuals/MX-M365N-M... When performing Scan to E-mail, you can also send Cc or Bcc copies to other destinations. Tap to select destinations. Multiple destinations can be specified. To change [Subject], [File Name], [Reply Name], or [Body Text], tap a target entry box, or tap [Options].
- Page 741 USER'S MANUAL | MX-M365N/MX-M465N/MX-M565N USER'S ... http://siica.sharpusa.com/portals/0/downloads/Manuals/MX-M365N-M... CHANGING COLOR MODE Tapping the [Others] key allows you to configure various functions, for example, collectively sending two original pages as one sheet or original pages with different sizes. Tap the [Start] key to start scanning of the original.
- Page 742 USER'S MANUAL | MX-M365N/MX-M465N/MX-M565N USER'S ... http://siica.sharpusa.com/portals/0/downloads/Manuals/MX-M365N-M... scanning automatically ends and the transmission is reserved. Tap the [Change Setting] key to change the exposure, resolution, scan size, and send size for each original page scanned. However, when "Card Shot" is selected in Others, change only the exposure when scanning an even-numbered original page.
- Page 743 USER'S MANUAL | MX-M365N/MX-M465N/MX-M565N USER'S ... http://siica.sharpusa.com/portals/0/downloads/Manuals/MX-M365N-M... CHANGING THE SUBJECT, FILE NAME, REPLY-TO, AND BODY TEXT AT THE TIME OF SCAN TRANSMISSION Overview Change the subject, file name, reply-to, and body text when performing a scan transmission. If necessary, directly enter the text.
- Page 744 USER'S MANUAL | MX-M365N/MX-M465N/MX-M565N USER'S ... http://siica.sharpusa.com/portals/0/downloads/Manuals/MX-M365N-M... Tap the [Clear] key. If you wish to directly enter the text, tap the [Direct Entry] key to open the soft keyboard. Enter the text and tap the [OK] key. To change the file name, tap the [File Name] entry box.
- Page 745 USER'S MANUAL | MX-M365N/MX-M465N/MX-M565N USER'S ... http://siica.sharpusa.com/portals/0/downloads/Manuals/MX-M365N-M... address. Selecting the [Add 'Reply to' to Cc] checkbox to adds a reply address to the Cc address. To change the body text, tap the [Body Text] entry box. Enter the body text.
- Page 746 USER'S MANUAL | MX-M365N/MX-M465N/MX-M565N USER'S ... http://siica.sharpusa.com/portals/0/downloads/Manuals/MX-M365N-M... To edit the selected line, tap the [Edit] key. The soft keyboard will appear with the selected text entered. 746 of 1441 3/17/2016 7:14 AM...
- Page 747 USER'S MANUAL | MX-M365N/MX-M465N/MX-M565N USER'S ... http://siica.sharpusa.com/portals/0/downloads/Manuals/MX-M365N-M... SENDING A FAX IN INTERNET FAX MODE Overview Transmits a fax in Internet Fax mode. This procedure can also be used to perform a direct transmission by Direct SMTP. If the memory becomes full while the originals are being scanned, a message will appear and scanning will stop.
- Page 748 USER'S MANUAL | MX-M365N/MX-M465N/MX-M565N USER'S ... http://siica.sharpusa.com/portals/0/downloads/Manuals/MX-M365N-M... Place the original. Place the original in the document feeder tray of the automatic document feeder, or on the document glass. AUTOMATIC DOCUMENT FEEDER DOCUMENT GLASS Do not place any objects under the original size detector. Closing the automatic document feeder with an object underneath may damage the original size detector plate and prevent correct detection of the document size.
- Page 749 USER'S MANUAL | MX-M365N/MX-M465N/MX-M565N USER'S ... http://siica.sharpusa.com/portals/0/downloads/Manuals/MX-M365N-M... USING A SEARCH NUMBER TO RETRIEVE A DESTINATION ENTERING AN ADDRESS MANUALLY SPECIFYING A NETWORK FOLDER RETRIEVING A DESTINATION FROM A GLOBAL ADDRESS BOOK USING A TRANSMISSION LOG TO RESEND icon appears in one-touch keys in which Internet fax addresses are stored.
- Page 750 USER'S MANUAL | MX-M365N/MX-M465N/MX-M565N USER'S ... http://siica.sharpusa.com/portals/0/downloads/Manuals/MX-M365N-M... Tap the [Start] key to start scanning of the original. Tap the [Preview] key to check the preview of an image before sending the original. If the original is placed on the document glass, the [Read-End] key appears in the touch panel.
- Page 751 USER'S MANUAL | MX-M365N/MX-M465N/MX-M565N USER'S ... http://siica.sharpusa.com/portals/0/downloads/Manuals/MX-M365N-M... exposure when scanning an even-numbered original page. 751 of 1441 3/17/2016 7:14 AM...
- Page 752 USER'S MANUAL | MX-M365N/MX-M465N/MX-M565N USER'S ... http://siica.sharpusa.com/portals/0/downloads/Manuals/MX-M365N-M... CHANGING THE SUBJECT, FILE NAME, AND BODY TEXT AT THE TIME OF INTERNET FAX TRANSMISSION Overview Change the subject, file name, and body text when performing an Internet fax transmission. If necessary, directly enter the text. Configure a file name, and other settings for an Internet fax using the Send Settings of the other functions.
- Page 753 USER'S MANUAL | MX-M365N/MX-M465N/MX-M565N USER'S ... http://siica.sharpusa.com/portals/0/downloads/Manuals/MX-M365N-M... To change the file name, tap the [File Name] entry box. After the settings are completed, tap Tap the key of the file name from the list. To directly enter the file name, tap the [Direct Entry] key.
- Page 754 USER'S MANUAL | MX-M365N/MX-M465N/MX-M565N USER'S ... http://siica.sharpusa.com/portals/0/downloads/Manuals/MX-M365N-M... Enter up to 1800 characters. (A line break counts as one character.) to select on a line basis. To edit the selected line, tap the [Edit] key. The soft keyboard will appear with the selected text entered.
- Page 755 USER'S MANUAL | MX-M365N/MX-M465N/MX-M565N USER'S ... http://siica.sharpusa.com/portals/0/downloads/Manuals/MX-M365N-M... SENDING THE SAME IMAGE TO MULTIPLE DESTINATIONS (BROADCAST TRANSMISSION) Overview Send the same scanned image to multiple scan, Internet fax, and fax mode destinations in a single operation. One operation allows you to send data to up to 500 destinations, including the reserved send jobs.
- Page 756 USER'S MANUAL | MX-M365N/MX-M465N/MX-M565N USER'S ... http://siica.sharpusa.com/portals/0/downloads/Manuals/MX-M365N-M... Mono2. If you wish to send the same image as fax to all destinations, tap the [Send Same Image as Fax Address] key on the action panel. To register destinations in a contact or group: In the base screen or address book screen, tap the [Register/Edit Address] key on the action panel, or tap the [Register/Edit Address in Address Book] icon in the home screen.
- Page 757 USER'S MANUAL | MX-M365N/MX-M465N/MX-M565N USER'S ... http://siica.sharpusa.com/portals/0/downloads/Manuals/MX-M365N-M... To switch delivery types (To/Cc/Bcc), tap If [System Settings] → [Image Send Settings] → [Operation Settings] → [Default Settings] → [Must Input Next Address Key at Broadcast Setting] is enabled in "Setting mode", tap before specifying the next destination.
- Page 758 USER'S MANUAL | MX-M365N/MX-M465N/MX-M565N USER'S ... http://siica.sharpusa.com/portals/0/downloads/Manuals/MX-M365N-M... information, see "CHECKING THE IMAGE TO BE TRANSMITTED". If you inserted the original pages in the document feeder tray, all pages are scanned. A beep will sound to indicate that scanning and transmission have ended.
- Page 759 USER'S MANUAL | MX-M365N/MX-M465N/MX-M565N USER'S ... http://siica.sharpusa.com/portals/0/downloads/Manuals/MX-M365N-M... SETTING MODES WHEN MULTIPLE TYPES OF ADDRESSES ARE INCLUDED IN A BROADCAST TRANSMISSION This section explains settings you should bear in mind if multiple types of addresses are included in a broadcast transmission.
- Page 760 USER'S MANUAL | MX-M365N/MX-M465N/MX-M565N USER'S ... http://siica.sharpusa.com/portals/0/downloads/Manuals/MX-M365N-M... This mode is available only for Fax and Internet Fax. It is linked to a mode with 2in1 an appropriate function. This mode is available for Scanner and Data entry. It is linked to a mode with a Dropout color n appropriate function.
- Page 761 USER'S MANUAL | MX-M365N/MX-M465N/MX-M565N USER'S ... http://siica.sharpusa.com/portals/0/downloads/Manuals/MX-M365N-M... RESENDING TO UNSUCCESSFUL BROADCAST TRANSMISSION DESTINATIONS Overview The results of a completed broadcast transmission can be checked in the job status screen. If transmission to any of the destinations failed, resend the image to those destinations.
- Page 762 USER'S MANUAL | MX-M365N/MX-M465N/MX-M565N USER'S ... http://siica.sharpusa.com/portals/0/downloads/Manuals/MX-M365N-M... After tapping the [Sending Failed] tab, tap the [Resending to all unsuccessful transmission destinations] key on the action panel to resend the image. The steps to follow after the [Resending to all unsuccessful transmission destinations] key is tapped differ depending on whether or not document filing is used.
- Page 763 USER'S MANUAL | MX-M365N/MX-M465N/MX-M565N USER'S ... http://siica.sharpusa.com/portals/0/downloads/Manuals/MX-M365N-M... SENDING AN INTERNET FAX FROM A PC (PC- I-FAX) A file on a computer can be sent via the machine as a fax (PC-I Fax function). Faxes are sent using the PC-I Fax function in the same way that documents are printed.
- Page 764 USER'S MANUAL | MX-M365N/MX-M465N/MX-M565N USER'S ... http://siica.sharpusa.com/portals/0/downloads/Manuals/MX-M365N-M... AUTOMATICALLY SCANNING BOTH SIDES OF AN ORIGINAL (2-SIDED ORIGINAL) Overview The automatic document feeder is used to automatically scan both sides of an original. The settings on 2-sided scanning are cleared when transmission has completed.
- Page 765 USER'S MANUAL | MX-M365N/MX-M465N/MX-M565N USER'S ... http://siica.sharpusa.com/portals/0/downloads/Manuals/MX-M365N-M... To cancel 2-sided scanning: Tap the [2-Sided original type Tablet] key or the [2-Sided original type Book] key that has been forcibly displayed and cancel the display. 765 of 1441 3/17/2016 7:14 AM...
- Page 766 USER'S MANUAL | MX-M365N/MX-M465N/MX-M565N USER'S ... http://siica.sharpusa.com/portals/0/downloads/Manuals/MX-M365N-M... SCAN SIZE AND SEND SIZE (ENLARGE/REDUCE) When the original is placed, its size is automatically detected. The size of the placed original is indicated as the scan size, and the size to be transmitted is indicated as the send size.
- Page 767 USER'S MANUAL | MX-M365N/MX-M465N/MX-M565N USER'S ... http://siica.sharpusa.com/portals/0/downloads/Manuals/MX-M365N-M... SPECIFYING THE ORIGINAL SCAN SIZE USING NUMERIC VALUES 767 of 1441 3/17/2016 7:14 AM...
- Page 768 USER'S MANUAL | MX-M365N/MX-M465N/MX-M565N USER'S ... http://siica.sharpusa.com/portals/0/downloads/Manuals/MX-M365N-M... SPECIFYING THE ORIGINAL SCAN SIZE IN PAPER SIZE Overview When the original size is not standard (inch size or non-standard size) or is not detected correctly, manually specify the original size. When [Long Size] is selected, the 2-sided scanning setting and send size cannot be changed.
- Page 769 USER'S MANUAL | MX-M365N/MX-M465N/MX-M565N USER'S ... http://siica.sharpusa.com/portals/0/downloads/Manuals/MX-M365N-M... Use the automatic document feeder to scan a long original. The maximum width that can be scanned is 39-3/8" (1,000 mm) (the maximum height is 11-5/8" (297 mm)). TRANSMITTABLE ORIGINAL SIZES 769 of 1441...
- Page 770 USER'S MANUAL | MX-M365N/MX-M465N/MX-M565N USER'S ... http://siica.sharpusa.com/portals/0/downloads/Manuals/MX-M365N-M... SPECIFYING THE ORIGINAL SCAN SIZE USING NUMERIC VALUES Overview When scanning a non-standard size original such as a card or postcard, specify the original size using numeric values after placing the original. The width can be from 1" to 17" (25 mm to 432 mm), and the height can be from 1" to 11-5/8"...
- Page 771 USER'S MANUAL | MX-M365N/MX-M465N/MX-M565N USER'S ... http://siica.sharpusa.com/portals/0/downloads/Manuals/MX-M365N-M... Tap the [Execute] key. On the base screen, check that the specified size is displayed on the [Original] key. After the settings are completed, tap twice. 771 of 1441 3/17/2016 7:14 AM...
- Page 772 USER'S MANUAL | MX-M365N/MX-M465N/MX-M565N USER'S ... http://siica.sharpusa.com/portals/0/downloads/Manuals/MX-M365N-M... SPECIFYING THE SEND SIZE OF THE IMAGE Overview Tap this key to specify the send size as a paper size. If the specified send size is larger than the scan size, the image will be enlarged. If the specified send size is smaller than the scan size, the image will be reduced.
- Page 773 USER'S MANUAL | MX-M365N/MX-M465N/MX-M565N USER'S ... http://siica.sharpusa.com/portals/0/downloads/Manuals/MX-M365N-M... Depending on the paper size specified for the "Scan Size", it may not be possible to select some sizes for the "Send Size". You cannot tap size keys that are unavailable for the "Send Size".
- Page 774 USER'S MANUAL | MX-M365N/MX-M465N/MX-M565N USER'S ... http://siica.sharpusa.com/portals/0/downloads/Manuals/MX-M365N-M... CHANGING THE EXPOSURE AND ORIGINAL IMAGE TYPE Overview Optimum scanning is ensured by selecting exposure and original image type based on the original. When using the document glass to scan multiple original pages, change the exposure setting each time you change pages.
- Page 775 USER'S MANUAL | MX-M365N/MX-M465N/MX-M565N USER'S ... http://siica.sharpusa.com/portals/0/downloads/Manuals/MX-M365N-M... Manual Text/Prtd.Pho This mode provides the best balance for scanning an original which contains both text and printed photographs, such as a magazine or catalogue. Text/Photo This mode provides the best balance for scanning an original which contains both text and photographs, such as a text document with a photo pasted on.
- Page 776 USER'S MANUAL | MX-M365N/MX-M465N/MX-M565N USER'S ... http://siica.sharpusa.com/portals/0/downloads/Manuals/MX-M365N-M... In Internet Fax Mode Tap the [Exposure] key. to adjust the exposure. After the settings are completed, tap When [Auto] is selected, the exposure will be set to "3". 776 of 1441 3/17/2016 7:14 AM...
- Page 777 USER'S MANUAL | MX-M365N/MX-M465N/MX-M565N USER'S ... http://siica.sharpusa.com/portals/0/downloads/Manuals/MX-M365N-M... CHANGING THE RESOLUTION Overview Specify the resolution setting. How to select the resolution For normal text originals, 200 x 200 dpi (200 x 100 dpi in Internet fax mode) produces an image that is sufficiently legible.
- Page 778 USER'S MANUAL | MX-M365N/MX-M465N/MX-M565N USER'S ... http://siica.sharpusa.com/portals/0/downloads/Manuals/MX-M365N-M... After the settings are completed, tap If there is a mix of destinations in different modes, tap to switch modes to set the resolution in each mode. However, FTP/Desktop and Network Folder are set to the same mode.
- Page 779 USER'S MANUAL | MX-M365N/MX-M465N/MX-M565N USER'S ... http://siica.sharpusa.com/portals/0/downloads/Manuals/MX-M365N-M... CHANGING FORMAT IN SCAN OR DATA ENTRY MODE Overview Change the file format (file type and compression mode/compression ratio) for sending a scanned image at the time of transmission. In addition, if the scanned originals are divided into separate files, the number of pages per file can be changed.
- Page 780 USER'S MANUAL | MX-M365N/MX-M465N/MX-M565N USER'S ... http://siica.sharpusa.com/portals/0/downloads/Manuals/MX-M365N-M... The file format for sending a scanned image is specified when the destination is stored in a one-touch key; however, you can change the format at the time of transmission. If [PDF/Encrypt] is specified for the file format, the password entry screen appears when scanning.
- Page 781 USER'S MANUAL | MX-M365N/MX-M465N/MX-M565N USER'S ... http://siica.sharpusa.com/portals/0/downloads/Manuals/MX-M365N-M... The format setting for [B/W] mode is the file format with the color mode set to [Mono2]. The format setting for [Color/Grayscale] mode is the file format with the color mode set to [Full Color] or [Grayscale].
- Page 782 USER'S MANUAL | MX-M365N/MX-M465N/MX-M565N USER'S ... http://siica.sharpusa.com/portals/0/downloads/Manuals/MX-M365N-M... key. [Emphasize Black Letter] in the [Color/Grayscale] tab is a file format that reduces the data size while suppressing deterioration of black text. To change the number of pages per file, set the [Specified Pages per File]...
- Page 783 USER'S MANUAL | MX-M365N/MX-M465N/MX-M565N USER'S ... http://siica.sharpusa.com/portals/0/downloads/Manuals/MX-M365N-M... CHANGING FORMAT IN INTERNET FAX MODE Overview Change the file format (file type and compression mode) for sending a scanned image in Internet Fax mode. The file format for sending an Internet fax is normally set to [TIFF-F]. If the destination Internet fax machine does not support full mode (it only supports simple mode), select [TIFF-S].
- Page 784 USER'S MANUAL | MX-M365N/MX-M465N/MX-M565N USER'S ... http://siica.sharpusa.com/portals/0/downloads/Manuals/MX-M365N-M... 784 of 1441 3/17/2016 7:14 AM...
- Page 785 USER'S MANUAL | MX-M365N/MX-M465N/MX-M565N USER'S ... http://siica.sharpusa.com/portals/0/downloads/Manuals/MX-M365N-M... CHANGING COLOR MODE Overview Change the color mode used to scan the original. Mode Scanning method Auto The machine detects whether the original is color or black and white and autom atically selects full color or black and white (Mono2 or Grayscale) scanning.
- Page 786 USER'S MANUAL | MX-M365N/MX-M465N/MX-M565N USER'S ... http://siica.sharpusa.com/portals/0/downloads/Manuals/MX-M365N-M... Tap the [Grayscale] or [Mono2] key to set the B/W mode for automatic color selection. Specify whether Mono2 or grayscale is used when scanning black and white originals. Note that if the file format is set to JPEG, scanning will take place in grayscale.
- Page 787 USER'S MANUAL | MX-M365N/MX-M465N/MX-M565N USER'S ... http://siica.sharpusa.com/portals/0/downloads/Manuals/MX-M365N-M... CHECKING THE IMAGE TO BE TRANSMITTED Check the image that will be sent in the touch panel before transmission. If you tap the [Preview] key before scanning the original, you can check the status of the scanned image in the preview screen.
- Page 788 USER'S MANUAL | MX-M365N/MX-M465N/MX-M565N USER'S ... http://siica.sharpusa.com/portals/0/downloads/Manuals/MX-M365N-M... STORING SCAN OPERATIONS (PROGRAM) Overview This function collectively stores various settings as one program. The stored program can be retrieved using an easy operation. For example, suppose 8-1/2" x 11" (A4) size documents are scanned into a file and sent to each branch office once a month.
- Page 789 USER'S MANUAL | MX-M365N/MX-M465N/MX-M565N USER'S ... http://siica.sharpusa.com/portals/0/downloads/Manuals/MX-M365N-M... or mistakes. To configure a program: Tap the [Store Program - Set Current Store] key on the action panel that appears when you operate any mode screens. The settings stored in a program will be retained even after the program is used for transmission.
- Page 790 USER'S MANUAL | MX-M365N/MX-M465N/MX-M565N USER'S ... http://siica.sharpusa.com/portals/0/downloads/Manuals/MX-M365N-M... DOCUMENT GLASS Tap the desired program key. Configure additional settings. For the called program, additionally configure the following settings: Image settings: Scan Size Send Size, File Format, Color Mode Send settings Others: Timer Transmission, Card Shot, File, Quick File, Transaction Report When stored in the program, this cannot be additionally specified.
- Page 791 USER'S MANUAL | MX-M365N/MX-M465N/MX-M565N USER'S ... http://siica.sharpusa.com/portals/0/downloads/Manuals/MX-M365N-M... SENDING TWO PAGES AS A SINGLE PAGE (2IN1) Overview Reduce two original pages to the equal size and sent them as a single page. This function is convenient when you have a large number of original pages and wish to reduce the number of pages sent.
- Page 792 USER'S MANUAL | MX-M365N/MX-M465N/MX-M565N USER'S ... http://siica.sharpusa.com/portals/0/downloads/Manuals/MX-M365N-M... Place the original in the document feeder tray of the automatic document feeder, or on the document glass. AUTOMATIC DOCUMENT FEEDER DOCUMENT GLASS Specify the destination. RETRIEVING A DESTINATION FROM AN ADDRESS BOOK...
- Page 793 USER'S MANUAL | MX-M365N/MX-M465N/MX-M565N USER'S ... http://siica.sharpusa.com/portals/0/downloads/Manuals/MX-M365N-M... Tap the [Start] key to start scanning of the original. Tap the [Preview] key to check the preview of an image before sending a fax. For more information, see "CHECKING THE IMAGE TO BE TRANSMITTED".
- Page 794 USER'S MANUAL | MX-M365N/MX-M465N/MX-M565N USER'S ... http://siica.sharpusa.com/portals/0/downloads/Manuals/MX-M365N-M... SCANNING ORIGINALS OF DIFFERENT SIZES (MIXED SIZE ORIGINAL) Overview Scan originals of different sizes at the same time; for example, when 8-1/2" x 14" (B4) size originals are mixed together with 11" x 17" (A3) size originals.
- Page 795 USER'S MANUAL | MX-M365N/MX-M465N/MX-M565N USER'S ... http://siica.sharpusa.com/portals/0/downloads/Manuals/MX-M365N-M... feeder. Insert the originals with the corners aligned together in the far left corner of the document feeder tray. AUTOMATIC DOCUMENT FEEDER Specify the destination. RETRIEVING A DESTINATION FROM AN ADDRESS BOOK VIEWING A LIST OF THE SELECTED DESTINATIONS...
- Page 796 USER'S MANUAL | MX-M365N/MX-M465N/MX-M565N USER'S ... http://siica.sharpusa.com/portals/0/downloads/Manuals/MX-M365N-M... information, see "CHECKING THE IMAGE TO BE TRANSMITTED". However, settings for this function cannot be changed in the preview screen. A beep will sound to indicate that scanning and transmission have ended. 796 of 1441...
- Page 797 USER'S MANUAL | MX-M365N/MX-M465N/MX-M565N USER'S ... http://siica.sharpusa.com/portals/0/downloads/Manuals/MX-M365N-M... SCANNING BOTH SIDES OF A CARD ONTO A SINGLE PAGE (CARD SHOT) Overview Send the front and reverse sides of a card as a single page, without the need to send each side separately.
- Page 798 USER'S MANUAL | MX-M365N/MX-M465N/MX-M565N USER'S ... http://siica.sharpusa.com/portals/0/downloads/Manuals/MX-M365N-M... RETRIEVING A DESTINATION FROM AN ADDRESS BOOK VIEWING A LIST OF THE SELECTED DESTINATIONS USING A SEARCH NUMBER TO RETRIEVE A DESTINATION ENTERING AN ADDRESS MANUALLY SPECIFYING A NETWORK FOLDER RETRIEVING A DESTINATION FROM A GLOBAL ADDRESS BOOK USING A TRANSMISSION LOG TO RESEND Tap the [Others] key, and tap the [Card Shot] key.
- Page 799 USER'S MANUAL | MX-M365N/MX-M465N/MX-M565N USER'S ... http://siica.sharpusa.com/portals/0/downloads/Manuals/MX-M365N-M... "SPECIFYING THE SEND SIZE OF THE IMAGE". To cancel the Card Shot settings: Tap the [Off] key. Tap the [Start] key, and scan the front side. Tap the [Preview] key to check the preview of an image before sending a fax. For more information, see "CHECKING THE IMAGE TO BE...
- Page 800 USER'S MANUAL | MX-M365N/MX-M465N/MX-M565N USER'S ... http://siica.sharpusa.com/portals/0/downloads/Manuals/MX-M365N-M... SCANNING MANY ORIGINALS AT ONCE (JOB BUILD) Overview This function lets you separate an original consisting of numerous pages into sets, scan each set using the automatic document feeder, and transmit the pages in a single transmission.
- Page 801 USER'S MANUAL | MX-M365N/MX-M465N/MX-M565N USER'S ... http://siica.sharpusa.com/portals/0/downloads/Manuals/MX-M365N-M... Place originals in the automatic document feeder. The original can also be placed on the document glass. AUTOMATIC DOCUMENT FEEDER DOCUMENT GLASS Specify the destination. RETRIEVING A DESTINATION FROM AN ADDRESS BOOK VIEWING A LIST OF THE SELECTED DESTINATIONS...
- Page 802 USER'S MANUAL | MX-M365N/MX-M465N/MX-M565N USER'S ... http://siica.sharpusa.com/portals/0/downloads/Manuals/MX-M365N-M... Tap the [Start Sending] key. If no action is taken for one minute after the confirmation screen is displayed, scanning automatically ends and the transmission is reserved. The [Change Setting] key can be tapped to change the exposure, resolution, scan size, and send size for each original page scanned.
- Page 803 USER'S MANUAL | MX-M365N/MX-M465N/MX-M565N USER'S ... http://siica.sharpusa.com/portals/0/downloads/Manuals/MX-M365N-M... SCANNING AN ORIGINAL AS TWO SEPARATE PAGES (DUAL PAGE SCAN) Overview The left and right sides of an original are scanned as two separate pages. This function is useful when you wish to successively scan each page of a book or other bound document.
- Page 804 USER'S MANUAL | MX-M365N/MX-M465N/MX-M565N USER'S ... http://siica.sharpusa.com/portals/0/downloads/Manuals/MX-M365N-M... Align the center of the original with the appropriate size mark Specify the destination. RETRIEVING A DESTINATION FROM AN ADDRESS BOOK VIEWING A LIST OF THE SELECTED DESTINATIONS USING A SEARCH NUMBER TO RETRIEVE A DESTINATION...
- Page 805 USER'S MANUAL | MX-M365N/MX-M465N/MX-M565N USER'S ... http://siica.sharpusa.com/portals/0/downloads/Manuals/MX-M365N-M... To cancel the Dual Page Scan setting: Tap the [Dual Page Scan] key to clear the checkmark. Tap the [Start] key to start scanning of the original. Tap the [Preview] key to check the preview of an image before sending a fax. For more information, see "CHECKING THE IMAGE TO BE...
- Page 806 USER'S MANUAL | MX-M365N/MX-M465N/MX-M565N USER'S ... http://siica.sharpusa.com/portals/0/downloads/Manuals/MX-M365N-M... SPLITTING A PAMPHLET BY PAGE AND TRANSMITTING THE PAGES SUCCESSIVELY (BOOK DIVIDE) Overview The opened pages of a saddle-stitch pamphlet are split by page according to actual page order before transmission. When using this function, you do not need to sort the original pages to be sent.
- Page 807 USER'S MANUAL | MX-M365N/MX-M465N/MX-M565N USER'S ... http://siica.sharpusa.com/portals/0/downloads/Manuals/MX-M365N-M... USING A SEARCH NUMBER TO RETRIEVE A DESTINATION ENTERING AN ADDRESS MANUALLY SPECIFYING A NETWORK FOLDER RETRIEVING A DESTINATION FROM A GLOBAL ADDRESS BOOK USING A TRANSMISSION LOG TO RESEND Tap the [Others] key, and tap the [Book Divide] key.
- Page 808 USER'S MANUAL | MX-M365N/MX-M465N/MX-M565N USER'S ... http://siica.sharpusa.com/portals/0/downloads/Manuals/MX-M365N-M... WHITENING FAINT COLORS IN THE IMAGE (SUPPRESS BACKGROUND) Overview Suppresses light background areas of originals. This function cannot be used in Internet fax mode. Operation Place the original. Place the original in the document feeder tray of the automatic document feeder, or on the document glass.
- Page 809 USER'S MANUAL | MX-M365N/MX-M465N/MX-M565N USER'S ... http://siica.sharpusa.com/portals/0/downloads/Manuals/MX-M365N-M... ENTERING AN ADDRESS MANUALLY SPECIFYING A NETWORK FOLDER RETRIEVING A DESTINATION FROM A GLOBAL ADDRESS BOOK USING A TRANSMISSION LOG TO RESEND Tap the [Others] key, and tap the [Suppress Background] key. Tap the [On] key.
- Page 810 USER'S MANUAL | MX-M365N/MX-M465N/MX-M565N USER'S ... http://siica.sharpusa.com/portals/0/downloads/Manuals/MX-M365N-M... time. When scanning finishes, place the next original and tap the [Start] key. A beep will sound to indicate that transmission has ended. When the color mode setting is [Mono2], the suppress background function will not operate.
- Page 811 USER'S MANUAL | MX-M365N/MX-M465N/MX-M565N USER'S ... http://siica.sharpusa.com/portals/0/downloads/Manuals/MX-M365N-M... ADDING CONTRAST TO THE SCANNED ORIGINAL BEFORE TRANSMISSION (CONTRAST) Overview This function cannot be used in Internet fax mode. Operation Place the original. Place the original in the document feeder tray of the automatic document feeder, or on the document glass.
- Page 812 USER'S MANUAL | MX-M365N/MX-M465N/MX-M565N USER'S ... http://siica.sharpusa.com/portals/0/downloads/Manuals/MX-M365N-M... Tap the [Others] key, and tap the [Contrast] key. or slide the slider to adjust the contrast level. To cancel the contrast settings: Tap the [Off] key. After the settings are completed, tap and [Back] keys in sequence.
- Page 813 USER'S MANUAL | MX-M365N/MX-M465N/MX-M565N USER'S ... http://siica.sharpusa.com/portals/0/downloads/Manuals/MX-M365N-M... ENHANCING THE OUTLINE OF THE SCANNED ORIGINAL BEFORE TRANSMISSION (SHARPNESS) Overview This function cannot be used in Internet fax mode. Operation Place the original. Place the original in the document feeder tray of the automatic document feeder, or on the document glass.
- Page 814 USER'S MANUAL | MX-M365N/MX-M465N/MX-M565N USER'S ... http://siica.sharpusa.com/portals/0/downloads/Manuals/MX-M365N-M... Tap the [Others] key, and tap the [Sharpness] key. or slide the slider to adjust the sharpness. To cancel the sharpness settings: Tap the [Off] key. After the settings are completed, tap and [Back] keys in sequence.
- Page 815 USER'S MANUAL | MX-M365N/MX-M465N/MX-M565N USER'S ... http://siica.sharpusa.com/portals/0/downloads/Manuals/MX-M365N-M... REMOVING CHROMATIC COLORS FROM THE SCANNED ORIGINAL BEFORE TRANSMISSION (DROP OUT COLOR) Overview This function cannot be used in fax and Internet fax mode. Operation Place the original. Place the original in the document feeder tray of the automatic document feeder, or on the document glass.
- Page 816 USER'S MANUAL | MX-M365N/MX-M465N/MX-M565N USER'S ... http://siica.sharpusa.com/portals/0/downloads/Manuals/MX-M365N-M... A checkmark appears on the icon. After the settings are completed, tap the [Back] key. To cancel the Drop Out Color setting: Tap the [Drop Out Color] key to clear the checkmark. Tap the [Start] key to start scanning of the original.
- Page 817 USER'S MANUAL | MX-M365N/MX-M465N/MX-M565N USER'S ... http://siica.sharpusa.com/portals/0/downloads/Manuals/MX-M365N-M... ERASING PERIPHERAL SHADOWS ON THE IMAGE (ERASE) Overview When scanning thick originals or books, erase any peripheral shadows that may be produced on the image. This function erases the parts of the image where shadows tend to form, but does not detect shadows and erase only the shadows.
- Page 818 USER'S MANUAL | MX-M365N/MX-M465N/MX-M565N USER'S ... http://siica.sharpusa.com/portals/0/downloads/Manuals/MX-M365N-M... If a ratio setting is used in combination with an erase setting, the erase width will change according to the selected ratio. This function erases the parts of the image where shadows tend to form, but does not detect shadows and erase only the shadows.
- Page 819 USER'S MANUAL | MX-M365N/MX-M465N/MX-M565N USER'S ... http://siica.sharpusa.com/portals/0/downloads/Manuals/MX-M365N-M... SPECIFYING A NETWORK FOLDER RETRIEVING A DESTINATION FROM A GLOBAL ADDRESS BOOK USING A TRANSMISSION LOG TO RESEND Tap the [Others] key, and tap the [Erase] key. Tap the checkbox of the edge that you wish to erase, and specify the erase position.
- Page 820 USER'S MANUAL | MX-M365N/MX-M465N/MX-M565N USER'S ... http://siica.sharpusa.com/portals/0/downloads/Manuals/MX-M365N-M... reverse side, and enter the area using the numeric keys. To quickly set the area, first specify a value close to the desired value by the numeric keys, then adjust it with After the settings are completed, tap To cancel the erase settings: Tap the [Clear] key.
- Page 821 USER'S MANUAL | MX-M365N/MX-M465N/MX-M565N USER'S ... http://siica.sharpusa.com/portals/0/downloads/Manuals/MX-M365N-M... SCANNING A THIN ORIGINAL (SLOW SCAN MODE) Overview Use this function when you wish to scan thin originals using the automatic document feeder. This function helps prevent thin originals from misfeeding. When slow scan mode is selected, 2-sided scanning is not possible.
- Page 822 USER'S MANUAL | MX-M365N/MX-M465N/MX-M565N USER'S ... http://siica.sharpusa.com/portals/0/downloads/Manuals/MX-M365N-M... USING A TRANSMISSION LOG TO RESEND Touch the [Others] key, and tap the [Slow Scan Mode] key. A checkmark appears on the icon. To cancel the Slow Scan Mode setting: Tap the [Slow Scan Mode] key to clear the checkmark.
- Page 823 USER'S MANUAL | MX-M365N/MX-M465N/MX-M565N USER'S ... http://siica.sharpusa.com/portals/0/downloads/Manuals/MX-M365N-M... ELIMINATING BLANK PAGES FROM A TRANSMISSION (BLANK PAGE SKIP) Overview If the scanned original contains blank pages, this function skips them to send only non-blank pages. The machine detects blank pages, enabling you to skip useless blank sheets without checking an original.
- Page 824 USER'S MANUAL | MX-M365N/MX-M465N/MX-M565N USER'S ... http://siica.sharpusa.com/portals/0/downloads/Manuals/MX-M365N-M... Operation Place originals in the automatic document feeder. AUTOMATIC DOCUMENT FEEDER Specify the destination. RETRIEVING A DESTINATION FROM AN ADDRESS BOOK VIEWING A LIST OF THE SELECTED DESTINATIONS USING A SEARCH NUMBER TO RETRIEVE A DESTINATION...
- Page 825 USER'S MANUAL | MX-M365N/MX-M465N/MX-M565N USER'S ... http://siica.sharpusa.com/portals/0/downloads/Manuals/MX-M365N-M... Tap the [Start] key to start scanning of the original. Tap the [Preview] key to check the preview of an image before sending a fax. For more information, see "CHECKING THE IMAGE TO BE TRANSMITTED".
- Page 826 USER'S MANUAL | MX-M365N/MX-M465N/MX-M565N USER'S ... http://siica.sharpusa.com/portals/0/downloads/Manuals/MX-M365N-M... CHECKING THE NUMBER OF SCANNED ORIGINAL SHEETS BEFORE TRANSMISSION (ORIGINAL COUNT) Overview Count the number of scanned original sheets and display the count before transmission. Checking the number of scanned original sheets before transmission helps prevent transmission mistakes.
- Page 827 USER'S MANUAL | MX-M365N/MX-M465N/MX-M565N USER'S ... http://siica.sharpusa.com/portals/0/downloads/Manuals/MX-M365N-M... USING A TRANSMISSION LOG TO RESEND Tap the [Others] key, and tap the [Original Count] key. A checkmark appears on the icon. After the settings are completed, tap the [Back] key. To cancel the Original Count setting: Tap the [Original Count] key to clear the checkmark.
- Page 828 USER'S MANUAL | MX-M365N/MX-M465N/MX-M565N USER'S ... http://siica.sharpusa.com/portals/0/downloads/Manuals/MX-M365N-M... transmission. If the displayed number of original sheets is different from the actual number of sheets: Tap the [Cancel] key and then tap the [OK] key in the message screen to clear all scanned data.
- Page 829 USER'S MANUAL | MX-M365N/MX-M465N/MX-M565N USER'S ... http://siica.sharpusa.com/portals/0/downloads/Manuals/MX-M365N-M... STAMPING SCANNED ORIGINALS (VERIFICATION STAMP) Overview This function stamps each original that is scanned using the automatic document feeder, allowing you to verify that all originals were correctly scanned. To use the verification stamp function, the optional stamp unit must be installed.
- Page 830 USER'S MANUAL | MX-M365N/MX-M465N/MX-M565N USER'S ... http://siica.sharpusa.com/portals/0/downloads/Manuals/MX-M365N-M... USING A SEARCH NUMBER TO RETRIEVE A DESTINATION ENTERING AN ADDRESS MANUALLY SPECIFYING A NETWORK FOLDER RETRIEVING A DESTINATION FROM A GLOBAL ADDRESS BOOK USING A TRANSMISSION LOG TO RESEND Tap the [Verification Stamp] key on the action panel or [Others] key, and tap the [Verification Stamp] key.
- Page 831 USER'S MANUAL | MX-M365N/MX-M465N/MX-M565N USER'S ... http://siica.sharpusa.com/portals/0/downloads/Manuals/MX-M365N-M... ADDING YOUR SENDER INFORMATION TO FAXES (I-FAX OWN ADDRESS SEND) Your sender information (date, time, sender name, sender address, number of pages) is automatically added to the top of the file you transmit.
- Page 832 USER'S MANUAL | MX-M365N/MX-M465N/MX-M565N USER'S ... http://siica.sharpusa.com/portals/0/downloads/Manuals/MX-M365N-M... makes the transmission data longer than the scan size, so it may be reduced or divided onto two pages when printed by the receiving machine. 832 of 1441 3/17/2016 7:14 AM...
- Page 833 USER'S MANUAL | MX-M365N/MX-M465N/MX-M565N USER'S ... http://siica.sharpusa.com/portals/0/downloads/Manuals/MX-M365N-M... CHANGING THE PRINT SETTINGS FOR THE TRANSACTION REPORT (TRANSACTION REPORT) Overview A transaction report is automatically printed out to alert you when an Internet fax transmission fails or when a broadcast transmission is performed.
- Page 834 USER'S MANUAL | MX-M365N/MX-M465N/MX-M565N USER'S ... http://siica.sharpusa.com/portals/0/downloads/Manuals/MX-M365N-M... USING A SEARCH NUMBER TO RETRIEVE A DESTINATION ENTERING AN ADDRESS MANUALLY SPECIFYING A NETWORK FOLDER RETRIEVING A DESTINATION FROM A GLOBAL ADDRESS BOOK USING A TRANSMISSION LOG TO RESEND Tap the [Others] key, and tap the [Transaction Report] key.
- Page 835 USER'S MANUAL | MX-M365N/MX-M465N/MX-M565N USER'S ... http://siica.sharpusa.com/portals/0/downloads/Manuals/MX-M365N-M... Tap the [Start] key to start scanning of the original. Tap the [Preview] key to check the preview of an image before sending a fax. For more information, see "CHECKING THE IMAGE TO BE TRANSMITTED".
- Page 836 USER'S MANUAL | MX-M365N/MX-M465N/MX-M565N USER'S ... http://siica.sharpusa.com/portals/0/downloads/Manuals/MX-M365N-M... STARTING A TRANSMISSION AT A SPECIFIED TIME (TIMER TRANSMISSION) Overview Specify a time at which a transmission or broadcast transmission will automatically take place. Transmission begins automatically at the specified time. This function is helpful when you wish to perform reserved, broadcast or other transmissions during your absence or at night or other times when telephone rates are low.
- Page 837 USER'S MANUAL | MX-M365N/MX-M465N/MX-M565N USER'S ... http://siica.sharpusa.com/portals/0/downloads/Manuals/MX-M365N-M... when the document filing function is used, the scanned original image and settings are stored in the built-in hard drive.) If another transmission is in progress when the specified time arrives, the timer transmission will begin after that transmission is finished.
- Page 838 USER'S MANUAL | MX-M365N/MX-M465N/MX-M565N USER'S ... http://siica.sharpusa.com/portals/0/downloads/Manuals/MX-M365N-M... Tap [On] key. The setting will show the current time. If the time is different, correct it in the setting mode before starting a job. BEFORE USING THE NETWORK SCANNER Specify the date.
- Page 839 USER'S MANUAL | MX-M365N/MX-M465N/MX-M565N USER'S ... http://siica.sharpusa.com/portals/0/downloads/Manuals/MX-M365N-M... stands by for transmission. If you placed the original on the document glass, scan each page one at a time. When scanning finishes, place the next original and tap the [Start] key. Repeat until all pages have been scanned and then tap the [Read-End] key.
- Page 840 USER'S MANUAL | MX-M365N/MX-M465N/MX-M565N USER'S ... http://siica.sharpusa.com/portals/0/downloads/Manuals/MX-M365N-M... PRINTING IMAGE SENDING ACTIVITY REPORTS Print a log of recent image sending activities (date, name of destination, time required, result, and other items). The Image Sending Activity Report contains information that is useful in dealing with problems, such as the types of errors that occurred.
- Page 841 USER'S MANUAL | MX-M365N/MX-M465N/MX-M565N USER'S ... http://siica.sharpusa.com/portals/0/downloads/Manuals/MX-M365N-M... INFORMATION APPEARING IN THE RESULT COLUMN Error types and other information are printed in the result column of transaction and activity reports. When a transaction or activity report is printed, check the result of the transaction in the result column and take action as needed.
- Page 842 USER'S MANUAL | MX-M365N/MX-M465N/MX-M565N USER'S ... http://siica.sharpusa.com/portals/0/downloads/Manuals/MX-M365N-M... RECEIVING INTERNET FAXES AUTOMATICALLY Overview The Internet fax function periodically connects to the mail server (POP3 server) and checks whether or not Internet faxes have been received. When faxes have been received, the faxes are automatically retrieved and printed.
- Page 843 USER'S MANUAL | MX-M365N/MX-M465N/MX-M565N USER'S ... http://siica.sharpusa.com/portals/0/downloads/Manuals/MX-M365N-M... The fax is automatically printed. 843 of 1441 3/17/2016 7:14 AM...
- Page 844 USER'S MANUAL | MX-M365N/MX-M465N/MX-M565N USER'S ... http://siica.sharpusa.com/portals/0/downloads/Manuals/MX-M365N-M... RECEIVING INTERNET FAXES MANUALLY If the interval for checking for received faxes is somewhat long and you wish to check immediately, you can manually initiate reception. The [Receive] key can be tapped only when POP3 server settings are configured in the Setting mode (administrator).
- Page 845 USER'S MANUAL | MX-M365N/MX-M465N/MX-M565N USER'S ... http://siica.sharpusa.com/portals/0/downloads/Manuals/MX-M365N-M... PRINTING A PASSWORD-PROTECTED (HOLD SETTING FOR RECEIVED DATA PRINT) Enable this setting to have faxes received and stored in memory without being printed. To print the faxes, a password must be entered. When this function is used, a password entry screen appears in the touch panel when a fax is received.
- Page 846 USER'S MANUAL | MX-M365N/MX-M465N/MX-M565N USER'S ... http://siica.sharpusa.com/portals/0/downloads/Manuals/MX-M365N-M... also transferred. At that time, the same password entry screen will appear as for printing. Forwarding will not take place unless the password is entered. 846 of 1441 3/17/2016 7:14 AM...
- Page 847 USER'S MANUAL | MX-M365N/MX-M465N/MX-M565N USER'S ... http://siica.sharpusa.com/portals/0/downloads/Manuals/MX-M365N-M... PRINTING RECEIVED DATA AT A SPECIFIED TIME Print received data at a specified time. For stress-free printing, you should avoid printing large numbers of pages at peak times during the day, and when you do not urgently need to print.
- Page 848 USER'S MANUAL | MX-M365N/MX-M465N/MX-M565N USER'S ... http://siica.sharpusa.com/portals/0/downloads/Manuals/MX-M365N-M... To print received data at the specified time: In "Setting mode", select [System Settings] → [Image Send Settings] → [Operation Settings] → [Default Settings] → [Time Specified Output of Received Data]. To disable the hold setting for received data print: In "Setting mode", disable this function using [System Settings] →...
- Page 849 USER'S MANUAL | MX-M365N/MX-M465N/MX-M565N USER'S ... http://siica.sharpusa.com/portals/0/downloads/Manuals/MX-M365N-M... CHECKING THE IMAGE BEFORE PRINTING Overview Check the image of received data on the touch panel before printing. This function is available when [System Settings] → [Operation Settings] → [Preview Setting] → [Received Data Image Check Setting] is enabled in "Setting mode".
- Page 850 USER'S MANUAL | MX-M365N/MX-M465N/MX-M565N USER'S ... http://siica.sharpusa.com/portals/0/downloads/Manuals/MX-M365N-M... the action panel Displays the received data image. to show thumbnails of received images(Thumbnail screen). The list view or thumbnails view can be changed depending on the setting mode. To delete a received image, tap the [Delete] key on the action panel.
- Page 851 USER'S MANUAL | MX-M365N/MX-M465N/MX-M565N USER'S ... http://siica.sharpusa.com/portals/0/downloads/Manuals/MX-M365N-M... FORWARDING RECEIVED INTERNET FAX DATA (FAX DATA FORWARD) Overview When the machine cannot print because it is out of paper or out of toner, received Internet faxes are forwarded to another previously registered Internet fax address (including direct SMTP).
- Page 852 USER'S MANUAL | MX-M365N/MX-M465N/MX-M565N USER'S ... http://siica.sharpusa.com/portals/0/downloads/Manuals/MX-M365N-M... Tap the [Fax Data Receive/Forward] key. Tap the [Internet Fax Settings] key. Tap the [Execute] key in [Forward Received Data] to begin forwarding. 852 of 1441 3/17/2016 7:14 AM...
- Page 853 USER'S MANUAL | MX-M365N/MX-M465N/MX-M565N USER'S ... http://siica.sharpusa.com/portals/0/downloads/Manuals/MX-M365N-M... FORWARDING RECEIVED DATA TO PRESET DESTINATIONS (INBOUND ROUTING SETTINGS) Overview Received Internet faxes are automatically forwarded to a fax destination number, an Internet fax address, an e-mail address, a file server address, a desktop address, or a network folder address.
- Page 854 USER'S MANUAL | MX-M365N/MX-M465N/MX-M565N USER'S ... http://siica.sharpusa.com/portals/0/downloads/Manuals/MX-M365N-M... In "Setting mode (Web version)", click [Application Settings] → [Inbound Routing Settings] → [Administration Settings]. In "Forward Received Data", select [Valid] and click the [Store] button. Users without administrator rights can be prohibited from storing, editing, and deleting forwarding tables in this screen, and from specifying which table is used.
- Page 855 USER'S MANUAL | MX-M365N/MX-M465N/MX-M565N USER'S ... http://siica.sharpusa.com/portals/0/downloads/Manuals/MX-M365N-M... To store multiple sender addresses or fax numbers, repeat these steps. If you wish to have only faxes from specified addresses forwarded, store the desired sender addresses. Send addresses stored here can be selected from a list when you store a forwarding table.
- Page 856 USER'S MANUAL | MX-M365N/MX-M465N/MX-M565N USER'S ... http://siica.sharpusa.com/portals/0/downloads/Manuals/MX-M365N-M... Select the forwarding conditions. To always forward received data, select [Always Forward]. To specify a day and time on which received data will be forwarded, select [Forward on Selected Day & Time] and select the checkbox ( ) of the desired day of the week.
- Page 857 USER'S MANUAL | MX-M365N/MX-M465N/MX-M565N USER'S ... http://siica.sharpusa.com/portals/0/downloads/Manuals/MX-M365N-M... Specify this information if necessary. Enter an e-mail address, an Internet fax address, a direct SMTP address, or a fax number directly and tap the [Add] key. When you specify an e-mail address or a fax number, you can use the global address search.
- Page 858 USER'S MANUAL | MX-M365N/MX-M465N/MX-M565N USER'S ... http://siica.sharpusa.com/portals/0/downloads/Manuals/MX-M365N-M... SAVING RECEIVED FAXES TO THE MACHINE'S HARD DISK Received faxes can be saved to the machine's hard disk. Saved faxes can be viewed on a computer. Set PDF, TIFF (multi) or TIFF (signal) for the received data. You can also receive notification of the storage result or storage folder by E-mail.
- Page 859 USER'S MANUAL | MX-M365N/MX-M465N/MX-M565N USER'S ... http://siica.sharpusa.com/portals/0/downloads/Manuals/MX-M365N-M... In Setting mode, click [Application Settings] →[Inbound Routing (HDD Storage) Settings]. (Administrator rights required.) Data that can be saved are received faxes and received Internet faxes. Confidential reception and polling reception faxes cannot be saved.
- Page 860 USER'S MANUAL | MX-M365N/MX-M465N/MX-M565N USER'S ... http://siica.sharpusa.com/portals/0/downloads/Manuals/MX-M365N-M... FORWARDING RECEIVED DATA MANUALLY Overview Received faxes can be forwarded manually after receipt. This function is available when [System Settings] → [Operation Settings] → [Preview Setting] → [Received Data Image Check Setting] is enabled in "Setting mode".
- Page 861 USER'S MANUAL | MX-M365N/MX-M465N/MX-M565N USER'S ... http://siica.sharpusa.com/portals/0/downloads/Manuals/MX-M365N-M... Multiple sets of received data can be selected. When you select a single received data only, you can tap the [Check Image] key on the action panel and check the image on the preview screen.
- Page 862 USER'S MANUAL | MX-M365N/MX-M465N/MX-M565N USER'S ... http://siica.sharpusa.com/portals/0/downloads/Manuals/MX-M365N-M... SAVING RECEIVED DATA Overview Save received faxes in the document filing folder. This function is available when [System Settings] → [Operation Settings] → [Preview Setting] → [Received Data Image Check Setting] is enabled in "Setting mode".
- Page 863 USER'S MANUAL | MX-M365N/MX-M465N/MX-M565N USER'S ... http://siica.sharpusa.com/portals/0/downloads/Manuals/MX-M365N-M... You can also display the received data list by tapping the job status display and tapping the [Check Received Data] key on the action panel of Job Status screen. Tap the key of the received data you wish to save, and tap the [File] key on the action panel to show thumbnails of received images(Thumbnail screen).
- Page 864 USER'S MANUAL | MX-M365N/MX-M465N/MX-M565N USER'S ... http://siica.sharpusa.com/portals/0/downloads/Manuals/MX-M365N-M... INTERNET FAX JOBS When you tap the job status display, jobs are displayed in a list. To check the status of an Internet Fax job, tap the [Internet Fax] tab. When you wish to stop or delete jobs or to perform priority processing, see the following...
- Page 865 USER'S MANUAL | MX-M365N/MX-M465N/MX-M565N USER'S ... http://siica.sharpusa.com/portals/0/downloads/Manuals/MX-M365N-M... COMPLETED TRANSMISSION/RECEPTION JOBS A usual transmission job moves to the job list when transmission is completed. Then the status field displays "Send OK". However, Internet Fax jobs such as reception, timer transmission, retries, and forwarding are displayed in the job status screen as follows: Reception job During Internet Fax receiving, the status field displays "Receiving"...
- Page 866 USER'S MANUAL | MX-M365N/MX-M465N/MX-M565N USER'S ... http://siica.sharpusa.com/portals/0/downloads/Manuals/MX-M365N-M... Received data is not printed When a data is being received, "Receiving" appears in the job queue list. When the reception is completed, the status changes to "Waiting". Received Internet fax is printed When reception is completed, the status field displays "In Memory"...
- Page 867 USER'S MANUAL | MX-M365N/MX-M465N/MX-M565N USER'S ... http://siica.sharpusa.com/portals/0/downloads/Manuals/MX-M365N-M... METADATA DELIVERY (DATA ENTRY) When the application integration module kit is installed, metadata (data indicating the attributes of the image file and how it is to be processed) is generated based on pre-stored information and transmitted separately from an image file that is generated for sending a scanned image.
- Page 868 USER'S MANUAL | MX-M365N/MX-M465N/MX-M565N USER'S ... http://siica.sharpusa.com/portals/0/downloads/Manuals/MX-M365N-M... SETTINGS REQUIRED IN THE SETTING MODE (WEB VERSION) To configure the settings related to metadata, select [Application Settings] → [Metadata Entry] in "Setting mode". (Administrator rights are required.) Enable metadata delivery. Storing Metadata Sets Store the items (the metadata set) to write to the XML file that will be generated during scanning.
- Page 869 USER'S MANUAL | MX-M365N/MX-M465N/MX-M565N USER'S ... http://siica.sharpusa.com/portals/0/downloads/Manuals/MX-M365N-M... METADATA DELIVERY USING SCAN TO DESKTOP When Network Scanner Tool is used in its factory default configuration, a file will be generated with a new file name on the PC. When Network Scanner Tool is used as a means of sending a metadata file to a third party application, this setting must be disabled to allow cross referencing between the image file and XML file by means of the file name generated by the computer.
- Page 870 USER'S MANUAL | MX-M365N/MX-M465N/MX-M565N USER'S ... http://siica.sharpusa.com/portals/0/downloads/Manuals/MX-M365N-M... TRANSMITTING METADATA Overview Select a metadata set, enter each item, and perform metadata delivery. Metadata delivery is performed using the document filing function. The [Data Entry] tab appears in the transmission settings screen of document filing mode to allow metadata delivery.
- Page 871 USER'S MANUAL | MX-M365N/MX-M465N/MX-M565N USER'S ... http://siica.sharpusa.com/portals/0/downloads/Manuals/MX-M365N-M... The keys of the items stored in the metadata set will appear. Tap the key of the item that you wish to enter. Tap the key of the value that you wish to enter, and tap the [OK] key.
- Page 872 USER'S MANUAL | MX-M365N/MX-M465N/MX-M565N USER'S ... http://siica.sharpusa.com/portals/0/downloads/Manuals/MX-M365N-M... METADATA FIELDS The following three types of metadata are included in the XML file that is transmitted. Data automatically generated by the machine These data are always included in the XML file and are automatically stored on your...
- Page 873 USER'S MANUAL | MX-M365N/MX-M465N/MX-M565N USER'S ... http://siica.sharpusa.com/portals/0/downloads/Manuals/MX-M365N-M... es] checkbox is selected in the metadata entry screen in the setting mode (Web version)) (Blank until a value is set in the send s ettings screen.) 873 of 1441 3/17/2016 7:14 AM...
- Page 874 USER'S MANUAL | MX-M365N/MX-M465N/MX-M565N USER'S ... http://siica.sharpusa.com/portals/0/downloads/Manuals/MX-M365N-M... DOCUMENT FILING This function saves the original scanned on the machine, received fax data, or print data from a computer on the hard drive of the machine or an external memory device as data.
- Page 875 USER'S MANUAL | MX-M365N/MX-M465N/MX-M565N USER'S ... http://siica.sharpusa.com/portals/0/downloads/Manuals/MX-M365N-M... 875 of 1441 3/17/2016 7:14 AM...
- Page 876 USER'S MANUAL | MX-M365N/MX-M465N/MX-M565N USER'S ... http://siica.sharpusa.com/portals/0/downloads/Manuals/MX-M365N-M... TYPES OF DOCUMENT FILING There are the following ways to save a file using document filing: [Quick File] and [File] in copy mode or image send mode, and [Scan to HDD] and [Scan to External Memory Device] in document filing mode.
- Page 877 USER'S MANUAL | MX-M365N/MX-M465N/MX-M565N USER'S ... http://siica.sharpusa.com/portals/0/downloads/Manuals/MX-M365N-M... FOLDER TYPES Three types of folders are used to store files on the hard drive using the document filing function. Folders on the hard drive Quick File Folder Documents scanned using the [Quick File] key are stored in this folder. A user name and file name are automatically assigned to each job.
- Page 878 USER'S MANUAL | MX-M365N/MX-M465N/MX-M565N USER'S ... http://siica.sharpusa.com/portals/0/downloads/Manuals/MX-M365N-M... CONVENIENT ITEMS TO STORE When storing a job using [File] in copy mode or image send mode, or [Scan to HDD] in document filing mode, it is convenient to store the items below. These settings are not required when storing a job using [Quick File].
- Page 879 USER'S MANUAL | MX-M365N/MX-M465N/MX-M565N USER'S ... http://siica.sharpusa.com/portals/0/downloads/Manuals/MX-M365N-M... APPROXIMATE NUMBER OF PAGES AND FILES THAT CAN BE STORED Combined total number of pages and total number of files that can be stored in custom folders and in the Main folder Examples of original types...
- Page 880 USER'S MANUAL | MX-M365N/MX-M465N/MX-M565N USER'S ... http://siica.sharpusa.com/portals/0/downloads/Manuals/MX-M365N-M... Size: A4 Black & white original (Text) Max. 2000 Size: A4 * The indicated numbers are guidelines for the number of pages that can be stored when all pages are full color, and when all pages are black & white.
- Page 881 USER'S MANUAL | MX-M365N/MX-M465N/MX-M565N USER'S ... http://siica.sharpusa.com/portals/0/downloads/Manuals/MX-M365N-M... AUTOMATIC DELETION OF FILES You can have document filing data in specified folders automatically deleted by specifying the folders and the time. Periodic deletion of files stored in the machine helps to prevent the disclosure of sensitive information and frees space on the hard drive.
- Page 882 USER'S MANUAL | MX-M365N/MX-M465N/MX-M565N USER'S ... http://siica.sharpusa.com/portals/0/downloads/Manuals/MX-M365N-M... INFORMATION ADDED TO FILES When saving a file using "File", add the following information to distinguish it from other files. User Name The user name is required to enter a file ownership and other information .
- Page 883 "Property Change" as required. Do not store sensitive documents or documents that you do not want to be used by others. Except in cases provided for by law, SHARP Corporation bears no responsibility for any damages that result from the disclosure of sensitive information due to...
- Page 884 USER'S MANUAL | MX-M365N/MX-M465N/MX-M565N USER'S ... http://siica.sharpusa.com/portals/0/downloads/Manuals/MX-M365N-M... USING DOCUMENT FILING IN EACH MODE To use Document Filing, select the action panel for each mode. To save data simultaneously with a copy or fax, tap the [File] or [Quick File] key on the action panel in each mode.
- Page 885 USER'S MANUAL | MX-M365N/MX-M465N/MX-M565N USER'S ... http://siica.sharpusa.com/portals/0/downloads/Manuals/MX-M365N-M... [Favorites Menu]. Using document filing in print mode To use document filing in print mode, select document filing in the printer driver. For details about document filing, see "SAVING AND USING PRINT FILES (Force retention/document filing)"...
- Page 886 USER'S MANUAL | MX-M365N/MX-M465N/MX-M565N USER'S ... http://siica.sharpusa.com/portals/0/downloads/Manuals/MX-M365N-M... BASE SCREEN OF DOCUMENT FILING MODE 886 of 1441 3/17/2016 7:14 AM...
- Page 887 USER'S MANUAL | MX-M365N/MX-M465N/MX-M565N USER'S ... http://siica.sharpusa.com/portals/0/downloads/Manuals/MX-M365N-M... QUICK FILE Overview This function allows you to store an original in copy mode or image send mode as an image file in the Quick File folder of the machine. The image file stored in quick file mode can be retrieved at a later time, allowing you to copy the document or transmit it in image send mode without having to locate the original.
- Page 888 USER'S MANUAL | MX-M365N/MX-M465N/MX-M565N USER'S ... http://siica.sharpusa.com/portals/0/downloads/Manuals/MX-M365N-M... Tap the [Quick File] key to enable When a message relating to saving confidential information appears, tap the [OK] key. Start a copy or image sending. When the function is executed, the image data of the original is stored in the Quick File folder.
- Page 889 USER'S MANUAL | MX-M365N/MX-M465N/MX-M565N USER'S ... http://siica.sharpusa.com/portals/0/downloads/Manuals/MX-M365N-M... FILE Overview Tapping the [File] key of the document filing function when printing or transmitting an original in each mode allows you to store the original in the Main folder or stored Custom folder as a file simultaneously with printing or transmission.
- Page 890 USER'S MANUAL | MX-M365N/MX-M465N/MX-M565N USER'S ... http://siica.sharpusa.com/portals/0/downloads/Manuals/MX-M365N-M... Changing the property Specifying a user name Assigning a file name Specifying the folder Creating PDF for PC browsing To save in an external memory device: Assigning a file name Specifying the folder Creating PDF for PC browsing After configuring the above settings, you will return to this screen.
- Page 891 USER'S MANUAL | MX-M365N/MX-M465N/MX-M565N USER'S ... http://siica.sharpusa.com/portals/0/downloads/Manuals/MX-M365N-M... PROCEDURE FOR PLACING THE ORIGINAL DEPENDING ON THE TYPE AND STATUS OF THE ORIGINAL". File Information The procedure for detail settings is described below. Specifying a property, user name, file name, and folder makes it easier to manage and search for a file.
- Page 892 USER'S MANUAL | MX-M365N/MX-M465N/MX-M565N USER'S ... http://siica.sharpusa.com/portals/0/downloads/Manuals/MX-M365N-M... required. However, a "Protect" file that is saved in the Quick File folder can only be changed to "Sharing". A file that is saved in the Quick File folder cannot be changed to "Confidential". If the file is moved to the Main folder or a custom folder, the property can be changed to "Confidential".
- Page 893 USER'S MANUAL | MX-M365N/MX-M465N/MX-M565N USER'S ... http://siica.sharpusa.com/portals/0/downloads/Manuals/MX-M365N-M... A file name can be assigned to the file. Tap the [File Name] text box and enter the file name. Enter a file name using up to 30 characters. File Name If a file name that already exists is specified, a tilde and a serial number are added after the file name and this file is saved as a different file.
- Page 894 USER'S MANUAL | MX-M365N/MX-M465N/MX-M565N USER'S ... http://siica.sharpusa.com/portals/0/downloads/Manuals/MX-M365N-M... SAVE ON HDD Place the original and tap the [Preview] key. Place the original in the document feeder tray of the automatic document feeder, or on the document glass. AUTOMATIC DOCUMENT FEEDER DOCUMENT GLASS Tap the [Scan to HDD] key on the action panel.
- Page 895 USER'S MANUAL | MX-M365N/MX-M465N/MX-M565N USER'S ... http://siica.sharpusa.com/portals/0/downloads/Manuals/MX-M365N-M... SAVE IN EXTERNAL MEMORY DEVICE Place the original and tap the [Preview] key. Place the original in the document feeder tray of the automatic document feeder, or on the document glass. AUTOMATIC DOCUMENT FEEDER DOCUMENT GLASS Tap the [Scan to External Memory Device] key on the action panel.
- Page 896 USER'S MANUAL | MX-M365N/MX-M465N/MX-M565N USER'S ... http://siica.sharpusa.com/portals/0/downloads/Manuals/MX-M365N-M... SEQUENCE FOR USING A STORED FILE Overview The screens and procedures differ depending on whether or not user authentication is enabled. The sequence for using a stored file depending on the situation is explained.
- Page 897 USER'S MANUAL | MX-M365N/MX-M465N/MX-M565N USER'S ... http://siica.sharpusa.com/portals/0/downloads/Manuals/MX-M365N-M... Select an operation item. Select the desired operation and configure settings. FILE SELECTION SCREEN FILE PRINTING FILE TRANSMISSION FILE MOVING DELETE FILE FILE IMAGE CHECKING FILE MERGING 897 of 1441 3/17/2016 7:14 AM...
- Page 898 USER'S MANUAL | MX-M365N/MX-M465N/MX-M565N USER'S ... http://siica.sharpusa.com/portals/0/downloads/Manuals/MX-M365N-M... FILE SELECTION SCREEN The file selection screen can be displayed in "List screen" format or "Thumbnail screen" format to display thumbnail images of files. List display mode Thumbnail display mode Mode icons 898 of 1441...
- Page 899 USER'S MANUAL | MX-M365N/MX-M465N/MX-M565N USER'S ... http://siica.sharpusa.com/portals/0/downloads/Manuals/MX-M365N-M... COPYING Internet Fa Printer Direct SMT Fax Send Scan to E- File Store mail Scan to Scan to De Scan to Network Folder sktop PC-Fax PC-I-Fax S Edit Send (When different types of jobs such as copy a...
- Page 900 USER'S MANUAL | MX-M365N/MX-M465N/MX-M565N USER'S ... http://siica.sharpusa.com/portals/0/downloads/Manuals/MX-M365N-M... SELECTING A FILE TO RETRIEVE Tap the [HDD File retrieve] key. When user authentication is enabled and "My Folder" is configured by selecting [User Control] in "Setting mode" → [User List], the custom folder specified as "My Folder"...
- Page 901 USER'S MANUAL | MX-M365N/MX-M465N/MX-M565N USER'S ... http://siica.sharpusa.com/portals/0/downloads/Manuals/MX-M365N-M... FILE PRINTING Overview A file stored using document filing can be retrieved and printed when needed. The settings used when the file was stored are also stored, and thus the file can be printed again using those settings.
- Page 902 USER'S MANUAL | MX-M365N/MX-M465N/MX-M565N USER'S ... http://siica.sharpusa.com/portals/0/downloads/Manuals/MX-M365N-M... Changing settings before printing After selecting the desired file, follow the steps below. SELECTING A FILE TO RETRIEVE Tap the [Choose Print Settings] key. Change the print settings. For more information, see "OVERVIEW".
- Page 903 USER'S MANUAL | MX-M365N/MX-M465N/MX-M565N USER'S ... http://siica.sharpusa.com/portals/0/downloads/Manuals/MX-M365N-M... MULTI-FILE PRINTING Select the keys of the multiple files that you wish to print. Confidential files cannot be printed simultaneously with other files. A file in the currently selected folder cannot be selected simultaneously with a file in a different folder.
- Page 904 USER'S MANUAL | MX-M365N/MX-M465N/MX-M565N USER'S ... http://siica.sharpusa.com/portals/0/downloads/Manuals/MX-M365N-M... BATCH PRINTING Tap the [Batch Print] key. Tap the [User Name] text box. Select the user name. After selecting the user name, tap If you have selected [System Settings] in "Setting mode" →[Document Filing Settings] →...
- Page 905 USER'S MANUAL | MX-M365N/MX-M465N/MX-M565N USER'S ... http://siica.sharpusa.com/portals/0/downloads/Manuals/MX-M365N-M... Number from Stored Setting of Each Job.] checkbox to set to When printing with the number of copies at data saving, go to step 7. to specify the number of copies. As required, directly tap the numeric value display key and change the value using the numeric keys.
- Page 906 USER'S MANUAL | MX-M365N/MX-M465N/MX-M565N USER'S ... http://siica.sharpusa.com/portals/0/downloads/Manuals/MX-M365N-M... FILE TRANSMISSION Overview The settings used when the file was stored with document filing are stored, and thus the file can be transmitted using those settings. If needed, you can also change the transmission settings to modify the retrieved file.
- Page 907 USER'S MANUAL | MX-M365N/MX-M465N/MX-M565N USER'S ... http://siica.sharpusa.com/portals/0/downloads/Manuals/MX-M365N-M... Tap the [Send] key on the action panel. Select settings for sending. Tap the [Start] key. 907 of 1441 3/17/2016 7:14 AM...
- Page 908 USER'S MANUAL | MX-M365N/MX-M465N/MX-M565N USER'S ... http://siica.sharpusa.com/portals/0/downloads/Manuals/MX-M365N-M... FILE MOVING Overview Changes the file storage location. (The file is moved to another folder.) A file whose property is "Protect" cannot be moved. To move a protected file, change its property to "Sharing" or "Confidential".
- Page 909 USER'S MANUAL | MX-M365N/MX-M465N/MX-M565N USER'S ... http://siica.sharpusa.com/portals/0/downloads/Manuals/MX-M365N-M... A file cannot be moved to the Quick File folder. With this procedure, the original name is changed and the file is moved to the specified folder. (Unlike the "Save As" command on a computer, the file is not copied to the specified folder with the original file remaining in the original location.)
- Page 910 USER'S MANUAL | MX-M365N/MX-M465N/MX-M565N USER'S ... http://siica.sharpusa.com/portals/0/downloads/Manuals/MX-M365N-M... DELETE FILE Overview Stored files that are no longer required can be deleted. A file whose property is "Protect" cannot be deleted. To delete a protected file, change its property to "Sharing" or "Confidential".
- Page 911 USER'S MANUAL | MX-M365N/MX-M465N/MX-M565N USER'S ... http://siica.sharpusa.com/portals/0/downloads/Manuals/MX-M365N-M... 911 of 1441 3/17/2016 7:14 AM...
- Page 912 USER'S MANUAL | MX-M365N/MX-M465N/MX-M565N USER'S ... http://siica.sharpusa.com/portals/0/downloads/Manuals/MX-M365N-M... FILE IMAGE CHECKING Overview Depending on the size of the image, part of the image may be clipped off in the image check screen on the touch panel. A preview image is an image for display on the touch panel. It will differ from the actual print result.
- Page 913 USER'S MANUAL | MX-M365N/MX-M465N/MX-M565N USER'S ... http://siica.sharpusa.com/portals/0/downloads/Manuals/MX-M365N-M... Check the image of the file. 913 of 1441 3/17/2016 7:14 AM...
- Page 914 USER'S MANUAL | MX-M365N/MX-M465N/MX-M565N USER'S ... http://siica.sharpusa.com/portals/0/downloads/Manuals/MX-M365N-M... FILE MERGING Overview You can combine files that have been saved by Document Filing. If you have only selected a single file, the [File Merge] key is not displayed. The file name is a combination of "the first file name", "a tilde (~)", and "a serial number".
- Page 915 USER'S MANUAL | MX-M365N/MX-M465N/MX-M565N USER'S ... http://siica.sharpusa.com/portals/0/downloads/Manuals/MX-M365N-M... Specifying a user name Assigning a file name Specifying the folder Creating PDF for PC browsing To delete the original file, select the [Delete] checkbox. Tap the [Execute] key. Combining of files starts, and after the processing is finished, the "Files combined."...
- Page 916 USER'S MANUAL | MX-M365N/MX-M465N/MX-M565N USER'S ... http://siica.sharpusa.com/portals/0/downloads/Manuals/MX-M365N-M... RETRIEVING AND USING A FILE FROM THE JOB STATUS SCREEN Overview Files stored using File and Quick File appear as keys in the job status complete screen. This is convenient when you need to quickly print the saved data of a copy job or quickly send a saved fax to another destination.
- Page 917 USER'S MANUAL | MX-M365N/MX-M465N/MX-M565N USER'S ... http://siica.sharpusa.com/portals/0/downloads/Manuals/MX-M365N-M... To view detailed information on a file, select the file, and then tap the [Check Details of Selected Job] key on the action panel. 917 of 1441 3/17/2016 7:14 AM...
- Page 918 USER'S MANUAL | MX-M365N/MX-M465N/MX-M565N USER'S ... http://siica.sharpusa.com/portals/0/downloads/Manuals/MX-M365N-M... FILE SEARCH AND RETRIEVAL Overview When there are many stored files, it may take some time to locate a file. The search function of document filing mode can be used to find a file quickly.
- Page 919 USER'S MANUAL | MX-M365N/MX-M465N/MX-M565N USER'S ... http://siica.sharpusa.com/portals/0/downloads/Manuals/MX-M365N-M... If the folder with a password is tapped, a password entry screen will appear. Enter the password (5 to 8 digits) using the numeric keys. Select search conditions. Tap each text box and set the search condition.
- Page 920 USER'S MANUAL | MX-M365N/MX-M465N/MX-M565N USER'S ... http://siica.sharpusa.com/portals/0/downloads/Manuals/MX-M365N-M... When you have selected [Today] or [Date Set], set the time and date. Tap the [Start Search] key. A list of the files that match your search conditions will appear. Select the desired file from the list. The job settings screen will appear.
- Page 921 USER'S MANUAL | MX-M365N/MX-M465N/MX-M565N USER'S ... http://siica.sharpusa.com/portals/0/downloads/Manuals/MX-M365N-M... PRINTING AN EXTERNAL FILE Overview A file stored in the FTP server, USB memory device, or network folder of a PC can be printed. The file can also be modified before printing by changing the print settings.
- Page 922 USER'S MANUAL | MX-M365N/MX-M465N/MX-M565N USER'S ... http://siica.sharpusa.com/portals/0/downloads/Manuals/MX-M365N-M... Select a file or folder. Change the print settings. For more information, see "FILE PRINTING". Select the [Delete] checkbox when needed. To fit the image to the paper size when printing, select the [Fit To Page] checkbox Tap the [Start] key to start file printing.
- Page 923 USER'S MANUAL | MX-M365N/MX-M465N/MX-M565N USER'S ... http://siica.sharpusa.com/portals/0/downloads/Manuals/MX-M365N-M... Tap the [Select File from Network Folder to Print] key on the action panel. Select a workgroup. When you tap the [Direct Input of Folder Path] key in the action panel and enter the path to a folder on the keyboard, the folder having that path appears.
- Page 924 USER'S MANUAL | MX-M365N/MX-M465N/MX-M565N USER'S ... http://siica.sharpusa.com/portals/0/downloads/Manuals/MX-M365N-M... (A) Displays the workgroup selection screen. (B) Displays the server selection screen. Select a file or folder. When the file (D) is tapped, the print screen appears. (A) Displays the first level of the network folder. This does not appear if there is just one upper level.
- Page 925 USER'S MANUAL | MX-M365N/MX-M465N/MX-M565N USER'S ... http://siica.sharpusa.com/portals/0/downloads/Manuals/MX-M365N-M... Select the [Delete] checkbox when needed. To fit the image to the paper size when printing, select the [Fit To Page] checkbox Tap the [Start] key to start file printing. 925 of 1441...
- Page 926 USER'S MANUAL | MX-M365N/MX-M465N/MX-M565N USER'S ... http://siica.sharpusa.com/portals/0/downloads/Manuals/MX-M365N-M... SETTING MODE Overview Use "Setting mode" to configure the system settings of the machine. This mode allows management of various functions that will make it easier to use the machine, such as default registration for each function, network connection setting, and log check of operation status.
- Page 927 USER'S MANUAL | MX-M365N/MX-M465N/MX-M565N USER'S ... http://siica.sharpusa.com/portals/0/downloads/Manuals/MX-M365N-M... The setting menu appears on the left side of the displayed screen. Tap the setting in the menu that you want to configure. To quit the setting mode, tap the [Exit] key in the upper right corner of the screen.
- Page 928 USER'S MANUAL | MX-M365N/MX-M465N/MX-M565N USER'S ... http://siica.sharpusa.com/portals/0/downloads/Manuals/MX-M365N-M... Tap the [Print] key on the [All Custom Setting List]. Check the IP address on the printed list. Start the Web browser on the PC, and enter the IP address of the machine.
- Page 929 USER'S MANUAL | MX-M365N/MX-M465N/MX-M565N USER'S ... http://siica.sharpusa.com/portals/0/downloads/Manuals/MX-M365N-M... TOP PAGE The following is a list of setting mode items, factory default settings and restrictions for each item. Depending on the machine specifications and peripheral devices installed, it may not be possible to use some settings.
- Page 930 USER'S MANUAL | MX-M365N/MX-M465N/MX-M565N USER'S ... http://siica.sharpusa.com/portals/0/downloads/Manuals/MX-M365N-M... STATUS The following is a list of setting mode items, factory default settings and restrictions for each item. Depending on the machine specifications and peripheral devices installed, it may not be possible to use some settings.
- Page 931 USER'S MANUAL | MX-M365N/MX-M465N/MX-M565N USER'S ... http://siica.sharpusa.com/portals/0/downloads/Manuals/MX-M365N-M... ADDRESS BOOK The following is a list of setting mode items, factory default settings and restrictions for each item. Depending on the machine specifications and peripheral devices installed, it may not be possible to use some settings.
- Page 932 USER'S MANUAL | MX-M365N/MX-M465N/MX-M565N USER'S ... http://siica.sharpusa.com/portals/0/downloads/Manuals/MX-M365N-M... DOCUMENT OPERATIONS The following is a list of setting mode items, factory default settings and restrictions for each item. Depending on the machine specifications and peripheral devices installed, it may not be possible to use some settings.
- Page 933 USER'S MANUAL | MX-M365N/MX-M465N/MX-M565N USER'S ... http://siica.sharpusa.com/portals/0/downloads/Manuals/MX-M365N-M... USER CONTROL The following is a list of setting mode items, factory default settings and restrictions for each item. Depending on the machine specifications and peripheral devices installed, it may not be possible to use some settings.
- Page 934 USER'S MANUAL | MX-M365N/MX-M465N/MX-M565N USER'S ... http://siica.sharpusa.com/portals/0/downloads/Manuals/MX-M365N-M... Default Network Authentication Ser ver Setting Disabled Perform LDAP server access contr Enabled Display Usage Status after Login Display login name. Login name display Disabled Include job status in user authentic ation Enabled (60 sec)
- Page 935 USER'S MANUAL | MX-M365N/MX-M465N/MX-M565N USER'S ... http://siica.sharpusa.com/portals/0/downloads/Manuals/MX-M365N-M... Home Screen List User Count View User Count Save user count Card Area Settings Import from Configuration file Card Scan Test Disabled Check Facility Code in HID Mode Card Type/Card Reader Settings Card Type / Card Reader...
- Page 936 USER'S MANUAL | MX-M365N/MX-M465N/MX-M565N USER'S ... http://siica.sharpusa.com/portals/0/downloads/Manuals/MX-M365N-M... BILLING CODE SETTING Overview The following is a list of setting mode items, factory default settings and restrictions for each item. Depending on the machine specifications and peripheral devices installed, it may not be possible to use some settings.
- Page 937 USER'S MANUAL | MX-M365N/MX-M465N/MX-M565N USER'S ... http://siica.sharpusa.com/portals/0/downloads/Manuals/MX-M365N-M... × ○ Billing Code Display Name Setting Default × ○ Main Code Display Name Default × ○ Sub Code Display Name * Displayed when the Web Browsing Expansion Kit is installed. 937 of 1441...
- Page 938 USER'S MANUAL | MX-M365N/MX-M465N/MX-M565N USER'S ... http://siica.sharpusa.com/portals/0/downloads/Manuals/MX-M365N-M... SYSTEM SETTINGS The following is a list of setting mode items, factory default settings and restrictions for each item. Depending on the machine specifications and peripheral devices installed, it may not be possible to use some settings.
- Page 939 USER'S MANUAL | MX-M365N/MX-M465N/MX-M565N USER'S ... http://siica.sharpusa.com/portals/0/downloads/Manuals/MX-M365N-M... Disabled Daylight Saving Time Setting [MM/DD/YYYY], [/], [La Date Format st], [12-Hour] English (US) Keyboard Select List Print (User) U: General user; A: System administrator/Administrator Item Factory default setting U List Print (User)
- Page 940 USER'S MANUAL | MX-M365N/MX-M465N/MX-M565N USER'S ... http://siica.sharpusa.com/portals/0/downloads/Manuals/MX-M365N-M... Plain, Auto-Inch *1,*2 Tray 3 Plain, 8-1/2" x 11" Plain, Auto-Inch *1,*2 Tray 4 Plain, 8-1/2" x 11" Plain, 8-1/2" x 11" (A4) Tray 5 Plain, Auto-Inch Bypass Custom 1 to 7: X = 17", Custom Size Registration (Bypass) Y = 11"...
- Page 941 USER'S MANUAL | MX-M365N/MX-M465N/MX-M565N USER'S ... http://siica.sharpusa.com/portals/0/downloads/Manuals/MX-M365N-M... Enabled Manual Reception Key in Initial S creen Forward Received Data *1 When the Internet fax expansion kit is installed. *2 When the facsimile expansion kit is installed. Printer Condition Settings U: General user; A: System administrator/Administrator...
- Page 942 USER'S MANUAL | MX-M365N/MX-M465N/MX-M565N USER'S ... http://siica.sharpusa.com/portals/0/downloads/Manuals/MX-M365N-M... Enabled Fit To Page Varies depending on the Output machine configuration Enabled Print per Unit Disabled Staple Position Disabled Punch Disabled Quick File PCL Settings PC-8 PCL Symbol Set Setting Internal Font, 0: Courier PCL Font Setting 0.CR=CR;...
- Page 943 USER'S MANUAL | MX-M365N/MX-M465N/MX-M565N USER'S ... http://siica.sharpusa.com/portals/0/downloads/Manuals/MX-M365N-M... USB-Device Check U: General user; A: System administrator/Administrator Item Factory default setting U USB-Device Check Devices Recognized Driver Operation Settings U: General user; A: System administrator/Administrator Item Factory default setting Operation Settings Disabled...
- Page 944 USER'S MANUAL | MX-M365N/MX-M465N/MX-M565N USER'S ... http://siica.sharpusa.com/portals/0/downloads/Manuals/MX-M365N-M... Enabled Display Action Panel as default. Disabled Display Confirmation Dialog whe n job is canceled. Disabled Disabling of Job Priority Operatio Disabled Disabling of Bypass Printing 0.0 seconds Key Operation Setting Disabled Disable Auto Key Repeat 0.5 seconds...
- Page 945 USER'S MANUAL | MX-M365N/MX-M465N/MX-M565N USER'S ... http://siica.sharpusa.com/portals/0/downloads/Manuals/MX-M365N-M... Pattern 1 MFP Display Pattern Setting Preview Setting Disabled Received Data Image Check Sett Default List/Thumbnail Display Thumbnail Fax/I-Fax Reception Data File Retrieve of Document Filing List Main Folder/Quick File Folder List Custom Folder...
- Page 946 USER'S MANUAL | MX-M365N/MX-M465N/MX-M565N USER'S ... http://siica.sharpusa.com/portals/0/downloads/Manuals/MX-M365N-M... Display in Both PC and View Password Entry Screen Not stored Cookie Settings Soft Keyboard Template Setting Customized Key Setting Mode Key Display Setting Home Screen Registration Home Screen Settings *1 When an external keyboard is not installed. : Soft Keyboard *2 This cannot be set on the machine.
- Page 947 USER'S MANUAL | MX-M365N/MX-M465N/MX-M565N USER'S ... http://siica.sharpusa.com/portals/0/downloads/Manuals/MX-M365N-M... Disabled Disabling of Large Capacity Cassett Disabled Disabling of Optional Paper Drawer Disabled Disabling of Tray Setting Disabled Disabling of Finisher Disabled Disabling of Offset Disabled Disabling of Stapler 0.0 mm (1/2") Saddle Stitch Position Adjust...
- Page 948 USER'S MANUAL | MX-M365N/MX-M465N/MX-M565N USER'S ... http://siica.sharpusa.com/portals/0/downloads/Manuals/MX-M365N-M... Fusing Control Settings 16 to 23 lbs. (60 to 89g/ Paper Weight One Sided List Prints Disable Black Streak Reduction Disable Display warning message for black s treaks detection. *1 When a large capacity tray is installed...
- Page 949 USER'S MANUAL | MX-M365N/MX-M465N/MX-M565N USER'S ... http://siica.sharpusa.com/portals/0/downloads/Manuals/MX-M365N-M... Enabled Offset Copy Settings Document Glass: 5 (Nor Copy Exposure Adjustment mal) Document Feeder: 5 (Nor mal) Rotation copy Rotation Copy Setting Add or Change Extra Preset Rati Setting a Maximum Number of C opies Initial Margin Shift Setting 1/2"...
- Page 950 USER'S MANUAL | MX-M365N/MX-M465N/MX-M565N USER'S ... http://siica.sharpusa.com/portals/0/downloads/Manuals/MX-M365N-M... Disabled Fit to Page Enabled Automatic Saddle Stitch 1/2" Initial Tab Copy Setting Disabled Disabling of Registration/Deletio n of Program Disabled Disabling of Bypass-Tray in Dupl ex Copy Disabled Disabling of Auto Paper Selectio...
- Page 951 USER'S MANUAL | MX-M365N/MX-M465N/MX-M565N USER'S ... http://siica.sharpusa.com/portals/0/downloads/Manuals/MX-M365N-M... Item Factory default setting Printer Settings Default Settings Enabled Prohibit Notice Page Printing Disabled Prohibit Test Page Printing Disabled A4/Letter Size Auto Change Print Density Level 3 (Normal) Color 3 (Normal) All 0...
- Page 952 USER'S MANUAL | MX-M365N/MX-M465N/MX-M565N USER'S ... http://siica.sharpusa.com/portals/0/downloads/Manuals/MX-M365N-M... Interface Settings Disabled Hexadecimal Dump Mode 60 seconds I/O Timeout Enabled Enable USB Port Auto USB Port Emulation Switching Enabled Enable Network Port Auto Network Port Emulation Switchin Switch at End of Job...
- Page 953 USER'S MANUAL | MX-M365N/MX-M465N/MX-M565N USER'S ... http://siica.sharpusa.com/portals/0/downloads/Manuals/MX-M365N-M... stalled) Address Book Default Selection Enabled Apply Addresses of Sending Modes Only Disable Higher priority is given to th e display of address book. None Category Displayed as Default Disabled Display all address type regard less of the mode being display ed currently.
- Page 954 USER'S MANUAL | MX-M365N/MX-M465N/MX-M565N USER'S ... http://siica.sharpusa.com/portals/0/downloads/Manuals/MX-M365N-M... 3 (Normal) Sharpness 3 (Normal) Contrast Disabled Sending the same image sent i n Fax/I-Fax mode Disabled Be sure to press Next Addres s Key ( ) before selecting t he next address...
- Page 955 USER'S MANUAL | MX-M365N/MX-M465N/MX-M565N USER'S ... http://siica.sharpusa.com/portals/0/downloads/Manuals/MX-M365N-M... tion from Operation Panel All Invalid Disable Registering Destina tion on Web Page Disabled Disabling of Registration/D eletion of Program All Invalid Disable Registration of Me mory Box All Invalid Disable Destination Registr...
- Page 956 USER'S MANUAL | MX-M365N/MX-M465N/MX-M565N USER'S ... http://siica.sharpusa.com/portals/0/downloads/Manuals/MX-M365N-M... Sender Data Registration Registration of Own Name Sel Scan Settings Scan Settings Default Sender Set Default Color Mode Settings Scanner Common Auto (No item) Grayscale (No item) Disabled Disable Change of B/W Setting in Auto Mode...
- Page 957 USER'S MANUAL | MX-M365N/MX-M465N/MX-M565N USER'S ... http://siica.sharpusa.com/portals/0/downloads/Manuals/MX-M365N-M... Middle Color/Grayscale Disabled Bk Letter Emphasis Disabled Specified Pages per File Number of Pages E-mail File Type MMR (G4) Black & White Middle Color/Grayscale Disabled Bk Letter Emphasis Disabled Specified Pages per File...
- Page 958 USER'S MANUAL | MX-M365N/MX-M465N/MX-M565N USER'S ... http://siica.sharpusa.com/portals/0/downloads/Manuals/MX-M365N-M... Folder) Bcc Setting Disabled Enable Bcc Disabled Display Bcc Address on the Job Status Screen Disable Scan Function Disabled PC Scan Disabled Default Address Setting Internet Fax Settings Default Settings Enabled Auto Wake Up Print...
- Page 959 USER'S MANUAL | MX-M365N/MX-M465N/MX-M565N USER'S ... http://siica.sharpusa.com/portals/0/downloads/Manuals/MX-M365N-M... Activity Report Print Select Setting Disabled Auto Print at Memory Full Disabled Print Daily at Designated Ti Disabled Body Text Print Select Set ting Send Setting Disabled I-Fax Reception Report On/O ff Setting...
- Page 960 USER'S MANUAL | MX-M365N/MX-M465N/MX-M565N USER'S ... http://siica.sharpusa.com/portals/0/downloads/Manuals/MX-M365N-M... Set Address for Data Forwardi Disabled Direct SMTP Disabled Add Hostname or IP Addres s Too Hostname or IP Address Disabled Receiving Date & Time Print Disabled A3 RX Reduce 60 seconds POP3 Communication Timeou t Setting 5 min.
- Page 961 USER'S MANUAL | MX-M365N/MX-M465N/MX-M565N USER'S ... http://siica.sharpusa.com/portals/0/downloads/Manuals/MX-M365N-M... U: General user; A: System administrator/Administrator Item Factory default setting Document Filing Settings Sharing Mode Default Mode Settings Date Sort Method Setting Administrator Authority Setting Disabled Delete File Disabled Delete Folder Disabled Change Password...
- Page 962 USER'S MANUAL | MX-M365N/MX-M465N/MX-M565N USER'S ... http://siica.sharpusa.com/portals/0/downloads/Manuals/MX-M365N-M... Disabled Disabling Text/Stamp printing at Reprint Batch Print Settings Enabled Selection of [All Users] is not allowed. Enabled Selection of [User Unknown] i s not allowed. Erase Width Adjustment 1/2" Edge Clearance Width 1/2"...
- Page 963 USER'S MANUAL | MX-M365N/MX-M465N/MX-M565N USER'S ... http://siica.sharpusa.com/portals/0/downloads/Manuals/MX-M365N-M... Compression Ratio: Middl Color/Grayscale Disabled Emphasize Black Letter Disabled Specified Pages per File Auto Default Exposure Settings Auto Default Original Image Type 200 X 200 dpi Initial Resolution Settings Disabled Disable Storing to External Mem...
- Page 964 USER'S MANUAL | MX-M365N/MX-M465N/MX-M565N USER'S ... http://siica.sharpusa.com/portals/0/downloads/Manuals/MX-M365N-M... Disabled Scanner Disabled Apply the resolution at job exe cution 200dpix200dpi Resolution Disabled Internet Fax Disabled Apply the resolution at job exe cution 200dpix100dpi Resolution Disabled Disabled Apply the resolution at job exe...
- Page 965 USER'S MANUAL | MX-M365N/MX-M465N/MX-M565N USER'S ... http://siica.sharpusa.com/portals/0/downloads/Manuals/MX-M365N-M... C-I-Fax) Disabled Fax Send (Including PC-Fax) Enabled Scan to HDD Scan Send Disabled Copy Disabled Printer Enabled Scan Send Disabled Internet Fax Send (Including P C-I-Fax) Disabled Fax Send (Including PC-Fax) Enabled Scan to HDD...
- Page 966 USER'S MANUAL | MX-M365N/MX-M465N/MX-M565N USER'S ... http://siica.sharpusa.com/portals/0/downloads/Manuals/MX-M365N-M... Disabled Printer Disabled Scan Send Disabled Internet Fax Send (Including P C-I-Fax) Enabled Fax Send (Including PC-Fax) Disabled Scan to HDD All Invalid Automatic Deletion of File Settings *1 When the exit tray unit is installed.
- Page 967 USER'S MANUAL | MX-M365N/MX-M465N/MX-M565N USER'S ... http://siica.sharpusa.com/portals/0/downloads/Manuals/MX-M365N-M... Sharp OSA Settings U: General user; A: System administrator/Administrator Item Factory default setting Sharp OSA Settings External Account Setting Disabled External Account Control Disabled Enable Authentication by Extern al Server USB Driver Settings...
- Page 968 USER'S MANUAL | MX-M365N/MX-M465N/MX-M565N USER'S ... http://siica.sharpusa.com/portals/0/downloads/Manuals/MX-M365N-M... User Control Disabled Disabling of Printing by Invalid Us Operation Settings Disabled Cancel Auto Clear Timer Disabled Disabling of Job Priority Operatio Disabled Disabling of Bypass Printing Disabled Disable Auto Key Repeat Disabled...
- Page 969 USER'S MANUAL | MX-M365N/MX-M465N/MX-M565N USER'S ... http://siica.sharpusa.com/portals/0/downloads/Manuals/MX-M365N-M... Disabled Disabling of Stapler Disabled Disabling of Punch Disabled Disabling of Master Machine Mod Disabled Disabling of Slave Machine Mode Copy Function Settings Disabled Disabling of Registration/Deletio n of Program Disabled Disabling of Bypass-Tray in Dupl...
- Page 970 USER'S MANUAL | MX-M365N/MX-M465N/MX-M565N USER'S ... http://siica.sharpusa.com/portals/0/downloads/Manuals/MX-M365N-M... Disabled Disabling sending while printing Image Send Settings Disabled Disable Switching of Display O rder Disabled Disable Fax Broadcasting Disabled Disable Scan Function Settings to Disable Registration All Invalid Disable Registering Destinatio n from Operation Panel...
- Page 971 USER'S MANUAL | MX-M365N/MX-M465N/MX-M565N USER'S ... http://siica.sharpusa.com/portals/0/downloads/Manuals/MX-M365N-M... All Invalid Disable Selection from Addres s Book All Invalid Disable Direct Entry Disabled Disable PC-I-Fax Transmissio Disabled Disable PC-Fax Transmission Document Filing Settings Disabled Disabling Text/Stamp printing at Reprint Batch Print Settings...
- Page 972 USER'S MANUAL | MX-M365N/MX-M465N/MX-M565N USER'S ... http://siica.sharpusa.com/portals/0/downloads/Manuals/MX-M365N-M... Disabled Disable display of History Security Settings Hidden Pattern Print Setting Disabled Disable Direct Entry *1 When a large capacity tray is installed *2 When a paper drawer is installed *3 When a saddle finisher or finisher is installed...
- Page 973 USER'S MANUAL | MX-M365N/MX-M465N/MX-M565N USER'S ... http://siica.sharpusa.com/portals/0/downloads/Manuals/MX-M365N-M... Product Key Serial Number Barcode Font Kit Internet Fax Expansion Kit E-mail Alert and Status Application Integration Module XPS expansion kit Web Browsing Expansion Kit * It may not be possible to use some settings, depending on the peripheral devices installed.
- Page 974 USER'S MANUAL | MX-M365N/MX-M465N/MX-M565N USER'S ... http://siica.sharpusa.com/portals/0/downloads/Manuals/MX-M365N-M... NETWORK SETTINGS The following is a list of setting mode items, factory default settings and restrictions for each item. Depending on the machine specifications and peripheral devices installed, it may not be possible to use some settings.
- Page 975 USER'S MANUAL | MX-M365N/MX-M465N/MX-M565N USER'S ... http://siica.sharpusa.com/portals/0/downloads/Manuals/MX-M365N-M... Protocol Settings IPv4 Settings Disabled DHCP/BOOTP Disabled RARP IPv6 Settings Disabled IPv6 Enabled DHCPv6 Ping Command NetWare NetWare Settings Disabled NetWare 802.2 Frame Type PSERVER Operation Mode PSERVER Settings RPRINTER Settings EtherTalk EtherTalk Settings...
- Page 976 USER'S MANUAL | MX-M365N/MX-M465N/MX-M565N USER'S ... http://siica.sharpusa.com/portals/0/downloads/Manuals/MX-M365N-M... Disabled NBT/WINS Services Settings WINS SMTP SNMP Kerberos SNTP mDNS Print Port Settings LPD Settings Enabled 0 seconds Timeout Disabled Use Banner Raw Print Settings Enabled Raw Print 9100 Port Number 90 seconds...
- Page 977 USER'S MANUAL | MX-M365N/MX-M465N/MX-M565N USER'S ... http://siica.sharpusa.com/portals/0/downloads/Manuals/MX-M365N-M... Disabled Use Bidirectional WSD Settings Enabled WSD Print Enabled Use Multicast Discovery LDAP Settings Enabled LDAP Settings Global Address Books List Public Folder/NAS Settings Public Allowed Use of Storage Shared Allowed Use of Storage...
- Page 978 USER'S MANUAL | MX-M365N/MX-M465N/MX-M565N USER'S ... http://siica.sharpusa.com/portals/0/downloads/Manuals/MX-M365N-M... Address without using proxy Wireless Settings Wireless Settings Connection Type Switching HTTP Access Settings Number of Users who can log in at the Same Time Auto Logout Time View Login User 978 of 1441...
- Page 979 USER'S MANUAL | MX-M365N/MX-M465N/MX-M565N USER'S ... http://siica.sharpusa.com/portals/0/downloads/Manuals/MX-M365N-M... APPLICATION SETTINGS The following is a list of setting mode items, factory default settings and restrictions for each item. Depending on the machine specifications and peripheral devices installed, it may not be possible to use some settings.
- Page 980 USER'S MANUAL | MX-M365N/MX-M465N/MX-M565N USER'S ... http://siica.sharpusa.com/portals/0/downloads/Manuals/MX-M365N-M... Enabled Add Job Information Automatical ly to the Mail Message Body Disabled Add a Footer Automatically to th e Mail Message Body Mail Footer Registration Internet Fax Settings Receive Settings Enabled Internet fax reception...
- Page 981 USER'S MANUAL | MX-M365N/MX-M465N/MX-M565N USER'S ... http://siica.sharpusa.com/portals/0/downloads/Manuals/MX-M365N-M... Sender Name I-Fax Own Address Direct SMTP Port Number (Receive) Timeout Port Number (Send) Timeout Inbound Routing Settings Sender Number/Address Registrati Administration Settings Inbound Routing Settings Disabled Inbound Routing Disabled Disable Registration of Forwar...
- Page 982 USER'S MANUAL | MX-M365N/MX-M465N/MX-M565N USER'S ... http://siica.sharpusa.com/portals/0/downloads/Manuals/MX-M365N-M... File Naming Disabled If received from a contact regi stered in the address book, se nder's name is changed to con tact's name. Settings for HDD Storing of Receiv ed Data Document Administration Function...
- Page 983 USER'S MANUAL | MX-M365N/MX-M465N/MX-M565N USER'S ... http://siica.sharpusa.com/portals/0/downloads/Manuals/MX-M365N-M... Disabled External Account Control Embedded Application Settings Polling Setting Web Browsing Settings Alert me How to handle Cookie? Disabled Disable URL Entry Disabled Disable Adding or Editing Favourite Disabled Disable Registration/Edit of Home...
- Page 984 USER'S MANUAL | MX-M365N/MX-M465N/MX-M565N USER'S ... http://siica.sharpusa.com/portals/0/downloads/Manuals/MX-M365N-M... E-mail Print Settings Disabled E-mail Print POP3 Server Port Number Disabled POP Authentication User Name Password 5 minutes Check Interval Disabled Enable SSL Connection Test Setting for Print from the MFP(FTP) Setting for Print from the MFP(SMB)
- Page 985 USER'S MANUAL | MX-M365N/MX-M465N/MX-M565N USER'S ... http://siica.sharpusa.com/portals/0/downloads/Manuals/MX-M365N-M... ENERGY SAVE The following is a list of setting mode items, factory default settings and restrictions for each item. Depending on the machine specifications and peripheral devices installed, it may not be possible to use some settings.
- Page 986 USER'S MANUAL | MX-M365N/MX-M465N/MX-M565N USER'S ... http://siica.sharpusa.com/portals/0/downloads/Manuals/MX-M365N-M... Enabled HDD Store Enabled Scan to Ext.Memory Dev. Enabled Print Enabled Send Enabled External Data Access Enabled System Settings Enabled Sharp OSA Enabled Web Browsing Power Management Setting 1 minutes Preheat Mode Setting...
- Page 987 USER'S MANUAL | MX-M365N/MX-M465N/MX-M565N USER'S ... http://siica.sharpusa.com/portals/0/downloads/Manuals/MX-M365N-M... Power ON/OFF Schedule Setting * When the Web browsing expansion kit is installed. 987 of 1441 3/17/2016 7:14 AM...
- Page 988 USER'S MANUAL | MX-M365N/MX-M465N/MX-M565N USER'S ... http://siica.sharpusa.com/portals/0/downloads/Manuals/MX-M365N-M... E-MAIL ALERT AND STATUS The following is a list of setting mode items, factory default settings and restrictions for each item. Depending on the machine specifications and peripheral devices installed, it may not be possible to use some settings.
- Page 989 USER'S MANUAL | MX-M365N/MX-M465N/MX-M565N USER'S ... http://siica.sharpusa.com/portals/0/downloads/Manuals/MX-M365N-M... JOB LOG The following is a list of setting mode items, factory default settings and restrictions for each item. Depending on the machine specifications and peripheral devices installed, it may not be possible to use some settings.
- Page 990 USER'S MANUAL | MX-M365N/MX-M465N/MX-M565N USER'S ... http://siica.sharpusa.com/portals/0/downloads/Manuals/MX-M365N-M... SECURITY SETTINGS The following is a list of setting mode items, factory default settings and restrictions for each item. Depending on the machine specifications and peripheral devices installed, it may not be possible to use some settings.
- Page 991 USER'S MANUAL | MX-M365N/MX-M465N/MX-M565N USER'S ... http://siica.sharpusa.com/portals/0/downloads/Manuals/MX-M365N-M... Enabled Raw Print 9100 Port Number Enabled Port Number Enabled Port Number Disabled IPP-SSL Port Number Enabled Tandem Output Receive 50001 Port Number Enabled PC Scan 52000 Port Number Enabled Remote Operation Panel...
- Page 992 USER'S MANUAL | MX-M365N/MX-M465N/MX-M565N USER'S ... http://siica.sharpusa.com/portals/0/downloads/Manuals/MX-M365N-M... Enabled SMTP Enabled Enabled USB-Device Expansion Sharp OSA (Expansion Platform) Enabled HTTP 10080 Port Number Enabled HTTPS 10443 Port Number Client Port Enabled HTTP Enabled HTTPS Enabled Enabled FTPS Enabled SMTP Enabled SMTP-SSL...
- Page 993 USER'S MANUAL | MX-M365N/MX-M465N/MX-M565N USER'S ... http://siica.sharpusa.com/portals/0/downloads/Manuals/MX-M365N-M... Enabled LDAP Enabled LDAP-SSL Enabled SMB/WINS Disabled SNTP Enabled mDNS Enabled Tandem Output Send Enabled Data Backup (Send) Disabled Filter Setting IP Address Filter Settings Allowed Filter Mode Filter Addresses 1 to 4 0.0.0.0...
- Page 994 USER'S MANUAL | MX-M365N/MX-M465N/MX-M565N USER'S ... http://siica.sharpusa.com/portals/0/downloads/Manuals/MX-M365N-M... evice Web Page Access Client Port Enabled HTTPS Enabled FTPS Enabled SMTP-SSL Enabled POP3-SSL Enabled LDAP-SSL Level of Encryption Certificate Information IEEE802.1X Setting Disabled IEEE802.1X Authentication EAP-TLS EAP Authentication Method EAP User Name...
- Page 995 USER'S MANUAL | MX-M365N/MX-M465N/MX-M565N USER'S ... http://siica.sharpusa.com/portals/0/downloads/Manuals/MX-M365N-M... IPsec Settings Disabled IPsec Settings IKEv1 Settings Pre-Shared Key 28800 seconds SA Lifetime (time) 28800 KB (1/2") SA Lifetime (size) 30 seconds IKE Lifetime IPsec Rules Hidden Pattern Print Default Settings Standard Hidden Pattern Print Setting...
- Page 996 USER'S MANUAL | MX-M365N/MX-M465N/MX-M565N USER'S ... http://siica.sharpusa.com/portals/0/downloads/Manuals/MX-M365N-M... Enabled, DO NOT COPY Pre-Set Word Pre-set Text Disabled Unit Serial Number Disabled Account Job ID Disabled Login Name/User Number Disabled Control No. Disabled Date/Time Disabled Disable Direct Entry Contrast Black Custom Text Registration...
- Page 997 USER'S MANUAL | MX-M365N/MX-M465N/MX-M565N USER'S ... http://siica.sharpusa.com/portals/0/downloads/Manuals/MX-M365N-M... Vertical Position Disabled Print Upper Side of Paper Enabled Print Lower Side of Paper Horizontal Position Enabled Print Left Side of Paper Disabled Print Right Side of Paper Select the Job to Print...
- Page 998 USER'S MANUAL | MX-M365N/MX-M465N/MX-M565N USER'S ... http://siica.sharpusa.com/portals/0/downloads/Manuals/MX-M365N-M... TOP PAGE The top page displays the system information of the machine. It displays the model name, current status, and machine location. Item Description [Update] key Updates the information displayed. Unit Serial Numb Indicates the serial number of the machine.
- Page 999 USER'S MANUAL | MX-M365N/MX-M465N/MX-M565N USER'S ... http://siica.sharpusa.com/portals/0/downloads/Manuals/MX-M365N-M... Toner Low Paper Low Input Tray Open Output Tray Full Output Tray Nearly Full Near to overdue service maintenance Online Auto Power Shut-Off Warming Up BUSY Memo Displays text that the administrator entered. If you have logged in as an administr ator, you can enter a memo.
- Page 1000 USER'S MANUAL | MX-M365N/MX-M465N/MX-M565N USER'S ... http://siica.sharpusa.com/portals/0/downloads/Manuals/MX-M365N-M... DEVICE STATUS This screen shows the device status. Item Description [Update] button Updates the information displayed. [Back] button Returns to the top page. Paper Input Tray Status Displays the current status of the paper trays installed in the machin...
Need help?
Do you have a question about the MX-M365N and is the answer not in the manual?
Questions and answers