
Related Manuals for Rangemaster RMB608BL


Summary of Contents for Rangemaster RMB608BL
-
Page 1: Electric Oven
RMB608BL/SS Electric Oven User Guide & Installation & Service Instructions U110590 - 02... -
Page 3: Table Of Contents
Contents Before You Start... Oven Overview Function Overview Programming Overview Cooking Tips Cooking Table Cleaning Your Oven Troubleshooting Installation 10. Circuit Diagram 11. Technical Data 12. Warranty/After Sales Service... -
Page 5: Before You Start
1. Before You Start... Thank you for buying a Rangemaster oven. It should give you Use dry oven gloves when applicable – using damp many years trouble-free cooking if installed and operated gloves might result in steam burns when you touch a correctly. - Page 6 Cleaning In the interests of hygiene and safety, the oven should be kept clean at all times as a build up in fats and other foodstuffs could result in a fire. Clean only the parts listed in this guide. Clean with caution. If a wet sponge or cloth is used to wipe spills on a hot surface, be careful to avoid steam burns.
-
Page 7: Oven Overview
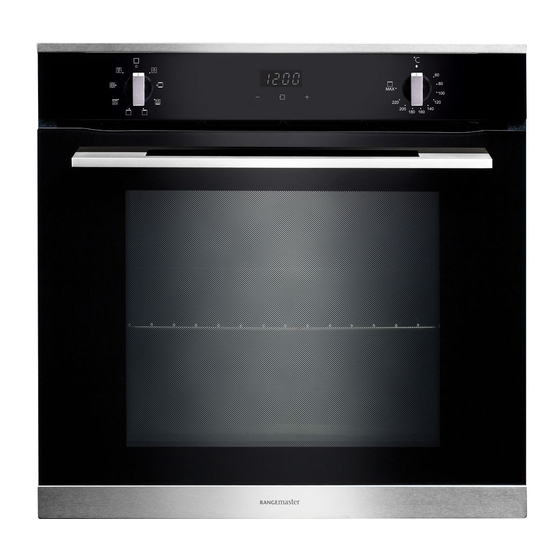
2. Oven Overview Fig. 2.1 ArtNo.325-0011 - BI oven R6012 Key: Fig. 2.1 Checking the Parts The oven is supplied with the following parts: 1. Oven Light 3 buttons, clock and function display • 1x Handle 2. Conventional • 2x Shelf Temperature and 3. -
Page 8: Function Overview
3. Function Overview No Function Mode Selected Oven Light The oven light will operate on all selected function. This function uses the upper and lower heating elements. Natural convection Conventional heat creates a perfect cooking zone in the centre of the oven, ideal for dark fruit cakes Shelf position 2 or 3 and pastries. -
Page 9: Programming Overview
4. Programming Overview Oven Shelf levels Fig. 4.1 Always count shelf levels from the bottom upwards (Fig. 4.1) When correctly installed, your product will meet all safety requirements laid down for this type of product. However, special care should be taken around the rear or the underneath of the appliance as these areas are not designed or intended to be touched and may contain sharp or rough edges that... - Page 10 Semi-automatic cooking Fig. 4.3 The lower oven can be set to switch off automatically with a preset time of 10 hours. Cannot be used on the top oven. This features works by knowing the cooking duration. For example if the time is 13:30 and the food is required to bake for 45 minutes, the lower oven will stop working at 14:15.
-
Page 11: Cooking Tips
5. Cooking Tips Tips on Cooking with the Timer General Oven Tips If you want to cook more than one dish, choose dishes that The wire shelves should always be pushed firmly to the back require approximately the same cooking time. However, of the oven. -
Page 12: Cooking Table
6. Cooking Table The oven control settings and cooking times given in the table below are intended to be used Top (T) AS A GUIDE ONLY. Individual tastes may require the temperature to be altered to provide a preferred result. ArtNo.050-0007 Centre (C) Oven shelf positions... -
Page 13: Cleaning Your Oven
7. Cleaning Your Oven Essential Information Fig. 7.1 Allow the oven to cool and isolate the electricity supply before carrying out any thorough cleaning and maintenance. Never use paint solvents, washing soda, caustic ArtNo.325-0001 - BI oven door hinges cleaners, biological powders, bleach, chlorine based bleach cleaners, coarse abrasives or salt. -
Page 14: Changing The Bulb
Removing the glass from the door Fig. 7.4 Follow the procedure to remove the door. Place the door on a soft and clean surface. With both hands hold the door and push the buttons on either side of the oven door (Fig. 7.4). One the top cap has been removed you will have access to the glass. -
Page 15: Troubleshooting
8. Troubleshooting DocNo.054-0001 - Troubleshooting BI oven Steam is coming from the oven. A dish of water when placed on the shelf should be the When cooking foods with a high water content (e.g. same depth all over. (For example, if it is deeper at the oven chips) there may be some steam visible at the top back, then the back of the cooker should be raised up or of the door. -
Page 16: Installation
INSTALLATION Check the appliance is electrically safe when you have finished. 9. Installation DocNo.064-0003 - Installation - R6012 oven Dear Installer Location of the Oven Before you start your installation, please complete the details The oven may be installed in a kitchen/kitchen diner but NOT BELOW. -
Page 17: Positioning The Oven
INSTALLATION Check the appliance is electrically safe when you have finished. Fig. 9.1 577.2 All dimensions in mm 568.8 Positioning the Oven Failure to allow adequate ventilation to the appliance may result in overheating or damage to adjacent units and could The oven can be installed under a worktop (Fig. - Page 18 INSTALLATION Check the appliance is electrically safe when you have finished. Provision for Ventilation DOUBLE POLE SWITCHED Fig. 9.2 FUSE SPUR OUTLET The appliance housing used must provide adequate ventilation. For built-in installation, a minimum ventilation space of 85 – 90mm 40mm must exist between the rear of the appliance and the back of the housing or an adjacent wall.
-
Page 19: Levelling The Appliance
0.5 cm. These shims are only used when you notice the appliance is 105 mm uneven in the cabinet and it is not lined up with Rangemaster built-in appliance. Check that the dimensions of the cabinet are correct for this appliance. -
Page 20: Circuit Diagram
10. Circuit Diagram DocNo.094-0003 - Circuit diagram R6012 oven... -
Page 21: Technical Data
594 mm Width 594 mm 560 - 600 Depth 568.8 mm 560 (min) Oven Data Brand Rangemaster Model identification RMB608BL/SS Type of oven Electric Mass 37.3 Number of cavities Single Cavity Efficiency Fuel type Electric Cavity type Multifunction* *Drop Down Door... -
Page 22: Warranty/After Sales Service
12. Warranty/After Sales Service DocNo.111-0003 Warranty No.10 If consultation or technical assistance is needed, please provide the local authorised service agent with the purchase invoice and the product code/serial number. The 2 years free maintenance for the operation of the appliance started from the date of purchase of this product. - Page 23 Notes...
- Page 24 Clarence Street, Royal Leamington Spa, Warwickshire, CV31 2AD, England. Tel: +44 (0) 800 8046261 E-mail: consumers@agarangemaster.co.uk...
Need help?
Do you have a question about the RMB608BL and is the answer not in the manual?
Questions and answers