
Related Manuals for Meta System EasyCan Digital


Summary of Contents for Meta System EasyCan Digital
- Page 1 EasyCan Digital ISTRUZIONI DI MONTAGGIO INSTALLATION INSTRUCTION www.metasystem.it...
-
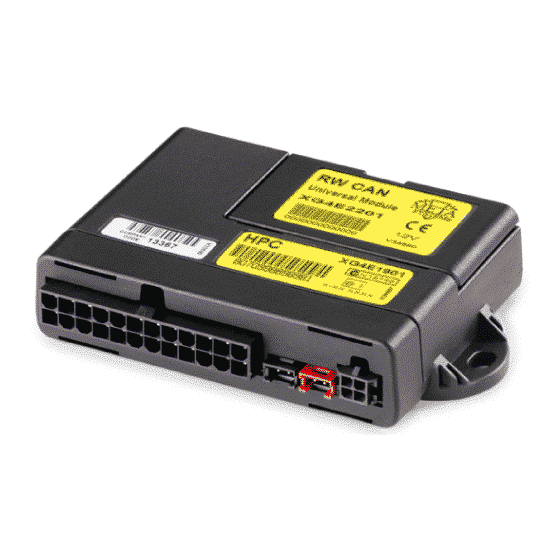
Page 2: Caratteristiche Tecniche
CAN-BUS disponibili al prodotto EasyCan Digital consultare la lista abbinamento prodotto/vettura disponibile nell’area tecnica del sito www.metasystem.it. Per inserire nel prodotto EasyCan Digital i nuovi protocolli CAN-BUS necessari all’applicazione sul veicolo o gli adeguamenti dei protocolli CAN-BUS esistenti seguire le indicazioni illustrate a pagina 10 dove dove sarà presente anche una lista dei principali protocolli CAN-BUS residenti all’interno del modulo Digital. -
Page 3: Schema Generale
SCHEMA GENERALE (SET-UP/OVERRIDE SWITCH) TX RX SENSORE PROTEZIONE VOLUMETRICA (ROSSO) PREDISPOSIZIONE SENSORE PROTEZIONE SIRENA VOLUMETRICA (Fig. 6, 7, 8) (NERO) INSTALLARE FUSIBILE 15A PREDISPOSIZIONE ROSSO POSITIVO VIOLA PROTEZIONE BATTERIA (+30) COFANO (Fig. 15) NERO MASSA PROTEZIONE VERDE PORTE ARANCIO POSITIVO CHIAVE DI AVVIAMENTO (+15) VIOLA PROTEZIONE... - Page 4 EasyCan SIRENE ABBINABILI A La centrale EasyCan riconosce automaticamente il modello di sirena adattandosi ad essa. Il riconoscimento avviene tramite l’emissione acustica di un BOOP nell’istante in cui si alimenta il sistema d’allarme e per evitare che la sirena non risponda si raccomanda all’installatore di collegarla prima di alimentare il sistema d’allarme.
- Page 5 PROTEZIONE VOLUMETRICA INIBIZIONE PROTEZIONE VOLUMETRICA Per escludere la protezione volumetrica procedere come descritto e illustrato di seguito; attivare 2 volte il +15 quadro del veicolo, dopo i 3 Beep della centrale chiudere la vettura con il radiocomando d’orgine entro 20 Sec. Un lampeggio molto rapido durante il tempo di immunità...
- Page 6 BLINKER Per il pilotaggio degli indicatori di direzione durante una fase di allarme è indispensabile collegare i fi li di colore Azzurro e Azzurro/Verde. Se la vettura non è dotata del lampeggio degli indicatori di direzione alla chiusura/apertura occorre attivare la selezione Blinker Ins/Dis “ON”...
- Page 7 USCITA ALLARME PER RELE’ CLACSON/PAGER Sul fi lo MARRONE è presente, durante un ciclo d’allarme, un comando negativo per pilotare il relé d’origine o uno supplementare per il clacson della vettura o un eventuale Pager. Il comando negativo può essere di tipo continuo o alternato a seconda della selezione eseguita nella tabella di programmazione delle funzioni accessorie.
- Page 8 Pulsante/Led con le indicazioni presenti nel libretto d’uso o in alternativa abbinando delle chiavi elettroniche come illustrato di seguito. Per alcune applicazioni del prodotto EasyCan Digital è possibile disporre della disattivazione in emergenza tramite l’utilizzo della chiave con transponder originale dell’autovettura.
- Page 9 Nel caso che all’inserimento dell’allarme un vetro sia aperto la centrale EasyCan Digital avviserà con un BOOP e provvederà dopo la chiusura del veicolo ad escludere la protezione volumetrica avvisando l’utente con le stesse segnalazioni previste per l’inibizione volontaria dopo la chiusura del veicolo.
- Page 10 CAN-BUS esistenti è necessario l’utilizzo del programmatore portatile PDC/CAR ALARM PROGRAMMER e del cablaggio dedicato per EasyCan (code:ABS13720) I protocolli per l’aggiornamento del prodotto EasyCan Digital sono inclusi all’interno del software presente nel programmatore portatile PDC/CAR ALARM PROGRAMMER e per avere disponibili i nuovi protocolli è necessario aggiornare il programmatore scaricando la nuova versione software dall’area tecnica del sito www.metasystem.it dove troverete...
- Page 11 PERSONALIZZAZIONE DELLE MODALITÀ OPERATIVE Nella tabella sotto riportata sono indicate le modalità operative disponibili. In evidenza sono riportate le selezioni impostate di fabbrica e in chiaro la possibile alternativa a quanto programmato di fabbrica. Per variare la programmazione di fabbrica passando dalla riga “A” a quella “B” della tabella (o viceversa) è necessario seguire la seguente procedura operativa: NOTA: Il passaggio, tramite +15 quadro, dalla riga “A”...
- Page 12 MODULO IBRIDO M327 (OPT) Il modulo ibrido M327 permette di disporre di uno o più radiocomandi aggiuntivi a quello d’origine tramite i quali è possibile comandare le chiusure centralizzate, gli indicatori di direzione, lo sblocco del baule e l’allarme EasyCan. L’utilizzo del radiocomando in dotazione alla centrale M327 consente inoltre di inibire, con una doppia pressione del tasto chiude, la protezione ultrasuoni evitando le attivazioni del quadro veicolo.
- Page 13 ANTIRAPINA La funzione antirapina prevede l’installazione di un pulsante nascosto da premere ogni volta che viene aperta una porta con quadro strumenti acceso. La mancata pressione del pulsante attiva una procedura di avviso che si conclude dopo 150sec. con il blocco dell’avviamento del veicolo; lo sblocco dell’allarme potrà essere eseguito solo inserendo l’override o la chiave elettronica.
- Page 14 ESTRAZIONE DEL MODULO Nel caso sia necessario estrarre e sostituire il modulo sganciarlo seguendo le istruzioni mostrate di seguito e eseguire l’operazione con prodotto scollegato dalla batteria dell’auto. Per inserire il nuovo modulo è necessario posizionarlo in modo che i connettori maschio/femmina corrispondano e spingerlo in sede fi no allo scatto dei blocchi meccanici.
-
Page 15: Technical Specifications
To enter the new CAN-BUS protocols needed for vehicle application, or existing CAN-BUS protocol updates in the EasyCan Digital product, follow the instructions on page 10, where there is also a list of the main CAN-BUS protocols resident inside the Digital module. - Page 16 GENERAL DIAGRAM (SET-UP/OVERRIDE SWITCH) TX RX SENSOR FOR VOLUME PROTECTION (RED) SIREN PRE-WIRING SENSOR FOR VOLUME (Fig. 6, 7, 8) PROTECTION (BLACK ) MOUNT 15A FUSE PRE-WIRING FOR BONNET POSITIVE BATTERY PURPLE PROTECTION (+30) (Fig. 15) BLACK EARTH DOOR GREEN PROTECTION ORANGE IGNITION KEY...
- Page 17 EasyCan SIRENS COMBINABLE WITH The EasyCan control unit automatically recognises the siren model and adapts to it. It recognises it by means of an acoustic BOOP the instant the alarm system is powered; to ensure the siren responds make sure the installer connects it before powering the alarm system. BLACK/RED BLACK CONNECTOR ON CABLE...
- Page 18 VOLUMETRIC PROTECTION VOLUMETRIC PROTECTION INHIBITION To disable the volumetric protection proceed as explained and illustrated below; activate the car’s +15 panel twice and after the 3 beeps of the control unit lock the car with the original remote control within the next 20 seconds. The LED will fl ash very quickly during the immunity time to indicate that the alarm is activated with the volumetric protection disabled.
- Page 19 BLINKER To control the blinkers during an alarm phase it is essential to connect the Blue and Blue/Green wires. If the car does not have blinker fl ashing, when opening and closing you have to activate the selection Blinker ON/OFF “ON”...
- Page 20 ALARM OUTPUT FOR HORN/PAGER RELAY During an alarm cycle there is either a negative command for controlling the original relay on the BROWN wire or a supplementary relay for the horn or a Pager. The negative command can be the continuous or alternating type depending on what was selected in the accessory functions programming table.
- Page 21 LED following the instructions in the user handbook or alternatively, combining the electronic keys as illustrated below. For some EasyCan Digital product applications, emergency deactivation is available using the original car key with transponder. To know on which car models the EMERGENCY DEACTIVATION with original transponder is available, refer to the product/car list on the www.metasystem.it.
- Page 22 If a window is open when the alarm is engaged, the EasyCan Digital unit will signal this with a BOOP and, after the vehicle has been closed, will cut out the volumetric protection and notify the user with the same signals provided for voluntary inhibition after vehicle closing.
- Page 23 The EasyCan Digital product is supplied with a factory set-up which permits the automatic recognition of all the CAN-BUS protocols of the Volkswagen group (VW autosearch).
- Page 24 CUSTOMISING THE OPERATING MODES The available operating modes are listed in the following table. The factory settings are in bold type and the possible alternatives are in plain text. To change the factory programming, going from line “A” to line “B” of the table (or vice versa) proceed as follows: NOTE: Passage, via +15 panel, from line “A”...
- Page 25 HYBRID MODULE M327 (OPT) With the hybrid module M327 you can have one or more additional remote controls besides the original one and by means of which it is possible to control centralised locking, the blinkers, releasing the trunk and the EasyCan alarm. By using the remote control that comes with the control unit M327 you can also inhibit, by pressing twice on the lock key, the ultrasound protection device thus preventing activation of the car’s instrument panel.
- Page 26 REMOVING THE MODULE In the event of having to remove and replace the module, to release it follow the instructions shown below and perform the operation with the product disconnected from the car battery. To fi t the new module, position it so the male/female connectors correspond and push it into its seat until the mechanical blocks click.
- Page 27 ANTI-CARJACK ALARM For the anti-carjack alarm function, a hidden button is installed which has to be pressed each time a door is opened with the instrument panel on. If the button is not pressed a warning procedure is started that ends after 150 seconds and the ignition blocks;...
Need help?
Do you have a question about the EasyCan Digital and is the answer not in the manual?
Questions and answers