Table of Contents
Advertisement
Quick Links
See also:
User Manual
Advertisement
Table of Contents

Related Manuals for Canon VC-C3


Summary of Contents for Canon VC-C3
-
Page 1: Instruction Manual
INSTRUCTION MANUAL Please read this instruction manual carefully before operation. Be sure to read the “Safe Use of Equipment” section before using this equipment. Store this manual in a readily accessible ENGLISH location for future reference. -
Page 2: Introduction
Preset function (programmable presets can be stored in camera’s memory) Camera ID setting If the VC-C3 is connected to a recording device (for example a VCR), Canon Inc. accepts no responsibility whatsoever for any financial losses that may be incurred as a result of the loss of recorded information or images, regardless of the internal or external cause of the loss. -
Page 3: Safe Use Of Equipment
Date of Purchase Dealer Purchased from Dealer Address Dealer Phone No. Model No. VC-C3 Serial No. Important Operational Instructions WARNING: TO REDUCE THE RISK OF ELECTRIC SHOCK, DO NOT EXPOSE THIS EQUIPMENT TO RAIN OR MOISTURE. - Page 4 If such changes or modifications should be made, you could be required to stop operation of the equipment. Canon U.S.A. Inc. One Canon Plaza, Lake Success, NY 11042, U.S.A. Tel No. (516) 328-5600 IC NOTICE This product does not exceed the Class B limits for radio noise emissions from digital apparatus as set out in the Interference-causing equipment standard entitled ‘Digital Apparatus’, ICES-003 of the Industry and Canada.
-
Page 5: Important Safety Instructions
In these safety instructions the word “e q u i p m e n t ” a child or adult, and serious damage to the r e fers to the CANON communication camera equipment.An equipment and cart VC-C3 and all its accessori e s. - Page 6 15. Overloading - Do not overload wall outlets that are specified by Canon or that have and extension cords as this can result in a the same characteristics as the original risk of fire or electric shock.
- Page 7 If any soiling or leakage of the internal contact your nearest Canon supplier. Do battery fluid occurs, thoroughly clean not continue to use the equipment as this the soiling or leaked fluid with water.
-
Page 8: Table Of Contents
Adjusting the Brightness (BRIGHTNESS) ..........23 Storing a Preset Position/Restoring a Preset Position ......23 OPERATE Mode ..................24 ID Mode ................25 Preparations ....................25 Selecting the VC-C3 to be Controlled ............26 Cancelling ID Mode ................28 Troubleshooting..............30 Maintenance ................32 Specifications..............33 Quick Guide of Operation ..........34 Appendix A ......35... -
Page 9: Before You Use The Vc-C3
Before You Use the VC-C3 Checking the Accessories Camera CCU (Camera control unit) (Camera head and base) Wireless controller AC adapter CCU (camera control unit) cable Pin cable 6 strips of Velcro ® Instruction Manual Warranty Card... -
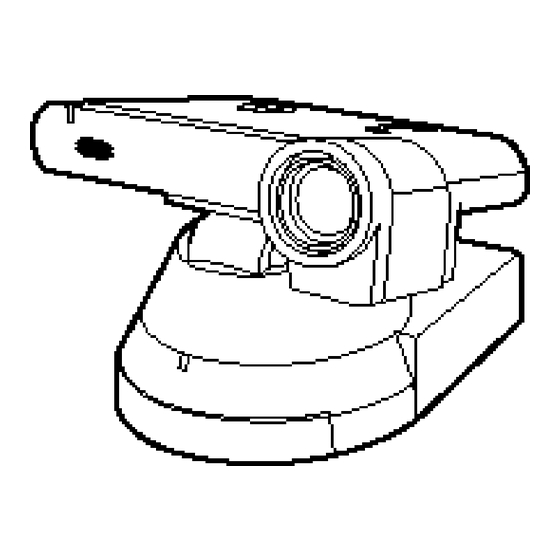
Page 10: Nomenclature
VC-C3 OFF and ON again. These switches should be set when *1 When the extension button is pressed, the VC-C3 transmits a signal you connect the VC-C3 to the to the computer. This means that some software can attach the computer (consult your authorized camera detection function to the extension button. -
Page 11: Wireless Controller
Not used in normal use . Battery cover See P.14 for information on loading batteries. *1 When the OPTION button is pressed, the VC-C3 transmits a signal to the computer. This means that some software can attach the camera detection function to the OPTION button. -
Page 12: Connecting The Components
*2 The computer connection cable differs depending on the type of computer used. Check with your dealer. *3 If your VC-C3 is connected to external speakers, the sound made by the camera head motor when it operates will be audible through the speakers. -
Page 13: Installing The Vc-C3
Installing the VC-C3 To ensure that the VC-C3 remains safely fixed in place, use the Velcro ® strips provided to mount the VC-C3. The camera and the camera control unit can be placed separetely or combined into one unit. When the Camera and the Camera Control Unit are... -
Page 14: Loading The Batteries Into The Wireless Controller
Before You Use the VC-C3 Loading the Batteries into the Wireless Contro l l e r The wireless controller requires two R6/AA-type batteries (not supplied). 1. Remove the battery cover. 2. Insert the batteries, taking care that the poles (+ and –) are correctly positioned. -
Page 15: The Leds
The LEDs The VC-C3 has three LEDs (camera head, base and camera control unit). -
Page 16: Using The Vc-C3
Monitor (ON) (base ON) unit (ON) The VC-C3 is set to auto-focus mode when it is first turned on or when power is recycled. If any of the connection cables are disconnected while the base or camera control unit is powered ON, then proceed as follows: 1. - Page 17 ON, the power to the base will be supplied automatically. Turn the base power switch and the camera control unit main power switch OFF when you are not using the VC-C3. If you are not planning on using the VC-C3 for a long time, unplug the AC adapter.
-
Page 18: Operations
If the camera and camera control unit are used as one unit (see P.13), the cable connected to the camera control unit may appear on the monitor in some camera head angles. If external speakers are connected to the VC-C3, the sound made by the camera head motor will be audible through the speakers. -
Page 19: Focusing (Focus)
To use auto-focus mode Press the button. Subjects not suitable for auto-focus The VC-C3 may have difficulty focusing automatically on subjects of the type shown below. Use the manual focus mode for such situations. Subjects with little Angled subjects Highly reflective... - Page 20 Holding down the button continues to shorten the focal distance. When you press the button in auto-focus mode, the VC-C3 switches to manual focus mode and the focal distance shortens. To focus on distant subjects Press the button. Holding down the button continues to lengthen the focal distance.
-
Page 21: Zooming In/Out (Tele/Wide)
If you do not press the button, it will no longer be possible to correctly adjust the camera head angle. Focusing Range The VC-C3 may not be able to focus depending on the zoom position.Refer to “ Focusing Range” on P.20. - Page 22 This function increases the brightness level of an image when it appears dark on the monitor. To adjust the brightness Press the button. When the VC-C3 is turned ON, the brightness level is set to normal. Three levels of brightness are available. The brightness level of the image increases each time you press the button.When you press the...
-
Page 23: Adjusting The Brightness (Brightness)
The VC-C3 returns to the stored camera head angle, zoom position and brightness level. When the VC-C3 is in manual focus mode, the focus may be incorrect when a preset position is restored. In this event, set the VC-C3 to auto-focus mode or focus the VC-C3 manually. -
Page 24: Operate Mode
It is recommended to place the VC-C3 in out of the OPERATE mode when the VC-C3 will not be used for an extended period of time. -
Page 25: Id Mode
The numbers on the ID selector go up to 9, but only numbers 1 to 6 are valid as ID numbers. If you set the ID to 0 or 7 through 9, the VC-C3 will respond to any wireless controller command and... -
Page 26: Selecting The Vc-C3 To Be Controlled
ID Mode Selecting the VC-C3 to be Controlled When you select a specific VC-C3 to be controlled, only the selected VC-C3 will respond to wireless controller commands. 1. Press the button. The base LEDs on all the VC-C3s will blink orange (at 0.5-second intervals). - Page 27 Example of Actual Operation In this example, the VC-C3 with ID number 2 is selected and the operation of the VC-C3s with different ID numbers is restricted. The ID numbers have been set using the ID selector and the base LEDs on all the VC-C3s are lit green.
-
Page 28: Cancelling Id Mode
To cancel the operation, press the button again. 2. Press the button. The VC-C3 ID mode is cancelled and the restriction on the operation of other VC-C3s is removed.The base LEDs on all the VC-C3s turn green and all the VC-C3s can be controlled using the wireless controller. - Page 29 Example of Actual Operation In this example, the selection of the VC-C3 with ID number 2 is cancelled and the restriction on the operation of VC-C3s with other ID numbers is removed. The VC-C3 with the ID number 2 is selected and...
-
Page 30: Troubleshooting
Check 2: Is the base LED blinking green (at 1-second intervals)? Response: If the VC-C3 is out of the OPERATE mode. Press the button on the wireless controller to turn the VC-C3 to the OPERATE mode. P.24... - Page 31 Response: If a preset position is restored when the VC-C3 is in manual focus mode, the VC-C3 may be out of focus once the VC-C3 is in the preset position. Adjust the focus manually or press the button on the wireless controller to switch the VC-C3 to auto-focus mode.
-
Page 32: Maintenance
Camera control unit main power switch Base power switch 2. Carefully clean the VC-C3 with a soft cloth that has been moistened with water or a mild detergent. Do not use flammable solvents such as alcohol, benzine or thinners. The use of such substances can cause a fire or electric shock. -
Page 33: Specifications
Specifications * When using your computer to control the VC-C3, the image on the screen can appear shaky when the camera head is being moved slowly. These specifications are subject to change without notice. -
Page 34: Quick Guide Of Operation
Quick Guide of Operation... -
Page 35: Appendix A (Serial Pin Outs And Bits Rate Set)
RS-232C Pin Out Diagrams 9pin DSUB to 8pin mini-DIN (VC-C3) Connection Below is a cable pin out of the cable required to control the VC-C3 from a computer with a 9pin control port. 8pin mini-DIN to 8pin mini-DIN (VC-C3) Connection Below is a cable pin out of the cable required to control the VC-C3 from a computer with a 8pin control port. - Page 36 CANON INC. 30-2, Shimomaruko 3-chome, Ohta-ku, Tokyo 146-8501, Japan U.S.A. CANON U.S.A., INC. NEW YORK OFFICE One Canon Plaza, Lake Success, NY 11042, U.S.A. phone: 516-328-5960 CANON U.S.A., INC. LOS ANGELES OFFICE 15955 Alton Parkway, Irvine, CA 92718-3616, U.S.A. phone: 714-753-4320 JAPAN CANON SALES CO., INC.
Need help?
Do you have a question about the VC-C3 and is the answer not in the manual?
Questions and answers