Table of Contents
Advertisement
Advertisement
Table of Contents

Subscribe to Our Youtube Channel
Related Manuals for HP HP 241 G1 Notebook PC


Summary of Contents for HP HP 241 G1 Notebook PC
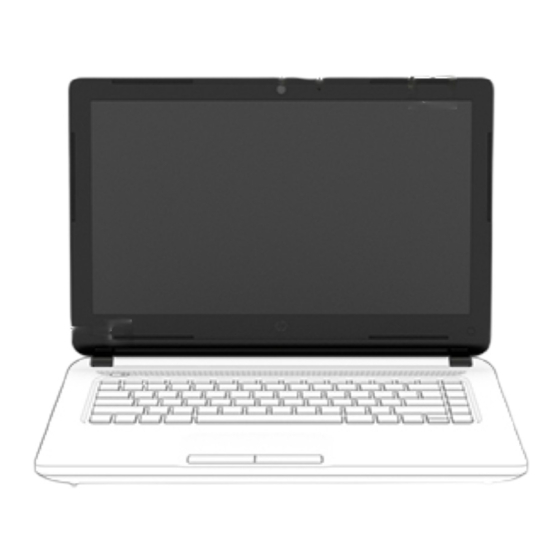
- Page 1 HP 241 G1 Notebook PC Maintenance and Service Guide...
- Page 2 HP End User License Agreement (EULA). If you do not accept these license terms, your sole remedy is to return the...
- Page 3 Safety warning notice WARNING! To reduce the possibility of heat-related injuries or of overheating the device, do not place the device directly on your lap or obstruct the device air vents. Use the device only on a hard, flat surface. Do not allow another hard surface, such as an adjoining optional printer, or a soft surface, such as pillows or rugs or clothing, to block airflow.
- Page 4 Safety warning notice...
-
Page 5: Table Of Contents
Table of contents 1 Product description ............................1 2 External component identification ......................... 3 Display ................................... 3 Left side ................................. 4 Right side ................................5 Top ..................................6 TouchPad ............................. 6 Lights ..............................7 Buttons and speakers ......................... 8 Keys ..............................9 Bottom ................................. - Page 6 Determining the BIOS version ......................48 Downloading a BIOS update ......................48 8 Using HP PC Hardware Diagnostics (UEFI) ...................... 50 Downloading HP PC Hardware Diagnostics (UEFI) to a USB device ..............50 9 Specifications ............................. 52 Computer specifications ............................52 35.6-cm (14.0-in) display specifications ......................
- Page 7 Changing the computer boot order ................59 Removing the HP Recovery partition (select models only) ........... 59 11 Statement of memory volatility ........................60 Nonvolatile memory usage ..........................62 Questions and answers ............................64 Using HP Sure Start (select models only) ......................65 12 Power cord set requirements ........................
- Page 8 viii...
-
Page 9: Product Description
● 500-GB, 5400-rpm, SATA, 7.0-mm hard drive ● 250-GB, 5400-rpm, SATA, 7.0-mm hard drive Audio and video HP TrueVision HD webcam (fixed/no tilt), 1280×720 by 30 frames per second Support for non-webcam option Single digital microphone Dual speakers DTS Audio... - Page 10 Taps enabled as default Power requirements Support for a removable 6-cell, 47-WHr, 2.20-AHr, Li-ion battery Support for a removable 4-cell, 41-WHr, 2.80-AHr, Li-ion battery Support for a 65-W EM HP Smart adapter, 4.5-mm Security Kensington Security Lock Operating system Preinstalled: Microsoft®...
-
Page 11: External Component Identification
To access this document: From the Start screen, type support, and then select the HP Support Assistant app. ‒ or – From the Windows desktop, click the question mark icon in the notification area, at the far right of the taskbar. -
Page 12: Left Side
Left side Component Description Power connector Connects an AC adapter. ● AC adapter/battery light Amber: The computer is connected to external power and the battery is charged from 0 to 99 percent. ● Blinking amber: A battery that is the only available power source has reached a low battery level. -
Page 13: Right Side
To access this document: ▲ From the Start screen, type support, and then select the HP Support Assistant app. ‒ or – From the Windows desktop, click the question mark icon in the notification area, at the far right of the taskbar. -
Page 14: Top
TouchPad Component Description TouchPad zone Reads your finger gestures to move the pointer or activate items on the screen. NOTE: The TouchPad also supports edge-swipe gestures. Left TouchPad button Functions like the left button on an external mouse. Right TouchPad button Functions like the right button on an external mouse. -
Page 15: Lights
Lights Component Description Caps lock light On: Caps lock is on, which switches the keys to all capital letters. ● Mute light Amber: Computer sound is off. ● Off: Computer sound is on. Wireless light On: An integrated wireless device, such as a wireless local area network (WLAN) device is on. -
Page 16: Buttons And Speakers
Buttons and speakers Component Description ● Power button When the computer is off, press the button to turn on the computer. ● When the computer is on, press the button briefly to initiate Sleep. ● When the computer is in the Sleep state, press the button briefly to exit Sleep. -
Page 17: Keys
Keys Component Description Displays system information when pressed in combination with key. Executes frequently used system functions when pressed in combination with the key or the spacebar. Windows key Returns you to the Start screen from an open app or the Windows desktop. -
Page 18: Bottom
Bottom Component Description Battery lock latch Locks and unlocks the battery in the battery bay Battery bay Holds the battery. Battery release latch Releases the battery. Vents (3) Enable airflow to cool internal components. NOTE: The computer fan starts up automatically to cool internal components and prevent overheating. -
Page 19: Labels
Microsoft® Certificate of Authenticity label (select models only prior to Windows 8)—Contains the Windows Product Key. You may need the Product Key to update or troubleshoot the operating system. HP platforms with Windows 8 or Windows 8.x preinstalled do not have the physical label. Instead a Digital Product Key is electronically installed. -
Page 20: Illustrated Parts Catalog
Illustrated parts catalog Computer major components Chapter 3 Illustrated parts catalog... - Page 21 Item Component Spare part number Display assembly: The display assembly is spared at the subcomponent level only. For more display assembly spare part information, see Display assembly components on page Top cover/keyboard for use in India (includes touchpad and keyboard cable) 802473-D61 TouchPad button board (includes TouchPad cable, TouchPad button board cable, and 802468-001...
-
Page 22: Display Assembly Components
Display assembly components Item Component Spare part number Display bezel For use in models with a webcam 805099-001 For use in models without a webcam 805100-001 Display panel cable For use in models with a webcam 802483-001 For use in models without a webcam 805102-001 Webcam/microphone module (includes double-sided adhesive) 802486-001... -
Page 23: Mass Storage Devices
Hard drive brackets (left and right) (2c) Hard drive connector/cable Miscellaneous parts Component Spare part number 65-W HP Smart adapter (non-PFC, EM, 4.5-mm) 714657-001 Power cord for use only in India (3-pin, black, 1.0-m): 755530-D61 Rubber Kit 802487-001 Screw Kit... - Page 24 2-GB memory module (PCL3, 12800, 1600-MHz) 675794-001 Qualcomm Atheros AR9565 802.11b/g/n 1×1 WiFi + Bluetooth 4.0 Combo Adapter 714657-001 65-W HP Smart adapter (non-PFC, EM, 4.5-mm) 752237-001 4-cell, 41-WHr, 2.80-AHr, Li-ion battery 755530-D61 Power cord for use in India (3-pin, black, 1.0-m) 778186-001 500-GB, 5400-rpm, SATA, 7.0-mm hard drive (does not include hard drive bracket or hard...
-
Page 25: Removal And Replacement Preliminary Requirements
Removal and replacement preliminary requirements Tools required You will need the following tools to complete the removal and replacement procedures: ● Flat-bladed screw driver ● Magnetic screw driver ● Phillips P0 screw driver Service considerations The following sections include some of the considerations that you must keep in mind during disassembly and assembly procedures. -
Page 26: Cables And Connectors
Cables and connectors CAUTION: When servicing the computer, be sure that cables are placed in their proper locations during the reassembly process. Improper cable placement can damage the computer. Cables must be handled with extreme care to avoid damage. Apply only the tension required to unseat or seat the cables during removal and insertion. - Page 27 The following table shows how humidity affects the electrostatic voltage levels generated by different activities. CAUTION: A product can be degraded by as little as 700 V. Typical electrostatic voltage levels Relative humidity Event Walking across carpet 35,000 V 15,000 V 7,500 V Walking across vinyl floor 12,000 V...
-
Page 28: Packaging And Transporting Guidelines
Packaging and transporting guidelines Follow these grounding guidelines when packaging and transporting equipment: ● To avoid hand contact, transport products in static-safe tubes, bags, or boxes. ● Protect ESD-sensitive parts and assemblies with conductive or approved containers or packaging. ● Keep ESD-sensitive parts in their containers until the parts arrive at static-free workstations. - Page 29 Equipment guidelines Grounding equipment must include either a wrist strap or a foot strap at a grounded workstation. ● When seated, wear a wrist strap connected to a grounded system. Wrist straps are flexible straps with a minimum of one megohm ±10% resistance in the ground cords. To provide proper ground, wear a strap snugly against the skin at all times.
-
Page 30: Removal And Replacement Procedures For Customer Self-Repair Parts
Self-Repair is supported in your location. NOTE: HP continually improves and changes product parts. For complete and current information on supported parts for your computer, go to http://partsurfer.hp.com, select your country or region, and then follow the on-screen instructions. Component replacement procedures... -
Page 31: Battery
WARNING! To reduce potential safety issues, use only the battery provided with the computer, a replacement battery provided by HP, or a compatible battery purchased from HP. CAUTION: Removing a battery that is the sole power source for the computer can cause loss of information. -
Page 32: Memory Cover
Memory cover NOTE: The memory cover is included in the Plastics Kit, spare part number 802476-001. Before removing the memory cover, follow these steps: Turn off the computer. If you are unsure whether the computer is off or in Hibernation, turn the computer on, and then shut it down through the operating system. -
Page 33: Memory Module
Memory module Description Spare part number 2 GB 691739-001 Before removing the memory module, follow these steps: Turn off the computer. If you are unsure whether the computer is off or in Hibernation, turn the computer on, and then shut it down through the operating system. Disconnect the power from the computer by unplugging the power cord from the computer. -
Page 34: Removal And Replacement Procedures For Authorized Service Provider Parts
Accessing these parts can damage the computer or void the warranty. NOTE: HP continually improves and changes product parts. For complete and current information on supported parts for your computer, go to http://partsurfer.hp.com, select your country or region, and then follow the on-screen instructions. Component replacement procedures This chapter provides removal and replacement procedures for Authorized Service Provider only parts. - Page 35 Remove the 14 Phillips PM2.0×4.5 screws (2) that secure the top cover to the base enclosure. Lift the base enclosure from the computer. Reverse this procedure to install the base enclosure. Component replacement procedures...
-
Page 36: Wlan Module
WLAN module Description Spare part number Qualcomm Atheros AR9565 802.11b/g/n 1×1 WiFi + Bluetooth 4.0 Combo Adapter 675794-001 Before removing the WLAN module, follow these steps: Turn off the computer. If you are unsure whether the computer is off or in Hibernation, turn the computer on, and then shut it down through the operating system. - Page 37 Remove the WLAN module (3) by pulling the module away from the slot at an angle. NOTE: If the WLAN antenna cables are not connected to the terminals on the WLAN module, protective sleeves should be installed on the antenna connectors, as shown in the following illustration. Reverse this procedure to install the WLAN module.
-
Page 38: Hard Drive
Hard drive NOTE: The hard drive bracket, rubber frame, and cable are included in the Hard Drive Hardware Kit, spare part number 802471-001. See Mass storage devices on page 15 for more information on the Hard Drive Hardware Kit. Description Spare part number 500-GB, 5400-rpm, SATA, 7.0-mm hard drive 778186-001... - Page 39 Release the left and right sides of the hard drive bracket (2) from the hard drive. Remove the hard drive bracket (3) from the hard drive. Reverse this procedure to reassemble and install the hard drive. Component replacement procedures...
-
Page 40: Rtc Battery
RTC battery Description Spare part number RTC battery (includes cable and double-sided adhesive) 718440-001 Before removing the RTC battery, follow these steps: Turn off the computer. If you are unsure whether the computer is off or in Hibernation, turn the computer on, and then shut it down through the operating system. -
Page 41: Audio/Usb Board
Audio/USB board Description Spare part number Audio/USB board (includes audio jack, USB port, and cable) 802469-001 Before removing the audio/USB board, follow these steps: Turn off the computer. If you are unsure whether the computer is off or in Hibernation, turn the computer on, and then shut it down through the operating system. -
Page 42: Fan
Description Spare part number Fan (includes cable) 802479-001 Before removing the fan, follow these steps: Turn off the computer. If you are unsure whether the computer is off or in Hibernation, turn the computer on, and then shut it down through the operating system. Disconnect the power from the computer by unplugging the power cord from the computer. -
Page 43: Heat Sink
Heat sink Description Spare part number Heat sink (includes replacement thermal material) 802480-001 Before removing the heat sink, follow these steps: Turn off the computer. If you are unsure whether the computer is off or in Hibernation, turn the computer on, and then shut it down through the operating system. Disconnect the power from the computer by unplugging the power cord from the computer. -
Page 44: Touchpad Button Board
Reverse this procedure to install the heat sink. TouchPad button board Description Spare part number TouchPad button board (includes TouchPad cable, TouchPad button board cable, and double-sided 802468-001 adhesive) Before removing the TouchPad button board, follow these steps: Turn off the computer. If you are unsure whether the computer is off or in Hibernation, turn the computer on, and then shut it down through the operating system. -
Page 45: System Board
Remove the TouchPad button board from the computer. Reverse this procedure to install the TouchPad button board. System board NOTE: The system board spare part kit includes replacement thermal material. Description Spare part number System board equipped with an A4-PRO 3340B 2.20-GHz processor (quad core, 25 W, 2-MB L2 cache) 802492-601 and the Windows 8 Professional operating system (includes replacement thermal material): Before removing the system board, follow these steps:... - Page 46 Remove the system board: Disconnect the following cables from the system board: (1): Speaker cable (2): Power connector cable (3): Display cable (4): Touchpad cable (5): Audio/USB board cable (6): Keyboard cable Remove the cable from atop the right speaker, and then lift the speaker aside to gain access to the screw underneath.
-
Page 47: Speakers
Remove the system board (3) by pulling it to the left at an angle. Reverse this procedure to install the system board. Speakers Description Spare part number Speaker Kit (includes left and right speakers and cables) 802477-001 Before removing the speakers, follow these steps: Turn off the computer. - Page 48 Remove the speakers (2). Reverse this procedure to install the speakers. Chapter 6 Removal and replacement procedures for Authorized Service Provider parts...
-
Page 49: Power Connector Cable
Power connector cable Description Spare part number Power connector cable 802488-001 Before removing the power connector cable, follow these steps: Turn off the computer. If you are unsure whether the computer is off or in Hibernation, turn the computer on, and then shut it down through the operating system. Disconnect the power from the computer by unplugging the power cord from the computer. -
Page 50: Display Assembly
Display assembly NOTE: The display assembly is spared at the subcomponent level only. For more display assembly spare part information, see the individual removal subsections. Before removing the display assembly, follow these steps: Turn off the computer. If you are unsure whether the computer is off or in Hibernation, turn the computer on, and then shut it down through the operating system. - Page 51 Remove the two Phillips PM2.5×4.0 screws (2) that secure the display bezel to the display assembly. Flex the inside edges of the top edge (1), the left and right sides (2), and the bottom edge (3) of the display bezel until the bezel disengages from the display enclosure. Remove the display bezel (4).
- Page 52 Disconnect the webcam/microphone module cable (2) from the webcam/microphone module. Remove the webcam/microphone module. The webcam/microphone module is available using spare part number 802486-001. If it is necessary to replace the display panel: Remove the four Phillips PM2.0×3.0 screws that secure the display panel to the display enclosure. CAUTION: Before turning the display panel upside down, make sure the work surface is clear of tools, screws, and any other foreign objects.
- Page 53 Release the adhesive strip (2) that secures the display panel cable connector to the display panel. Disconnect the display panel cable (3) from the display panel. Remove the display panel. The display panel is available using spare part number 802491-001. If it is necessary to replace the display hinges: Remove the four Phillips PM2.5×3.25 broadhead screws (1) that secure the display hinges to the display enclosure.
- Page 54 Remove the display hinges (2). The display hinges are included in the Display Hinge Kit, spare part number 802485-001. If it is necessary to replace the display cable: Release the cable from the clips (1) and routing channel built into the top, right, and bottom edges of the display enclosure.
- Page 55 Release the WLAN antenna cable from the clips (1) and routing channel built into the top edge and right side of the display enclosure. Detach the WLAN antenna transceiver (2) from the display enclosure. (The WLAN antenna transceiver is attached to the display enclosure with double-sided adhesive.) Remove the WLAN antenna cable and transceiver.
-
Page 56: Using Setup Utility (Bios)
BIOS that is installed. BIOS version information (also known as ROM date and System BIOS) can be revealed from the Start screen by typing support, selecting the HP Support Assistant app, and then selecting System Information, or by using Setup Utility (BIOS). - Page 57 From the Start screen, type support, and then select the HP Support Assistant app. ‒ or – From the Windows desktop, click the question mark icon in the notification area, at the far right of the taskbar. Click Updates and tune-ups, and then click Check for HP updates now.
-
Page 58: Using Hp Pc Hardware Diagnostics (Uefi)
Using HP PC Hardware Diagnostics (UEFI) HP PC Hardware Diagnostics is a Unified Extensible Firmware Interface (UEFI) that allows you to run diagnostic tests to determine whether the computer hardware is functioning properly. The tool runs outside the operating system so that it can isolate hardware failures from issues that are caused by the operating system or other software components. - Page 59 Select your computer model, and then select your operating system. In the Diagnostic section, click HP UEFI Support Environment. – or – Click Download, and then select Run. Downloading HP PC Hardware Diagnostics (UEFI) to a USB device...
-
Page 60: Specifications
Specifications Computer specifications Metric U.S. Dimensions Width 366 mm 14.41 in Depth 244 mm 9.61 in Height 22.9 mm 0.9 in Weight 1.99 kg 5.34 lb Operating voltage and current 19.5 V dc @ 3.33 A – 65 W DC plug NOTE: This product is designed for IT power systems in Norway with phase-to-phase voltage not exceeding 240 V rms. -
Page 61: 35.6-Cm (14.0-In) Display Specifications
35.6-cm (14.0-in) display specifications Metric U.S. Dimensions Height 17.6 cm 6.93 in Width 31.2 cm 12.28 in Diagonal 35.7 cm 14.06 in Number of colors up to 16.8 million Contrast ratio 200:1 (typical) Brightness 200 nits (typical) Pixel resolution Pitch 0.197 ×... -
Page 62: Hard Drive Specifications
Hard drive specifications 500-GB* 250-GB* Dimensions Height 7 mm 7 mm Length 100.4 mm 100.4 mm Width 69.9 mm 69.9 mm Weight 110 g 110 g Interface type SATA SATA Transfer rate Synchronous (maximum) 1.1 GB/sec 1.1 GB/sec Security ATA security or SED ATA security Seek times (typical read, including setting) Single track... -
Page 63: 10 Backing Up, Restoring, And Recovering
Use HP Recovery Manager after you successfully set up the computer to create HP Recovery media. This step creates a backup of the HP Recovery partition on the computer. The backup can be used to reinstall the original operating system in cases where the hard drive is corrupted or has been replaced. For... -
Page 64: Using Windows Tools
The creation process can take an hour or more. Do not interrupt the creation process. ● If necessary, you can exit the program before you have finished creating all of the recovery DVDs. HP Recovery Manager will finish burning the current DVD. The next time you start HP Recovery Manager, you will be prompted to continue, and the remaining discs will be burned. -
Page 65: Recovering Using Hp Recovery Manager
Applications Reinstall, and then follow the on-screen instructions. ● On select models, if you want to reset your computer using a minimized image, you can choose the HP Minimized Image Recovery option from the HP Recovery partition or HP Recovery media. Minimized Image Recovery installs only drivers and hardware-enabling applications. -
Page 66: Using The Hp Recovery Partition (Select Models Only)
Using HP Recovery media to recover You can use HP Recovery media to recover the original system. This method can be used if your system does not have an HP Recovery partition or if the hard drive is not working properly. -
Page 67: Changing The Computer Boot Order
Changing the computer boot order If your computer does not restart in HP Recovery Manager, you can change the computer boot order, which is the order of devices listed in BIOS where the computer looks for startup information. You can change the selection for a USB flash drive. -
Page 68: 11 Statement Of Memory Volatility
AMD-based system boards contain nonvolatile memory subcomponents as originally shipped from HP, assuming that no subsequent modifications have been made to the system and assuming that no applications, features, or functionality have been added to or installed on the system. - Page 69 Reboot the system. If the system has a Trusted Platform Module (TPM) and/or fingerprint reader, one or two prompts will appear—one to clear the TPM and the other to Reset Fingerprint Sensor; press or tap to accept or to reject. Remove all power and system batteries for at least 24 hours.
-
Page 70: Nonvolatile Memory Usage
HP Sure Start models only) backup of The content is managed Embedded Controller. critical System solely by the HP Sure Start BIOS code, EC Embedded Controller. firmware, and critical PC configuration data for select... - Page 71 Fingerprint reader 512 KByte flash Stores Fingerprint reader memory is Only a digitally signed fingerprint programmed by user application can make the templates. enrollment in HP call to write to the flash. ProtectTools Security Manager. Nonvolatile memory usage...
-
Page 72: Questions And Answers
HP has provided options in Computer Setup (BIOS) to allow you to run in legacy BIOS, if required by the operating system. Examples of this requirement would be if you upgrade or downgrade the OS. -
Page 73: Using Hp Sure Start (Select Models Only)
BIOS to its previously safe state, without user intervention. Those select computer models ship with HP Sure Start configured and enabled. HP Sure Start is configured and already enabled so that most users can use the HP Sure Start default configuration. The default configuration can be customized by advanced users. -
Page 74: 12 Power Cord Set Requirements
12 Power cord set requirements The wide-range input feature of the computer permits it to operate from any line voltage from 100 to 120 volts AC, or from 220 to 240 volts AC. The 3-conductor power cord set included with the computer meets the requirements for use in the country or region where the equipment is purchased. - Page 75 Country/region Accredited agency Applicable note number South Korea Sweden CEMKO Switzerland Taiwan BSMI The United Kingdom The United States The flexible cord must be Type HO5VV-F, 3-conductor, 1.0-mm² conductor size. Power cord set fittings (appliance coupler and wall plug) must bear the certification mark of the agency responsible for evaluation in the country or region where it will be used.
-
Page 76: 13 Recycling
Follow the local laws and regulations in your area for battery disposal. HP encourages customers to recycle used electronic hardware, HP original print cartridges, and rechargeable batteries. For more information about recycling programs, see the HP Web site at http://www.hp.com/... -
Page 77: Index
18 hinge left TouchPad 6 removal 45 power 8 spare part number 14, 16, 46 electrostatic discharge 18 right TouchPad 6 HP PC Hardware Diagnostics (UEFI) equipment guidelines 21 downloading 50 esc key, identifying 9 Index... - Page 78 4 system 57 latch, battery release 10 product description 2 USB flash drive 58 lights USB 2.0 5 using HP Recovery media 56 AC adapter/battery 4 USB 3.0 4 recovery media caps lock 7 power button, identifying 8 creating 55...
- Page 79 regulatory information system restore point, creating 55 regulatory label 11 wireless certification labels 11 tools required 17 removal/replacement top cover procedures 22, 26 spare part number 13 removing personal data from volatile TouchPad system memory 60 buttons 6 RJ-45 (network) jack, identifying 4 TouchPad button board RJ-45 (network) status lights, removal 36...
Need help?
Do you have a question about the HP 241 G1 Notebook PC and is the answer not in the manual?
Questions and answers