
Subscribe to Our Youtube Channel
Related Manuals for Aim-TTI TG5011A


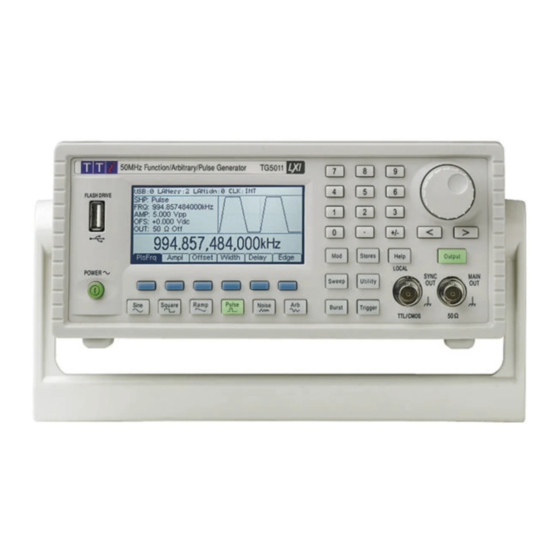
Summary of Contents for Aim-TTI TG5011A
- Page 1 TG5011A/TG2511A & TG5012A/TG2512A Function/Arbitrary Generators INSTRUCTION MANUAL...
-
Page 2: Table Of Contents
Table of Contents Table of Contents Introduction Specification Safety Installation Connections General Continuous Carrier Waveform Operation Pulse Generator Noise Generator PRBS Generator Modulation Sweep Burst Dual Channel Operation Trigger Menu Output Menu Utility Menu Stores Menu Help Operations Editing Arbitrary Waveforms Synchronising Two Generators Calibration Remote Interface Operation... -
Page 3: Introduction
Introduction This manual is for the TG5011A and TG2511A single channel generators and the TG5012A and TG2512A dual channel generators. Wherever there are differences in the specification, the limits for the TG2511A/TG2512A are shown in square brackets [ ] after the TG5011A/TG5012A limits. -
Page 4: Specification
Specification General specifications apply for the temperature range 5°C to 40°C. Accuracy specifications apply for the temperature range 18°C to 28°C after 30 minutes warm−up, at maximum output into 50Ω. Typical specifications are determined by design and are not guaranteed. TG2512A limits, where different, are shown in square brackets [ ] after the TG5012A limits. - Page 5 Ramp Frequency Range: 1µHz to 1MHz [1µHz to 500kHz] Frequency Resolution: 1µHz, 12 digits Output Level: 10mVp-p to 10Vp−p into 50Ω Linearity Error: <0.1% to 30 kHz Variable Symmetry: 0.0 % to 100.0 %, 0.1% resolution Pulse Frequency Range: 500µHz to 12.5MHz [500µHz to 6.25MHz] Frequency Resolution: 1µHz, 14 digits Output Level:...
- Page 6 Output Filter Selects between 50MHz Elliptic or 20MHz Bessel filter depending on the waveform. Noise Gaussian White Noise: Noise can be added to any carrier waveform (except pulse and square and noise itself). The amount of noise added can be specified as 0% to 50% of the amplitude of the carrier waveform.
- Page 7 Carrier Waveforms: Sine, Square, Ramp, Arb, PRBS Modulation Source: Internal/External Internal Modulating Sine, Square, Up Ramp, Down Ramp, Triangle, Noise, DC, Sinc, Waveforms: Exponential Rise, Logarithmic Rise and User Defined Arbs PRBS-PN7, PN9, PN11, PN15, PN20, PN23 Internal Modulating 1µHz to 1MHz, 1µHz resolution Frequency: Phase Deviation: -360.0 to +360.0 degrees, 0.1 degree resolution...
- Page 8 Triggered Burst Each active edge of the trigger signal will produce one burst of the waveform. Carrier Waveforms: Sine, Square, Ramp, Arb, Pulse, PRBS Maximum Carrier Frequency: 10MHz (finite cycles), 50MHz [25MHz] (infinite), subject to carrier waveform. Number of Cycles: 1 to 16,777215 and infinite.
- Page 9 Dual-channel Operations Tracking Independent (Off): The channels are independent of each other. Equal: The two channels are identical and behave identically. Inverse: The two channels are identical except that the output of channel 2 is inverted. In this mode the two channels can be used together as a differential signal source.
- Page 10 Cross channel trigger Operating modes: Either channel can be triggered by the other. Sources: Carrier, Modulation, Burst, Trigger, Sweep. Outputs Main Outputs Output Impedance: 50Ω Amplitude: 20mV to 20Vp−p open circuit (10mV to 10Vp−p into 50Ω). Amplitude can be specified open circuit (hi Z) or into an assumed load of 1Ω to 10kΩ in Vpp, Vrms or dBm.
- Page 11 Sync Outs (Contd) Sweep Sync: Marker Off A square wave that is a TTL high from the beginning of the sweep and a TTL low from the midpoint of the sweep Marker On A square wave that is a TTL high from the beginning of the sweep and a TTL low from the marker frequency Output Signal Logic level nominally 3V.
- Page 12 TG2511A/TG5011A - 97mm(H) x 250mm(W) x 270mm(L) TG2512A/TG5012A - 97mm(H) x 250mm(W) x 295mm(L) Rack mount: TG2511A/TG5011A - 86.5mm (2U) x 213.5mm (½−rack) width x 244mm(L) TG2512A/TG5012A - 86.5mm (2U) x 213.5mm (½−rack) width x 269mm(L) Weight: TG2511A/TG5011A – 2.55kg TG2512A/TG5012A - 2.7kg...
-
Page 13: Safety
Safety This generator is a Safety Class I instrument according to IEC classification and has been designed to meet the requirements of EN61010−1 (Safety Requirements for Electrical Equipment for Measurement, Control and Laboratory Use). It is an Installation Category II instrument intended for operation from a normal single phase supply. -
Page 14: Installation
Installation Mains Operating Voltage This instrument has a universal input range and will operate from a nominal 115V or 230V mains supply without adjustment. Check that the local supply meets the AC input requirement given in the Specification. Mains Lead Connect the instrument to the AC supply using the mains lead provided. -
Page 15: Connections
60 seconds. Do not apply an external voltage to this output. SYNC OUT (One for each channel. Front mounted on TG5011A and TG2511A only) Multifunction output which is user definable or automatically set to be any of the following:... -
Page 16: Rear Panel Connections
FLASH DRIVE This is a USB Host port for the connection of most types of flash drive which conform to the Mass Storage Class specification. The instrument will accept drives formatted with the FAT16 or FAT32 filing systems. This port does not support any other class of device. Rear Panel Connections SYNC OUT (Rear mounted on TG5012A and TG2512A. -
Page 17: General
General Initial Operation This section is a general introduction to the organisation of the instrument and is intended to be read before using the generator for the first time. Detailed operation is covered in later sections starting with Continuous Carrier Waveform Operation. In this manual front panel keys and sockets are shown in capitals, e.g. - Page 18 • TRIGGER/LOCAL key. Used to enter the Trigger menu where the instrument trigger parameters may be specified. This key is also used on a dual channel instrument to return to local from remote mode. • UTILITY key gives access to menus for a variety of functions such as SYNC OUT set−up, power−up parameters and error message settings.
- Page 19 • Field shows the GPIB port status. As shown, the port is disabled. When the port is enabled the field will show . During GPIB remote control the icon will flash. If GPIB is not fitted to the instrument the field will be blank. •...
- Page 20 Numeric Editing Any numeric parameter may be changed in one of the following ways: • Enter a new value from the numeric key pad. • Use the left and right cursor keys to select a digit position then use the knob to increment/decrement the value at that position.
-
Page 21: Continuous Carrier Waveform Operation
Continuous Carrier Waveform Operation The instrument can generate seven types of carrier waveform: sine, square, ramp, pulse, noise, PRBS and arbitrary. This section deals with the use of the instrument as a simple function generator, i.e. generating sine, square, ramp and arbitrary waveforms continuously with no modulation. - Page 22 The amplitude may be changed in either of the ways detailed in General: Numeric Editing. The amplitude can be set in terms of peak-to-peak Volts (Vpp), r.m.s. Volts (Vrms) or dBm (referenced to the user specified load, see the section on setting the output load; the default is 50Ω). For Vpp and Vrms the level can be set assuming that the output is either open-circuit or terminated;...
- Page 23 Special Use of the +/– Key While editing a parameter which has only positive values the +/– key may be used as a shortcut to invert the output waveform. Alternate presses will set the output between normal and inverted. The inverted state is indicated by appearing in the field of the Parameters Box and the...
- Page 24 The phase may be changed in either of the ways detailed in General: Numeric Editing. The setting may be used to determine the phase difference between the the channels of a two channel instrument. The channels may be phase aligned by pressing the Align soft-key.
- Page 25 There are no Freq Ampl soft-keys and the Offset soft-key has changed to ArbDC The Parameters Box shows in the field, the Graph Box shows a dc waveform with dc offset arrows and the Edit Box contains the dc voltage menu. The voltage may be changed in either of the ways detailed in General: Numeric Editing.
- Page 26 Information, Warning and Error Messages Three classes of message are displayed on the screen in a Pop-up Box. INFORMATION messages are shown to inform the user of actions that are being taken, for example: Please wait... the current settings are being saved WARNING messages are shown when the entered setting causes some change which the user might not necessarily expect.
-
Page 27: Pulse Generator
Pulse Generator General The pulse generator can produce a wide range of pulses with adjustable period, width, delay and edge speed. It may also be set in Gated or Burst mode, or modulated using PWM; for more information see the sections on Modulation and Burst. Each channel of a two channel instrument has an independent pulse generator. - Page 28 Pulse Delay Pressing the soft-key shows the delay parameter in the Edit Box and the Graph Box Delay changes to show that delay is being edited. The delay may be changed in either of the ways detailed in General: Numeric Editing. Changing the delay causes the start of the pulse to be delayed with respect to the carrier sync...
- Page 29 There is now a soft-key. If this is pressed the display changes to: Range When using the independent options both edge times must use the same range. Choose the range by pressing the appropriate soft-key. When using the coupled option the range will change automatically as the edge times are edited.
-
Page 30: Noise Generator
Noise Generator The instrument contains a wide-band Gaussian white noise generator for each channel which may be used in the following ways: • As the main output from the carrier wave generator • As a modulating waveform • Added as a percentage to the current output waveform These options are described in the following sections. - Page 31 To add noise to the output waveform press the OUTPUT key, then the NseAd soft-key. See the display below. Pressing the NseAd soft-key will alternate between Noise-Add ON Noise-Add OFF With noise added the Graph Box shows in the top right corner and two extra soft-key +NOISE labels appear, NseLvl...
-
Page 32: Prbs Generator
PRBS Generator The instrument contains a PRBS (Pseudo Random Binary Sequence) generator for each channel which may be used in the following ways: • As the main output from the carrier wave generator • As a modulating waveform These options are described in the following sections. In dual channel mode there are some restrictions on PRBS;... - Page 33 Use the soft-key to set the rate at which the PRBS generator is clocked. The value Bit Rate may be changed in either of the ways detailed in General: Numeric Editing. Use the soft-keys to set these parameters as for any other carrier wave. The Ampl Offset Edge...
-
Page 34: Modulation
Modulation General The instrument can apply seven types of modulation: AM (Amplitude Modulation), FM (Frequency Modulation), PM (Phase Modulation), PWM (Pulse Width Modulation), BPSK (Binary Phase Shift Keying), SUM (Carrier plus Modulating signal) and FSK (Frequency Shift Keying). It is not possible to apply all modulations to all carrier types or to simultaneously apply more than one modulation to any carrier type. - Page 35 soft-key indicates that there are too many options to show all at once so press this key to show more. In this case there is one more list of types which will show when the soft-key is pressed. One more press of the soft-key will show the first list again.
- Page 36 The depth may be changed in either of the ways detailed in General: Numeric Editing. To set the modulation frequency press the soft-key. The frequency parameter will appear in Freq the Edit Box and the modulating waveform in the Graph Box will show that frequency is being edited.
- Page 37 One more press of the soft-key will show the first list again. Select the modulation shape required by pressing the appropriate key then press the soft-key to return to the top level Done modulation menu. All the parameters for AM are now set. To select FM press the MOD key to turn on modulation and then press the soft key to show Type...
- Page 38 The deviation may be changed in either of the ways detailed in General: Numeric Editing. To set the modulation frequency press the soft-key. The frequency parameter will appear in the Edit Freq Box and the modulating waveform in the Graph Box will show that frequency is being edited. The frequency may be changed in either of the ways detailed in General: Numeric Editing.
- Page 39 One more press of the soft-key will show the first list again. Select the modulation shape required by pressing the appropriate key then press the soft-key to return to the top level Done modulation menu. All the parameters for FM are now set. To select PM press the MOD key to turn on modulation and then press the soft key to show Type...
- Page 40 The soft-keys present all of the modulation types which may be applied to the selected carrier waveform. If is not already selected press the soft-key followed by the key to return to the top level Done modulation menu. To select the modulation source press the Source soft-key.
- Page 41 soft-key indicates that there are too many options to show all at once so press this key to show more. In this case there are four more lists of shapes which will show with successive presses of the soft-key. One more press of the soft-key will show the first list again.
- Page 42 soft-key indicates that there are too many options to show all at once so press this key to show more. In this case there is one more list of types which will show when the soft-key is pressed. One more press of the soft-key will show the first list again.
- Page 43 The frequency may be changed in either of the ways detailed in General: Numeric Editing. To set the modulation shape press the soft-key. The currently selected shape will appear Shape in the Edit Box and the soft-keys will change to a list of shapes available. soft-key indicates that there are too many options to show all at once so press this key to show more.
- Page 44 PWM is applicable to pulse only so select Pulse then select PWM by pressing the MOD key to show the display below. Note that PWM is the only modulation type applicable to pulse so there is no soft-key to Type allow selection of any other type.
- Page 45 The frequency may be changed in either of the ways detailed in General: Numeric Editing. To set the modulation shape press the Shape soft-key. The currently selected shape will appear in the Edit Box and the soft-keys will change to a list of shapes available. soft-key indicates that there are too many options to show all at once so press this key to show more.
- Page 46 To select FSK press the MOD key to turn on modulation and then press the Type soft key to show the display below. soft-key indicates that there are too many options to show all at once so press this key to show more.
- Page 47 The hop frequency may be changed in either of the ways detailed in General: Numeric Editing. To set the switching rate press the Rate soft-key. The rate parameter will appear in the Edit Box and the modulating waveform in the Graph Box will show that the switching rate is being edited. The rate may be changed in either of the ways detailed in General: Numeric Editing.
- Page 48 BPSK To select BPSK press the MOD key to turn on modulation and then press the soft key to Type show the display below. soft-key indicates that there are too many options to show all at once so press this key to show more.
- Page 49 The deviation may be changed in either of the ways detailed in General: Numeric Editing. To set the switching rate press the Rate soft-key. The rate parameter will appear in the Edit Box and the modulating waveform in the Graph Box will show that the switching rate is being edited. The rate may be changed in either of the ways detailed in General: Numeric Editing.
-
Page 50: Sweep
Sweep General All waveforms can be swept with the exception of Pulse and Noise. The sweep function allows the carrier frequency to be swept using small frequency steps from the start frequency to the stop frequency. There are over 16000 steps and this remains constant for all sweep times and frequency spans. - Page 51 Sweep Type To set the sweep type press the soft-key. The currently selected type will appear in the Edit Type Box and soft-keys will change to a list of sweep types available. soft-key indicates that there are too many options to show all at once so press this key to show more.
- Page 52 Centre and Span The instrument also allows the start and stop frequency parameters to be entered in terms of centre and span. Pressing either the soft-key while it is highlighted will switch the mode Start Stop from start/stop to centre/span. To return to start/stop mode press the highlighted Centre soft-key.
- Page 53 If the marker is disabled the Edit Box will show . To enable the marker press the Marker – Off soft-key again. Marker The marker frequency may be changed in either of the ways detailed in General: Numeric Editing. Sweep Mode The sweep mode specifies how the sweep will be started.
- Page 54 Pressing the soft-key again while it is highlighted will return to continuous mode. Mode All the parameters for sweep are now set.
-
Page 55: Burst
Burst General All waveforms can be run using the Burst function with the exception of Noise. The burst function allows the carrier waveform to be triggered, produce a user specified number of cycles and then stop and wait for the next trigger. For a PRBS waveform burst the count is PRBS clocks and not PRBS cycles. - Page 56 Burst Type To set the burst type press the soft-key. Each press will select the next type from Type . The currently selected type will N Cycle Burst Infinite Burst Gated Burst appear in the Edit Box, the TYPE field in the Parameters Box will show the type and the Graph Box will show the trigger waveform below a representation of the carrier waveform with the burst type applied.
-
Page 57: Dual Channel Operation
Dual Channel Operation General Dual channel instruments have additional capabilities which allow the channels to be connected in various ways. All of the options are available from the Dual Channel menu which is accessed by pressing the Utility key. This presents several further menus which allow control of instrument and system capabilities not available directly from the menus described so far. - Page 58 Here the Parameters boxes for both channels are presented together on the screen. The Parameters box of the selected channel is highlighted. Pressing the soft-key again will then switch to which is Display Graph Ch1 – Graph Ch2 similar to the screen above but shows the Graph boxes together. Pressing the soft-key once more will then switch back to again.
- Page 59 It is possible to set any combination of Frequency, Amplitude and Output coupling. When a parameter is coupled it may be changed on either channel and the other channel will also change. To select frequency coupling press the soft-key. This will show the frequency tracking Freq options.
-
Page 60: Trigger Menu
Trigger Menu General Pressing the Trigger key will show the Trigger menu which allows control of instrument triggering capabilities. Repeated presses of the key will cycle round the four possible trigger sources: Source (using the internal trigger generator), (using the Internal Trigger External Trigger signal at the TRIG IN connector),... - Page 61 Pressing the TrgOut soft-key allows the source ot the current channel trigger output to be set. The Edit Box shows the current setting. There are seven options: Auto . The generator chooses the default for the current waveform type and modulation. Carrier Referenced .
-
Page 62: Output Menu
Output Menu General Pressing either Output key will show the Output menu for the selected channel which allows control of the respective MAIN OUT parameters. soft-key indicates that there are too many options to show all at once so press this key to show more. - Page 63 soft-key indicates that there are too many options to show all at once so press this key to show more. In this case there is one more list of types. One more press of the soft-key will show the first list again. Select the Sync type required by pressing the appropriate key then press the soft-key to return to the top level Sync menu or press the Utility key to exit the Utility menus.
- Page 64 This is the value that is assumed to be loading at the instrument MAIN OUT connector. The value is used to calculate the actual values of amplitude and dc offset. Note that the output impedance of the instrument MAIN OUT connector is fixed at 50Ω. The value may be changed in either of the ways detailed in General: Numeric Editing.
- Page 65 To add noise to the output waveform press the NseAd soft-key to show the Noise Add menu. Pressing the NseAd soft-key will alternate between Noise-Add ON Noise-Add OFF With noise added the Graph Box shows in the top right corner and two extra soft-key +NOISE labels appear, NseLvl...
-
Page 66: Utility Menu
Utility Menu General Pressing the Utility key presents several further menus which allow control of instrument and system capabilities not available directly from the menus described so far. Each of the soft-key selected menus is discussed in the following sections. Dual Channel Operation Pressing the Dual Ch... - Page 67 Beep State Pressing the soft-key will alternate between . With beep on the Beep Beep ON Beep Off error and warning messages will be accompanied by a sound. These sounds are suppressed with beep off. Display Control Pressing the soft-key will show the display control menu. Display Pressing the soft-key allows the display contrast to be adjusted.
- Page 68 Number Format Pressing the soft-key will show the Format menu. Format This menu allows the number format used in the Edit Box to be customised. The default is comma format which is selected by pressing the Comma soft-key. In comma format, digits after the decimal point are arranged in groups of three with the groups separated by a comma.
- Page 69 the 10MHz REF IN connector will be used, if it is valid, and the Status Line will show . If the signal at the 10MHz REF IN connector is invalid or not present the warning message External will pop up and the clock invalid Generator running on internal clock Status line will show indicating that the generator is running on internal clock.
- Page 70 Pressing the soft-key shows the remote interface menu. This allows activation and control of the installed interfaces. See the Remote Control section for full details of the use of the interfaces. Help This soft-key gives access to the Help menu which is explained in the Help Operations section. The key is not available on a single channel instrument where help is accessed directly from the HELP key on the keyboard.
-
Page 71: Stores Menu
Stores Menu General The stores menu gives access to both the instrument’s local storage of arbitrary waveforms and parameter set-ups and the external storage of a connected USB flash drive. There are facilities for saving and recalling set-ups to and from local stores, deleting set-ups and arbitrary waveforms and copying waveform and set-up files to and from a USB flash drive. - Page 72 The files are listed by name and the number indicates the size of the file in bytes for a set-up file or the number of points in a waveform file. There are nine local set-up stores and four local arbitrary waveform stores. The respective lists always show all of the stores even if they are empty.
- Page 73 Copy The copy operation allows set-up files to be copied between local storage and an attached USB flash drive. To copy a file from local to disk: 1. Select the Box by pressing the soft-key. Local: Local Select the file to be copied. Press the soft-key.
- Page 74 To copy a file from disk to local: 1. Select the Box by pressing the soft-key. Local: Local 2. Select the local store to receive the file from disk. 3. Select the Box by pressing the soft-key. Disk Disk 4. Select the file to be copied. 5.
- Page 75 Save The save operation allows the current instrument set-up to be saved to a local set-up store. Save will function with or without an attached USB flash drive. To perform a save operation first select the set-up store for the current instrument state to be saved Pressing the soft-key will show a screen similar to that below.
- Page 76 There are four local arbitrary waveform stores numbered . The number is shown next to the file name in the Box. Initially the files are all set to the default four point square-wave. Local: Thefile names are set as by default but they may be changed as they are used. ARB1 ARB4 Each arbitrary waveform store can hold a waveform with a maximum of 65536 points.
- Page 77 : Box shows that the source is and shows the file to be copied. The Copy from Local : Box shows the file that will be written to disk. The Edit Box shows the name of the file Copy to that will be written and the soft-key labels.
- Page 78 Box shows that the source is and shows the file to be copied. The Copy from: Disk Copy to: Box shows the file that will be written to the local store. The Edit Box shows the name of the file that will be written and the soft-key labels. KNOB and cursor keys allow the name to be edited.
-
Page 79: Help Operations
Help Operations General The instrument has a comprehensive help system which allows easy access to any Help page. It is possible to get help in two ways: 1. Help menu. Press the HELP key to access a list of help topics which give general information about instrument operations. -
Page 80: Editing Arbitrary Waveforms
Editing Arbitrary Waveforms General The instrument contains some basic editing capabilities for arbitrary waveforms. The supplied Waveform Manager Plus Version 4 Windows application may be used when more comprehensive capabilities for creation and editing are required. Waveforms created in Waveform Manager Plus may be downloaded to the instrument via a remote control interface or they may be transferred using a USB flash drive. - Page 81 Interp soft-key allows the type of expansion to be specified. With Interpolator Off selected points will be repeated, this is most appropriate for waveforms with fast rising or falling edges. With selected linear interpolation will be used as points are added, Interpolator On this is most appropriate for waveforms which are more sinusoidal in nature.
- Page 82 Point Editing Pressing the soft-key shows the point edit menu in the Edit Box. Point The point edit menu allows individual points in the waveform to be set to any vertical level value. soft-key selects setting of the point number; pressing the soft-key then Point# Value...
- Page 83 Naming a Waveform Pressing the soft-key shows the name edit menu in the Edit Box. Name The soft-key labels, KNOB and cursor keys allow the name to be edited. soft-key enters a space character at the cursor position. Space soft-key cancels the operation and returns to the top level edit menu. Execute soft-key changes the name and returns to the top level edit menu when complete The cursor keys will move the edit cursor through the name and turning the KNOB will cycle...
-
Page 84: Synchronising Two Generators
Synchronising Two Generators Two generators can be synchronised together following the procedure outlined below. It is possible to link more than two generators in this way but results are not guaranteed. Synchronising Principles Frequency locking is achieved by using the clock output from the master generator to drive the clock input of a slave. - Page 85 The phase relationship between the slave and the master is set independently for each channel from the carrier wave menus, see the Continuous Carrier Waveform Operations section. The phase may be changed in either of the ways detailed in General: Numeric Editing. The convention adopted for the phase relationship between generators is that a positive phase setting advances the slave generator with respect to the master and a negative setting delays the slave generator.
-
Page 86: Calibration
Calibration All parameters can be calibrated without opening the case, i.e. the generator offers ‘closed−box’ calibration. All adjustments are made digitally with calibration constants stored in flash memory. The calibration routine requires only a DVM, oscilloscope and a frequency counter and takes no more than a few minutes. - Page 87 Using the Password to Access Calibration or Change the Password With the password set, pressing calib on the utility screen will now show: When the correct password has been entered from the keyboard the display changes to the opening screen of the calibration routine and calibration can proceed as described in the Calibration Routine section.
- Page 88 STEP 12 CH1 10dB attenuator Adjust for 3.162V ± 3mV STEP 13 CH1 Sine amplitude flatness Note reading STEP 14 CH1 Level 1MHz Adjust for same reading STEP 15 CH1 Level 2MHz Adjust for same reading STEP 16 CH1 Level 5MHz Adjust for same reading STEP 17 CH1 Level 10MHz...
- Page 89 CH2 DC offset at − full scale. STEP 50 Check for –10V ± 50mV STEP 51 CH2 Multiplier zero. Adjust for minimum Volts AC STEP 52 CH2 Multiplier offset. Adjust for 0V ± 3mV STEP 53 CH2 Waveform offset Filter 1. Adjust for 0V ±...
- Page 90 STEP 88 CH2 Fall time (2) Adjust for 40us STEP 89 CH2 Square-wave symmetry 50% Adjust for 50us ± 0.1us STEP 90 CH2 Square-wave symmetry 75% Adjust for 75us ± 0.1us STEP 91 CH2 Square-wave symmetry 25MHz Adjust for 50% ± 1% STEP 92 CH2 Square-wave symmetry 35MHz Adjust for 50% ±...
-
Page 91: Remote Interface Operation
Remote Interface Operation The instrument can be remotely controlled via its USB, LAN or GPIB (optional) interfaces. USB remote control operates in a similar way to an RS232 interface but via the USB connector. Software supplied with the instrument sets up the controlling computer to treat the USB connection as a virtual COM port. -
Page 92: Usb Interface
Remote/Local Operation At power-on the instrument will be in the local state so the REM indicator is not displayed on the Status Line. In this state all front panel operations are possible. When the instrument receives a command from an interface the remote state will be entered and the REM indicator is displayed on Status Line. - Page 93 LAN Connection To use the LAN interface, the IP address of the unit must be known. On the supplied CD-ROM is a guide to the LXI Discovery Tool which provides links to the latest version of the tool and associated downloads.
- Page 94 VISA Resource Name Because of the limited support for VXI-11(Discovery Protocol only), the instrument must be referred to by its raw socket information when used in software packages which communicate via a VISA resource name. For example, an instrument at IP address 192.168.1.100 would normally have a VISA resource name of "TCPIP0::192.168.1.100::inst0::INSTR"...
- Page 95 The IEEE 488.2 error is handled as follows. If the response formatter is waiting to INTERRUPTED send a response message and a has been read by the parser or <PROGRAM MESSAGE TERMINATOR> the input queue contains more than one END message then the instrument has been INTERRUPTED and an error is generated.
- Page 96 Standard Event Status and Standard Event Status Enable Registers These two registers are implemented as required by the IEEE Std. 488.2. Any bits set in the Standard Event Status Register which correspond to bits set in the Standard Event Status Enable Register will cause the ESB bit to be set in the Status Byte Register. The Standard Event Status Register is read and cleared by the *ESR? command.
- Page 97 Status Model Power-on and Remote Operation Default Settings The following instrument status values are set at power on: Status Byte Register Service Request Enable Register † Standard Event Status Register = 128 (pon bit set) Standard Event Status Enable Register † Execution Error Register Query Error Register Parallel Poll Enable Register †...
-
Page 98: Remote Commands
Remote Commands USB/LAN Remote Command Format USB input to the instrument is buffered in a 256 byte input queue which is filled, under interrupt, in a manner transparent to all other instrument operations. USB interface conforms with USB 2.0 Full Speed. -
Page 99: Command List
Command List This section lists all commands and queries implemented in this instrument. Note that there are no dependent parameters, coupled parameters, overlapping commands, expression program data elements or compound command program headers; each command is completely executed before the next command is started. All commands are sequential and the operation complete message is generated immediately after execution in all cases. - Page 100 OUTPUT <cpd> Set the output to <ON>, <OFF>, <NORMAL> or <INVERT> ZLOAD <cpd> Set the output load, which the generator is to assume for amplitude and dc offset entries, to <1..10,000>Ohms or <OPEN>. SQRSYMM <nrf> Set the square waveform symmetry to <nrf> % RMPSYMM <nrf>...
- Page 101 ARBRESIZE <cpd>,<nr1> Change the size of arbitrary waveform <cpd> to <nr1>. ARBDEF <cpd1>,<cpd2>,<cpd3> Define an arbitrary waveform with user specified waveform name and waveform point interpolation state. <cpd1> ARB1, ARB2, ARB3 or ARB4 <cpd2> “user specified waveform name” <cpd3> waveform point interpolation ON or OFF ARB1 <bin>...
- Page 102 MODFMSHAPE <cpd> Set FM waveform shape to <SINE>, <SQUARE>, <RAMPUP>, <RAMPDN>, <TRIANG>, <NOISE>, <DC>, <SINC>, <EXPRISE>, <LOGRISE>, <ARB1>, <ARB2>, <ARB3>, <ARB4>, <PRBSPN7>, <PRBSPN9>, <PRBSPN11>, <PRBSPN15>, <PRBSPN20> or <PRBSPN23> MODPMSHAPE <cpd> Set PM waveform shape to <SINE>, <SQUARE>, <RAMPUP>, <RAMPDN>, <TRIANG>, <NOISE>, <DC>, <SINC>, <EXPRISE>, <LOGRISE>, <ARB1>, <ARB2>, <ARB3>, <ARB4>, <PRBSPN7>, <PRBSPN9>, <PRBSPN11>, <PRBSPN15>, <PRBSPN20>...
- Page 103 MODPOLBPSK <cpd> Set BPSK slope to <POS> or <NEG> Sweep Commands SWPTYPE <cpd> Set the sweep type to <LINUP>, <LINDN>, <LINUPDN>, <LINDNUP>, <LOGUP>, <LOGDN>, <LOGUPDN> or <LOGDNUP> SWPMODE <cpd> Set the sweep mode to <CONT> or <TRIG>. SWPBEGFREQ <nrf> Set the sweep start frequency to <nrf> Hz. SWPENDFREQ <nrf>...
- Page 104 FRQCPLRAT <nrf> Set waveform frequency coupling ratio to <nrf>. FRQCPLOFS <nrf> Set waveform frequency coupling offset to <nrf> Hz. PLSFRQCPLSWT <cpd> Set pulse waveform frequency coupling to <ON> or <OFF>. PLSFRQCPLTYP <cpd> Set pulse frequency coupling type to <RATIO> or <OFFSET>. PLSFRQCPLRAT <nrf>...
- Page 105 Install data from a previous *LRN? command. *RST Resets the instrument parameters to their default values. *RCL <nr1> Recalls a previously stored instrument set-up file from the specified non- volatile memory location. *SAV <nr1> Saves the complete instrument set-up file to the specified non-volatile memory location.
-
Page 106: Remote Commands Summary
Remote Commands Summary *CLS clears status byte register of the interface *ESE <nrf> sets the standard event status enable register to the value of <nrf> *ESE? returns the value in the standard event status enable register in <nr1> *ESR? returns the value in the standard event status register in <nr1> *IDN? returns the instrument identification *IST? - Page 107 ARB2? returns the binary-data from an existing arbitrary waveform memory location ARB2 ARB3? returns the binary-data from an existing arbitrary waveform memory locationARB3 ARB4? returns the binary-data from an existing arbitrary waveform memory location ARB4 ARB1DEF? returns user specified waveform name, waveform point interpolation state and waveform length of ARB1 ARB2DEF? returns user specified waveform name, waveform point interpolation...
- Page 108 DCOFFS <nrf> sets the dc offset to <nrf> Volts EER? query and clear execution error number register FREQ <nrf> sets the waveform frequency to <nrf> Hz FRQCPLOFS <nrf> sets waveform frequency coupling offset to <nrf> Hz FRQCPLRAT <nrf> sets waveform frequency coupling ratio to <nrf> FRQCPLSWT <cpd>...
- Page 109 MODPMSRC <cpd> sets PM waveform source to <INT> or <EXT> MODPOLBPSK <cpd> sets BPSK slope to <POS> or <NEG> MODPOLFSK <cpd> sets FSK slope to <POS> or <NEG> MODPWMDEVSYM <nrf> sets PWM waveform deviation to <nrf> % MODPWMDEVWDT <nrf> sets PWM waveform deviation to <nrf> sec MODPWMFREQ <nrf>...
- Page 110 PULSRISE <nrf> sets the pulse waveform positive edge to <nrf> sec PULSSYMM <nrf> sets the pulse waveform symmetry to <nrf> % PULSWID <nrf> sets the pulse waveform width to <nrf> sec QER? query and clear query error register RMPSYMM <nrf> sets the ramp waveform symmetry to <nrf>...
-
Page 111: Appendix 1. Information, Warning And Error Messages
Appendix 1. Information, Warning and Error Messages In the following list where [VALUE] appears a numeric value will be inserted in the message which is appropriate to the parameter currently being edited. Message numbers that are omitted are reserved and not currently used. Some numbers can produce two different messages depending on the current instrument editing mode;... - Page 112 Amplitude invalid. 20dB range held. Lower limit [VALUE]. Amplitude invalid. 30dB range held. Lower limit [VALUE]. Amplitude invalid. 40dB range held. Lower limit [VALUE]. Amplitude invalid. 50dB range held. Lower limit [VALUE]. Offset invalid. Upper limit [VALUE]. Offset invalid. Lower limit [VALUE]. Arb DC Offset invalid.
- Page 113 Duty cycle invalid. Lower limit [VALUE]. Duty cycle fixed for frequencies above 25MHz. Ramp symmetry invalid. Upper limit 100.0%. Ramp symmetry invalid. Lower limit 0.0%. Noise percentage invalid. Upper limit 50%. Noise percentage invalid. Lower limit 0%. Waveform percentage invalid. Upper limit 100%. Waveform percentage invalid.
- Page 114 -110 Sweep frequencies invalid for Square. Square frequency upper limit [VALUE]. -111 Sweep frequencies invalid for Ramp. Ramp frequency upper limit [VALUE]. -112 Sweep frequencies invalid for Arb. Arb frequency upper limit [VALUE]. -113 Sweep invalid for Pulse. Turn Sweep off to output Pulse. -114 Sweep invalid for Noise.
- Page 115 Rise+Fall cannot exceed Width. -150 Rise time cannot exceed Width-Deviation/2. Rise time cannot exceed Width/2. -152 Rise+Fall cannot exceed Period-Delay-Width-Deviation. Rise+Fall cannot exceed Period-Delay-Width. -154 Fall time invalid. Upper limit [VALUE]. -155 Fall time invalid. Lower limit [VALUE]. -156 Fall time cannot exceed Period-Delay-Width-Deviation/2. Fall time cannot exceed Period-Delay-Width/2.
- Page 116 Frequency invalid. Centre+Span/2 upper limit [VALUE]. -189 Start frequency invalid. Upper limit [VALUE]. Stop frequency invalid. Lower limit [VALUE]. -191 Start frequency invalid. Lower limit [VALUE]. Frequency invalid. Centre-Span/2 lower limit [VALUE]. -193 Marker frequency invalid. Upper limit [VALUE]. -194 Marker frequency invalid.
- Page 117 -228 Password did not match. Please try again. -229 Unsupported USB device. Device current limit to 500mA. -230 Unsupported USB device. Please insert USB-Flash disk only. -231 Unsupported remote command. -232 Unsupported remote command Parameter. -233 The specified parameter is not valid for this current mod, sweep or burst function. -234 The specified ARB location is not available.
- Page 118 -268 Frequencies cannot be coupled when generator is set as Master/Slave. -269 Frequencies cannot be coupled when Modulation/Sweep/Burst is on. -270 Frequencies cannot be coupled for the currently selected waveforms. -271 Frequency ratio invalid. Upper limit 1000.0. -272 Frequency ratio invalid. Lower limit 0.001. -273 Frequency offset invalid.
- Page 119 Hop frequency changed to maximum allowed for selected waveform. Hop frequency changed to minimum allowed for selected waveform. Deviation changed to maximum allowed for current settings. AM internal waveform shape changed to default Sine. FM internal waveform shape changed to default Sine. PM internal waveform shape changed to default Sine.
- Page 120 Information Messages Key test successful. New password stored. Select a unit to enter value or press Cancel. Please reduce the files on USB-Flash disk and try again. Test data has been written to RAM. RAM test successful.
-
Page 121: Appendix 2. Factory Default Settings
Appendix 2. Factory Default Settings Output Configuration Factory Setting Function Sine wave Frequency 10kHz Amplitude / Offset 1 Vpp / 0.000 Vdc Output Units Output Termination 50Ω Autorange Modulation Factory Setting Carrier AM, FM, PM, FSK, BPSK, SUM 10 kHz Sine wave Carrier PWM 10 kHz Pulse Mod. - Page 122 Output State Triggering Operations Factory Setting Trigger Source Internal Immediate Internal Trigger Period 1 ms Remote Interface Configuration Factory Setting GPIB Address DHCP Auto IP IP Address 192.168.1.100 Subnet Mask 255.255.0.0 Default Gateway 0.0.0.0 DNS Server 0.0.0.0 Host Name none Domain Name none Calibration...
-
Page 123: Appendix 3. Waveform Manager Plus V.4 Arbitrary Waveform Creation And Management Software
Appendix 3. Waveform Manager Plus V.4 Arbitrary Waveform Creation and Management Software The Waveform Manager Plus Version 4 program allows construction, editing, exchange, translation and storage of many types of waveform data. It is compatible with many popular DSOs and all TTi waveform generation products. -
Page 124: Maintenance
Maintenance The Manufacturers or their agents overseas will provide a repair service for any unit developing a fault. Where owners wish to undertake their own maintenance work, this should only be done by skilled personnel in conjunction with the service guide which may be obtained directly from the Manufacturers or their agents overseas. - Page 125 Thurlby Thandar Instruments Ltd. Glebe Road • Huntingdon • Cambridgeshire • PE29 7DR • England (United Kingdom) Telephone: +44 (0)1480 412451 • Fax: +44 (0)1480 450409 International web site: www.aimtti.com • UK web site: www.aimtti.co.uk Email: info@aimtti.com Aim Instruments and Thurlby Thandar Instruments...
Need help?
Do you have a question about the TG5011A and is the answer not in the manual?
Questions and answers