
Related Manuals for ROHS 6400AK Series

Summary of Contents for ROHS 6400AK Series
-
Page 1: User Manual
Intelligent Dome Camera (6400AK Series) User Manual 6400AK Series Camera User Manual Version 1.0... -
Page 2: Table Of Contents
Intelligent Dome Camera (6400AK Series) User Manual Contents Ⅰ、Product Overview..................6 Ⅱ、Technical Specifications................7 Ⅲ、Installation and Connection...............9 3.1 Installation and Connection..............9 3.1.1 Intelligent Dome Camera Wall-mounted Bracket Installation..9 3.1.2 Intelligent Dome Camera Ceiling-mounted Bracket Installation... 11 Ⅳ、Product Main Function................12 4.1 Camera Function................ - Page 3 Intelligent Dome Camera (6400AK Series) User Manual 5.4.3 Lens initialization................16 5.4.4 Focus....................16 5.4.5 Exposure..................18 5.4.6 Privacy Area................... 19 5.4.7 WEB....................19 5.5 Dome Camera Setting................20 5.5.1 Configuration..................21 5.5.2 Preset Position................23 5.5.3 Cruising..................23 5.5.4 Scanning..................24 5.5.5 Home Place..................26 5.6 Timed Events..................
- Page 4 Intelligent Dome Camera (6400AK Series) User Manual Warning Thank you for choosing Color Video Camera, Please make sure the mode of the camera and Supply Voltage is correct before operating it. According to the stipulation of FCC part 15, our products have passed the test and be known as a Class A Digital Product.
-
Page 5: Safety Precaution
Intelligent Dome Camera (6400AK Series) User Manual Safety Precaution 1. Please read this manual carefully before using this Intelligent Dome Camera. 2. In order to avoid damaging this product, please choose the power correctly. 3. During the course of transportation ,storage and installation, the product... -
Page 6: Ⅰ、Product Overview
Intelligent Dome Camera (6400AK Series) User Manual Product Declaration 1. The product please prevail in kind, the instructions are for reference only. 2. The products will update in time, if upgrade without notice and it will be allowed differences before and after the update. -
Page 7: Ⅱ、Technical Specifications
Intelligent Dome Camera (6400AK Series) User Manual Ⅱ、Technical Specifications Mode RL-CS-6400AK-138IR RL-CS-6400AK-141IR 1/3" SONY Exview CCD II Image sensor 1/4" SONY Super HAD CCD Video core Relong 8022W Sony1010P Signal system PAL/NTSC Horizontal resolution 650TVL 540TVL Min. Illumination 0.001Lux/F1.2(color mode) 0.01Lux/F1.2(color mode)... - Page 8 Intelligent Dome Camera (6400AK Series) User Manual Mode RL-CS-6400AK-149IR RL-CS-6400AK-148IR RL-CS-6400AK-146IR Video core Sony980P Sony480 Relong 6122W Image sensor 1/4" SONY Super HAD CCD Signal system PAL/NTSC Horizontal 480TVL 480TVL 650TVL resolution Min.Illumination 0.1Lux/F1.2(color mode) manual、auto、fluorescence、indoor、outdoor、speed AWB. Video auto Core S/N ratio ≥52db...
-
Page 9: Ⅲ、Installation And Connection
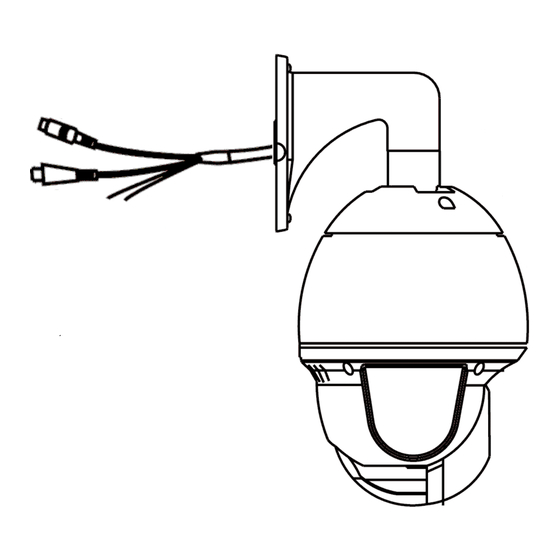
Intelligent Dome Camera (6400AK Series) User Manual Ⅲ、Installation and Connection 3.1 Installation and Connection 1. The installation and connection of the Mini Intelligent Dome Camera should be implemented under local provisions by people who own the technical qualifications of CCTV system installation. - Page 10 Intelligent Dome Camera (6400AK Series) User Manual Note: Don`t touch the camera cover by your hand, if you need to operate on it, you should wear the professional gloves. Outer Wire Connection Connect the BNC video interface of Dome Camera to the arranged video cable;...
-
Page 11: Intelligent Dome Camera Ceiling-Mounted Bracket Installation
Intelligent Dome Camera (6400AK Series) User Manual structure of the Dome, and turn back to the initial position by the resetting program, then vertically turn to 45 ° .When the Dome totally stops, the self-checking finishes and it is ready to be under control. -
Page 12: Ⅳ、Product Main Function
Intelligent Dome Camera (6400AK Series) User Manual Ⅳ、Product Main Function 4.1 Camera Function 4.1.1 Object Tracking Users can use the control lever on the control keyboard to move the Dome camera up and down, or left and right to track the moving object or change the field of vision, and change the visual angle or the image of the object by adjusting the focal length. -
Page 13: Scanning Between Two Spots
Intelligent Dome Camera (6400AK Series) User Manual 4.1.6 Scanning between Two Spots The Dome Camera have the left and right scanning function, you can set the first point and the second point randomly, the Speed Dome Camera can scan automatically visit back and forth under user`s selected speed. -
Page 14: Ⅴ、Camera(Osd)Setup
Intelligent Dome Camera (6400AK Series) User Manual Ⅴ、Camera(OSD)Setup 5.1 Operating instructions 5.1.1 Item Selections “ △ ” means the current operation of the menu. And select the current operation by controlling “Up”、 “Down”、 “Left”、 “Right” button. When the symbol “ △ ” is on the left of the screen, select the items by controlling the “Up”... -
Page 15: Check The Basic Information
Intelligent Dome Camera (6400AK Series) User Manual the password is correct then enter into the Main Menu, if you do not select a password-protected, you can access directly. Main Menu △System information Core Settings Camera Settings Camera Functions Exit Up/Down Enter 5.2.2 Exit the Menu... -
Page 16: Flip
Intelligent Dome Camera (6400AK Series) User Manual 5.4.1 Mirror a. Select the “Mirror” option b. Click the “Right” button, and then carry out the Mirror Settings. 5.4.2 Flip a. Select the “Flip” option b. Click the “Right” button, and then carry out the Flipping Settings. -
Page 17: Focus
Intelligent Dome Camera (6400AK Series) User Manual will be forbidden. 5.4.4 Focus a. Select the “Focus” b. Click the “Right” button, and then enter into the Focus Setting Focus △Auto- Focus Mode Restore the Auto-Focus Close-Focus Limit Return Up/Down Enter 5.4.4.1 Auto-Focus... -
Page 18: Exposure
Intelligent Dome Camera (6400AK Series) User Manual d. Click the “Left” button, exit 5.4.4.3 Close Distance Focus Limit a. Choose the “Close Distance Focus Limit” option b. Click the “Right” button, and then enter into the Close Distance Focus Limit setting c. -
Page 19: Privacy Area
Intelligent Dome Camera (6400AK Series) User Manual b. Click the “Right” button, and enter into the Manual Exposure c. Click the “Up/Down” buttons,select “Iris, Shutter or Gain” d. Click the “Right” button; you can adjust the manual exposure for Iris,... -
Page 20: Web
Intelligent Dome Camera (6400AK Series) User Manual 5.4.7 WEB a. Choose the “WEB” option b. Click the “Right” button; enter into the WEB setting △Auto Indoor Outdoor Manual Return Up/Down Confirm 5.4.7.1 Auto a. Choose the “Auto” option b. Click the “Right” button,select Auto WEB mode and enter into the Auto WEB intermission allowed / forbidden selections c. -
Page 21: Configuration
Intelligent Dome Camera (6400AK Series) User Manual 5.5 Dome Camera Setting a. Choose the “Dome Camera Setting” option b. Click the “Right” button,enter into Dome Camera Setting Dome Camera Setting △Configuration Preset Points Cruising Scanning Home Place Timed Events Restore the factory Default... - Page 22 Intelligent Dome Camera (6400AK Series) User Manual 5.5.1.2 Agreement a. Choose the “Agreement” option b. Click the “Right” button,enter into the “Agreement” selection c. Click “Up/Down” buttons to choose the agreement of “Pelco-D” or “Pelco-P” d. Click the “Right” button to save and exit 5.5.1.3 Baud Rate...
-
Page 23: Preset Position
Intelligent Dome Camera (6400AK Series) User Manual can choose new “0” position through the direction button, then set preset position 12 to save and return back; If you do not modify the “0”position, you can set preset position 11 to return Variable Rate :... -
Page 24: Cruising
Intelligent Dome Camera (6400AK Series) User Manual the preset position setting d. Set PTZ and Mirror position by controller, according to the picture prompt, set preset position 11 to return, and set preset position 12 to save and return back e. -
Page 25: Scanning
Intelligent Dome Camera (6400AK Series) User Manual d. Click the “Left” button, exit the setting and return back to cruising menu 5.5.3.3 Testing a. Choose the “Testing” option b. Click the “Right” button, enter the cruising group input c. Input the cruising group numbers, click the “Right” button to test the cruising group 5.5.4 Scanning... - Page 26 Intelligent Dome Camera (6400AK Series) User Manual 5.5.4.3 Pattern Scanning a. Choose the “Pattern Scanning” option b. Click the “Right” button to enter the Pattern Scanning group input c. Input numbers 1-4; click the “Right” button to enter the Pattern Scanning “Allow/Forbidden”...
- Page 27 Intelligent Dome Camera (6400AK Series) User Manual setup preset points “11”to exit testing Pattern Scanning: The dome camera execute the Pattern Scan testing, setup preset points “11”to exit testing d. Click the “Left” button, return to the scanning menu 5.5.5 Home Place a.
-
Page 28: Home Place
Intelligent Dome Camera (6400AK Series) User Manual home place waiting time setting Home Place Scanning △Close Auto Scanning Long-Distance Auto Scanning Horizontal Scanning Pattern Scanning Return Up/Down Enter 5.5.5.4Home Place Latency Time a. Input numbers 10-240, click the “Right” button to save the site then return back to the last menu 5.6 Timed Events... -
Page 29: Preview
Intelligent Dome Camera (6400AK Series) User Manual e. Input numbers 0-23, click the “Right” button, enter into the timed events, then beginning to carry out the minutes setting f. Input numbers 0-59, click the “Right” button, enter into the timed events, then beginning to carry out the time setting g. -
Page 30: Close Auto Scanning
Intelligent Dome Camera (6400AK Series) User Manual 5.8.1 Preset Points a. Choose the “Preset Points” option b. Click the “Right” button; enter the Preset Points number input c. Input the Preset Points numbers, Click the “Right” button; call the Preset Points then exit the menu at the same time 5.8.2 Cruising... -
Page 31: Ⅵ、Trouble Shooting
Intelligent Dome Camera (6400AK Series) User Manual Ⅵ、Trouble Shooting Problems Possible reasons Solutions Power supply Replace damaged or under power No action, no pictures when power is Wrong connection of Correct power Project line fault Eliminate Mechanical failure Recondition Abnormal self-... -
Page 32: Ⅶ、Appendix Ⅰ:lightning And Surge Protection
Intelligent Dome Camera (6400AK Series) User Manual control cable Bad host operations Power on again Overload or communication distance Add code distributor too far Ⅶ、Appendix Ⅰ:Lightning and Surge Protection The Product adopts grade 3 lightning protection technology, which is effective for avoiding the damage of equipment from pulse signal, such as those from instant lightning or surge. - Page 33 Intelligent Dome Camera (6400AK Series) User Manual PIC 1 This product use the dome shell connecting ground, if you don`t use it, lightning ground jumper cap can be changed to lightning to connect the external...
-
Page 34: Appendix Ⅱ:cleanness Of Transparent Cover
Intelligent Dome Camera (6400AK Series) User Manual lines. Single-wire earthed lightning ground locking in customers’ external line lightning ground screw, and pick the Lightning to take the press to an external line lightning protection ground terminal.(As picture 2) PIC 2 Appendix Ⅱ:Cleanness of Transparent Cover... - Page 35 Intelligent Dome Camera (6400AK Series) User Manual special impedance 120 Ω, whose largest loading capacity is 32 payloads. (Including master device and controlled device) 2. The transmission distance of RS 485 Band Rate Maximum Transmission Distance 2400Bps 1800M 4800Bps 1200M...
- Page 36 Intelligent Dome Camera (6400AK Series) User Manual PIC5 4. Some problems in application Star connection is always adopted by users in application. In this situation, the terminal resistors should be on the 1# and 15# (as it is shown in picture 6) of two devices with maximum line distance.
-
Page 37: Appendix Ⅳ:relational Table Of 24Vac Line Diameter And Transmission Distance
Intelligent Dome Camera (6400AK Series) User Manual Appendix Ⅳ : Relational Table of 24VAC Line Diameter and Transmission Distance The maximum transmission distance s recommended in the situation that the line diameter is fixed and 24V AC voltage wastage rate is below 10%. As for... -
Page 38: Appendix V:domestic And Overseas Gauge Table
Intelligent Dome Camera (6400AK Series) User Manual Appendix V:Domestic and Overseas Gauge Table Naked wire Metric naked Approximately Approximately cross section wire radii American radii England radii area (mm) 0.050 0.00196 0.00283 0.060 0.070 0.00385 0.080 0.00503 0.090 0.00636 0.100 0.00785... -
Page 39: Appendix Vi:address Coding Table
Intelligent Dome Camera (6400AK Series) User Manual Appendix VI:Address coding table Binary code address Binary code address Binary code address 00000001 00010111 00101101 00000010 00011000 00101110 00000011 00011001 00101111 00000100 00011010 00110000 00000101 00011011 00110001 00000110 00011100 00110010 00000111 00011101... -
Page 40: Appendix Vi:address Coding Table
Intelligent Dome Camera (6400AK Series) User Manual Appendix VI:Address coding table Binary code address Binary code address Binary code address 01001001 01110011 10011101 01001010 01110100 10011110 01001011 01110101 10011111 01001100 01110110 10100000 01001101 01110111 10100001 01001110 01111000 10100010 01001111 01111001... -
Page 41: Appendix Vi:address Coding Table
Intelligent Dome Camera (6400AK Series) User Manual Appendix VI:Address coding table Binary code address Binary code address Binary code address 01100101 10001111 10111001 01100110 10010000 10111010 01100111 10010001 10111011 01101000 10010010 10111100 01101001 10010011 10111101 01101010 10010100 10111110 01101011 10010101...
Need help?
Do you have a question about the 6400AK Series and is the answer not in the manual?
Questions and answers