Advertisement
Table of Contents
- 1 Table of Contents
- 2 Step 1 Prepare the Chassis
- 3 Step 2 Mount the Cooler
- 4 Step 3 Insert RAM
- 5 Step 4 Put Board in Chassis
- 6 Step 5 Wire HDD
- 7 Step 6 Mount HDD
- 8 Step 7 Add Cross Bar
- 9 Step 8 Close Chassis
- 10 Optional: Application of a Passive Riser Card + Graphic Card AMD W2100
- 11 Step 9 Mount Msata
- 12 Step 10 Insert Passive Riser Card
- 13 Step 11 Add Graphic Card AMD W2100
- Download this manual
Assembly Instructions
D3313-S
Assembly Instructions
for D3313-S Kit Solution
________________________________________________________________________________________________________________
Table of Contents
Step 1 Prepare the Chassis ............................................................................................................................................. 2
Step 2 Mount the Cooler ................................................................................................................................................. 4
Step 3 Insert RAM ........................................................................................................................................................... 5
Step 4 Put Board in Chassis ............................................................................................................................................ 5
Step 5 Wire HDD ............................................................................................................................................................. 7
Step 6 Mount HDD .......................................................................................................................................................... 8
Step 7 Add Cross Bar ..................................................................................................................................................... 10
Step 8 Close Chassis ...................................................................................................................................................... 11
Optional: Application of a Passive Riser Card + Graphic Card AMD W2100 ................................................................... 12
Step 9 Mount mSata ..................................................................................................................................................... 12
Step 10 Insert Passive Riser Card .................................................................................................................................. 13
Step 11 Add Graphic Card AMD W2100 ........................................................................................................................ 13
__________________________________________________________________________________________________________________________________________________________
Page 1 of 15
www.fujitsu.com
Advertisement
Table of Contents

Related Manuals for Fujitsu D3313-S


Summary of Contents for Fujitsu D3313-S
-
Page 1: Table Of Contents
Assembly Instructions D3313-S Assembly Instructions for D3313-S Kit Solution ________________________________________________________________________________________________________________ Table of Contents Step 1 Prepare the Chassis ............................. 2 Step 2 Mount the Cooler ..............................4 Step 3 Insert RAM ................................5 Step 4 Put Board in Chassis ............................5 Step 5 Wire HDD ................................ -
Page 2: Step 1 Prepare The Chassis
Assembly Instructions D3313-S Step 1 Prepare the Chassis Open the chassis with two hands by putting some pressure on your thumbs to push the cover forward. After opening the chassis take out the contents. __________________________________________________________________________________________________________________________________________________________ Page 2 of 15 www.fujitsu.com... - Page 3 Assembly Instructions D3313-S Then, remove the cross bar (middle section) of the chassis. Remove the screw to take out the HDD tray. After removing the screw slide the tray off the chassis. You should now have a completely empty chassis.
-
Page 4: Step 2 Mount The Cooler
Assembly Instructions D3313-S Step 2 Mount the Cooler Place the backplate underneath the board, pushing the studs on the backplate through the holes on the board around the CPU. Then put the cooler on top of the CPU and screw it onto the backplate through the board. The thermal paste is already applied. -
Page 5: Step 3 Insert Ram
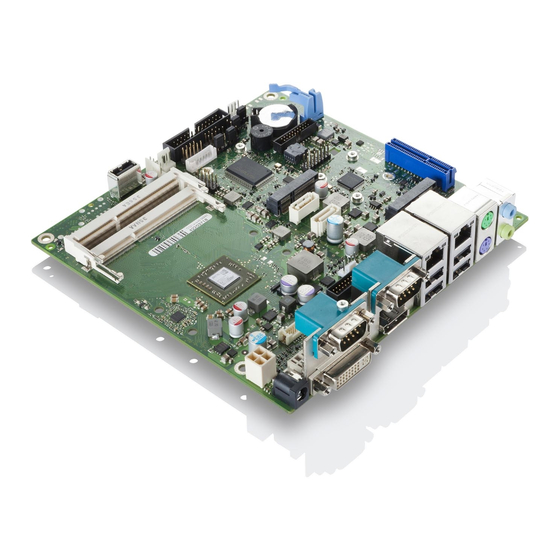
Assembly Instructions D3313-S Step 3 Insert RAM If you only have one RAM attach it to the top slot, if you have two, start with the bottom slot. Put in the first RAM tilted slightly upwards. Then push it down. - Page 6 Assembly Instructions D3313-S Now push down the board so that the holes on the board fit onto the screw holes on the chassis. Now screw in the board in all four holes. The board should now look like this: __________________________________________________________________________________________________________________________________________________________ Page 6 of 15 www.fujitsu.com...
-
Page 7: Step 5 Wire Hdd
Assembly Instructions D3313-S Step 5 Wire HDD At first you need to attach the HDD to the tray you have taken out earlier. Align the screw holes with the holes on the tray. Now add screws from the bottom. __________________________________________________________________________________________________________________________________________________________ Page 7 of 15 www.fujitsu.com... -
Page 8: Step 6 Mount Hdd
Assembly Instructions D3313-S Step 6 Mount HDD To mount the HDD place the hooks of the tray on the designated hole in the chassis and push the tray forward. You can now connect the HDD tray to the board. Then screw the HDD onto the chassis. - Page 9 Assembly Instructions D3313-S Now plug in the power cable. Connect the SATA cable. __________________________________________________________________________________________________________________________________________________________ Page 9 of 15 www.fujitsu.com...
-
Page 10: Step 7 Add Cross Bar
Assembly Instructions D3313-S Step 7 Add Cross Bar At first, plug in the front panel cable coming from the cross bar. Next, plug in the intrusion cable. On the left of the picture below you can see the plugged in front panel cable. -
Page 11: Step 8 Close Chassis
Assembly Instructions D3313-S Now, turn the chassis around and screw on the cross bar in the hole as seen in the pictures. Step 8 Close Chassis Slide the cover on top of the chassis and use some pressure to close it all the way. -
Page 12: Optional: Application Of A Passive Riser Card + Graphic Card Amd W2100
Assembly Instructions D3313-S After you have plugged in the power adapter you can secure it to prevent it from falling out. Your chassis is now assembled completely. Optional: Application of a Passive Riser Card + Graphic Card AMD W2100 Step 9 Mount mSata To carry out this step, you need the mSata, two screws and two nuts. -
Page 13: Step 10 Insert Passive Riser Card
Assembly Instructions D3313-S Put in the mSata tilted slightly upwards. Then push it down with your fingers and screw on the mSata as shown in the picture. Step 10 Insert Passive Riser Card Insert the passive riser card by putting it into the holder. -
Page 14: Step 11 Add Graphic Card Amd W2100
Assembly Instructions D3313-S Step 11 Add Graphic Card AMD W2100 Remove the screw to take out the cover. After removing the screw slide the cover out of the holder. __________________________________________________________________________________________________________________________________________________________ Page 14 of 15 www.fujitsu.com... - Page 15 Now you can put in the screw again. Contact © 2016 Fujitsu Technology Solutions GmbH. Fujitsu, the Fujitsu logo are FUJITSU trademarks or registered trademarks of Fujitsu Limited in Japan and other Fujitsu Technology Solutions Gmbh countries.
Need help?
Do you have a question about the D3313-S and is the answer not in the manual?
Questions and answers