Tieline VIA User Manual
Hide thumbs
Also See for VIA:
- Quick start user manual (39 pages) ,
- User manual (356 pages) ,
- User manual (15 pages)
Table of Contents
Advertisement
Advertisement
Table of Contents

Related Manuals for Tieline VIA


Summary of Contents for Tieline VIA
- Page 1 Codec User Manual Software Version: 2.16.xx Manual Version: 1.2 December, 2016...
-
Page 2: Table Of Contents
Table of Contents Part 1 Warnings & Safety Information Part 2 How to Use the Documentation Part 3 Glossary of Terms Part 4 Items Shipped with ViA Part 5 Introduction Part 6 Battery Use and Power Management Part 7 Inserting and Removing Modules... - Page 3 ViA User Manual v1.2 Part 19 Cue and Talkback Operation Part 20 General Audio Settings Part 21 Configuring AES3 and AES42 Input Audio Part 22 Backup and Redundancy Options 1 Monitoring SmartStream PLUS ........................... 103 2 Managing Failover ........................... 104...
- Page 4 5 Configuring POTS ........................... 218 6 Configuring Input/Output Settings ........................... 224 7 Configure Mono or Stereo Peer-to-Peer Programs in ViA ........................... 229 8 Configure Mono or Stereo + IFB Dialing Programs ........................... 237 9 Configure 2 Mono Peer-to-Peer Dialing Connections ...........................
- Page 5 5 Testing ISDN Connections ........................... 368 6 Using Answer Routes for Sessionless ISDN Calls ........................... 368 7 POTS Connection Tips & Precautions ........................... 372 8 ViA Compliances and Certifications ........................... 374 9 ViA Declaration of Conformity ........................... 375 10 Software Licences ........................... 376 11 Trademarks and Credit Notices ...........................
-
Page 6: Part 1 Warnings & Safety Information
PERMANENT DAMAGE MAY OCCUR! If you are unfamiliar with any facility, check that the line you are using is NOT a digital line. If the Tieline codec becomes faulty due to the use of a digital phone system, the WARRANTY WILL BE VOID. - Page 7 RADIO FREQUENCY SAFETY INFORMATION: IMPORTANT: To satisfy radio frequency exposure compliance requirements, the antenna and transmitter in the ViA codec must be at least 20 cm from all persons and must not be used in conjunction with any other antenna or transmitter.
- Page 8 ViA User Manual v1.2 guidelines on maximum exposure limits. As a rule of thumb, avoid extended periods listening to sound pressure levels (SPLs) of 85dBA or higher. CHINESE SAFETY WARNINGS: This device must only be used in not-tropical climate regions.
- Page 9 This Warranty does not apply if the product has been damaged by accident or misuse or as the result of service or modification performed by anyone other than Tieline. With the exception of the warranties set forth above, Tieline makes no other warranties, expressed or implied or statutory, including but not limited to warranties of merchantability and fitness for a particular purpose, which are hereby expressly disclaimed.
-
Page 10: Part 2 How To Use The Documentation
ViA User Manual v1.2 How to Use the Documentation Manual Conventions Warnings: Instructions that, if ignored, could result in death or serious personal injury caused by dangerous voltages or incorrect operation of the equipment. These must be observed for safe operation. -
Page 11: Part 3 Glossary Of Terms
ViA User Manual v1.2 Glossary of Terms AES/EBU Digital audio standard used to carry digital audio signals between devices AES3 Official term for the audio standard referred to often as AES/EBU AES42 AES standard for acoustics - Digital interface for microphones A gateway between a cellular network and another computer network. - Page 12 ViA User Manual v1.2 QoS (Quality of Priority given to different users or data flows across managed IP networks. This Service) generally requires a Service Level Agreement (SLA) with a Telco or ISP A standardized packet format for sending audio and video data streams and ensures consistency in the delivery order of voice data packets SDP defines the type of audio coding used within an RTP media stream.
-
Page 13: Part 4 Items Shipped With Via
Your new ViA codec is shipped with the following items: 1. ViA codec. 2. 12VDC power supply. 3. Rechargeable Li-ion battery pack RRC2057. 4. Protective case. If any of these items are missing or damaged please immediately contact Tieline or your dealer. © Tieline Pty. Ltd. 2016... -
Page 14: Part 5 Introduction
* Supported in later releases. Compatibility ViA connects over IP to any compatible codec brand that supports the EBU N/ACIP tech 3326 standard using SIP and SDP protocols. The codec also connects to competitor ISDN codecs in 'sessionless' mode. ViA is also POTS-compatible with Comrex® Vector, Matrix® or BlueBox®... -
Page 15: Part 6 Battery Use And Power Management
ViA User Manual v1.2 Battery Use and Power Management ViA has an internal battery slot on the rear panel designed for high performance RRC2057 Lithium- ion batteries. Only use this battery in the codec. Caution: 1. Please read the important safety and user information in the manufacturer user manuals for both the battery and any external charger purchased separately before use. - Page 16 The battery is fully charged and the external power supply is in use. Unknown battery error while the external power supply is attached. The battery should immediately be removed from the codec. Please contact Tieline if this situation persists. Unknown battery error. The battery should immediately be removed from the codec.
- Page 17 ViA User Manual v1.2 Touch Screen Power Management By default the TOUCH SCREEN has Screen Sleep mode enabled to preserve battery power. The default Screen Timeout setting is 1 minute. The TOUCH SCREEN will "reawaken" from sleep mode when a button or rotary encoder is adjusted, or the TOUCH SCREEN is tapped or swiped. It is also possible to: ·...
- Page 18 ViA User Manual v1.2 and then use the left and right buttons to Screen Brightness NAVIGATION adjust brightness. 6. Tap the On/Off button to toggle between enabling and disabling Adaptive Brightness Adjustment (default setting On). © Tieline Pty. Ltd. 2016...
- Page 19 ViA User Manual v1.2 Advanced Power Management Other ways to conserve battery power when operating without a power supply include the following: Power Management Mode Explanation Audio Power Setting Power consumption can be reduced by lowering the audio output threshold from +22dBU to +16dBU. Tap...
- Page 20 ViA User Manual v1.2 3. Tap to adjust each option. © Tieline Pty. Ltd. 2016...
-
Page 21: Part 7 Inserting And Removing Modules
A single module slot is available on the codec rear panel for inserting an optional ISDN or POTS module into the codec. ViA codec with an ISDN module installed Inserting or Removing a Module Ensure the codec is not powered up when inserting or removing modules. Where possible use anti-static precautions to help minimize the chance of static charges damaging the highly sensitive circuitry. -
Page 22: Part 8 External Connections
AES3 signals. Alternatively, input 1 also supports AES42 Mode 1 and Mode 2 mics. AES input modes can be selected via codec menus. VOLTAGE WARNING: DO NOT attach non-digital microphones or an AES3 source to input 1 when AES42 mode is selected, or equipment may be damaged by high voltages. - Page 23 Nine pin female RS232 serial data connection for local and remote control of equipment at either end of the link. 3 S/PDIF In/Out (Auxiliary S/PDIF IN/OUT auxiliary input and output via RCA connectors. input) 4 LAN1 and LAN2 Ports The codec features two Gigabit (10/100/1000) RJ-45 Ethernet ports for IP connections.
- Page 24 Right Side Panel Connections Connection Details 1 Stereo Line In STEREO LINE IN is an auxiliary line input option via a 3.5mm (1/8") TRS connector. 2 Outputs 1 and 2 OUTPUT 1 and 2 are balanced analog XLR line outputs.
- Page 25 2 SD Card slot SD card slot for file playback* 3 Module slot Module slot for inserting an optional ViA POTS or ViA ISDN module. 4 XLR Power Socket 4-pin male XLR on the rear panel to attach an external 12VDC 3A power supply.
-
Page 26: Part 9 Codec Controls
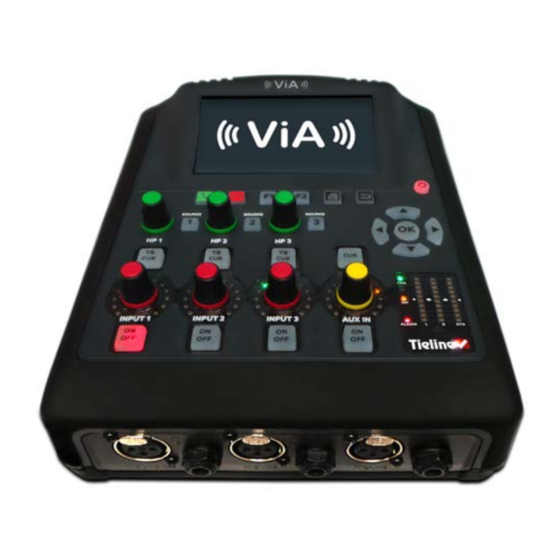
ViA User Manual v1.2 Codec Controls The top of the codec features input and headphone controls, as well as navigation buttons, a color LCD TOUCH SCREEN display and PPM meters. Navigation Buttons The codec has four arrow shaped navigation buttons for navigating codec menus and adjusting levels and settings. - Page 27 ViA User Manual v1.2 Operation Button Descriptions Features Operation Button Descriptions Connect Button Press to dial/connect Disconnect Button Press to disconnect a connection Function Button 1 Press to activate codec user functions Function Button 2 Press to activate codec user functions. Negotiate higher...
-
Page 28: Part 10 Wireless Ip Connection Options
The codec has multiple IP interface connection options, including: 1. LAN1 Ethernet port (default Primary Via interface in the Dialer 2. LAN2 Ethernet port (default Secondary Via interface in the Dialer ) 3. Internal Wi-Fi (default Tertiary Via interface in the Dialer ) 4. - Page 29 ViA User Manual v1.2 4. Tap to select the Wi-Fi access point to which you are connecting, in this example AndroidAP. 5. Tap to select the preferred Authentication Mode and then tap Password to enter the network password. 6. Enter the password, then tap Accept in the top right-hand corner of the TOUCH SCREEN.
- Page 30 Status Bar to confirm the codec has connected to the Wi-Fi access point. Important Note: ViA supports IEEE 802.11 a/b/g/n Wi-Fi with dual band connectivity (2.4 and 5 GHz). For increased security Tieline has implemented the WPA2-PSK authentication protocol because standard WEP encryption is less secure.
- Page 31 Helpful Hint: Use fingers on the TOUCH SCREEN to pinch zoom in to web-browser content, or zoom out. Connecting over Cellular Wireless via USB Modems 1. Attach a supported USB Modem to either USB PORT 1 or USB PORT 2 on the codec. When the modem is detected by the codec, the network symbol and signal strength is displayed in the Status Bar on the TOUCH SCREEN.
- Page 32 ViA User Manual v1.2 2. From the Home screen tap Settings > Transport Interfaces > Cellular > USB1/2 Module to view cellular details. Important Note: It may be necessary to manually add an Access Point Name (APN) if the codec cannot connect automatically to the network. See...
-
Page 33: Part 11 Menu Navigation
ViA User Manual v1.2 Menu Navigation Home Screen Navigation All main codec menus can be launched from the Home screen. Features Home Screen Elements 1 Dialer Tap to create simple 'ad hoc' dialing connections and save a program 2 Programs... - Page 34 ViA User Manual v1.2 Navigation Shortcuts 1. For IP and POTS connections negotiate higher bit rates by pressing the F2 button and then the NAVIGATE UP button while viewing the Statistics screen; for lower bit rates press the F2 button and then the NAVIGATE DOWN button.
-
Page 35: Part 12 Codec Menus
ViA User Manual v1.2 Codec Menus Following is an overview of the menu structure in the codec. © Tieline Pty. Ltd. 2016... -
Page 36: Part 13 Connection Guide
ViA User Manual v1.2 Connection Guide This quick start guide will get you connected with ViA in mono or stereo in just a few minutes. The codec is configured to connect in mono over IP by default when shipped, or when factory default settings are restored. -
Page 37: Connecting Over Ip
1. Press the HOME button to return to the Home screen, then tap Dialer 2. Tap Transport and select IP > Tieline if ISDN or POTS is the currently configured transport. Note: Select SIP instead of Tieline session when dialing non-Tieline codecs and Dialing SIP Peer-to-Peer to configure SIP connections. - Page 38 TOUCH SCREEN. 8. Tap Via to select a specific dialing interface in the Select Via screen, or use the default Any setting. Tap Save in the top right-hand corner of the screen to dial using the default Any setting.
- Page 39 ViA User Manual v1.2 · Primary = LAN1. · Secondary = LAN2. · Tertiary = Wi-Fi. You can also select a specific interface, e.g. Primary Secondary LAN1 LAN2, as displayed in the preceding image. Interfaces are not displayed if they are unavailable, e.g. if Wi- Fi is turned off or there is no cellular modem attached to USB PORT 1 USB PORT 2.
- Page 40 ViA User Manual v1.2 12. Tap FEC to configure local and remote forward error correction settings. See Configuring Forward Error Correction for more details. 13. Tap Direction if you want to save data and configure the codec to either Encode Only or Decode Only.
- Page 41 ViA User Manual v1.2 16. Tap Connect or press the CONNECT button to dial the destination codec. 17. Swipe left once to view Jitter and Send/Return values. 18. Tap the Statistics button to view connection and packet statistics. Note: Incrementally renegotiate higher connection bit rates by pressing the F2 button and then the NAVIGATE button while viewing the Statistics screen;...
-
Page 42: Monitoring Ip Connections
ViA User Manual v1.2 13.2 Monitoring IP Connections To view and monitor any active connections: 1. Press the HOME button to return to the Home screen, then tap Connections. 2. To view Connection Details: a. Tap the On Air indication on the Connections screen, or b. - Page 43 ViA User Manual v1.2 Feature Description 1 Lost Packets Packets sent that failed to arrive 2 Empty (Jitter Indicates how often the jitter buffer ‘reservoir’ empties causing loss of Buffer) audio 3 Late Packets The number of packets that arrive late, i.e. after audio play out...
-
Page 44: Connecting Over Sip
3. It is not possible to renegotiate the connection bit rate over a SIP connection. 4. When connecting to a Tieline G3 codec using SIP you need to manually select the G3 audio reference level. From the Home screen navigate to Audio >... - Page 45 ViA User Manual v1.2 3. Tap IP and then tap SIP. 4. Tap Algorithm to select the preferred algorithm, sample rate and bit-rate. G.711 is configured by default. 5. Tap Destination to configure how to connect. 6. To dial peer-to-peer tap Destination.
- Page 46 URI of the codec you want to dial, then tap Accept in the top right-hand corner of the TOUCH SCREEN to confirm all settings. 8. Tap Via to adjust the interface used to dial the connection. 9. Tap to select None as the SIP account when dialing peer-to-peer, or select a registered SIP account if you are using a SIP server to establish a connection.
- Page 47 · LAN2 with the SIP2 interface if you select Secondary in SIP mode. If you want to use a different IP interface such as Wi-Fi to dial over SIP, configure this as the Via setting in either the SIP1 or SIP2 interface. See Configuring SIP Interfaces for more information on configuring the two available SIP interfaces.
- Page 48 ViA User Manual v1.2 make a connection, or tap Save & Load Program to name and save the program. The new program will be loaded automatically after it has been saved. 12. Tap Connect or press the CONNECT button to dial the destination codec.
- Page 49 ViA User Manual v1.2 Important Notes: · See Configuring SIP Accounts for instructions on entering SIP account details into the codec. If your codec is registered with same SIP registrar as the destination codec then you only need to enter the SIP user name to dial successfully.
-
Page 50: Connecting With Fuse-Ip
How does Fuse-IP work? Fuse-IP is another Via interface you can use to dial, similar to selecting a LAN port or Wi-Fi. Fuse-IP requires one codec to be a server and the other codec is the client. Normally the remote codec is configured as the client and the studio codec is the server, because it's easier to dial static IP addresses configured at the studio than cellular or Wi-Fi interfaces at the remote site. - Page 51 ViA User Manual v1.2 2. Tap Transport Interfaces to expand the menu if it is not displayed, then tap Fuse-IP configure module settings. 3. Configure Client as the Fuse-IP Mode. 4. Tap Bonded Interfaces and then tap the On/Off button for the interfaces you want to bond.
- Page 52 ViA User Manual v1.2 6. Tap Inactivity Timeout if you want to turn the Fuse-IP tunnel off after a predetermined time period to save data, then click Save. Note: Inactivity Timeout can be configured from 0 to 1440 minutes. Enter 0 to disable the timeout.
- Page 53 Started, dialing server... persists after turning Fuse-IP On. 10. Select Fuse-IP as the Via interface with which to dial when creating a program in the Java Toolbox Web-GUI Programs panel or the Dialer Important Notes: ·...
-
Page 54: Connecting With Isdn
2. Tap Transport to adjust this setting if the current selection is IP. 3. Tap to select ISDN as the preferred connection type. 4. When dialing a Tieline codec tap to select the default Tieline Codecs Session Data setting, or tap Sessionless if dialing a non-Tieline codec. - Page 55 ViA User Manual v1.2 Important Note: By default, when Tieline codecs dial they send configuration settings to the remote codec using Tieline Session Data. This configures the codec receiving the call with matching algorithm, sample rate and bit rate settings. Non-Tieline devices don't support this feature and Sessionless must be selected to provide compatibility.
- Page 56 8. Tap to adjust the sample rate if required. 9. Tap Destination to configure ISDN dialing. 10. Tap Via to select a B-channel interface to use when dialing. Tap an individual B-channel, or use the default Any setting and allow the codec to use the first available interface.
- Page 57 ViA User Manual v1.2 13. Tap Done in the in the top right-hand corner of the TOUCH SCREEN to return to the Direct Dial screen.. 14. Tap the Auto reconnect On/Off button to toggle between enabling and disabling this feature. Note: See Configuring Auto Reconnect for more details.
- Page 58 ViA User Manual v1.2 16. Tap Connect or press the CONNECT button to dial the destination codec. Note: When dialing, the CONNECTED LED on the front of the unit will flash green; it turns solid green when connected. Swipe left once to view connection details.
-
Page 59: Connecting Pots
A POTS module is installed in the codec and line voltage has been detected Important Notes: · Configure the correct country setting for connections over POTS to adjust the ViA POTS G5 module for varying ring tones and line impedances in different countries. · See POTS Connection Tips and Precautions for valuable information about setting up and maintaining reliable POTS connections. - Page 60 Important Note: When Analog Phone is configured, the codec displays a simplified Dialer menu with applicable settings. 4. Tap to select Tieline Codecs session data when connecting to another Tieline codec, or tap Sessionless when dialing non-Tieline POTS codecs. Important Notes: Tieline Music Mono is the algorithm automatically configured for Tieline Codecs.
- Page 61 ViA User Manual v1.2 Important Note on Dial Pause Time: When dialing out through a PBX the codec must find a line on two occasions: · At the beginning of the call, and · When the call goes into the Public Switched Telephone Network (PSTN) from the PBX.
- Page 62 ViA User Manual v1.2 9. Tap Connect or press the CONNECT button to dial the destination codec. Note: When dialing and negotiating, the CXN LED on the front of the unit will flash green; it turns solid green when connected.
-
Page 63: Part 14 Redialing A Connection
ViA User Manual v1.2 Redialing a Connection Press the CONNECT button in any screen except the Dialer to view Call History and redial previous connections. Manually dialed connections are saved as programs and retain all dialing and configuration information. Previous connections are identified in the Call History screen by their program name, or by the directly dialed number or address used. -
Page 64: Part 15 Load, Connect And Manage Programs
What is a Program? Tieline ViA, Genie, Merlin and Bridge-IT codecs also use 'programs' to connect to each other. A program configures a Tieline codec to send or receive one or more Audio Streams based upon the particular application the codec is being used for at any given time. - Page 65 3. Tap Load Program & Unload Previous to load a saved program and unload the current program. Note: Saved programs could have been configured using the Java Toolbox Web- GUI, or locally via the TOUCH SCREEN. 4. The Connections screen is displayed when you load a new program. Tap Connect to dial the program.
- Page 66 ViA User Manual v1.2 programs, or if you want to configure the codec to always use a particular jitter buffer or FEC setting.To learn more see Lock or Unlock a Program in the Codec. Disconnect a Program 1. Press the red DISCONNECT button at any time to hangup a connection.
- Page 67 ViA User Manual v1.2 2. Tap to select a program which is not a favorite, i.e. there is no Star symbol next to the radio button. 3. Tap More Options and then tap Add to Favorites. 4. In this example, the program LA Studio 2 appears in the Programs list with a Star symbol next to the radio button, indicating it has been added to the list of Favorites.
- Page 68 ViA User Manual v1.2 3. Tap More Options and then tap Remove Favorite. 4. The example program LA Studio 2 appears in the Programs list without a Star symbol next to the radio button, indicating it has been removed from Favorites.
- Page 69 ViA User Manual v1.2 3. Tap More Options and then tap Delete. 4. Tap Delete in the confirmation dialog. © Tieline Pty. Ltd. 2016...
-
Page 70: Part 16 Via Headphone Controls
ViA User Manual v1.2 ViA Headphone Controls WARNING: LISTENING AUDIO EXCESSIVE VOLUMES CAN CAUSE PERMANENT HEARING DAMAGE. REDUCE VOLUME AS LOW AS POSSIBLE. A headphone volume limiter can be employed to protect hearing when monitoring loud sources and/or when using low impedance headphones. To configure this: 1. - Page 71 Important Note: When the audio menu is enabled in administrator mode it is possible to configure the headphone mix via the Headphone menu. Select Home screen > Audio > Headphones . Then tap Headphone Settings for each headphone output and select the preferred headphone mix.
- Page 72 ViA User Manual v1.2 3. Tap to select or deselect sources in the matrix and then tap Menu to view available configuration options. These include: · Undo All Changes: tap to undo all changes made in the Edit Mix screen.
-
Page 73: Part 17 Input Levels And Input Settings
2. Do not attach an unbalanced input source (e.g. smartphone) to an analog XLR input if phantom power is enabled, or it may damage the connected device. Tieline recommends using an unbalanced to balanced converter to avoid damaging connected equipment. - Page 74 ViA User Manual v1.2 3. Tap to select the input you want to configure. 4. Tap to select Analog as the Input Type and tap to select Gain Type. 5. Tap to select the correct gain setting, or tap Save to keep the existing setting.
- Page 75 ViA User Manual v1.2 2. Tap to select IGC. There are three settings; Auto, Fixed and Off. In the default Auto mode, the codec detects when incoming audio levels have reduced sufficiently after IGC has been activated and automatically returns input levels to the gain setting prior to IGC being activated.
- Page 76 ViA User Manual v1.2 Phantom Power Settings Phantom power can be enabled or disabled when inputs 1-3 are in analog mic level input mode (default setting disabled). Phantom power of 10V or 48V is supplied to all inputs when enabled. The default setting is 10V and the currently configured voltage is displayed in brackets next to Phantom Power in the Input Config screen.
- Page 77 ViA User Manual v1.2 2. Tap to select the correct voltage to suit the microphone you are using. Important Note: The same phantom power voltage is applied across all compatible inputs. See General Audio Settings for more information about: · Adjusting Phantom Power Voltage.
- Page 78 There are 3 stereo auxiliary input and 2 stereo auxiliary output options available in the codec: · An analog stereo line input via 1/8" (3.5mm) TRS jack. · A stereo S/PDIF input and output via RCA connectors, supporting 32kHz, 44.1kHz and 48kHz sample rates.
- Page 79 ViA User Manual v1.2 To select an input option: 1. Press the HOME button to return to the Home screen, then tap Audio > Inputs 2. Tap to select the Aux input you want to configure. 3. Tap to select Input Type.
- Page 80 Other Auxiliary Input Options Other input options available include: 1. Cue Button Mode: Monitor the auxiliary input via headphone output HP 1 (default enabled). 2. Polarity Inversion: Tap the On/Off button to toggle phase reversal of the selected input (default Off).
-
Page 81: Part 18 Ppm Meters And Analog Audio Outputs
A Tieline codec with proprietary Tieline session data enabled will automatically adjust the reference level to suit G5 and G3 codecs, or Report-IT. When connecting to a non-Tieline codec, or a Tieline codec without session data enabled, the codec will use the Tieline G5 reference scale setting. For... -
Page 82: Tieline Pty. Ltd
ViA User Manual v1.2 PPMs on the Codec PPMs on the Connections screen PPM Meters for Mono Peer-to-Peer Programs When a mono program is connected the codec displays a mix of all inputs on the LEFT PPM and mono return audio on the RETURN PPM. By default, all inputs are mixed in the outgoing mono program audio stream. - Page 83 ViA User Manual v1.2 routed to both encoders 1 and 2. To provide stereo on the auxiliary input, the left channel is routed to encoder 1 and the right channel is routed to encoder 2. The Connections screen PPM meters display outgoing stereo program audio on the left and right SND PPMs.
- Page 84 ViA User Manual v1.2 The left hand Connections screen PPM meters display outgoing program audio on the SND PPM and return audio on the RTN PPM for the first mono connection. The right hand PPM meters display outgoing program audio on the SND PPM and return audio on the RTN PPM for the second mono connection.
- Page 85 ViA User Manual v1.2 By default, return audio from the program audio stream (first connection) is routed to both analog OUTPUT 1 (decoder 1) and OUTPUT 2 (decoder 2). PPM Meters for Stereo + IFB Programs The codec is capable of broadcasting a bidirectional stereo peer-to-peer audio stream and a separate bidirectional IFB (talkback/communications) audio stream.
-
Page 86: Part 19 Cue And Talkback Operation
Cue and Talkback Operation The codec supports both cue and talkback functions. Cue provides: · Offline communications between local announcers via headphone outputs when the TB CUE button is pressed on inputs 1-3. · Offline monitoring of the auxiliary input via headphone output 1 (HP1). - Page 87 Auxiliary Input Cue The codec supports offline cueing of external sources attached to the stereo auxiliary input. By default, offline cue monitoring of the auxiliary input is only available via headphone output 1 (HP1). Talkback In talkback mode, pressing the CUE TB button delivers ‘discreet’...
- Page 88 ViA User Manual v1.2 Important Note: Default input routing is outlined in Appendix B: Default Matrix Routing. © Tieline Pty. Ltd. 2016...
-
Page 89: Part 20 General Audio Settings
ViA User Manual v1.2 General Audio Settings General audio settings include the following options: · Audio reference levels. · Phantom power voltage settings for inputs 1-3. · Disabling +48V Phantom Power on boot. · Show/hide +48V High Voltage warning dialog. - Page 90 Tieline G5 reference scale setting. The default Tieline G5 audio reference scale displayed on the PPMs when you connect to a Tieline G5 codec is -38dBFS to 0dBFS (e.g. Merlin, Genie, Bridge-IT and ViA codec families). The comparison table below outlines the reference scales for G5 and G3 codecs and Report-IT in dBFS, as well as the equivalent dBU scale.
- Page 91 ViA User Manual v1.2 Helpful Hint: As a shortcut you can tap the Hamburger menu in the Input Audio screen to adjust this setting. Phantom Power Voltage VOLTAGE WARNING: Microphones and other ancillary audio equipment may be very sensitive to phantom power voltages and should not be attached to the codec inputs when phantom power is enabled, or equipment may be damaged these voltages.
- Page 92 ViA User Manual v1.2 Disable +48V Phantom Power on Boot By default, 48V phantom power is disabled when the codec is rebooted. This protects users from attaching a non-phantom device to a phantom-enabled codec input and damaging equipment. This feature can be disabled if required: 1.
- Page 93 ViA User Manual v1.2 Analog Input Level Scale It is possible to change the input PPM meter scale used by the codec from dBFS (default) to dBU. This is most useful when viewing PPM meters in the Inputs panel in the Toolbox web-GUI. To adjust this setting: 1.
- Page 94 ViA User Manual v1.2 2. Tap the On/Off button to enable and disable this feature. Output AGC (Automatic Gain Control) AGC is enabled by default on the analog outputs. AGC is independent of IGC (Intelligent Gain Control). 1. Press the HOME button to return to the Home screen, then tap Audio 2.
- Page 95 ViA User Manual v1.2 The following table outlines the default matrix settings for how inputs are routed to analog outputs in loop back audio test mode. Inputs Analog Output 1 Analog Output 2 Aux In Left Aux in Right © Tieline Pty. Ltd. 2016...
-
Page 96: Input Audio
ViA User Manual v1.2 Configuring AES3 and AES42 Input Audio INPUT 1 (MIC/LINE/AES) on the codec supports: · A mic or line level analog source, or · AES3 (AES/EBU) format digital audio, or · An AES42 digital microphone. VOLTAGE WARNING: DO NOT attach non-digital microphones or an AES3 source to input 1 when AES42 input mode is selected, or equipment may be damaged by high voltages. - Page 97 ViA User Manual v1.2 4. Tap Input Type. AES3 6. AES3 settings are confirmed in the Input Type field on the screen. Important Note: There is a maximum of 6dB of additional gain available when adjusting an AES input source.
- Page 98 ViA User Manual v1.2 AES42 Digital Microphone Input VOLTAGE WARNING: DO NOT attach non-digital microphones or an AES3 source to input 1 when AES42 input mode is selected, or equipment may be damaged by high voltages. As a safety measure, by default the codec will reboot and configure input 1 for an analog microphone after an AES42 mic has been used.
- Page 99 ViA User Manual v1.2 Tap AES42 AES42 settings are confirmed in the Input Type field on the screen and an AES42 Settings menu appears. 7. Tap AE42 Settings to adjust mic parameters as required. © Tieline Pty. Ltd. 2016...
-
Page 100: Part 22 Backup And Redundancy Options
Imagine the peace of mind knowing you can bond 2 USB modem data links from different Telcos and let Tieline’s Fuse-IP technology automatically manage the data capability of each link! Flexibility is paramount for remotes, so you can even bond a USB modem with a Wi-Fi connection, or bond two Ethernet connections. - Page 101 ISDN connection, or a backup POTS connection in the same program. Note: ViA has a single module slot and can connect over POTS or ISDN if a ViA POTS or ViA ISDN module is installed. For details on configuring backup connections using failover see...
- Page 102 ViA User Manual v1.2 configure FEC on each of these data streams. For more info on FEC see Configuring Forward Error Correction. Auto Reconnect Auto Reconnect is the simplest form of connection backup whereby the codec will redial a lost connection continuously until it is either: ·...
-
Page 103: Monitoring Smartstream Plus
ViA User Manual v1.2 Monitoring SmartStream PLUS 22.1 When you configure a SmartStream PLUS connection it appears like a regular stereo connection on the Connections Screen. Swipe left once to view Jitter and Send/Return values for each connection. Tap the Statistics button or swipe left again to view packet statistics. -
Page 104: Managing Failover
ViA User Manual v1.2 Managing Failover 22.2 If a primary and backup connection are configured in a program, the codec supports automatically failing over to a backup connection according to Backup data loss parameters. It can also automatically fail back to the original connection according to Auto Resume parameters. It is also possible to manually fail over to a backup connection, and fail back to the original connection, using the Connection Details screen. - Page 105 ViA User Manual v1.2 2. Tap Fail Back in the confirmation dialog to disconnect the backup connection and reconnect the primary connection. © Tieline Pty. Ltd. 2016...
-
Page 106: Part 23 Administrator And Basic Operation Modes
ViA User Manual v1.2 Administrator and Basic Operation Modes The codec can be operated in either Admin Mode or Basic Mode. When shipped the codec is configured in Admin Mode with access to all features and menus. An administrator can also configure the codec to present a subset of menus for non-technical users in Basic Mode to simplify operation. - Page 107 ViA User Manual v1.2 Admin Mode Active Basic Mode Active Admin Mode Login There are two ways to log in as an administrator when the codec is in Basic Mode: 1. Tap Menu on the Home screen and then tap Switch to Admin Mode to log in as an administrator.
- Page 108 An administrator can adjust the subset of settings visible to a user when the codec is in Basic Mode. To adjust these settings and the login Password: 1. Log in as an administrator and tap Manage via the Menu button, or navigate to Home screen >...
- Page 109 ViA User Manual v1.2 Change the Administrator Password 1. Tap Password. 2. Enter the current admin password, then tap Accept in the top right-hand corner of the TOUCH SCREEN. 3. Tap New Admin Password to enter the new password, then tap the Right Arrow in the top right-hand corner of the TOUCH SCREEN.
- Page 110 ViA User Manual v1.2 5. Tap Save in the right-hand corner of the TOUCH SCREEN to confirm the changed password. Configure Basic Mode Settings Tap Basic Mode Settings to configure which menus and screens are visible in the codec in Basic Mode.
- Page 111 Wi-Fi access point information. Configure ViA Power-up Mode The codec can be configured to always boot in either Admin Mode or Basic Mode. 1. Tap ViA Power-up Mode. 2. Tap to select the preferred option. © Tieline Pty. Ltd. 2016...
-
Page 112: Part 24 About Isdn Modules
The NT-1 is a relatively simple device that converts a 2-wire U interface into the 4-wire S/T interface. If you have an NT-1 device connected to the U interface line then you will require a Tieline ViA (ST) ISDN module (S/T interface - model: TLISDNEUROVIA). If you don’t have an NT-1 device installed then the Tieline ViA (U) USA ISDN module (U interface - model: TLISDNUSAVIA) will be required. - Page 113 ViA User Manual v1.2 How to Configure ISDN G5 Modules To configure the codec to dial using ISDN for the first time: 1. Ensure that the correct country setting is configured in your codec via Home screen > Settings > System > Country 2.
-
Page 114: Isdn Module Settings
ISDN Module Settings 24.1 ISDN Module settings in the Transport Interfaces menu determine how an ISDN module operates at a particular site. Other answering-related settings are available in the Transport menu via Answering > [Select ISDN Config]. Configuring ViA ISDN Modules To adjust ISDN module settings: 1. - Page 115 ViA User Manual v1.2 4. This menu is a call filter to allow or deny voice or data calls according to your preferences. By default Data Only is selected. Tap to accept or disallow voice or data calls according to your preferences.
- Page 116 DN or MSN numbers as required. Note: SPID1 and SPID2 are only visible when a ViA (U) USA ISDN module is installed in the codec. 10. Use the on-screen keyboard to enter each number, then tap Accept in the top right-hand corner of the TOUCH SCREEN to add each number.
- Page 117 ViA User Manual v1.2 ap Save in the top right-hand corner of the TOUCH SCREEN to confirm and store all entered numbers. Important Notes: Directory Numbers and Multiple Subscriber Numbers Directory Numbers (DN) in North America and Multiple Subscriber Numbers (MSN) in the rest of the world are simply phone numbers associated with an ISDN B channel, like lines listed in a typical phone directory.
- Page 118 ViA User Manual v1.2 (your codec) sends the SPID to the switch. The switch then associates the SPID with a specific Service Profile and directory number. Note: SPID numbers normally include the phone number and additional prefix or suffix digits up to 20 digits long.
-
Page 119: Isdn Answering Configuration
ViA User Manual v1.2 ISDN Answering Configuration 24.2 Important Note: For more detailed information about ISDN Answer Config parameters, including bonding and 'route' configuration etc., please see Configuring ISDN Answering the Java Toolbox Web-GUI manual, or Configuring ISDN Answering in the HTML5 Toolbox Web-GUI manual. - Page 120 Non-Tieline Encoding and answer route settings are used to answer sessionless calls. 5. Tap Non-Tieline Encoding and then tap to select the default algorithm used when receiving a call from a non-Tieline codec.
- Page 121 ViA User Manual v1.2 2. Navigate to Answering and then tap ISDN Answering 3. Tap Menu in the top left corner of the TOUCH SCREEN and then tap Reset ISDN Answer Config. 4. Tap in the confirmation dialog to revert to factory default settings.
-
Page 122: Part 25 About Pots Modules
About POTS Modules The ViA POTS G5 module is essentially the same as other G5 POTS modules in Genie and Merlin codecs. It can be used in the codec to stream high quality audio over a POTS (PSTN) phone line. - Page 123 Making Analog Phone (Voice) Calls The ViA POTS G5 module is capable of making analog voice calls. This may be useful to dial a telephone hybrid, or to use for communications, or when there is no Tieline codec at the other end of the link.
-
Page 124: Pots Module Settings
> Transport Interfaces > POTS Module to configure how the codec operates at a particular site when using POTS. Other POTS answering-related settings are available in the Answering menu via Settings > Answering > POTS Answering if you are connecting to non-Tieline codecs. - Page 125 Answering . Adjustments to these settings are not normally necessary when connecting between Tieline codecs. Default session and algorithm settings may need to be adjusted when connecting to non-Tieline codecs over POTS. To configure answering settings in the Java or HTML5 Toolbox Web-GUI see: ·...
- Page 126 ViA User Manual v1.2 ViA POTS G5 modules initially attempt to establish a link at the lowest Max Bit rate setting configured in the two modules being connected. If the POTS line doesn't support this bit rate, the modems will attempt to connect at the highest possible bit rate to suit the prevailing line quality at each end of the link.
- Page 127 Monitor Modem Tone (Affects Dialing and Answering) Tap the On/Off button to Enable (default) or Disable this feature. If enabled the module will allow audio monitoring of modem tones via the phone input during POTS Codec mode connections. Important Notes: ·...
-
Page 128: Pots Answering Configuration
By default, Tieline codecs communicate information via session data transferred when a connection is established. If you answer a call from a non-Tieline codec (or a sessionless call from a Tieline codec), POTS Answering settings determine the algorithm used when connecting. An Answering Route can also be configured, which routes a call to a specific audio stream on the answering codec. - Page 129 ViA User Manual v1.2 4. Tap to select Tieline Codecs and Sessionless or Sessionless Only if connecting to non- Tieline codecs only. Important Note: By default, calls from Tieline codecs contain session data information, which includes algorithm, bit-rate, route and other settings. Calls from non-Tieline codecs are sessionless.
-
Page 130: Part 26 About Sip
SIP peer-to-peer connection involves two codecs connecting to each other directly using an IP address, as you would for a standard Tieline IP call. The difference is that a Tieline IP call uses proprietary Tieline session data to negotiate call parameters (e.g. algorithm and bit rate) when a call is established, whereas a peer-to-peer SIP connection uses Session Description Protocol (SDP) for this purpose. - Page 131 SIP is G.711. SIP Server Connections The benefit of using a SIP server to connect is that any device can be ‘discovered’ via its SIP server registration. This is particularly useful if a codec is being used in multiple locations with IP addresses that are DHCP assigned.
- Page 132 · Failover and SmartStream PLUS redundant streaming are not available with SIP connections. · When connecting to a Tieline G3 codec using SIP you need to manually select the G3 audio reference level in the codec. To do this select Audio >...
-
Page 133: Configuring Sip Accounts
ViA User Manual v1.2 Configuring SIP Accounts 26.1 Getting Started Up to 6 SIP accounts can be configured in the codec and registering codecs for SIP connectivity is simple. First, choose the SIP server to which you will register your codec. On a LAN this may be your own server, or it could be one of the many internet servers available. - Page 134 ViA User Manual v1.2 3. Tap Accounts to view the SIP Accounts screen. In the following image an account has been added, registered and enabled. To add another SIP account, tap an account which is Not configured. 4. Tap each field in turn to enter the SIP account credentials. Tap Done to confirm the details for each entry.
- Page 135 ViA User Manual v1.2 7. Once enabled, the SIP account can be selected when creating a new SIP connection via the Home screen > Dialer > Destination Confirming Account Registration There are three symbols displayed in the codec next to an account which indicate SIP account registration status.
-
Page 136: Configuring Sip Interfaces
ViA User Manual v1.2 3. Verify that the Via selected in the SIP1 or SIP2 interface settings corresponds with the network interface being used by the codec to register the account. E.g. LAN1, LAN2 or Wi- 26.2 Configuring SIP Interfaces The codec supports dialing over two SIP interfaces simultaneously. - Page 137 ViA User Manual v1.2 4. Tap to select and edit any setting, then tap to select the Via, i.e. the interface used to dial over SIP1 or SIP2. 5. Tap Public IP Address if you want to dial over SIP from behind a firewall. Enter the public IP address here and then configure port forwarding to route traffic to the codec's local IP address behind your firewall.
- Page 138 ViA User Manual v1.2 Important Notes: The settings for SIP1 and SIP2 cannot be edited if the interface is enabled. © Tieline Pty. Ltd. 2016...
-
Page 139: Part 27 Other Touch Screen Configuration Tasks
ViA User Manual v1.2 Other Touch Screen Configuration Tasks The following sections explain how to configure a wide range of codec settings using TOUCH SCREEN. 27.1 Configuring LAN/VLAN Settings Verifying IP Address Details in the Codec 1. Press the HOME button to return to the Home screen, then tap Settings 2. - Page 140 ViA User Manual v1.2 Important Note: See the Java Toolbox Web-GUI Configuring IP Settings section, or the HTML5 Toolbox Web-GUI Configuring IP Settings section, for more details about IP connections. For further assistance with IPv4 or IPv6 network settings contact your IT Administrator.
- Page 141 ViA User Manual v1.2 4. Tap IPv4 Configuration. 5. Tap to select DHCP. 6. Tap Save in the top right-hand corner to reconfigure the codec for DHCP IP address configuration. © Tieline Pty. Ltd. 2016...
- Page 142 ViA User Manual v1.2 Configure a Static IPv4 Address Static IP addresses are fixed addresses which are normally recommended for studio installations. Using a static IP address ensures remote codecs can connect reliably using the same IP address over time.
- Page 143 ViA User Manual v1.2 6. Use the on-screen keyboard to enter the static IP address into the codec, and then tap the Right Arrow in the top-right hand corner of the TOUCH SCREEN. 7. Enter the IPv4 Subnet mask into the codec, and then tap the Right Arrow.
- Page 144 ViA User Manual v1.2 IPv6 Address Assignment There are three IPv6 settings available for each LAN port on the codec and any VLANs which are configured. 1. Auto: By default, an address is automatically assigned to the codec when you connect the codec to an IPv6 router.
-
Page 145: Adding Cellular Access Points
ViA User Manual v1.2 Adding Cellular Access Points 27.2 If a USB modem is attached to the codec and does not connect to a cellular network you can add a custom access point number (APN) profile. Often this is necessary when you are using different SIM cards in an unlocked USB modem. - Page 146 ViA User Manual v1.2 5. Tap Name to name the profile and then tap to enter each access point setting. Tap Save in the top right-hand corner of the TOUCH SCREEN when all settings are entered. Select a Custom USB Modem Profile (APN) 1.
-
Page 147: Selecting An Algorithm
MusicPLUS algorithms. Overview of Tieline Algorithms 1. The Tieline Music algorithm is optimized for audio bit rates as low as 19.2kbps with only a 20 millisecond encode delay. It offers 15 kHz mono from 24kbps to 48kbps. 2. Tieline MusicPLUS delivers up to 20 kHz mono from 48kbps upwards. It can also deliver up to 20 kHz stereo from 96kbps upwards, offering huge savings on your IP data bills and outstanding audio quality. - Page 148 LC-AAC is optimized for audio bit rates of 64kbps per channel or higher using a sample rate of 48kHz. Tieline recommends using LC-AAC instead of HE-AAC if bandwidth of 64kbps or higher per channel is available, to optimize audio quality. If lower bandwidth than 64kbps is available consider using HE-AAC, Tieline Music or Tieline MusicPLUS.
- Page 149 Home screen, then tap Dialer 2. Tap Algorithm to reconfigure the algorithm for the selected Transport (IP, SIP, ISDN, POTS). 3. Tap to select an algorithm. Note: In most situations Tieline Music is the best algorithm to select and this is configured by default.
- Page 150 Use MP2 algorithms at 64kbps mono or 128kbps stereo for high quality connections when using SIP, or use G.711 and G.722 if required. Tieline G3 codecs do not support connections using algorithms like AAC, aptX Enhanced and Opus and will default to MPEG Layer 2 if an incoming call is configured to use these algorithms.
- Page 151 ViA User Manual v1.2 Algor- Audio Algor- rate over- Audio Quality and Recom m ended Band- ithm ic per channel head Features applications for on-air ithm Delay connectio w idth Linear/PCM 16/24 bit sample rate x 80kbps · Full bandw idth, ·...
- Page 152 ViA User Manual v1.2 · High delay · Use w hen bidirectional communication betw een announcers is not required LC-AAC Up to 64ms 64kbps 15kbps · High quality voice · Voice or music 15kHz and music at remotes as w ell as low est bit rate;...
- Page 153 ViA User Manual v1.2 · Highly cascade low delay is highly resilient desirable. · Resilient w ith multiple encodes/decodes w hen required Opus 4Hz- 20ms 9.6-256kbps 16kbps · Very high quality · "Opus Voice" is ideal 20kHz voice and music for high quality, and ·...
- Page 154 ViA User Manual v1.2 IP Connection Bit rates Supported © Tieline Pty. Ltd. 2016...
-
Page 155: Configuring The Jitter Buffer
· Manage delay dynamically based on current network congestion. · Manage forward error correction (FEC). With Tieline codecs you can configure either a fixed or automatic jitter buffer and the settings you use depend on the IP network you are connecting over. Over LANs, WANs and wireless networks the automatic jitter buffer generally works well. - Page 156 A fixed jitter buffer is preferable over satellite or high latency connections to ensure continuity of signals. CAUTION: If a Tieline codec connects to a device that is using non-compliant RTP streams then the last fixed setting configured in the codec will be enabled (default is 500ms). Non- compliant devices include some other brands of codec, web streams and other devices.
- Page 157 ViA User Manual v1.2 Algorithm Non-SIP Connections SIP Connections Linear (Uncompressed) Tieline Music Tieline MusicPLUS G.711 G.722 MPEG Layer 2 MPEG Layer 3 LC-AAC HE-AAC v.1 HE-AAC v.2 AAC-LD AAC-ELD Opus aptX Enhanced Configuring Automatic Jitter Buffering (Default Setting) 1. Press the HOME button to return to the Home screen, then tap Dialer 2.
- Page 158 ViA User Manual v1.2 5. Use the on-screen keyboard to set the minimum jitter buffer depth. Note: The Depth setting allows you to select predetermined minimum and maximum jitter settings within the auto jitter buffer's minimum and maximum jitter limitations. The default setting of 60 to 1000ms is a good starting point for most networks.
- Page 159 5. Fixed (F): This state is displayed if the jitter buffer is fixed. Fixing Jitter Buffer Settings The default jitter-buffer latency in Tieline codecs is 500 milliseconds. This is a very reliable setting that will work for just about all connections. However, this is quite a long delay and we recommend that when you set up an IP connection you test how low you can configure the jitter-buffer in your codec before the broadcast.
- Page 160 ViA User Manual v1.2 4. Use the on-screen keyboard to set the fixed jitter buffer depth, then tap Accept in the top right-hand corner of the TOUCH SCREEN to complete configuration. When manually configuring the jitter-buffer delay in a codec it is necessary to think carefully about the type of connection you will be using.
-
Page 161: Configuring Forward Error Correction
100ms to the fixed jitter buffer on a codec receiving FEC at a setting of 20% and 20ms at a setting of 100%. Tieline’s auto jitter buffer detects the amount of FEC that is being used and automatically compensates to increase the codec jitter buffer when this feature is enabled. - Page 162 ViA User Manual v1.2 3. Tap to select the local codec's FEC ratio. 4. Tap to select the remote codec's FEC ratio. The four FEC settings are outlined in the following table with their bit rate ratios. © Tieline Pty. Ltd. 2016...
- Page 163 FEC according to the available uplink bandwidth at each end for best performance. As an example, if you want 15 kHz mono (using the Tieline Music Algorithm) you will need at least a 24kbps connection for audio. Adding 100% FEC will add another 24kbps making your bit rate 48kbps plus some overhead of around 10kbps is required.
-
Page 164: Configuring Auto Reconnect
ViA User Manual v1.2 Here is another example, if you want 15 kHz stereo, you need at least 56kbps for the audio. 100% FEC requires at least 112kbps and 50% FEC requires at least 84kbps. If your uplink speed is 256kbps and you're on a shared connection, then choosing a lower FEC setting of 20%-33% may deliver better results. -
Page 165: Configuring Encode/Decode Direction
ViA User Manual v1.2 Auto reconnect enabled for ISDN 27.7 Configuring Encode/Decode Direction By default the codec by is configured to both encode and decode data. However, it is possible to configure the codec to either encode or decode audio data only. This is useful for: ·... -
Page 166: Headphone Settings
ViA User Manual v1.2 Headphone Settings 27.8 The Headphone Settings menu includes configuration settings for the three 1/4 inch (6.35mm) headphone jack outputs. To access this menu press the HOME button to return to the Home screen, then tap Audio >... -
Page 167: Enabling Relays & Rs232 Data
By default, alarm tones are enabled in the headphone outputs to deliver low battery level alerts. To disable alarm tones and adjust the level of the alarm tone in the headphones. Acknowledging active alarm tones via the TOUCH SCREEN will turn alarm tones off: 1. Press the HOME button to return to the Home screen, then tap Audio >... - Page 168 ViA User Manual v1.2 Configuring Control Port Contact Closure Operation The Rules panel in the Toolbox Java and HTML5 Web-GUIs can be used to configure switch inputs and relay outputs. See Creating Rules to learn about configuring rules using the Java Toolbox Web-...
-
Page 169: Configuring Tcp/Udp Ports
ViA User Manual v1.2 Important Notes: · When connecting to G3 codecs over IP, ISDN or POTS only in-band data is available via the Music and MusicPLUS algorithms. See RS232 Data Configuration for more details. · Only the dialing codec needs to be configured to send RS232 data to another Tieline G5 codec. - Page 170 Codec at the Studio. This section also contains useful information for configuring port forwarding and troubleshooting IP connections. The following sections describe how to adjust port settings for Tieline session data and audio ports. To configure SIP ports see Configuring SIP Interfaces...
- Page 171 Tieline G5 codecs (Bridge-IT, Genie, Merlin and ViA codec families) and Tieline Commander and i- Mix codecs dialing over IP1 use session port 9002 by default. Tieline G3 codecs dialing over IP2 use session port 9012 and the codec can answer calls from these codecs automatically using the Alternate Answering Session Port.
- Page 172 ViA User Manual v1.2 5. Tap Alternate Answering Session Port to change the port, then tap Accept in the top right-hand corner of the TOUCH SCREEN. © Tieline Pty. Ltd. 2016...
-
Page 173: Configuring Qos For Ip Packets
ViA User Manual v1.2 27.11 Configuring QoS for IP Packets It is possible for IP networks to prioritize and differentiate between data packets transmitted through routers across networks. This is useful because in data networks many different IP services like email, voice, web pages, streaming video and music coexist within the same network infrastructure. - Page 174 ViA User Manual v1.2 4. Enter the DSCP value recommended by your IT administrator, then tap Accept in the top right-hand corner of the TOUCH SCREEN. Important Note: To ensure the continuous and regular flow of tagged data packets along the path from point-to-point, all routers and switching equipment must allow the QoS DSCP setting.
-
Page 175: Reset And Restore Factory Default Settings
4 Codec Logs Tap to clear codec event and log history. Note: This should only be performed if instructed to by Tieline support staff. Important Note: After restoring factory defaults the codec will automatically reboot. 1. Press the HOME button to return to the Home screen, then tap Settings 2. - Page 176 ViA User Manual v1.2 Important Note: A confirmation dialog is presented for each reset function. Reset and Restore Defaults using the Toolbox Web-GUI Reset Factory Default Settings to use the Java Toolbox Web-GUI to reset and restore factory defaults. To use the HTML5 Toolbox Web-GUI see Reset Factory Default Settings.
-
Page 177: Configuring Via Interfaces
3. Internal Wi-Fi (default Tertiary Via interface) Important Note: · If an interface is not available it is not listed in the Via interface selection screen. E.g. Wi-Fi is not enabled or a USB modem is not attached. · VLAN interfaces have features similar to physical Ethernet interfaces. However, your network administrator will need to configure VLAN support throughout your network for them to be supported in your codec. - Page 178 1. Press the HOME button to return to the Home screen, then tap Settings 2. Tap to expand the System menu and then tap IP Via Setup 3. Tap to select an interface to configure. 4. Tap to select the default interface to use. Note: If an IP option is already selected in another interface, e.g.
-
Page 179: Configuring Snmp Settings
ViA User Manual v1.2 27.14 Configuring SNMP Settings The codec supports Simple Network Management Protocol (SNMP) for managing devices on IP networks. Description of SNMP Settings in the Codec Features Operation Button Descriptions Read Only SNMP provides two types of access, namely Read-Only access and Community Read-Write access. - Page 180 ViA User Manual v1.2 3. Tap to adjust each setting in turn. 4. Tap Accept in the top right-hand corner of the TOUCH SCREEN to save each new entry. Important Note: For more information on configuring SNMP codec settings using the...
-
Page 181: Configuring Country Of Use
ViA User Manual v1.2 27.15 Configuring Country of Use The Country setting in the codec configures country-specific settings like: · POTS line ring tones. · POTS line impedance. · Use of G.711 µ -law for North America and Japan, and G.711 a-law in most other regions of the world (e.g. -
Page 182: Typing And Language Options
ViA User Manual v1.2 27.16 Typing and Language Options The onscreen keyboard supports multiple languages including English, French, Spanish and Portuguese. French onscreen keyboard The keyboard can be used in three different ways to enter and edit alphanumeric text. Touch Screen Typing With your finger swipe left and right on the space bar to select a different language. - Page 183 ViA User Manual v1.2 Space bar selected with dotted 'focus' Use the NAVIGATION buttons to select characters and then press the OK button to add each character. Using an External USB Keyboard Attach an external USB keyboard to a USB port on the codec. Use the arrow keys to navigate to the space bar, then use the down arrow key to scroll through language options.
-
Page 184: Configuring Web-Gui Settings
ViA User Manual v1.2 27.17 Configuring Web-GUI Settings Use the Web GUI menu to adjust the Toolbox Web-GUI password, port settings and enable/disable the HTML5 Quick Connect Web-GUI. 1. Press the HOME button to return to the Home screen, then tap Settings 2. -
Page 185: Lock Or Unlock A Program In The Codec
Generally programs will be up or down-mixed by the answering codec to match the loaded program type. In some situations incompatible program types will be rejected. A compatible program type can still connect and specify different connection parameters such as the algorithm and bit rate via session data. - Page 186 ViA User Manual v1.2 1. Press the HOME button to return to the Home screen, then tap Settings 2. Tap to expand the Answering menu and then tap Lock Program 3. Tap the On/Off button to toggle between enabling and disabling Lock Loaded User Program (default setting Off).
-
Page 187: Power Shut Down Options
ViA User Manual v1.2 27.19 Power Shut Down Options To view power shut down options press the POWER button. The following screen is displayed. Tap to select an option. Note: a confirmation dialog is displayed for Shut Down and Reboot functions. -
Page 188: Adjusting Time Settings
ViA User Manual v1.2 27.20 Adjusting Time Settings To adjust time settings in the codec: 1. Press the HOME button to return to the Home screen, then tap Settings 2. Tap to expand the System menu and then tap Time 3. -
Page 189: About Unit Details
ViA User Manual v1.2 27.21 About Unit Details The Unit Details menu lists details like the codec firmware version, IP addresses and the serial number. 1. Press the HOME button to return to the Home screen, then tap Settings 2. Tap to expand the About menu and then tap Unit Details... -
Page 190: Part 28 Connecting To The Toolbox Web-Gui
About the HTML5 Toolbox Quick Connect The HTML5 Toolbox Quick Connect Web-GUI has a reduced feature-set and allows non-technical users to load existing programs and dial via the Quick Connect panel. Users can dial a simple peer-to-peer connection over POTS, ISDN or IP. -
Page 191: Opening The Java Or Html5 Web-Gui & Login
2. When you launch Toolbox an authentication dialog prompts you to enter a password to login. The first time you log in you can enter the default setting "password" and click the OK button. Tieline highly recommends you click the hyperlink in the login dialog or visit Changing the Default Password to change the password. - Page 192 Using the Web-GUI over the Internet If your codec is connected over the internet via a public static IP address it is possible to connect and configure it from any PC also connected to the internet.
- Page 193 ViA User Manual v1.2 LAN Troubleshooting PC LAN Settings Check the LAN settings on your PC if it is connected to a LAN and is having trouble opening the Toolbox Web-GUI in a web-browser. 1. Open Internet Explorer. 2. Click Tools > Internet Options > Connections.
-
Page 194: Changing The Default Password
· Ports 80 and 8080 are commonly used to access the Tieline codec web server. You can add an additional layer of security by translating these ports on the WAN side of your network into non-standard port numbers. -
Page 195: Part 29 Using The Java Toolbox Web-Gui
ViA User Manual v1.2 4. Enter a new password and then tap Accept in the top right-hand corner of the TOUCH SCREEN. Important Note: The Username in the codec menu is permanently set to admin and cannot be changed; only the Password can be changed. - Page 196 ViA User Manual v1.2 5 Close button Click to close the Master panel 6 Connect button Click Connect to connect all audio streams configured within the currently selected program in the Programs list; this button also loads the program currently selected in the Programs list...
- Page 197 ViA User Manual v1.2 Programs Panel for Connection Configuration Feature Description Programs List Displays all programs in the codec New Program button Click to add a new program Program Name The name of the currently selected program in the panel...
- Page 198 ViA User Manual v1.2 Inputs Panel for Input Adjustments Important Note: Tieline codecs have different input configurations, therefore the image shown may not reflect the number of inputs displayed in your codec Web-GUI. Feature Description Channel ON/OFF Buttons Click to turn each channel ON or OFF...
- Page 199 ViA User Manual v1.2 Statistics Panel for Monitoring Connection Stability Feature Description Headings Headings for packet arrival statistics available Connection Statistics Right-click to view audio stream bit-rate, data and jitter buffer statistics Maximize/Minimize Click to maximize a panel to view it in full-screen mode, or...
- Page 200 ViA User Manual v1.2 Rules Panel for Creating Relay Activation Rules Rule Description 1 Connect and disconnect a Click to configure Connection and Disconnection by program when an input is toggling an input toggled 2 Connect when an input is...
- Page 201 ViA User Manual v1.2 Settings Panel Feature Description 1 Network tab Click to edit or view codec network configuration settings 2 Options tab Click to configure RS232 and QoS data settings, lock a loaded user Program and adjust Session Port settings and SNMP. Also...
- Page 202 ViA User Manual v1.2 20 Save Settings button Saves all configuration settings Help Panel Feature Description 1 About Details of the Toolbox Web-GUI and codec firmware versions, as well as the codec serial number 2 Resources Links to open the user manual in a new browser, or view support...
-
Page 203: Configuring Ip Settings
An IP address is a unique address to identify a device on a TCP/IP network. Your codec uses dual IP protocol stacks to allow your codec to work on both IPv4 and IPv6 networks. Your Tieline codec supports both DHCP (default) IP addressing and static IP addresses for dialing IPv4 connection endpoints. - Page 204 IPv4 Address Configuration The codec is capable of automatic DHCP address assignment, or manually configured static IPv4 address configuration via the drop-down Configure IPv4 menu. If you want to ignore IPv4 settings select Off. DHCP IP addresses are automatically assigned and can change each time you connect to your Internet Service Provider or to your own local area network (LAN).
- Page 205 ViA User Manual v1.2 IPv6 Address Configuration An IPv6 address is represented by 8 groups of 16-bit hexadecimal values separated by colons (:). The drop-down Configure IPv6 menu provides three address configuration options: 1. Auto: An address is automatically assigned to the codec when you connect the codec to an IPv6 router.
- Page 206 Settings panel. 2. Click the Via Map button at the top of the Settings panel to display the settings for reconfiguring default Via interfaces. 3. Click to select primary, secondary or tertiary (1,2 or 3) and then click the Interface drop-down menu to select the preferred default setting.
-
Page 207: Configure Cellular Modems
ViA User Manual v1.2 4. Click the Save Settings button to store the configuration. Configuring QoS The codec can be configured to tag IP data packets sent across a network by entering a value into the Differentiated Services Code Point (DSCP) field within the header of data packets transmitted over the network. - Page 208 MMS APN information and you need to enter the internet APN details in the codec. See Adding Cellular Access Points for more details on configuration via the codec TOUCH SCREEN. Important Note: Use the Cellular panel in the HTML5 Toolbox Web-GUI to view modem firmware and signal strength (etc.) and verify custom APN details after configuring a new...
-
Page 209: Configure Fuse-Ip Bonding
Important Note: Up to 10 custom access point profiles can be added to the codec. 29.3 Configure Fuse-IP Bonding Tieline’s proprietary Fuse-IP data aggregation technology uses a point-to-point tunnel between two codecs to bond multiple IP interfaces (peers). Fuse-IP automatically distributes data over any two bonded interfaces, which may include: ·... -
Page 210: Configuring Isdn
· Use a dotted quad IPv4 address when configuring the Fuse-IP Server Address. 29.4 Configuring ISDN A ViA ISDN module can be inserted into the codec's rear panel module slot. This can be configured using the codec TOUCH SCREEN or the Toolbox graphical user interface (GUI). See About ISDN Modules for additional information on ISDN. - Page 211 ViA User Manual v1.2 Configure ISDN module settings. Configure ISDN Answering settings. 29.4.1 Configuring ISDN Modules ISDN settings in the Module menu determine how each codec module operates at a particular site. You can copy similar programs between codecs installed at different locations and also configure site-specific settings for how each ISDN module should connect.
- Page 212 ViA User Manual v1.2 Often broadcasters prefer to predict which B channel will answer an incoming call to ensure audio routing is consistent. However, if a DN or MSN number is not entered in the codec and multiple B channels are available, the codec may use any channel to answer an incoming call.
- Page 213 ISDN Answer Config, which tells the answering codec how a sessionless call will try and connect. After installing a ViA ISDN module it is possible to save up to two different ISDN Answer Configs, which allow up to 2 ISDN B channels to be individually configured for unique answering behaviors.
- Page 214 Unbonded Only Unbonded single B Channel Bonded Unbonded (May Calls using the same algorithm from the same Tieline codec, Bond) or sessionless calls, will attempt to bond when received. Calls using incompatible algorithms will not be bonded Bonded Only Will only bond compatible algorithms. This mode will reject incompatible calls which cannot be bonded, e.g.
- Page 215 Config 1-2 in ISDN Answer. You can also select the default algorithm. For example, if a call from a non-Tieline codec is received via B Channel 1 on Module 1 (i.e. no Dial Route has been specified in the dialing codec): 1.
- Page 216 If it fails to receive Tieline session data within 5 seconds (i.e. a non- Tieline codec is calling, or a Tieline codec with session data disabled), it will use the settings in the ISDN Answering Config instead.
- Page 217 Allow Answering of Sessionless ISDN Calls Only Select Sessionless Only when answering ISDN calls from non-Tieline codecs only. When Sessionless Only is selected, the codec will not wait to receive the Tieline session data. This reduces the time taken to answer an inbound sessionless call.
-
Page 218: Configuring Pots
· Audio route: None 29.5 Configuring POTS A ViA POTS module can be inserted into the codec's rear panel module slot. This can be configured using the TOUCH SCREEN or the Toolbox graphical user interface (GUI). See About POTS Modules for additional information on POTS. - Page 219 · Disabled: disables the POTS G5 module from receiving a POTS Codec or Analog Phone call. Calls are answered based on the POTS Answer settings. Adjustments to these Config settings are not normally necessary when connecting between Tieline codecs. They are normally adjusted when connecting to non-Tieline codecs over POTS (see Configuring POTS Answering for more info).
- Page 220 Monitor Modem Tone (Dialing and Answering) Click the drop-down arrow for Monitor Modem Tone to select either Enabled or Disabled. When enabled, the module will allow audio monitoring of modem tones via the phone input while connecting in POTS Codec mode.
- Page 221 · Expected dialing behaviors and encoding, e.g. whether audio streams use Route tags and which algorithm is used. If you answer a call from a non-Tieline codec you will need to create an answering "Config" to determine the settings used when connecting.
- Page 222 POTS connections. When dialing Tieline to Tieline over POTS using the Merlin or Genie family of codecs, you can configure a Dial Route in the dialing codec's program and a corresponding Answer Route in the answering codec's program. This will ensure a particular audio stream is routed between two codecs consistently.
- Page 223 Config 1 or 2 in POTS Answer. You can also select the default algorithm. For example, if a call from a non-Tieline codec is received via POTS Module 1 (i.e. no Dial Route has been specified in the dialing codec): 1.
-
Page 224: Configuring Input/Output Settings
ViA User Manual v1.2 Configuring Input/Output Settings 29.6 Click the Inputs button to view input controls available within the Java Toolbox Web-GUI. Setting Audio Levels Input levels on the Input panel should be set to ensure audio peaks average at the first yellow indications on the PPM meters, which represents nominal 0 VU at -18dBFS. - Page 225 ViA User Manual v1.2 Select Input Type VOLTAGE WARNING: DO NOT attach non-digital microphones or an AES3 source to input 1 when AES42 input mode is selected, or equipment may be damaged by high voltages supplied in this mode. See Configuring AES3 and AES42 Input Audio for more info.
- Page 226 (default setting disabled). Phantom power of 10V or 48V is supplied to all inputs when enabled. The default setting is 10V and the currently configured voltage is displayed in brackets in the Phantom power menu via the Home screen, then tap Audio > Inputs >...
- Page 227 ViA User Manual v1.2 Cue/Talkback The codec supports both cue and talkback functions. Cue provides local communications via the mic inputs and headphone outputs and talkback is configured to provide communication between the codec and the studio. For more details on cue and talkback functionality see Cue and Talkback Operation.
- Page 228 ViA User Manual v1.2 On/Off Button as Cough Button This feature on Inputs 1-3 allows the ON/OFF button on the codec to be used as a cough button, whereby an input is turned off while the ON/OFF button is pressed. Each input can be configured independently.
-
Page 229: Configure Mono Or Stereo Peer-To-Peer Programs In Via
ViA User Manual v1.2 Configure Mono or Stereo Peer-to-Peer Programs in ViA 29.7 The Programs panel incorporates a wizard to configure a new program and all audio stream settings. Before you configure a new codec program consider if: · You want your codec to be capable of dialing and answering, dialing only or answering only. - Page 230 ViA User Manual v1.2 Important Note: When you decide to use an existing program as a template, the new program inherits all the settings of the template program and you can adjust these settings as required by continuing through the program wizard.
- Page 231 For IP connections configure the IP address, ports, and then specify which streaming interface (Via) is used to dial this connection, e.g. Primary (LAN1) or Secondary (LAN2) etc. Note: By default Any will first select LAN1 if it is available, or the Secondary (LAN2) or Tertiary (Wi-Fi) interface if it is unavailable.
- Page 232 Next to configure Auto Reconnect or a backup connection, whereby the alternative connection is dialed if the primary connection fails. By default, Primary IP streaming is via LAN1. Select a different IP interface to achieve the maximum level of redundancy for redundant streaming, e.g. Secondary (from the secondary LAN2 port), or Tertiary, which is configured for Wi-Fi by default.
- Page 233 ViA User Manual v1.2 Next, click Save Program to save the program with default algorithm settings, or click Next to specify a different algorithm and configure a backup connection if required. (recommended). Dialing settings for this ISDN audio stream are now complete.
- Page 234 The time frame against which lost data is measured Keep Alive The keep connection alive time before failing over to a backup connection; Tieline RTP pings every second to confirm connectivity Automatic Resume Select the check-box to configure fail back to a higher...
- Page 235 Configuring Answering Connections The codec is capable of being configured to accept calls via different transports (e.g. IP and ISDN), or to accept calls using different audio ports. If you are configuring the codec to allow it to answer one or more incoming audio stream connections: 1.
- Page 236 ViA User Manual v1.2 For ISDN, settings are determined by ISDN module answering settings. For more details Configuring ISDN Answering. For POTS, settings are determined by POTS module answering settings. For more details see Configuring POTS Answering. 3. After configuring all settings there are 2 options: i.
-
Page 237: Configure Mono Or Stereo + Ifb Dialing Programs
Configure Mono or Stereo + IFB Dialing Programs 29.8 This program is designed to allow remote ViA, Merlin and Merlin PLUS codecs to dial a Merlin or Merlin PLUS codec at the studio and transmit: 1. A bidirectional mono or stereo audio stream connection. - Page 238 ViA User Manual v1.2 · Some drop-down menus and settings may be greyed out intentionally depending on features available and the transport selected (e.g. IP or ISDN). · It is possible to save a program at several points throughout the program wizard and use default settings to save configuration time.
- Page 239 For IP connections configure the IP address, ports, and then specify which streaming interface (Via) is used to dial this connection, e.g. Primary (LAN1) or Secondary (LAN2) etc. Note: By default Any will first select LAN1 if it is available, or the Secondary (LAN2) or Tertiary (Wi-Fi) interface if it is unavailable.
- Page 240 Note: When loading a 2 x Mono or Stereo Peer-to-Peer + IFB program in a Merlin PLUS at the studio, use Remote Audio Port 9020 for the second mono/stereo dialing connection to the studio. This audio stream will be routed via audio inputs/outputs 3 and 4 on the studio Merlin PLUS codec.
- Page 241 Next to configure Auto Reconnect or a backup connection, whereby the alternative connection is dialed if the primary connection fails. By default, Primary IP streaming is via LAN1. Select a different IP interface to achieve the maximum level of redundancy for redundant streaming, e.g. Secondary (from the secondary LAN2 port), or Tertiary, which is configured for Wi-Fi by default.
- Page 242 ViA User Manual v1.2 Dialing settings for this ISDN audio stream are now complete. Select POTS Codec in the Mode drop-down menu to encode/decode using POTS, or select Analog Phone to configure a standard analog phone call, then click Next.
- Page 243 The time frame against which lost data is measured Keep Alive The keep connection alive time before failing over to a backup connection; Tieline RTP pings every second to confirm connectivity Automatic Resume Select the check-box to configure fail back to a higher...
- Page 244 ViA User Manual v1.2 3. Click Next to continue through the wizard and configure the backup connection in a similar manner to how you have configured the primary connection. Configure the Bidirectional IFB Audio Stream When you have finished configuring SmartStream PLUS, Auto Reconnect or a backup connection, proceed with configuration of the IFB audio stream in the wizard.
- Page 245 Note: When loading a 2 x Mono or Stereo Peer-to-Peer + IFB program in a Merlin PLUS at the studio, use Remote Audio Port 9030 to configure the second IFB connection at the studio. IFB audio over this audio stream connection will be routed via audio input/output 6 on the studio Merlin PLUS codec.
- Page 246 Reconnect or a backup connection, whereby the alternative connection is dialed if the primary connection fails. By default, Primary IP streaming is via LAN1. Select a different IP interface to achieve the maximum level of redundancy for redundant streaming, e.g. Secondary (from the secondary LAN2 port), or Tertiary, which is configured for Wi-Fi by default.
- Page 247 ViA User Manual v1.2 Important Note: Dual SmartStream PLUS redundant streaming over separate IP interfaces mitigates lost packets on either link and will provide IP network backup if an IP link is lost. To learn more about SmartStream PLUS redundant IP streaming see http://www.tieline.com/Transports/SmartStream-IP...
- Page 248 ViA User Manual v1.2 Dialing configuration settings for this POTS audio stream are now complete. 5. Click Save Program to complete configuration, then click Finish to exit the wizard. 6. The newly created program will be displayed in the left pane within the Programs panel and in the Master panel.
-
Page 249: Configure 2 Mono Peer-To-Peer Dialing Connections
ViA is capable of sending a mono program mix to two separate codecs over different connections. ViA 2 x Mono Peer-to-Peer Dialing Configuration This requires the creation of a dialing program in ViA with two separate mono audio streams and associated dialing connections. - Page 250 ViA User Manual v1.2 Important Note: When you decide to use an existing program as a template, the new program inherits all the settings of the template program and you can adjust these settings as required by continuing through the program wizard.
- Page 251 For IP connections configure the IP address, ports, and then specify which streaming interface (Via) is used to dial this connection, e.g. Primary (LAN1) or Secondary (LAN2) etc. Note: By default Any will first select LAN1 if it is available, or the Secondary (LAN2) or Tertiary (Wi-Fi) interface if it is unavailable.
- Page 252 Reconnect or a backup connection, whereby the alternative connection is dialed if the primary connection fails. By default, Primary IP streaming is via LAN1. Select a different IP interface to achieve the maximum level of redundancy for redundant streaming, e.g. Secondary (from the secondary LAN2 port), or Tertiary, which is configured for Wi-Fi by default.
- Page 253 ViA User Manual v1.2 Important Note: Dual SmartStream PLUS redundant streaming over separate IP interfaces mitigates lost packets on either link and will provide IP network backup if an IP link is lost. To learn more about SmartStream PLUS redundant IP streaming visit http://www.tieline.com/Transports/SmartStream-IP...
- Page 254 ViA User Manual v1.2 Select POTS Codec in the Mode drop-down menu to encode/decode using POTS, or select Analog Phone to configure a standard analog phone call, then click Next. Next, enter the phone number of the codec or device you want to dial. Then, click Save Program to save the program with default settings, or click Next to specify algorithm settings and configure a backup connection if required (recommended).
- Page 255 IP connection. Ensure the codec to which you are connecting is configured to connect using these ports. If you connect to a Tieline G3 codec using IP2, you will need to change the session port on the Genie Distribution codec to 9012 for the second audio stream connection, as this is used by default on G3 codecs for IP2.
-
Page 256: Configure And Register Sip Accounts
ViA User Manual v1.2 29.10 Configure and Register SIP Accounts This section provides instructions for registering your codec to a SIP server. If you want to make a peer-to-peer SIP call without using a SIP server, see Configure SIP Peer-to-Peer Programs. - Page 257 Timeout (which shouldn't need to be adjusted from the default setting). Also ensure a SIP Interface is selected (e.g. SIP1 or SIP2.) The SIP interface contains settings related to ports and the selected Via interface, e.g. LAN1 or LAN2. See SIP Interface Configuration for more details.
-
Page 258: Configure Sip Interfaces
Important Notes: 1. SIP1 is enabled and configured to use LAN1 by default, which is mapped to the Primary Via interface by default. 2. SIP2 is enabled and configured to use LAN2 by default, which is mapped to the Secondary Via interface by default. - Page 259 SIP Interfaces. 3. Default SIP settings are configured and you can select SIP1 or SIP2 to adjust each interface. Note: Ensure each interface uses a unique "Via" IP interface because they can't share an interface, e.g. LAN1. 4. Select the Enable check-box to activate an interface, then click the Save settings button to confirm the configuration.
-
Page 260: Sip Peer-To-Peer Programs
· The default UDP audio port when using SIP for a peer-to-peer connection is 5004 in Tieline codecs. To contact a codec that is behind a firewall or NAT-enabled router, it is essential that this and all other relevant ports are open and forwarded to the other device. - Page 261 6. Configure the destination codec IP Address and then specify a network interface, e.g. Primary (LAN1), if you are dialing without using a registered SIP account. Or, select a SIP account configured in the codec as the Via, then enter the destination SIP Account to dial using a registered SIP server account.
- Page 262 ViA User Manual v1.2 Important Notes: To dial using a SIP account you first need to Configure SIP Account settings into the codec and register the account to a SIP server. This may include Configuring a SIP interface over which to dial, e.g. SIP1 or SIP2.
- Page 263 ViA User Manual v1.2 9. Click Save Program to save all settings, or click Next to configure Auto Reconnect. If you click Save Program, select the check-box if you want to connect the program immediately, then click Finish. 10. The newly created program will be displayed in the Programs panel and in the Master panel.
-
Page 264: 13 2 X Mono Peer-To-Peer Sip Programs
· The default UDP audio port when using SIP for a peer-to-peer connection is 5004 in Tieline codecs. To contact a codec that is behind a firewall or NAT-enabled router, it is essential that this and all other relevant ports are open and forwarded to the other device. - Page 265 6. Configure the destination codec Address and then specify a network interface, e.g. Primary (LAN1), if you are dialing without using a registered SIP account. Or, select a SIP account configured in the codec as the Via, then enter the destination SIP Account to dial using a registered SIP server account.
- Page 266 ViA User Manual v1.2 Important Notes: To dial using a SIP account you first need to Configure SIP Account settings into the codec and register the account to a SIP server. This may include Configuring a SIP interface over which to dial, e.g. SIP1 or SIP2.
- Page 267 SIP call and a default peer-to-peer program will be loaded. There is no Tieline session data transferred during SIP calls to assist with configuring the codec. Important Notes: · Remember to lock an answering program in a codec when answering multiple SIP calls.
-
Page 268: Dial And Disconnect A Program
ViA User Manual v1.2 29.14 Dial and Disconnect a Program Connecting a Program 1. Click to select the program you want to load from the Programs list in the Master panel. 2. Click Connect to load the program and connect all audio streams. -
Page 269: Dial/Disconnect Multiple Audio Streams
ViA User Manual v1.2 2. Click the Failover button and then click Yes in the confirmation dialog to disconnect the primary connection and connect the backup connection. 3. To fail back to the original connection, simply click to select the primary audio stream in the Master panel and then click the Connect button. - Page 270 ViA User Manual v1.2 2. Click the Disconnect button. 3. Click Yes in the confirmation dialog to disconnect all audio stream connections. Disconnect a Single Audio Stream Connection 1. Click to select the audio stream connection you want to disconnect.
-
Page 271: Adjusting The Connection Bit Rate
ViA User Manual v1.2 29.16 Adjusting the Connection Bit Rate 1. Click to select an active connection in the Master panel for which you want to adjust the bit rate. The Renegotiate Bit Rate menu will appear at the bottom of the Master panel. - Page 272 ViA User Manual v1.2 3. Click the blue arrow to expand audio stream information and click the Edit symbol adjust program settings. The program wizard will open at the relevant point to facilitate editing of connection parameters. Click Save Program to store settings.
-
Page 273: Reset Factory Default Settings
ViA User Manual v1.2 29.18 Reset Factory Default Settings There are several options which allow you to restore factory default settings within the codec. See Reset and Restore Factory Defaults for more details on each option. 1. Open the Web-GUI and click the Settings symbol at the top of the screen to display the Settings panel. - Page 274 ViA User Manual v1.2 · Program, audio stream and connection names. · IP address, port, algorithm, jitter buffer, FEC and bit rate settings (etc.) for audio stream connections. Creating Backup Files 1. Open the Java Toolbox Web-GUI and click the Settings symbol at the top of the screen to display the Settings panel.
-
Page 275: Lock Or Unlock Programs
ViA User Manual v1.2 4. Navigate to the configuration file on your PC that you want to load, then click Open. 5. Use your mouse-pointer to click and select the check boxes for restoring items. For example, you could select the Include programs check-box and deselect the Include system check-box if you are only copying programs onto codecs. -
Page 276: Configure Country Setting
ViA User Manual v1.2 4. Click Save Settings to save the new configuration. Important Note: · Only custom programs can be locked in a codec. · If Lock Loaded User Program is enabled and you load a new custom program in the codec, the feature remains enabled and locks the most recently loaded custom program. -
Page 277: Configuring Snmp In The Codec
ViA User Manual v1.2 3. Click the Country drop-down menu arrow to select the correct country of operation. 4. Click the Save Settings button to save the new configuration. 29.22 Configuring SNMP in the Codec The codec supports Simple Network Management Protocol (SNMP ) for managing devices on IP networks. -
Page 278: Download Logs
Please verify that your SNMP software contains the required files as specified in 1213. 29.23 Download Logs The codec is capable of providing diagnostic information via user logs, which can either be sent to Tieline support, or downloaded for user diagnostics. Procedure for Sending Logs to Tieline 1. -
Page 279: Rs232 Data Configuration
ViA User Manual v1.2 3. Save the file to your computer and then send it as a .zip file to Tieline support via support@tieline.com Download Event Logs Event logs can be downloaded from the codec and viewed using any text editor, e.g. Microsoft®... - Page 280 Important Notes: · When connecting to G3 codecs over IP, ISDN or POTS, only in-band data is available via the Music and MusicPLUS algorithms. · Use firmware higher than 2.8.xx in the Bridge-IT, Genie and Merlin families of codecs to enable auxiliary data over multicast connections.
-
Page 281: Creating Rules
ViA User Manual v1.2 29.25 Creating Rules The Rules panel in the Java Toolbox Web-GUI is used to configure events for specific codec actions. Typically these 'rules' are based on a change in the state of a GPIO control port or the codec being connected or disconnected. - Page 282 ViA User Manual v1.2 4. Check the Rule Summary and click Create Rule to save the settings. Rule 2: Switch Different Control Port Inputs On to Connect and Disconnect a Program This rule is used to connect and disconnect a selected program when different codec control port inputs are turned on.
- Page 283 ViA User Manual v1.2 3. Check the Rule summary and click Create Rule to save the settings. Rule 4: Toggle a Relay Output with each Change in Connection Status This rule is used to toggle a codec's control port relay output each time a program connects and disconnects.
-
Page 284: Upgrading Codec Firmware
ViA User Manual v1.2 29.26 Upgrading Codec Firmware To download the latest codec firmware visit http://www.tieline.com/Support/Latest-Firmware. Manual Firmware Upgrades The following procedure explains how to perform codec firmware upgrades with a downloaded firmware file saved to your PC. 1. Click the Settings symbol at the top of the Java Toolbox Web-GUI screen if the Settings panel is not displayed. -
Page 285: Part 30 Using The Html5 Toolbox Web-Gui
ViA User Manual v1.2 Using the HTML5 Toolbox Web-GUI The following sections provide an overview of the different configuration panels available within the codec's HTML5 Toolbox Web-GUI. Navigate with the mouse pointer to the Menu Bar at the top of the Web-GUI screen and click to select and open each panel in turn. - Page 286 ViA User Manual v1.2 Some panels can be resized. Click the bottom right-hand corner of a panel supporting this feature and drag and resize as required. © Tieline Pty. Ltd. 2016...
- Page 287 ViA User Manual v1.2 Master Panels: Load Programs & Manage Audio Streams Program Loader Panel Feature Description 1 Programs list Lists all configured programs which have been added into the codec. Click to select a program before loading. 2 Settings...
- Page 288 ViA User Manual v1.2 Feature Description 1 Program Click to connect/disconnect all audio streams in a program. Connect/Disconnect button 2 Audio Stream Click to connect/disconnect all connections in an audio stream. Connect/Disconnect button 3 Connection Click to connect/disconnect an individual connection. Click to Connect/Disconnect adjust the connection bit-rate when a connection is active.
- Page 289 ViA User Manual v1.2 PPMs Panel Feature Description 1 PPM Meters 6 PPM meters using dBFS audio scale metering 2 Close button Click to close the panel. © Tieline Pty. Ltd. 2016...
- Page 290 ViA User Manual v1.2 Inputs Panel for Input Adjustments Feature Description Settings button Click to adjust input name, type, gain, IGC, phantom on/off, cue/talkback, polarity inversion and on/off as cough button. Input PPM meter Input PPM meter. On/Off button Click to toggle an input on or off.
- Page 291 ViA User Manual v1.2 Rules Panel for Creating Relay Activation Rules Rule Description Connect and disconnect Click to configure connection and disconnection by program when an input is toggling an input. toggled Connect when an input is Click to configure connection and disconnection after...
- Page 292 ViA User Manual v1.2 Settings Panels Numerous Settings panels can be opened in the Web-GUI. Each panel provides specific codec configuration settings and options. Click to select and open each panel. As an example, the Network panel is displayed with network interface configuration options. A brief description of the other panel options is also provided.
- Page 293 Click to open the panel and edit SIP account settings. Up to 6 SIP accounts are supported. 13 SIP Interfaces Click to open the panel and configure port, proxy and Via settings for the SIP1 and SIP2 interfaces. The codec supports dialing over these SIP interfaces simultaneously.
- Page 294 Click to open the codec user manual in a new browser, or view support information (Note: the codec name displayed will vary by product type) 3 Support website link Click to visit the support page on the Tieline website. 4 Email Support Click to email Tieline support. 5 Event Logs...
- Page 295 ViA User Manual v1.2 Language Selection The HTML5 Toolbox Web-GUI offers language support for several languages. 1. Click on the Language drop-down menu arrow in the top right-hand corner of the Web-GUI page. 2. Select the preferred language to display.
-
Page 296: Using The Html5 Toolbox Quick Connect Web-Gui
The HTML5 Quick Connect Web-GUI is designed for simple peer-to-peer connections and non- technical users. It has a reduced feature-set and allows users to: 1. Load existing programs in a codec via the Program Loader panel and then dial via the Quick Connect panel. -
Page 297: Tieline Pty. Ltd
ViA User Manual v1.2 2. The Check-box symbol appears next to the program name to confirm it has been loaded and the Load button changes to an Unload button. To unload a program click the Unload button. Dial a Loaded Program 1. - Page 298 ViA User Manual v1.2 Disconnect a Loaded Program 1. Click the Disconnect button in the Quick Connect panel. 2. Click Yes in the confirmation dialog to disconnect the connection. © Tieline Pty. Ltd. 2016...
- Page 299 ViA User Manual v1.2 Dial Peer-to-Peer over IP with Quick Connect Important Notes: · Click the Unload button in the Program Loader panel if a program is currently loaded. · To dial over IP using SIP, click the drop-down arrow for Transport and select SIP.
- Page 300 ViA User Manual v1.2 3. Click the select the appropriate Sample Rate and Bit Rate for the connection. Note: If only one sample rate is available this will be automatically selected. 4. Click in the Destination text box and enter the IP address of the destination codec.
- Page 301 ViA User Manual v1.2 4. Click to select the appropriate Sample Rate for the connection. 5. Click in each Destination text box in turn to enter the ISDN number for each B Channel. 6. Click the Connect button to dial.
- Page 302 4. Click the Connect button to dial. Monitoring PPMs The default Tieline G5 audio reference scale displayed on the PPMs is -38dBFS to 0dBFS when you connect to a Tieline G5 codec, e.g. Merlin, Genie, Bridge-IT and ViA codec families.
- Page 303 ViA User Manual v1.2 Mono and Stereo PPM Metering When connected with a mono program the codec will display a mix of inputs 1 and 2 on PPM1. PPM 3 displays the level of return audio. When connecting with a stereo program, the codec displays audio on PPM1 and 2 for inputs 1 and 2 and PPM 3 and 4 for the return audio.
-
Page 304: Configuring Ip Settings
An IP address is a unique address to identify a device on a TCP/IP network. Your codec uses dual IP protocol stacks to allow your codec to work on both IPv4 and IPv6 networks. Tieline codecs support both DHCP (default) IP addressing and static IP addresses for dialing IPv4 connection endpoints. - Page 305 Click to select the TCP/IP tab in the Network panel to configure settings. The codec is capable of automatic DHCP address assignment, or manually configured static IPv4 address configuration via the drop-down Configure IPv4 drop-down menu. If you want to ignore IPv4 settings select Off.
- Page 306 ViA User Manual v1.2 Click Save to store all configuration settings. Note: The Subnet Mask is used by the TCP/IP protocol to determine whether a host is on the local subnet or on a remote network. The default Gateway is the router linking the codec's subnet to other networks.
- Page 307 When dialing over IP you can select the preferred interface to use when establishing a connection. By default Any is selected, which means the first available interface will be used to dial a connection. The default Via interfaces in order of use when available are: 1. LAN1 Ethernet port (default Primary Via interface) 2.
- Page 308 ViA User Manual v1.2 1. Open the HTML5 Toolbox Web-GUI and click Settings and then click IP Via Mapping to open this panel. 2. Click the drop-down arrow for each interface to select the preferred default setting. 3. Click Save to store the configuration.
-
Page 309: Configure Cellular Modems
MMS APN information and you need to enter the internet APN details in the codec. See Adding Cellular Access Points for more details on configuration via the codec TOUCH SCREEN. Cellular Configuration Open the HTML5 Toolbox Web-GUI and click Settings and then Cellular to view and configure a cellular modem attached to the codec. -
Page 310: Configure Fuse-Ip Bonding
Profile drop-down menu and click Save 30.4 Configure Fuse-IP Bonding Tieline’s proprietary Fuse-IP data aggregation technology uses a point-to-point tunnel between two codecs to bond multiple IP interfaces (peers). Fuse-IP automatically distributes data over any two bonded interfaces, which may include: ·... - Page 311 ViA User Manual v1.2 3. Leave the default Fuse-IP Port as 8999 in most situations unless this port is already in use, e.g. you have multiple codecs behind a firewall using Fuse-IP, therefore you need to allocate a different port for each Fuse-IP tunnel. Note: the port number on the client and server codecs must be the same.
- Page 312 ViA User Manual v1.2 6. Click the On/Off button for Fuse-IP to create a Fuse-IP tunnel between the server and client codecs. Note: Connected should be displayed after a few seconds. 7. The status indicator is orange when Fuse-IP is enabled but no tunnel is created. It turns green when a tunnel is active.
-
Page 313: Configuring Isdn
· Use a dotted quad IPv4 address when configuring the Fuse-IP Server Address. 30.5 Configuring ISDN A ViA ISDN module can be inserted into the codec's rear panel module slot. This can be configured using the codec TOUCH SCREEN or the Toolbox graphical user interface (GUI). See About ISDN Modules for additional information on ISDN. - Page 314 ViA User Manual v1.2 3. Click the drop-down arrow for Accept select whether to allow or disallow circuit switched voice and data calls. The default setting allows Data only. Important Note: G.711 is the algorithm used when Voice Only is selected.
- Page 315 ISDN Answer Config, which tells the answering codec how a sessionless call will try and connect. After installing a ViA ISDN module it is possible to save up to two different ISDN Answer Configs, which allow each ISDN B channel to be individually configured for unique answering behaviors. ISDN answering can be configured to suit: ©...
- Page 316 · Expected dialing behaviors, e.g. if B channels should bond or not, and whether audio streams need to use Dial and Answer Route tags. · The type of call being received by the codec, e.g. Tieline (with Tieline Session Data) versus non-Tieline sessionless calls.
- Page 317 B channels. When dialing Tieline to Tieline over ISDN using the Merlin, Genie and ViA families family of codecs, you can configure a Dial Route in the dialing codec's program and a corresponding Answer Route in the answering codec's program. This will ensure a particular audio stream is routed between two codecs consistently.
- Page 318 Config 1-2 in ISDN Answer. You can also select the default algorithm. For example, if a call from a non-Tieline codec is received via B Channel 1 on Module 1 (i.e. no Dial Route has been specified in the dialing codec): 1.
- Page 319 If it fails to receive Tieline session data within 5 seconds (i.e. a non- Tieline codec is calling, or a Tieline codec with session data disabled), it will use the settings in the ISDN Answering Config instead.
-
Page 320: Configuring Pots
· Audio route: None 30.6 Configuring POTS A ViA POTS module can be inserted into the codec's rear panel module slot. This can be configured using the TOUCH SCREEN or the Toolbox graphical user interface (GUI). See About POTS Modules for additional information on POTS. - Page 321 ViA User Manual v1.2 Configuring POTS G5 Modules 1. Open the HTML5 Toolbox Web-GUI and click Settings and then Modules to view and configure POTS site settings. Important Notes: The POTS module Status is displayed in the Modules panel. No Phone Line is displayed when a cable is detached;...
- Page 322 Calls are answered based on the POTS Answer settings in Config 1 & 2. Adjustments to these Config settings are not normally necessary when connecting between Tieline codecs. They are usually adjusted when connecting to non-Tieline codecs over POTS (see...
- Page 323 · Blind Dialing: Allows the module to dial when no dial tone is present. 8. Click the drop-down arrow for Monitor Modem Tone to select either Enabled or Disabled. Note: When enabled, the module will allow audio monitoring of modem tones via the phone input while connecting in POTS Codec mode.
- Page 324 3. Select the Sessionless Only check-box when only non-Tieline codecs are dialing a Tieline codec over POTS. This allows you to choose the default encoding setting and Route the incoming call to a nominated audio stream via a corresponding Answer Route in the answering codec program if required.
- Page 325 Config 1 or 2 in POTS Answer. You can also select the default algorithm. For example, if a call from a non-Tieline codec is received via POTS Module 1 (i.e. no Dial Route has been specified in the dialing codec): 1.
-
Page 326: Configuring Input/Output Settings
ViA User Manual v1.2 4. Click Save Settings to store the new Config settings. 5. This will associate the incoming call with a corresponding Answer Route configured in the answering codec program, e.g. Answer Route 1. 30.7 Configuring Input/Output Settings Open the HTML5 Toolbox Web-GUI and click Inputs to display the Inputs panel. - Page 327 For more information on reference scales see General Audio Settings. For more information on input levels and input settings see ViA Input Levels and Input Settings. For more info on PPM meters see PPM Meters and Analog Audio Outputs. Select Input Type...
- Page 328 ViA User Manual v1.2 3. Click Save to confirm changes. Select Input Gain The default analog input gain setting for inputs 1-3 is Med Gain Mic. The stereo auxiliary input is a line level input when operating in analog mode. To adjust input gain settings: 1.
- Page 329 (default setting disabled). Phantom power of 10V or 48V is supplied to all inputs when enabled. The default setting is 10V and the currently configured voltage is displayed in brackets in the Phantom power menu via Home screen, then tap Audio > Inputs >...
- Page 330 ViA User Manual v1.2 VOLTAGE WARNING: Check the specifications of all microphones attached to the codec to ensure they will not be damaged by either 10V or 48V phantom power supplied by the codec inputs. 1. Click the Input Settings symbol on the input you want to adjust.
- Page 331 ViA User Manual v1.2 Polarity Inverted Select the Polarity Inverted check-box to reverse the polarity of an input. This is useful if two inputs are out of phase with each other. 1. Click the Input Settings symbol on the input you want to adjust.
- Page 332 ViA User Manual v1.2 3. Click Save to confirm the change. © Tieline Pty. Ltd. 2016...
-
Page 333: Configuring Sip
· Failover and SmartStream PLUS redundant streaming are not available with SIP connections. · When connecting to a Tieline G3 codec using SIP you need to manually select the G3 audio reference level. To do this select Home screen > Audio > Menu >... - Page 334 (which shouldn't need to be adjusted from the default setting). Also ensure a SIP Interface is selected (e.g. SIP1 or SIP2.) The SIP interface contains settings related to ports and the selected Via interface, e.g. LAN1 or LAN2. See Configuring SIP Interfaces for more details.
- Page 335 ViA User Manual v1.2 4. Click the Enable check-box at the top of the panel and then click the Save button to register the codec to the server. 5. If an account is registered successfully, the account registration indicator changes from red to green, and Not Registered (above the Enable check-box) becomes Registered.
- Page 336 1. Confirm all account registration information has been entered correctly. 2. Confirm the SIP interface (SIP1 or SIP2) configured as the Via in the account is enabled. 3. Verify that the Via selection in the SIP1 or SIP2 interface settings corresponds with the network interface being used by the codec to register the account.
- Page 337 SIP interface settings. 2. Default SIP settings are configured and select Interface SIP1 or Interface SIP2 to adjust each interface. Note: Ensure each interface uses a unique "Via" IP interface because they can't share one, e.g. LAN1. 3. Select the Enable check-box and then click the Save button to confirm settings.
- Page 338 ViA User Manual v1.2 © Tieline Pty. Ltd. 2016...
-
Page 339: Load, Unload And Dial A Program
ViA User Manual v1.2 Load, Unload and Dial a Program 30.9 To load and dial a program it is necessary to open the Program Loader panel and Connections panel. Use the Program Loader panel to load a program and then manage connecting and disconnecting using the Connections panel. - Page 340 ViA User Manual v1.2 Connecting a Program To connect audio streams and connections within an existing program there are three options: 1. Click the program Connect/Disconnect symbol and then click Connect; this connects all active audio streams and connections associated with the program.
- Page 341 ViA User Manual v1.2 Disconnect a Program To disconnect audio streams and connections within an existing program there are three options: 1. Click the program Connect/Disconnect symbol and then click Disconnect to disconnect a program; this includes all audio streams and connections associated with the program.
-
Page 342: Adjusting The Connection Bit Rate
ViA User Manual v1.2 Unloading a Program 1. Click to select the loaded program in the Program Loader panel and then click Unload to unload the program in the codec. 30.10 Adjusting the Connection Bit Rate 1. Open the HTML5 Toolbox Web-GUI and click Master and then click Connections to open the Connections panel. -
Page 343: Reset Factory Default Settings
ViA User Manual v1.2 30.11 Reset Factory Default Settings There are several options which allow you to restore or reset specific factory default settings within the codec. See Reset and Restore Factory Defaults for more details on each option. 1. Open the HTML5 Toolbox Web-GUI and click Settings at the top of the screen, then click Reset/Backup to display the Reset/Backup panel. -
Page 344: Backup And Restore Functions
ViA User Manual v1.2 30.12 Backup and Restore Functions The HTML5 Toolbox Web-GUI can be used to backup and restore codec settings, including: · Programs containing a variety of connection settings. · All system settings that have been adjusted to change the factory default codec settings (current run time settings). -
Page 345: Lock Or Unlock Programs
ViA User Manual v1.2 3. Click to select the check-boxes and confirm your restore settings. For example, you could select the Include programs check-box and deselect the Include system check-box if you are only copying programs onto codecs. 4. Click Restore and select the .tgz file you want to load onto the codec. A Success dialog confirms the files have been restored. - Page 346 ViA User Manual v1.2 4. Click Save to store the new configuration. Important Note: · A black Padlock symbol appears next to the program name in the Connections panel and in the Program Loader panel, to indicate a program is locked in the codec.
-
Page 347: Configure Country Setting
ViA User Manual v1.2 30.14 Configure Country Setting The Country setting in the codec configures country-specific settings like: · POTS line ring tones. · POTS line impedance. · Use of G.711 µ -law for North America and Japan, and G.711 a-law in most other regions of the world (e.g. -
Page 348: Configuring Snmp In The Codec
Management Information Base (MIB) files are required for SNMP applications to interact with your Tieline codec and interpret SNMP data. The codec supports SNMPv1 and SNMPv2 MIB protocols. The required MIB files can be downloaded from the codec using the following link in a PC web browser connected to the same network as your codec: ·... -
Page 349: Download Logs
1. Open the HTML5 Toolbox Web-GUI and click Settings in the Menu Bar, then click Help to display the Help panel. 2. Click Download Logs. 3. Save the file to your computer and then send it as a .zip file to Tieline support via support@tieline.com Download Event Logs Event logs can be downloaded from the codec and viewed in your browser. -
Page 350: Rs232 Data Configuration
Data). Important Notes: · When connecting to G3 codecs over IP, ISDN or POTS only in-band data is available via the Music and MusicPLUS algorithms. · Use firmware higher than 2.8.xx in the Bridge-IT, Genie and Merlin families of codecs to enable auxiliary data over multicast connections. -
Page 351: Creating Rules
ViA User Manual v1.2 30.18 Creating Rules The Rules panel in the HTML5 Toolbox Web-GUI is used to configure events for specific codec actions. Typically these 'rules' are based on a change in the state of a GPIO control port or the codec being connected or disconnected. - Page 352 ViA User Manual v1.2 Rule 1: Toggle a Control Port Input to Connect and Disconnect a Program This rule is used to connect and disconnect a selected program when a control port input is toggled. 1. Click the first rule in the Rules panel titled Connect and disconnect a program when an input is toggled.
- Page 353 ViA User Manual v1.2 4. Check the Rule summary and click Create Rule to save the settings. Rule 3: Synchronize Local Control Port Input Status with a Remote Relay Output Use this rule allow a local codec's control port input to change the state of a remote relay output.
- Page 354 ViA User Manual v1.2 4. Check the Rule summary and click Create Rule to save the settings. Deleting Rules 1. Open the HTML5 Toolbox Web-GUI and click Rules in the Menu Bar to display the Rules panel. 2. Click to select the rule you want to delete.
-
Page 355: Upgrading Codec Firmware
ViA User Manual v1.2 30.19 Upgrading Codec Firmware To download the latest codec firmware visit http://www.tieline.com/Support/Latest-Firmware. Firmware Upgrades The following procedure explains how to perform codec firmware upgrades with a downloaded firmware file saved to your PC. 1. Open the HTML5 Toolbox Web-GUI and click Settings in the Menu Bar, then click Firmware to display the Firmware panel. -
Page 356: Part 31 Reference
The following instructions are intended to help you configure your internet connection and Tieline codecs at the studio to enable incoming calls over the internet from a remote Tieline codec. It is assumed that you have a basic understanding of your IP network and how to configure IP devices. If... - Page 357 The following table lists the firewall ports you need to open for each model of Tieline codec if they are dialing your router at the studio. If the remote codec is also connected to a LAN with a firewall you may also need to open the ports at the remote end of the link to connect successfully.
- Page 358 ViA User Manual v1.2 Firewall Ports Commander G3/i-Mix G3 Bridge-IT/Bridge-IT XTRA Merlin, Genie & ViA Codec Families IP1 Session IP1 Audio Port: Session Port Audio (Proto): Session Port: Audio Port Port: 9002 9000 (Sess): 9002 9000 9002 Stream 1: 9000...
- Page 359 (Bridge-IT, Genie and Merlin codecs only) IP Address IPv6 Prefix Size IPv6 Gateway Configuring a Static IP Address ViA 1. Press the HOME button to return to the Home screen, then tap Settings 2. Tap to select Transport Interfaces and then LAN1...
- Page 360 Diagnosing Port Blocking via the Remote Codec LQ If you attach your Tieline codec at the remote site to a LAN with access to the internet you can often dial and connect to the studio without any problem. It is less likely that a firewall will block outgoing TCP and UDP ports.
- Page 361 1. "Connection Refused" usually means that the firewall is configured correctly but the codec is not using the expected port. For example, the firewall is set up to forward via port 9002 but codec is 'listening' to port 10,000. “Connection Refused” is not normally shown if the firewall is not configured correctly because a firewall will by design silently drop any forwarding requests to ports that it doesn’t have open (see next point).
-
Page 362: Understanding Ip Networks
(DHCP) and static. Most ISPs assign a dynamic public IP address by default, which can often change without you knowing. This is suitable for a quick demo of your Tieline codec, but for a permanent installation you will need to request a permanent static public IP address. - Page 363 Port Forwarding: Tieline TCP and UDP Port Settings For your Tieline Codec to communicate over the public internet an IP Address alone is not sufficient. In TCP/IP and UDP networks the codec port is the endpoint of your connection. Ports are doorways for IP devices to communicate with each other.
-
Page 364: Tips For Creating Reliable Ip Connections
256 kbps for a studio codec and 64 kbps for a field unit connection. 5. Use good quality equipment to connect your codecs to the internet. (Tieline successfully uses Cisco® switching and routing equipment.): · If you are using a DSL or ADSL connection make sure you purchase a high quality modem that can easily meet your speed requirements. - Page 365 ViA User Manual v1.2 7. Use a dedicated DSL/ADSL line for your codecs. Do not share a link with PCs or company networks. The only exception to this rule is if an organization has network equipment and engineers that can implement and manage quality of service (QoS) on its network.
-
Page 366: Testing Ip Network Connections
ViA User Manual v1.2 There are no wireless connections being used. 31.4 Testing IP Network Connections There are a few very simple tools that you can use to test whether a codec can be reached over an IP network. · Visit http://www.speedtest.net/... - Page 367 ViA User Manual v1.2 iv. Type ping, the IP address of the codec you are pinging, and then -t (i.e. ping 203.36.205.163 -t) and press the Enter key on your keyboard. v. Let the test run for several minutes and then press CTRL C.
-
Page 368: Testing Isdn Connections
Tieline Genie Distribution, Merlin, Merlin PLUS and ViA audio codecs support multiple connections using a variety of connection transports such as IP, ISDN and POTS. Tieline codecs support using Tieline session data, which assists with configuration and routing of multiple incoming calls to these codecs. - Page 369 “extension number” is used to route a phone call. Step 2: Configure the ISDN Module to accept two sessionless ISDN calls. This can be configured via Settings > Modules or use the Toolbox Web-GUI via Settings panel > Modules. 1. Select Config 1 and Sessionless Only and Route 1. Select your preferred algorithm, then click Save Settings.
- Page 370 B channel then that’s all you need to do. If, however, you want each non-Tieline codec to use the same B channel and be routed to the same codec output consistently, you must configure this in the site config for the ISDN module via Settings >...
- Page 371 ViA User Manual v1.2 If codec 1 always uses the first directory number to call then it will always be routed via Route 1 to the Answering Audio Stream Connection using Answer Route 1 (configured in step 1). Codec 2 should always use the second directory number and then it will always be routed via Route 2 to the Answering Audio Stream Connection configured with Answer Route 2.
-
Page 372: Pots Connection Tips & Precautions
POTS Operation Precautions POTS performance is greatly affected by the quality of the line being used. Precautions must be taken to ensure the Tieline codec is not sharing the line with other devices. Please remove these possible sources of interference: ·... - Page 373 Simply place the ADSL/DSL filter between the POTS line and your codec to remove the interference. 3. Tieline USA has a POTS test codec you can dial on +1-317-913 6911 to facilitate line tests at each end of your connection to diagnose line problems.
-
Page 374: Via Compliances And Certifications
ViA Compliances and Certifications 31.8 FCC Compliance This ViA codec displays all FCC compliance information on the LCD TOUCH SCREEN. To view FCC compliance information power up the codec and press the HOME button to return to the Home screen and then tap Settings >... -
Page 375: Via Declaration Of Conformity
ViA User Manual v1.2 ViA Declaration of Conformity 31.9 © Tieline Pty. Ltd. 2016... -
Page 376: Software Licences
(e.g. GNU General Public License v2/v3, GNU Lesser GPL v2.1/v3, BSD 3/2/4 Clause, MIT, ISC, etc.). The licenses are listed on the product via the Settings menu, About, Legal. You may request a copy of the source code of the open source software used in this product on DVD, by contacting our support team on +61 (0)8 9249 6688. -
Page 377: Trademarks And Credit Notices
14. IOS is a trademark or registered trademark of Cisco in the U.S. and other countries and is used under license. 15. Wi-Fi® and Wi-Fi Protected Access® (WPA) are registered trademarks of Wi-Fi Alliance. 16. AAC audio coding technology licensed from Via Licensing Corporation. © Tieline Pty. Ltd. 2016... -
Page 378: Part 32 Via Specifications
Advanced Networking VLAN tagging (IEEE 802.1Q,802.1p) Serial RS232 up to 115kbps with or without CTS/RTS flow control via female DB9 connector, can be used as a proprietary data channel Protocols supported Tieline, DHCP, SNMP, DNS, HTTP, IGMP, ICMP, VLAN, IPv4/v6,... - Page 379 ViA User Manual v1.2 Display 4.3 inch TFT Color LCD touch screen Navigation Touch screen or 5 button navigation keypad General Dimensions 5 5/16" x 3 1/4" x 7 7/8" 135mm (W) x 80mm (H) x 200mm (D) including rear connectors Weight 1.62 kg (with battery)
-
Page 380: Part 33 Appendix A: Rs232 And Control Port Wiring
330 ohm pull-up resistor to +5 volts. Operation is as simple as joining the input pin to the ground terminal. This can be via a remote relay contact or the open circuit collector of a transistor or FET. DO NOT feed voltages into the inputs. - Page 381 · When connecting to G3 codecs over IP, ISDN or POTS, only in-band data is available via the Music and MusicPLUS algorithms. · It is important to enable serial port flow control as it regulates the flow of data through the serial port.
-
Page 382: Part 34 Appendix B: Default Matrix Routing
ViA User Manual v1.2 Appendix B: Default Matrix Routing Default Mono Program Audio Routing Outputs Inputs Enco- Outp Output der1 Phone In Aux In Left Aux In Right Deco- der1 Default Stereo Program Audio Routing Outputs Inputs Enco- Enco- Outp... - Page 383 ViA User Manual v1.2 Default Mono plus IFB Program Audio Routing Outputs Inputs Enco- Enco- Outp der1 der2 (Main) (IFB) Phone In Aux In Left Aux In Right Deco- der1 (Main) Deco- der2 (IFB) Default Stereo plus IFB Program Audio Routing...
- Page 384 ViA User Manual v1.2 Outputs Deco- der2 (Main) Deco- der3 (IFB) Default 2 x Mono Peer-to-Peer Program Audio Routing Outputs Inputs Enco- Enco- der 1 der 2 (Main) (Main) Phone In Aux In Left Aux In Right Deco- der1 (Main)
-
Page 385: Index
Compliances explained Configuration types web-GUI software Alternative web-GUI port Configuration files configuration backup via HTML5 Toolbox Analog output matrix routing backup via Java Toolbox restore via HTML5 Toolbox Analog phone calls restore via Java Toolbox Answer routes about Connect/Hangup IP... -
Page 386: Tieline Pty. Ltd
ViA User Manual v1.2 Connections DHCP IP address AES42 touch screen config analog Dial & disconnect - HTML5 Toolbox Ethernet ports dial a program or audio stream headphone output disconnect a program or audio stream LAN ports unload a program opto-isolated outputs Dial &... - Page 387 Ganging inputs configure connections General audio settings configure Ethernet ports analog input level scale configure IP Via mapping auto reference level configure QoS automatic Gain Control configure VLANs disable AES42 mic on boot connections panel bit-rate adjust...
- Page 388 ViA User Manual v1.2 DHCP IP config Inputs IPv4/IPv6 ganging static IP config touch screen config IGC Auto Level view intelligent gain control metering IP and USB backup phantom power on/off IP connections Inputs - HTML5 Toolbox ISDN analog input type...
- Page 389 VLANs dial an audio stream Listening warning dial multiple IP streams Lock programs disconnect an audio stream Lock programs via Java Toolbox disconnect individual IP stream Logs - HTML5 Toolbox disconnect multiple IP streams send logs to Tieline DNS settings...
- Page 390 ViA User Manual v1.2 connections Mixer enable data input/output matrix routing Java Toolbox configuration Modules SmartStream PLUS inserting/removing Phantom power on/off Monitoring IP connection statistics Polarity inversion invert polarity IP link quality phase reverse IP packet reliability Ports Mono connection metering...
- Page 391 RS232 - HTML5 Toolbox specify outputs 2 x Mono Peer-to-Peer baud rates via web-GUI view settings flow control via web-GUI - Q - RS232 - Java Toolbox baud rates via web-GUI flow control via web-GUI...
- Page 392 ViA User Manual v1.2 Software Licences - S - Software upgrades - HTML5 Toolbox Software upgrades - Java Toolbox Sessionless ISDN Specifications answer route config Static IP address touch screen config about Stereo connection metering about peer-to-peer calls Stereo plus IFB metering...
- Page 393 IP Via Mapping panel - U - ISDN answer panel licensing panel master panels Understanding IP networks modules panel Unlock Programs network panel Unlock programs via Java Toolbox opening panels USB modem options panel connecting POTS answer panel connection PPMs panel indications...
Need help?
Do you have a question about the VIA and is the answer not in the manual?
Questions and answers