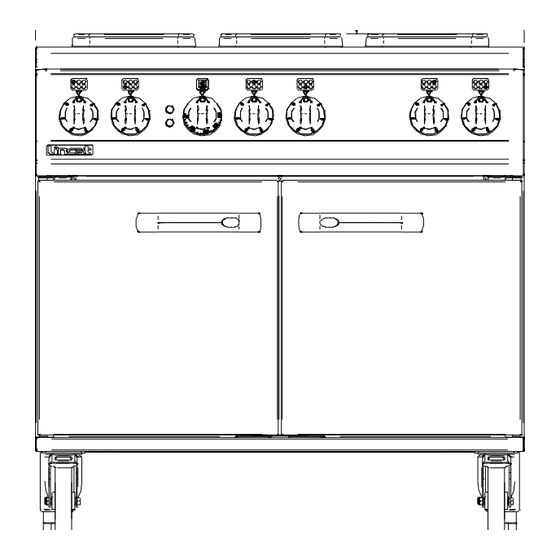
Lincat OE8008 Installation, Operating And Servicing Instructions

Lincat OE8008 Installation, Operating And Servicing Instructions

Electric oven ranges

Advertisement

Installation, Operating and Servicing
Instructions
Opus 800 Electric Oven Ranges
OE8008, OE8010
Please make a note of your product details for
future use:
Date Purchased:_________________________
Model Number:__________________________
Serial Number:__________________________
Dealer:_________________________________
_______________________________________
IS 602 ECN 3913
Page 1 of 13

Advertisement

Table of Contents
loading
Need help?

Need help?

Do you have a question about the OE8008 and is the answer not in the manual?

Questions and answers

Subscribe to Our Youtube Channel

Summary of Contents for Lincat OE8008

  • Page 1 Installation, Operating and Servicing Instructions Opus 800 Electric Oven Ranges OE8008, OE8010 Please make a note of your product details for future use: Date Purchased:_________________________ Model Number:__________________________ Serial Number:__________________________ Dealer:_________________________________ _______________________________________ IS 602 ECN 3913 Page 1 of 13...
  • Page 2: Table Of Contents

    WARNING! This symbol is used whenever there is a risk of personal injury. CAUTION! This symbol is used whenever there is a risk of damaging your Lincat product. NOTE: This symbol is used to provide additional information, hints and tips.
  • Page 3: Warnings And Precautions

    Ensure that the plug/socket is accessible at all times. Strip plastic coating and clean the appliance before use. During operation parts may become hot - avoid accidental contact. Disconnect this appliance before servicing, maintenance or cleaning. TECHNICAL DATA OE8008 OE8010 Height (mm) Width (mm) Depth (mm)
  • Page 4: Installation And Commissioning

    INSTALLATION AND COMMISSIONING This appliance must be earthed. Install this appliance on a level surface ensuring all vents are unobstructed. Any partitions, walls or furniture must be of non-combustible material. Minimum distances A 100mm B 1000mm – see Fig 1. Fig 1 An equipotential bonding terminal is provided to allow cross bonding with other equipment.
  • Page 5 Means of isolation with at least 3mm contact separation in all poles must be incorporated into the fixed wiring of this appliance. The fixed wiring insulation must be protected by insulated sleeving having a temperature rating of 60 Deg C. Supply cords shall be oil resistant, sheathed flexible cable not lighter than ordinary polychloroprene or equivalent elastomer sheathed cord (code 60245 IEC 57) If this appliance is fitted with castors, use caution at all times when manipulating or...
  • Page 6: Operating Instructions

    OPERATING INSTRUCTIONS Only qualified or trained personnel should use this appliance. Fig 2 Before using the appliance for the first time, turn the hotplates to full setting for 4 minutes without pans to allow them to cure and harden to maximum durability. Hotplates Switch on the electricity supply –...
  • Page 7: Cleaning

    Your Lincat product has a manufacturer’s warranty. This requires you to maintain and care for your product and follow maintenance instructions. If you fail to maintain your unit or damage components Lincat may charge you for a warranty repair. Please check the website for terms and conditions.
  • Page 8: Servicing, Maintenance And Component Replacement

    SERVICING, MAINTENANCE AND COMPONENT REPLACEMENT All servicing, maintenance and component replacement on this appliance should be carried out by one of our recommended service engineers. Replacement of some components requires removal of the facia panel and heat shield (see Fig 4). Remove the control knobs (A) and all screws beneath the facia (B).
  • Page 9 Thermostat Remove facia and heat shield (C). Unclip thermostat phial and remove thermostat, keeping the insulated sleeving to reuse on the new thermostat. Fit new thermostat, ensuring capillary is sleeved and routed to avoid internal electrical shorting. Refit facia. Hotplate Remove facia and heat shield (C) to access hotplate restraining nut.
  • Page 10 Safety thermostat Remove the thermostat bulb from the top of the oven. Working from the back of the appliance (Fig 5), remove the cable channel (E) and rear cover (F). Remove the connections from the thermostat. Remove the front control panel and pull the thermostat bulb out and through the oven back.
  • Page 11: Fault Finding

    FAULT FINDING Please refer to the Service Help Desk number on the final page of this manual. Even during correct use of the appliance, malfunctions and breakdowns may occur. Common situations are listed below, and checks a user should make before contacting the technical support centre are indicated.
  • Page 12: Spare Parts List

    Front braked castor CA145 Rear un-braked castor CO215 Contactor EL188 Hotplate element EL295 Element 4kW OE8010 EL248 Element 3kW OE8008 FA102 Fan impeller FA12 Oven motor GL80 Cable restraint HA77 Door handle KN505 Oven control knob KN514 Hob control knob...
  • Page 13: Service Information And Guarantee

    Type number All available on serial plate  Serial number Lincat reserve the right to carry out any work under warranty, given reasonable access to the appliance, during normal working hours, Monday to Friday, 08:30 to 17:00. GUARANTEE This unit carries a comprehensive UK mainland 2 year warranty. The guarantee is in addition to, and does not diminish your statutory or legal rights.

This manual is also suitable for:

Oe8010Oe8012Oe8011Oe8016Oe8015

Table of Contents