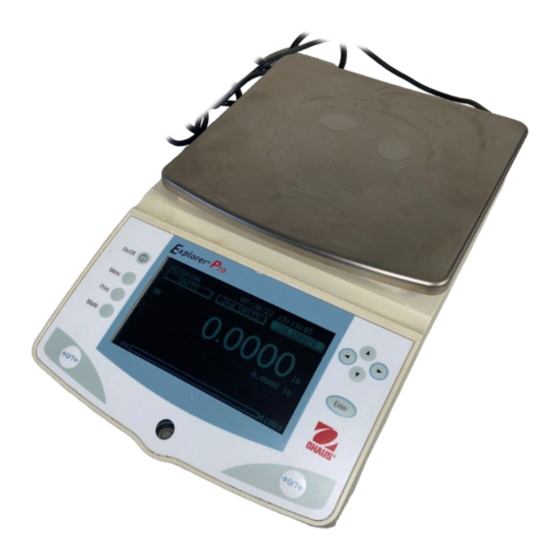
OHAUS Explorer Pro Instruction Manual
Hide thumbs
Also See for Explorer Pro:
- Service manual (114 pages) ,
- Instruction manual (60 pages) ,
- Instruction manual (42 pages)
Table of Contents
Advertisement
Quick Links
Advertisement
Table of Contents

Related Manuals for OHAUS Explorer Pro


Summary of Contents for OHAUS Explorer Pro
- Page 1 Explorer Pro Instruction Manual...
- Page 3 Ohaus Corporation, USA, was examined and evaluated in 1994 by the Bureau Veritas Quality Interna- tional, BVQI, and was awarded ISO 9001 registration. This certifies that Ohaus Corporation, USA, has a quality system that conforms with the international standards for quality management and quality assurance (ISO 9000 series). Repeat audits are carried out by BVQI at intervals to check that the quality system is operated in the proper manner.
- Page 4 Additional Standards CAN/CSA-C22.2 No. 1010.1-92; UL Std. No. 3101-1 Safety requirements for Electrical Equip. for measurement, Control and Laboratory Use, Part 1; General Requirements FCC, Part 15, class A Emission AS/NZS4251.1 AS/NZS4252.1 Emission and Immunity N13123 Note: This equipment has been tested and found to comply with the limits for a Class A digital device, pursuant to Part 15 of the FCC Rules. These limits are designed to provide reasonable protection against harmful interference when the equipment is operated in a commercial environment.
-
Page 5: Table Of Contents
Explorer Pro EN-1 TABLE OF CONTENTS INTRODUCTION............................EN-3 Description ............................EN-3 Features ............................... EN-3 Safety Precautions ..........................EN-3 INSTALLATION ............................EN-3 Unpacking ............................EN-3 Installing Components ..........................EN-4 2.2.1 Platform Installation ........................EN-4 2.2.2 Windshield Installation ........................ EN-4 2.2.3 Weigh Below Preparation ......................EN-4 2.3. - Page 6 EN-2 Explorer Pro TABLE OF CONTENTS (Cont.) 3.5.6 Interface ..........................EN-27 3.5.7 Print Options ........................... EN-28 3.5.8 GLP Print Options ........................EN-28 3.5.9 Lockout ..........................EN-29 3.5.10 Factory reset ..........................EN-29 3.9.11 LFT Legal for Trade ........................EN-30 3.5.12 Hardware Lock Switch ......................EN-30 3.5.13 Sealing the Balance .........................
-
Page 7: Explorer Pro
2. INSTALLATION 2.1 Unpacking 1.1 Description Open the package and remove the instrument and the Thank you for deciding to purchase an Explorer Pro ® accessories. Check the completeness of the delivery. The Balance from Ohaus. Explorer Pro’s software design allows ®... -
Page 8: Installing Components
6" Pan and Windshield. 2.2.3 Weigh Below Preparation The Explorer Pro balance is equipped with a weigh below hook at the bottom of the balance. To use this feature, remove the protective cover underneath the balance. See illustration for BOTTOM OF BALANCE location. -
Page 9: Selecting The Location
Explorer Pro EN-5 2.3 Selecting the Location 2.3.1 Balance Location The balance should be used indoors only and in an environment which is free from excessive air currents, corrosives, vibration, and temperature or humidity extremes (Max. 80%). Maximum altitude not to exceed 2000 m above sea level. These factors will affect displayed weight readings. -
Page 10: Connecting Power And Communications
AC Adapter Connection Rear of Balance 2.4.2 RS232 Interface Explorer Pro balances are equipped with a bidirectional RS232 compatible interface for communication with serial printers and computers. When the balance is connected directly to a printer, displayed data can be output at any time by simply pressing the Print button, or by using the Auto Print feature. -
Page 11: Initial Calibration
Explorer Pro EN-7 2.4.3 Initial Calibration Calibrating from the Weighing Screen Calibration Masses When the balance is first turned on, three soft keys appear on the weighing screen. The CALIBRATE soft key is highlighted. Calibration masses are required if the balance is not equipped This permits calibration immediately without entering the with internal calibration. -
Page 12: Operation
EN-8 Explorer Pro OPERATION 3.1 Overview of Controls WEIGHING 01/01/03 03:05:45: PM UNITS 2nd UNITS CALIBRATE 0.00 0.00g 6100g Designation Function Power On/ Off button. button When pressed in Menu mode, single press moves menu selection bar in an up direction and highlights the activated field or changes the settings of a selected field in increasing order. - Page 13 Explorer Pro EN-9 Designation Function button When pressed In Menu mode, single press moves menu selection bar in a down direction and highlights the selected field or changes the settings of a selected field in decreasing order. When at an alphanumeric field, then the number or letter is decremented.
-
Page 14: Overview Of Display Indicator
EN-10 Explorer Pro 3.2 Overview of Display Indicator WEIGHING 01/01/03 03:05:45: PM UNITS 2nd UNITS CALIBRATE Message Line 200.0000 >0< Result Line Result Line Result Line Result Line Result Line Result Line 6100g Designation Function Application Indicates the active application by function. -
Page 15: Menu
MENU Calibration 3.3.3 Turning on the Balance Balance Options Readout The Explorer Pro balance is ready to operate after the installation Application Modes Units procedures are performed. When the balance is first turned on Interface and it completes its checks, it can be used to weigh or tare... -
Page 16: Applications
Explorer Pro 3.4 Applications 3.4.1 Weighing The Explorer Pro balance is shipped with grams only enabled. The Explorer Pro balance contains Weighing, Parts Counting, The balance can be used immediately after calibration has been Animal Weighing, Percent Weighing, Check Weighing, G/N/T and Filling applications. -
Page 17: Parts Counting
Explorer Pro EN-13 ADJUSTMENTS PARTS COUNTING 01/01/03 03:05:45 PM SAMPLE SIZE SETUP NEW COUNT Three soft-keys at the top of the display screen labeled UNITS, 2nd UNITS and CALIBRATE are accessed by using the arrow Add 10 Pieces, Press Enter buttons and selected by pressing the Enter button. - Page 18 EN-14 Explorer Pro Display Settings: Custom, Default (default is Default) PARTS COUNTING SETUP Selecting Display Settings to Custom will bring up the DISPLAY Mode Count Unit SETTINGS screen that will allow individual display items to be Sample Size : 10 turned on or off.
- Page 19 Explorer Pro EN-15 ADJUSTMENTS PARTS COUNTING-CHECK The PC Check display contains three soft keys at the top of the This feature permits establishing a set quantity of pieces as a screen SAMPLE SIZE, SETUP and NEW COUNT. criteria for similar items that can be quickly checked against the NEW COUNT sample.
- Page 20 EN-16 Explorer Pro Three new entries Weight, Over and Under appear on this screen. PC FILLING 01/01/03 03:05:45 PM Selecting Exit will return balance to previous screen. SAMPLE SIZE SETUP NEW COUNT Weight: On,Off (default is On) Can be turned on or off.
-
Page 21: Percent Weighing
Explorer Pro EN-17 3.4.3 Percent Weighing One additional entry has been added to the PARTS COUNTING Percent weighing allows placing a reference load on the balance, SETUP, that is Target. Refer to the Adjustments section of parts then view other loads as a percentage of the reference. The load counting for a description of all other settings. - Page 22 Explorer Pro EN-18 Unit: g, kg, etc...(default g) The reference weight is removed and a second weight is placed Cycles through all units turned On in the Units menu. on the pan. The example illustrates a 50 g weight. Reference: 0-99999999 (default is 10)
-
Page 23: Animal Weighing
Explorer Pro EN-19 3.4.4 Animal Weighing ADJUSTMENTS The ANIMAL WEIGHING display contains three soft keys at the Animal weighing permits you to weigh small animals and filters top of the screen FILTER, SETUP and START/CLEAR . out animal movements. Choices of manual, semi automatic and automatic operation is possible. -
Page 24: Check Weighing
Explorer Pro EN-20 CHECK WEIGHING 01/01/03 03:05:45 PM Automatic Mode UNITS SETUP CALIBRATE Weighing process starts automatically as soon as the animal is O.00 placed on the pan. The weight is displayed until the animal is removed. The balance is ready for another animal weighing. -
Page 25: Gross/Net/Tare Weighing
Explorer Pro EN-21 3.4.6 Gross / Net / Tare Weighing Unit: g, kg, etc...(default is g) Cycles through all units turned On in the Units menu. Gross/Net/Tare (G/N/T) application allows to display Gross (sample plus container weight), NET (sample weight) and TARE Over: 0-99999999 (default is 15) (container weight) simultaneously. -
Page 26: Filling
Explorer Pro EN-22 ADJUSTMENTS ADJUSTMENTS The G/N/T WEIGHING display contains three soft keys at the top The FILLING display contains three soft keys at the top of the of the screen UNITS, 2nd UNITS and TARE. screen TARGET, SETUP and NEW TARGET. -
Page 27: Balance Settings
Environmental conditions must be met for the 3.5 Balance Settings AutoCal to be successfully completed. The Explorer Pro balance contains ten submenus that are accessible from the Menu. The submenus are Calibration, Balance AutoCal Delta: -100 - +100 (default is 0) -
Page 28: Balance Options
Explorer Pro EN-24 Compare the reading on the balance to the expected weight being Linearity Calibration: used. If the reading is above the expected weight, the delta entered Linearity calibration utilizes three calibration points, one at zero in digits is negative. If the reading is below the expected weight, load and two at specified calibration masses. -
Page 29: Readout
Explorer Pro EN-25 Languages: English, Spanish, etc...(default is English) READOUT Allows the selection of English, Spanish, French, German or Italian Filter Level Medium Stability Level (d) : 1.0 as the operating language to be displayed. Auto Zero (d) : 0.5... -
Page 30: Application Modes
Explorer Pro EN-26 3.5.4 Application Modes UNITS Press the Menu button, and select Application Modes. Carat (ct) : Off Penny weight (dwt) : Off Troy OZ (ozt) : Off Grain (GN) : Off Press the Enter button APPLICATION MODES screen is displayed. -
Page 31: Interface
Explorer Pro EN-27 Newton (N): On, Off (default is Off) EXPONENTS EXPONENTS EXPONENTS EXPONENTS EXPONENTS Unit (N) = g x 0.00980665, displayed readability by 1. Moves decimal point 3 places to the left. MOMME (m): On, Off (default is Off) Moves decimal point 2 places to the left. -
Page 32: Print Options
Stable Data : Off Numeric Data : Off Project Name: (default is OHAUS) Exit A project name of up to 8 characters may be entered. User Name: (default is OHAUS) A user name of up to 8 characters may be entered. -
Page 33: Lockout
GLP Print Options: Balance Options : No Readout : No Balance ID=OHAUS Application Modes : No Units : No User Name = OHAUS Interface : No All others Off Print Options : No GLP Print Options : No Lockout : No... -
Page 34: Lft Legal For Trade
“Certified balances have a securing sticker and additional labeling 09:56:16 applied at the factory. When subsequent verification is carried 9.989g out, they can be sealed either with a lead seal and wire, or with a Ref: new securing sticker”. Balance id:000001B9A925 Project Name:OHAUS User Name: OHAUS... -
Page 35: Care And Maintenance
Explorer Pro EN-31 4. CARE AND MAINTENANCE 4.1 Cleaning To keep the balance operating properly, the housing and pan should be kept clean and free from foreign material. If necessary, a cloth dampened with a mild detergent may be used. Keep calibration masses in a safe dry place. -
Page 36: Error Codes List
EN-32 Explorer 4.3 Error Codes List Error Codes List The following list describes the various error codes that can appear on the display and the suggested remedy. Data Errors 1.0 Transient error (hardware error, probably static discharge). If error persists, the balance must be serviced. -
Page 37: Service Information
4.4 Service Information If the Troubleshooting section does not resolve or describe your problem, you will need to contact an authorized Ohaus Service Agent. For Service assistance in the United States, please call Aftermarket, Ohaus Corporation toll-free at (800) 526-0659. An Ohaus Product Service Specialist will be available to help you. -
Page 38: Technical Data
EN-34 Explorer 5. TECHNICAL DATA 5.1 RS232 Commands Command Character Description Begin span calibration Set 1 second print delay (set x = 0 for OFF, or x = 1 for ON) Application mode. Set Averaging Filter Level 1= Low, 2= Medium, 3= High Begin linearity calibration Print displayed weight (stable or unstable) Field:... -
Page 39: Specifications
Explorer Pro EN-35 5.2 Specifications Admissible Ambient Conditions Use only in closed rooms Ambient Temperature range: 5 ºC to 40 ºC Atmospheric humidity: 80% rh @ to 30 ºC Voltage fluctuations: –15% +10% Installation category: Pollution degree: Power supply voltage:... -
Page 40: Limited Warranty
Ohaus. In lieu of a properly returned warranty registration card, the warranty period shall begin on the date of shipment to the authorized dealer. - Page 41 Explorer Pro EN-37 Index Index Index Index Index A A A A A Date Format 25 Density Determination Kit 33 AC Adapter Installation 6 Description 3 Accessories 33 Display Date/Time 25 Admissible Ambient Conditions 35 Admissible ambient conditions 35 E E E E E...
- Page 42 EN-38 Explorer Index Index Index Index Index M M M M M S S S S S Menu 11 Safety Precautions 3 Menu Structure 11 SAMPLE PRINTOUT 30 SAMPLE SIZE 13 N N N N N SAMPLE SIZE/APW 14, 16, 17 SCIENTIFIC NOTATION 27 Navigation 11 Sealing Screw 30...
- Page 43 Explorer Pro EN-39...
- Page 44 Explorer Ohaus Corporation 19A Chapin Road, P.O. Box 2033 Pine Brook, NJ 07058, USA Tel: (973) 377-9000, Fax: (973) 593-0359 With offices worldwide. www. ohaus.com *80250955* *80250955* *80250955* *80250955* *80250955* PN 80250955 B © Ohaus Corporation 2003 all rights reserved.
Need help?
Do you have a question about the Explorer Pro and is the answer not in the manual?
Questions and answers