Table of Contents
Advertisement
Advertisement
Table of Contents

Subscribe to Our Youtube Channel
Related Manuals for Firex betterpan DBRG series

Summary of Contents for Firex betterpan DBRG series
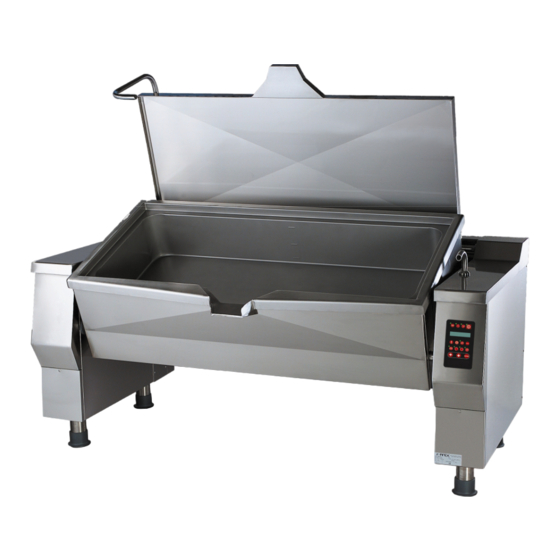
- Page 1 OWNER’S INSTRUCTION MANUAL TILTING BRATT-PAN WITH ELECTRONIC CONTROL “BETTERPAN” Models DBRG… DBRE… Models DBRG…-C DBRE…-C Cat. II - 0085 – AT0136 2H3+ Owners’ Instruction Manual – Tilting Bratt-Pan with electronic control “BETTERPAN – DBRG… - DBRE…”...
-
Page 2: Table Of Contents
Summary Summary..............Errore. Il segnalibro non è definito. 1. General warnings .......................3 1.1. Warnings and instructions for the user ..............3 2.0. Cleaning and care of the appliance ...............4 2.1. Daily cleaning ......................4 3.0. Special procedures in case of prolonged inactivity..........5 4.0. -
Page 3: General Warnings
1. General warnings − Read the warnings contained in this manual carefully as they provide important information concerning safety during the installation, use and maintenance of the appliance. − Keep these instructions carefully! − Only personnel trained for its specific use should use the equipment. −... -
Page 4: Cleaning And Care Of The Appliance
In case of recurrent failures contact a service technician. Before using it for the first time, wash the interior of the cooking vat thoroughly. Warning! : Fill the cooking vat up to its maximum level, which is 40 mm below the overflow edge, according to the maximum level mark (including food to be cooked). -
Page 5: Special Procedures In Case Of Prolonged Inactivity
3.0. Special procedures in case of prolonged inactivity 3.0. Pre − If the appliance is to stand idle for any length of time (e.g. holidays or seasonal closing) − In cas it must be cleaned thoroughly, leaving not traces of food or dirt. fondo −... -
Page 6: Operation Of The Appliance
4.0. Operation of the appliance 4.1. Description of pushbutton panel PUSHBUTTON FUNCTION PUSHBUTTON FUNCTION ON / OFF keyboard Vat down (only for DBR…-C versions) Start / Stop cooking Vat up (only for cycle DBR…-C S T A R T S T O P versions) Vat return Previous... -
Page 7: How To Turn The Appliance On And Off
4.2 How to turn the appliance on and off Press the pushbutton ON/OFF to switch the appliance on and off.. When the appliance is in “ON” mode, the green LED on the upper left-hand corner of the pushbutton is lit. When the appliance is in “STANDBY”... -
Page 8: How To Start A Cooking Cycle
E N T E R Press for a few seconds to confirm choice. The following will appear on the display: HH MM MM YY 08 : 00 30 / 11 / 07 E N T E R E N T E R Press again and set current data by means of the pushbuttons E N T E R... -
Page 9: Braizing
Probe C-N OPTIONAL (coking with core probe) Suitable for cooking requiring a precise adjustment and monitoring of the product core temperature; temperature is controlled by a needle probe (TCK) positioned inside the product. Cooking time is determined by achieving the set temperature. For this type of cooking, it is possible to select the holding cycle (at 65°... -
Page 10: How To Select Cooking Time
5.2.1. How to select cooking time Press pushbutton to enter cooking time selection mode. BRAIZING 180° 36° C TIME INFINITE The time can be changed by using the pushbuttons and confirmed by pressing E N T E R Warning: If the version purchased by user is provided with basket lift, it is also possible to set the "BASKETS"... -
Page 11: Cooking
5.3. COOKING Time and temperature settings are the same as for braizing. The temperature ranges from 20° C to 100° C. 5.4. DEEP-FRYING Time and temperature settings are the same as for braizing. The temperature ranges from 20° C to 195° C. CAUTION! For oil cooking cycles only enable the frying option on the control panel. -
Page 12: How To Select Cooking Time With C-N Probe
In which: 80 ° C = set product temperature 25 ° C = temperature actually measured by the core probe 150 ° C = set base temperature 25 ° C = temperature actually measured by the base probe E N T E R Confirm by pressing , then it will be necessary to confirm if we wish to start holding cycle (65 °... -
Page 13: C-S Probe (Core Probe Soft)
6.2. PROBE (Core probe soft) In this case it is necessary to select product temperature on the board and the difference with the cooking vat temperature. For a correct temperature detection, put the needle in the core of product, trying to penetrate as much as possible. -
Page 14: How To Select Cooking Time With C-S Probe
6.2.1. How to select cooking time with C-S probe This type of cooking is related to temperature and not to time, however it is possible to set a cooking time that will start countdown from the moment in which the selected product temperature has been reached E N T E R In this case, press... - Page 15 Press and, using buttons , select “BASKETS” and confirm by pressing E N T E R BOILING 100° 36° C BASKETS INFINITE E N T E R Press to set the baskets immersion time and confirm by pressing BOILING 100° 36°...
-
Page 16: How To Fill The Vat With Water
BOILING 100° 36° C BASKETS 00 : 03 – 00: 00 S T A R T S T O P e premere il tasto per far partire il riscaldamento dell’acqua. In the meanwhile, press to move the baskets to the charge/discharge position. Fix the baskets containing a new product against the bar After the boiling point is reached, press . -
Page 17: Manual Filling
COLD WATER SUPPLY SET : 15 AUS : 0 Once the desired number has been reached, press to start the operation. If filling needs to be interrupted in advance, press again or turn the valve anticlockwise. 9.2. Manual filling Repeat the same operations described for filling with litre gauge until the selection of hot/cold water. -
Page 18: How To Set Delayed Start
Keep the pushbutton pressed until the end of vat movement to re-enable all panel functions. If the vat cannot be moved different types of messages may appear on the display: LID OUT OF POSITION ********************************** Which means that the lid is closed or not completely open or VALVE OUT OF POSITION ********************************** This means that the water filling tap must be turned fully into the right position. -
Page 19: Other Optional Accessories
OPERATOR MENU set delayed start Now it is necessary to set cooking mode, temperature and time, as described in the previous chapters. COOKING 107 ° C 36 ° C TIME 00 : 05½ Now the starting time and date HH MM MM YY 08 : 00 30 / 11 / 07... -
Page 20: Display Messages
Press the black lever to start the jet of water. Release the lever and the jet of water will stop immediately. If a continuous jet of water is desired, turn the black lever fully. Warning: In order to avoid damage, handle this accessory gently and put back into position after use. Make sure that there is no hot oil in the vat before starting the jet. - Page 21 The input control relay is on, ECONOMIZER the appliance is temporally disabled (OFF). ********************************** A delayed start has been DELAYED START entered. ********************************** The delayed start was START OK successful. ********************************** The delayed start was Try again as described in START NOT OK unsuccessful.
- Page 22 There is too much heat near Check if the control panel MAX TEMPERATURE 3 the electronic components. and/or the adjacent panels are very hot. ********************************** If so, eliminate any sources of heat near the electronic components of the appliance. If the panels are not hot, apply to a service centre.
Need help?
Do you have a question about the betterpan DBRG series and is the answer not in the manual?
Questions and answers