Table of Contents

Related Manuals for Oricom PMR1250 80


Summary of Contents for Oricom PMR1250 80
- Page 1 User manual PMR1250 80 Channel UHF 2-Way Citizen Band Radio Keep this user guide for future reference. Always retain your proof of purchase in case of warranty service and register your product on line at: AUSTRALIA: www.oricom.com.au...
- Page 2 Need Help? If you need assistance setting up or using your Oricom product now or in the future, call Oricom Support. Australia 1300 889 785 www.oricom.com.au Mon-Fri 8am – 6pm AEST New Zealand 0800 67 42 66 www.oricom.co.nz Mon-Fri 10am – 8pm NZST...
-
Page 3: Table Of Contents
During this time wideband channel use will be gradually phased out as users upgrade their existing radio’s. This means that the new Oricom narrowband radio you have purchased will have more channels than older wideband radios. Some of these channels are locked and cannot be used, (see the attached channel chart for more information). -
Page 4: Safety Information And Warnings
Safety Information and Warnings Safety Information and Warnings Information on Safe Operation Read This Information Before Using Your Oricom Radio. WARNING The operation of your UHF radio in Australia and New Zealand is subject to conditions in the following licenses:... - Page 5 • If you believe the battery pack is damaged, remove product from the charger and stop using the product. Contact Oricom for assistance. • Never use a damaged battery pack as it may explode. • Remove batteries when they are no longer able to hold a charge and when the equipment will not be used for an extended period of time.
- Page 6 “blasting area” or in areas posted: “Turn off the two way radio.” Obey all signs and instructions. Exposure to Radio Frequency Energy Your Oricom two-way radio complies with Australian Communications Authority Radio communications (Electromagnetic Radiation-Human Exposure) Standard, 2003. To assure optimal radio performance and make sure...
- Page 7 Safety Information and Warnings Transmit and Receive Procedure Your two-way radio contains a transmitter and WARNING a receiver. To control your exposure and ensure compliance with the general population/uncontrolled environment exposure limits, always adhere to the following procedure: • Transmit no more than 50% of the time. •...
- Page 8 Safety Information and Warnings Medical Devices - Pacemakers The Advanced Medical Technology Association WARNING recommends that a minimum separation of 6 inches (15cm) be maintained between a handheld wireless radio and a pacemaker. These recommendations are consistent with the independent research by and recommendations of the U.S.
-
Page 9: Getting Started
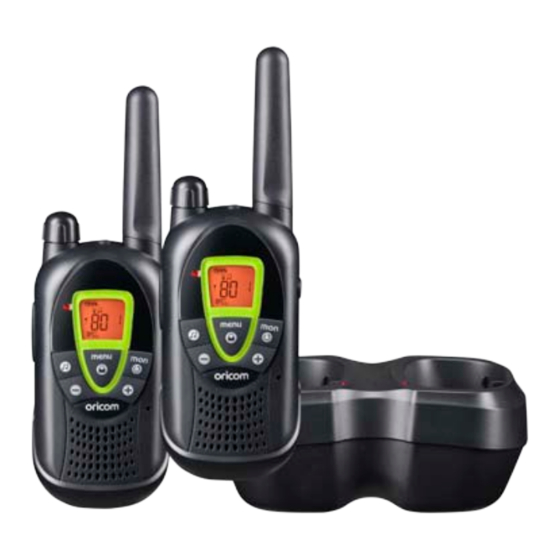
Getting Started Pack Contents 2 x Handheld Radios 2 x Battery Packs 1 dual charger 1 power adaptor Installing/Removing the Belt Clip 1. To install the belt clip, align the pin with the hole in the backside. Gently push until it clicks into position. -
Page 10: Charging Batteries
Getting Started Charging batteries When NiMh battery packs are installed, the desktop charger provides drop-in charging convenience. 1. Put the desktop charger on a flat surface. 2. Plug the supplied adaptor into the electric socket. Pay attention to the mentioned voltage and compare this with the indications of the power supply. -
Page 11: Oricom Pmr1250 Instructions
Oricom PMR1250 instructions Handset 1. Antenna 2. LCD Display 3. Earpiece connector 4. Menu / Key pad lock icon 5. Scan / Monitor button 6. Up button -Increase the speaker volume -Select the next value in the menu. 7. Speaker 8. -
Page 12: Operation
Operation Turning the unit ON/OFF The power on/off is controlled by a rotational knob, use the knob the turn the unit on or off. Adjusting Speaker Volume The volume is controlled by the rotational knob, rotate the knob to adjust the volume up and down. Receiving a Signal The unit is continuously in the RECEIVE mode when the unit is switched ON and not transmitting. - Page 13 Operation Transmitting range The talk range depends on the environment and terrain. The radio can reach (up to about 7km) in wide open spaces, without obstructions such as hills or buildings. Don’t try to use two radio units which are less than 1.5m (5 feet) apart. Otherwise, you may experience interference.
-
Page 14: Changing Channels
Operation Changing Channels Your radio has 75 available channels, to communicate with other radios's, you must have your radio tuned to the same channel. 1. Press the menu button once, the current channel number flashes on the display. 2. Press the button or the button to change the channel. - Page 15 Operation Note: Any radio set on the same channel can receive and listen to the conversation, also when the other use a CTCSS code. To disable CTCSS code, set the code to ‘0’. Channel 5 and 35 are used for emergency channels. Interference Eliminator Code will not operate on these two channels.
-
Page 16: Setting The Call Tone
Operation To deactivate the Room/Baby Monitor: 1. In stand-by, press the menu button until the BABY icon appears, the current Baby Vox setting flashes on the display and the BABY icon is displayed. 2. Press the button until ‘OF’ appears on the display, to turn the Room/Baby monitor off. -
Page 17: Channel Scan
Operation 2. Press the button to turn the VOX feature ON. Press button again to set the VOX sensitivity level between 1 and 3. Press the button until ‘OF’ appears on the display, to turn VOX OFF. 3. Press the PTT button to confirm and return to stand-by mode. Squelch level selection The adjustable Squelch allows you to optimise the radios sensitivity. - Page 18 Operation To start Scanning: 1. Briefly press the key. The scan icon will appear in the display, and the radio will begin to scroll through the channel and code combinations. 2. When the radio detects channel activity matching the channel and code combination, it stops scrolling and you can hear the transmission.
- Page 19 Operation transmission. You may press the key to stop scanning at any time. 2. If the radio stops on an undesired transmission, you may immediately resume the scan by briefly pressing 3. If the radio repeatedly stops on an undesired transmission, you may temporarily remove that channel from the scan list by pressing and holding for three seconds.
- Page 20 Operation How to disable dual scan: Press the menu button until the dual channel scan icon appears on the display. Then press the button or the button until ‘oF’ is displayed. When the Dual Channel Monitor function is activated, the radio will switch sequentially between the standby channel + CTCSS and the Dual Channel + CTCSS.
- Page 21 Operation Receive Channel Transmit channel 34 35* 36 37 38 Receive Channel 44 45 46 47 48 Transmit channel 74 75 76 77 78 * Channel 5 is emergency channel only Setting the Repeater function Repeater Station a. Press the Menu button 2 time on a repeater channel, “RPT”...
- Page 22 Operation Key Tone On/Off When a button is pressed, the unit will beep briefly. 1. Press the menu button until the current Key Tone setting flashed on the display. 2. Press the button or the button to enable (ON) or disable (OF) the Key Tone.
-
Page 23: Button Lock
Operation Button Lock 1. Press and hold the button for 3 seconds to activate the Button Lock mode. The Button Lock icon is displayed on the LCD Screen. 2. Press and hold the button again to deactivate Button Lock. Note: The Button Lock is not valid for the button, button, button and the PTT button. -
Page 24: Uhf Channels And Frequencies
UHF channels and frequencies Channel Frequency Table Radiocommunications (Citizen Band Radio Stations) Class Licence 2002 No licence is required to own or operate this radio in Australia and New Zealand. The Radiocommunications (Citizen Band Radio Stations) Class Licence 2002 contains the technical parameters, operating requirements, conditions of licence and relevant standards for Citizen Band (CB) radios. - Page 25 UHF channels and frequencies * The primary use for these channels is repeater operation using 750 kHz offset. Channels 1-8 and 41-48 inclusive are used for mobile reception and channels 31-38 and 71-78 for mobile transmission. In addition, any designated repeater channel may be used for simplex operation in areas where it is not used for repeater operation.
- Page 26 UHF channels and frequencies Channels 22 and 23 are for Telemetry and Telecommand use, voice communications are not allowed on these channels by law. Channel 9 and above are the best choices for general use in Simplex mode. 38 CTCSS CODE LIST CODE Frequency(Hz) CODE...
-
Page 27: Customer Support
Troubleshooting section of this user guide as well as “Frequently Asked Questions” on our website www.oricom.com.au. If you have further questions about using the product after reviewing the resources above or would like to purchase replacement parts or accessories please call our Customer Support Team. -
Page 28: Warranty
Please note that if a Customer Support Team member advises that your product does not qualify for return, this warranty does not apply to your product. Products that are authorised to be returned to Oricom in Australia must include all of the following: •... -
Page 29: Information
Any implied warranties that may be imposed by law are limited in duration to the Warranty Period. Oricom warrants that the product is free from defects in materials or workmanship during the Warranty Period. This Warranty does not extend to any product from which the serial number has been removed or was purchased outside of Australia. - Page 30 No change to the conditions of this Warranty is valid unless it is made in writing and signed by an authorised representative of Oricom. Oricom will not be in breach of a warranty expressly set out in this User Guide or under the Competition and Consumer Act 2010...
- Page 31 Oricom or Oricom’s authorised service provider. Oricom will not be liable for any damages caused by the product or the failure of the product to perform, including any lost profits or savings or special, incidental or consequential damages. Oricom is not liable for any claim made by a third party or made by you on behalf of a third party.
- Page 32 Phone: 1300 889 785 (Monday to Friday 8am to 6pm AEST) Web: www.oricom.com.au Fax: (02) 4574 8898 Contact details for Oricom support and warranty claims in New Zealand Email: support@oricom.co.nz Phone: 0800 674 266 (Monday to Friday 10am to 8pm NZST) Web: www.oricom.co.nz...
Need help?
Do you have a question about the PMR1250 80 and is the answer not in the manual?
Questions and answers