Table of Contents
Advertisement
Quick Links
Advertisement
Table of Contents

Related Manuals for IPitomy IP290


Summary of Contents for IPitomy IP290
- Page 1 IP290 VoIP Phone User Manual IPitomy Communications, LLC...
-
Page 2: Table Of Contents
INDEX 1. Getting Started ..........................4 About ............................4 Feature Highlights ........................4 2. Set up the Phone .......................... 4 3. Phone User Interface ........................6 3.1 Hardware Component Instructions ..................6 3.2 Phone Screen Display Features ................... 7 3.3 Basic Network Settings ....................... 9 3.4 SIP Account Settings ...................... - Page 3 5 SIP Account ........................... 28 5.1 Basic ............................28 5.2 Call ............................. 29 5.3 Security ..........................30 6 Phone Setting ..........................31 6.1 Basic ........................... 31 6.1.1 Time Settings ......................32 6.1.2 Call .......................... 33 6.1.3 VoIP Call Forward ....................34 6.1.4 QoS ..........................
-
Page 4: Getting Started
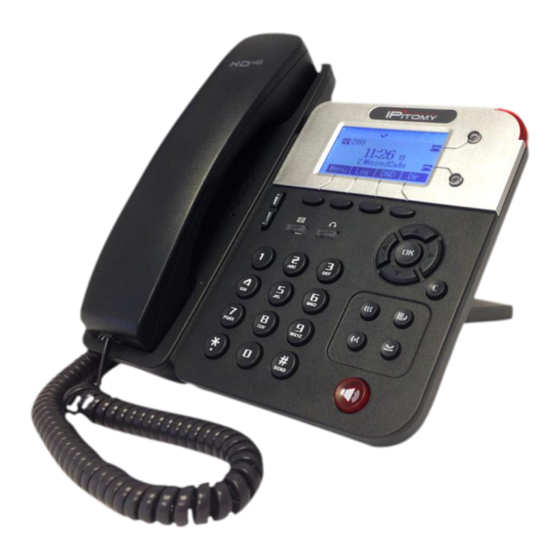
The IP290 has a 132x64 pixel graphic LCD, a large resolution display, and an elegant and intuitive user interface. IP290 delivers HD audio quality with HD handset, HD speaker and HD codec (G.722. and meets the demands of SMEs, Home Office and ISP applications. - Page 5 AC power adapter POE(Power over Ethernet) IEEE802.3af NOTES: Please make sure your phone support POE feature. You can check the label on the back of the phone, for example "Model: IP290 Rev:2.1.0", the P means it supports POE feature. www.ipitomy.com IPitomy Communications...
-
Page 6: Phone User Interface
Note: If POE works, the phone doesn't need to connect to the AC power adapter. Make sure the Ethernet cable and switch/hub is POE compliant. 3. Phone User Interface 3.1 Hardware Component Instructions The main hardware components of the IP290 IP Phone are the LCD screen and the keypad. www.ipitomy.com IPitomy Communications... -
Page 7: Phone Screen Display Features
Hardware component instructions of the IP290 IP Phone are: ITEM DESCRIPTION LCD Screen Displays information about calls, messages, soft keys, time, date and other relevant data: • Call information — caller ID, call duration • Icons (e.g. • Missed calls or second incoming caller's information •Time and date... - Page 8 Screen Top Icon The Screen Top Icon from left to right : Handset Hand on status :Speaker Hand on status :Headset Hand on status :Call MUTE :Missed Call :Call Forward :Text Message :Keypad Lock :Network is unavailable www.ipitomy.com IPitomy Communications...
-
Page 9: Basic Network Settings
Empty)> Network> LAN Port Press LAN Port to login in to the menu Select "PPPoE" mode Press "Enter" key Set the User Name\Password\web port\telnet port Press "Save" key to make it work Tips "Network is changed, press OK reboot " www.ipitomy.com IPitomy Communications... -
Page 10: Sip Account Settings
3.4 SIP Account Settings The IP290 IP phone makes calls based on SIP accounts, It can support single account or multi- accounts. Each account can be configured to the different SIP server. If you want to… Then... --1) Select “System setting” > “Advanced setting”;... -
Page 11: Basic Features
Enable Anonymous Call Press OK or MENU> Function Setting> Anonymous --Press Enter or OK button , -You can select which account want to use, enable/disable this feature and enable/disable reject anonymous www.ipitomy.com IPitomy Communications... -
Page 12: Redial
"Personal Phone Book", “Enterprise Phone Book”, “LDAP” and “Black List”, - or press Navigation button (in Standby interface) > select the desired contact. --2) Then press utton. NOTE: You also can press the "DIR" to login this menu when in the Idle state. www.ipitomy.com IPitomy Communications... -
Page 13: Multi-Lines To Answer The Call
To end a call, hang up. Here are some more details. Hang up while using the --Return the handset to its cradle, Handset -or press End Hang up while using the --Press Speaker button that is Red www.ipitomy.com IPitomy Communications... -
Page 14: Using Hold And Recover (Switch Calling Line)
3.5.10 Transferring Calls Transfer redirects a connected call. The target is the number to which you want to transfer the call. --1) Press TRANSFER button or press XFER; Talk to the transfer recipient before --2) Enter number; www.ipitomy.com IPitomy Communications... -
Page 15: Using Mute
Enable DND on a Press MENU or OK button > “Function setting” > “DND” > (select line) single line “Enable” Disable DND - -Global DND enabled, press disable global DND; --Line DND enabled, press twice www.ipitomy.com IPitomy Communications... -
Page 16: 3-Way Conference
- --1 ) Press the Voice Mail button (There has Voice Mail Voice Mail without is --2)Enter the User Password ---3)It will login into the voice mail server. You need to follow the IVR to do it. www.ipitomy.com IPitomy Communications... -
Page 17: Advanced Settings
-or press "OK" button > “Phone book”>“Personal phone book>View All”; --2) Select “Add contact”, press "OK" button; --3) Use the navigation keys to select content, press "OK" button to set and modify: -Name: set the name of contact, www.ipitomy.com IPitomy Communications... - Page 18 --3) Select the group you want to modify, press the "OK" button set and modify, press "Save" to save the change Delete group --1) Press "DIR" soft key, -or press "MENU" button > “Phone book”>“Personal phone book>View All”, -or press "OK" button > “Phone book”>“Personal phone book>View www.ipitomy.com IPitomy Communications...
-
Page 19: Black List
--3) Press "Add" and input the name\office number\mobile number\other number\SIP account who what you want to add into the Black List. View the Contact --1) Press "DIR" in the idle, from Black List -or press "MENU" or "OK" button > “Phone book”>“Black List”, www.ipitomy.com IPitomy Communications... -
Page 20: Using Call Logs
The IP Phone has two ways to configure it, one is setting in the phone MENU, another through the web interface. Here just description in MENU. NOTES: When you want to input the IP address like ".", it was replaced by the "*". www.ipitomy.com IPitomy Communications... -
Page 21: Language Setting
--3) After you finish select, press Save to make it work. 3.7.2 Message The IP290 has a vm message feature. It will display in the LCD when it has a New Message. --1)Press OK or MENU button; Create a Message --2)Select "Messaging"... -
Page 22: Ring Tone And Volume Setting
“Function Setting”, you can select " T9 > search" --2) Then press Enable/Disable and Save. --3) When you back to idle, you can use the digital keypad to search the contact. NOTES: The Search Phone Book setting default is Accurate Search. www.ipitomy.com IPitomy Communications... -
Page 23: Cannot Set The Features With Keypad
HTTP://192.168.0.10 or 192.168.0.10) in the address bar of web browser on your PC. The default user name is root (case-sensitive) and the password is root (case-sensitive). Main Interface-Phone Status Here you can see below information: System Run Time, Register Status, Network Status, System Information, etc. www.ipitomy.com IPitomy Communications... -
Page 24: Net Work
Hardware ID, Kernel Version, Auto-Provision Server URL, TFTP Server IP. 4.1 Net Work 4.1.1 LAN Port Basic ITEM DESCRIPTION Network Connection Mode Network Connection Mode has DHCP, Static IP, PPPoE. DNS Settings Select the DNS mode that you want. www.ipitomy.com IPitomy Communications... - Page 25 The default Telnet port is 23,if you want to change it(for example change it to 2003). You must input IP and Telnet port to login the manage page (for example telnet 192.168.0.200:2003).It will take effect on next reboot. www.ipitomy.com IPitomy Communications...
-
Page 26: Pc Port
Router feature is for the phone PC Port. You must input IP address (it’s equivalent to a gateway) and Net mask. If you want to use DHCP function, please turn it on, input start IP and end IP. www.ipitomy.com IPitomy Communications... -
Page 27: Advanced
VLAN Setting When using VLAN Setting option, you can set several parameters as follows: VLAN Setting Enable VLAN You can enable/disable VLAN for phone and The VLAN ID you want the phone or pc to join [LAN/PC Port] www.ipitomy.com IPitomy Communications... -
Page 28: Sip Account
You can choose VOIP/PSTN, this model does not support PSTN. Please contact us to buy another model that supports PSTN. Amount Of Line The line key of account used, default is 2 Account Used Display Name I Shows Caller ID when making a phone call www.ipitomy.com IPitomy Communications... -
Page 29: Call
Share with the line. BLA Number BLA Number Subscribe Period Subscribe expire time. Register Expire Time IP phone automatically registered every time SIP Transport There are UDP/TCP/TLS three options Ring Type Select this account ringing type. 5.2 Call www.ipitomy.com IPitomy Communications... -
Page 30: Security
UDP Keep-alive Interval Default is 30 second. 5.3 Security ITEM DECSRIPTION Security SIP Encryption Enable/Disable SIP encryption. RTP Encryption Enable/Disable RTP encryption. Encryption Algorithm The encryption algorithm at this time we only have RC4. Encryption Key The key with encryption. www.ipitomy.com IPitomy Communications... -
Page 31: Phone Setting
Call List Save You can choose to save the call list into the phone or not. Network Packet When select on, then you can capture the phone’s packet use notebook Mirroring which connect to pc port of the phone www.ipitomy.com IPitomy Communications... -
Page 32: Time Settings
You can use 24 hour time format or 12 hour time format Date Format You can choose the appropriate time format. Time Zone-GMT You can select different time zone for the phone Manual Setting Setting time manually. www.ipitomy.com IPitomy Communications... -
Page 33: Call
Open this feature, the phone light(Message) will be bright when it get message. Play Voice Mail Tone Open this feature, it will be ringing when it get message. Miss Call Display Turn on or off the display with Miss call in the phone LCD. www.ipitomy.com IPitomy Communications... -
Page 34: Voip Call Forward
Always Always transfer the call to others. If Busy If phone is busy working, the call will transfer to others. If No Answer I f the phone has no answer, the call will be transfer to others. www.ipitomy.com IPitomy Communications... - Page 35 Ring Frequency The ring frequency with the VOIP Call Forward. www.ipitomy.com IPitomy Communications...
-
Page 36: Qos
Ring Volume The ring volume default is Lv3, the range is 0~9. Handset Volume The handset volume default is Lv5, the range is 1~9. Speaker Phone Volume The speaker volume default is Lv5, the range is 1~9. www.ipitomy.com IPitomy Communications... - Page 37 Please upload a ring tone with G711A audio coding, Maximum 10 rings and the total sizes must less than 150k. Audio Codec Use the navigation keys to highlight the desired one in the Enabled/Disable Codes list, and press the o move to the other list. Jitter Buffer www.ipitomy.com IPitomy Communications...
-
Page 38: Line Keys
You can use multicast paging to quickly and easily forward time sensitive announcements out to people within the multicast group. Call Park You can use call park feature to place a call on hold, and then retrieve the call www.ipitomy.com IPitomy Communications... -
Page 39: Function Keys
Soft Keys: Soft key is the key with below display in the LCD. You can change it for your needs to the other features for many types of status. Per example, when are you dialing with someone, the LCD display soft key is Send \Del \Empty\End, Empty means nothing in it. www.ipitomy.com IPitomy Communications... -
Page 40: Dial Plan
Enable this feature will limit the dial length. Default is 25. No Dial Timeout Setting the range with no dial timeout, default is 5. Dial Rule Select the Add Rule button to add dial rule, see below. www.ipitomy.com IPitomy Communications... -
Page 41: Ip Strategy
7 Phone Book The phone book including Group, Contact, LDAP and Ban list, please review the following for more details: 7.1 Group You can add, edit and delete group in a phone book on this web page. www.ipitomy.com IPitomy Communications... -
Page 42: Contact
Contacts, you should click ’Delete All Contact’. You can edit or move this contact to Ban List after you select You can download and save this contact to PC after you select www.ipitomy.com IPitomy Communications... -
Page 43: Ldap
7.3 LDAP e.g. LDAP Name Filter:(sn=%s) LDAP Number Filter:(telephoneNumber=%s) Server Address:192.168.0.65 User name: Your user name Password: Your password LDAP Name Attributes 1:sn LDAP Name Attributes 2:cn LDAP Number Attributes 1: telephoneNumber 7.4 Ban List www.ipitomy.com IPitomy Communications... -
Page 44: Phone Maintenance
You can edit or move this contact to Contact after you select 8 Phone Maintenance 8.1 Basic NOTES: Don't unplug network cable or power when performing firmware upgrades! 8.1.1 HTTP Upgrade You can upgrade the software, kernel and configuration etc. files by HTTP. www.ipitomy.com IPitomy Communications... -
Page 45: Ftp Upgrade
Used for the administrator to find out or making sure the problem with this equipment. All Config File All Config File includes: Configuration, Extern, Log, XML Phone book, Enterprise Phone Book. 8.1.2 FTP Upgrade You can upgrade the software, kernel and configure files by FTP. www.ipitomy.com IPitomy Communications... -
Page 46: Tftp Upgrade
Used for updating/backup the expansion of the phone [NOTES: The mode doesn't support this feature] NOTES: It's not necessary to input filename when doing backup Configuration, Phone Book, EXT Module. 8.1.3 TFTP Upgrade You can upgrade the software, kernel and configure files by TFTP. www.ipitomy.com IPitomy Communications... -
Page 47: Default Setting
You can load the phone to the factory default setting in default setting option. Press the ‘Reset to Factory Setting’ option, the phone will load to factory default setting on next reboot. 8.1.5 Reboot You can use reboot option to reboot the phone. www.ipitomy.com IPitomy Communications... -
Page 48: Advanced
Level, you need to setup on this interface. 8.2.2 Auto Provision When you open the auto provision feature, the phone will do auto provision after it detects a different software or kernel (Higher or Lower) which are on the TFTP,HTTP,HTTPS,FTP, server. www.ipitomy.com IPitomy Communications... - Page 49 Enable/Disable the booting checking feature. booting checking Auto Provision Frequency Used for setting the time interval for auto provision Auto Provision Time Used for the specific time for auto provision Auto Provision Next Time Reset the Auto Provision Next Upgrading time. www.ipitomy.com IPitomy Communications...
-
Page 50: Password
10.1 WEB User In the upper right corner of the website page, you can select the user or logout. 10.2 Multi-Language In the upper right corner of the website page, you can select the language in the below list. www.ipitomy.com IPitomy Communications... -
Page 51: Note Tips
10.3 Note Tips In the middle of the web-interface page, there is are user tips in every function page. www.ipitomy.com IPitomy Communications...
Need help?
Do you have a question about the IP290 and is the answer not in the manual?
Questions and answers