Table of Contents
Advertisement
Quick Links
Download this manual
See also:
Instruction Manual
Advertisement
Table of Contents

Subscribe to Our Youtube Channel
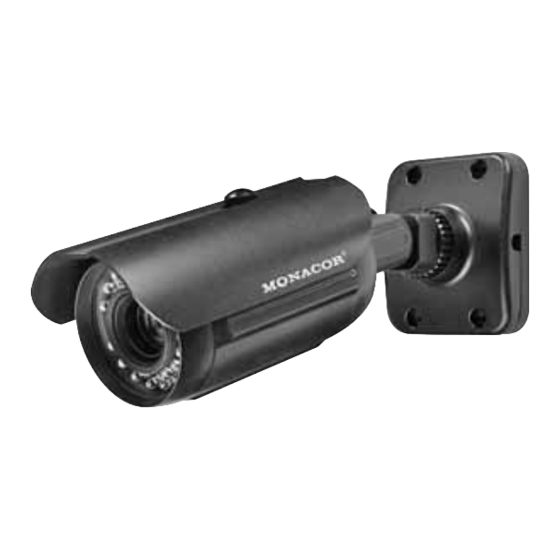
Summary of Contents for Monacor TVCCD-187HCOL
- Page 1 12x AF Zoom ICR Day/Night IR Bullet Camera Instruction Guide 12x AF Zoom ICR Day/Night IR Bullet Camera Printed in KOREA CTAB-120IR_1200...
- Page 2 The lightning flash with an arrowhead symbol, within an equilateral triangle is intended to alert the user to the presence of uninsulated dangerous voltage within the product's enclosure that may be of sufficient magnitude to constitute a risk of electric shock to persons. The exclamation point within an equilateral triangle is intended to alert the user to the presence of important operating and maintenance (servicing) instructions in the literature accompanying the appliance.
-
Page 3: Table Of Contents
■ Contents Features How to Use the Camera ■ Using OSD icons Warnings and Precautions ■ Main Menu Components ㆍ CAMERA SET ㆍ INTELLIGENCE Names and Functions of Parts ㆍ PRIVACY ZONE ■ SUN SHIELD ㆍ PRESET ■ LENS ㆍ OTHER SET ■... -
Page 4: Features
■ Features Warning ■ The camera requires periodic inspection. A/F 12x Optical Zoom CCVC (Camera Control via Contact an authorised technician to carry out the inspection. Coaxial cable) The built-in optical zoom lens is ahighly This is a remote control function that overlaps durable component. - Page 5 ■ Precautions Do not drop the camera and protect Never keep the camera pointed Do not install the camera in Do not install or use the camera in an it from physical shocks. directly at strong light. extreme temperature conditions. environment where the humidity is high.
-
Page 6: Components
■ Components Names and Functions of Parts ■ ① 1. DAY & NIGHT IR BULLET CAMERA ② 2. SCREWS ③ 2. ALLEN HEAD BOLT ⑥ 3. WRENCH ⑤ ④ 4. INSTRUCTION GUIDE ① SUN SHIELD ② LENS : 12X AF Optical Lens. ③... -
Page 7: Dimensions
■ Names and Functions of Parts Names and Functions of Parts ■ ⑥ Jog Shuttle Switch Service connector for easy installation of the camera. - A service monitor can be connected to the camera, allowing the operator to easily adjust camera angles and settings locally during installation. Dimensions ■... -
Page 8: Installation
■ Installation ■ Installation 1. Bracket & Camera Mounting - Affix the bracket to the mounting surface. - Use the supplied screws to attach to the mounting surface using the Flange adaptor pre-drilled holes in the bracket. Sun Shield Sun Shield Bolt 2. -
Page 9: How To Operate The Bracket
How to Use the Camera ■ ■ How to Operate the Bracket ■ Using OSD icons ㆍ◀ ▶ : If these icons appear in the left and right corner of a menu item, you can use them move to the previous or next menu. (EXIT) : Exits the menu setup screen. -
Page 10: ㆍ Camera Set
■ How to Use the Camera CAMERA SET ㆍALC : Adjust the open and close ▣ ALC ▣ of the iris. LEVEL [ 00]----l---- You can configure the general settings of the camera module. - LEVEL : Select an overall brightness BACKLIGHT level. - Page 11 ■ How to Use the Camera ● MOTION ● DIS (Digital Image Stabilization) You can specify a level of AGC for controlling the camera motion. If you set it to <ON> for a camera that is trembled or vibrated from an ambient This is available only of the SENS-UP menu is set to AUTO.
- Page 12 ■ How to Use the Camera - DAY→NIGHT DWELL TIME : ▣ MASK AREA ▣ ATW1 : 2500K ~ 9300K (※1) Time required to determine the 10000K Blue sky ATW2 : 2000K ~ 10000K <SIZE> filter switch. 9000K Rainy (suitable to sodium light source) (※2) <LOCATION>...
- Page 13 ■ How to Use the Camera 3. According to the specified recording mode, select a <WHITE BAL> mode with necessary options. • While you are working on the following objects, <AF> may not work ㆍATW1,2 : The camera can automatically adjust the color temperature properly.
- Page 14 ■ How to Use the Camera ● REVERSE ▲ You can reverse the video signal from REVERSE • If you set it to <DETECTION>, the <FIXED/MOVED> option of left to right, upside down, or vice versa POSI/NEGA ADVANCED menu will not be available. to your convenience.
-
Page 15: ㆍ Privacy Zone
■ How to Use the Camera ● SENSITIVITY 5. Using ▲▼◀▶ buttons to set the area of the privacy zone in order Sets the sensitivity of motion sensor. (Upper left→ Upper right→ lower right →lower left). Finally you may press ENTER to exit. While locating the point, please do not change ●... -
Page 16: ㆍ Other Set
■ How to Use the Camera 2. Select the preset number. ● FACTORY DEFAULTS ◀ PRESET ▶ When selected, the <FACTORY DE FAULTS> screen appears and you can ▣ FACTORY DEFAULTS ▣ reset all settings to the factory default settings by selecting the <OK>. CANCEL However, the protocol, baud rate, address and the language settings will... -
Page 17: ㆍ System Info
Troubleshooting ■ ■ How to Use the Camera If you have trouble operating your camera, refer to the following table. If the guidelines do not enable you to solve the problem, contact an SYSTEM INFO authorized technician. You can check the system information. Problem Solution 1. -
Page 18: Specifications
■ Troubleshooting Specifications ■ ITEM NTSC Problem Solution Power Supply AC24V / DC12V Dual Power Power Consumption MAX. 640mA (AC24V) / MAX. 800mA (DC12V) The screen flickers • Check that the camera is not facing toward the Effective Pixels 768(H) x 494(V) 752(H) x 582(V) continually.


Need help?
Do you have a question about the TVCCD-187HCOL and is the answer not in the manual?
Questions and answers