Table of Contents
Advertisement
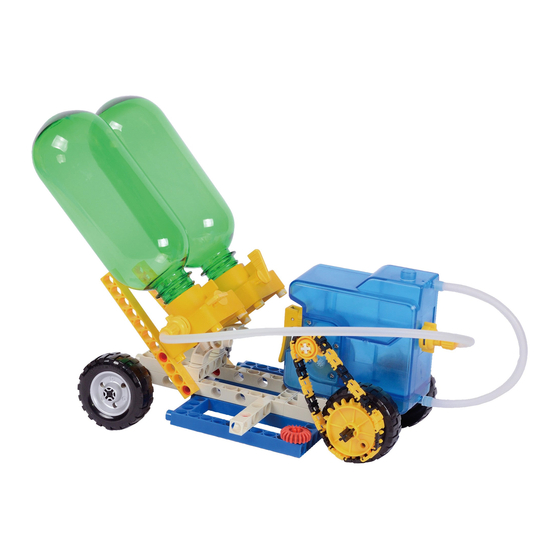
Quick Links
Advertisement
Table of Contents

Subscribe to Our Youtube Channel
Related Manuals for Thames & Kosmos Air Plus Water Power Plus


Summary of Contents for Thames & Kosmos Air Plus Water Power Plus
- Page 1 E X PE R I M E NT M A N UA L...
- Page 2 Air+Water Power PLUS | SAFETY INFORMATION WARNING NOTICE NOTE! Not suitable for children under 8 years of age. Use under adult supervision. There is risk of choking due to small parts that may be swallowed or inhaled. There is risk of strangulation if long hoses are wrapped around the neck. Save the packaging and instructions, which contain important information.
-
Page 3: Table Of Contents
Contents | Air+Water Power PLUS Your kit’s contents ........................... 4 A little bit of theory ......................... 6 Tips for model and hose assembly ................... 8 Jet nozzle models (no. 1 – 19) for land and water (without water recycling) ..10 Models (no. -
Page 4: Your Kit's Contents
Air+Water Power PLUS | Your kit’s contents Description Count Art. No. Description Count Art. No. LARGE PUMP 712970 MEDIUM GEAR WHEEL 710061 PLUG 712978 LARGE GEAR WHEEL 711100 FASTENER 712979 SHAFT PLUG 702525 THREADED CONNECTOR SHAFT PIN 710138 702526 HOSE (30 CM) 712977 ROD CONNECTOR 710119... - Page 5 Your kit’s contents | Air+Water Power PLUS 24 25...
- Page 6 Air+Water Power PLUS | A little bit of theory HOW DO JET NOZZLE MODELS WORK Pump When you operate the pump, you push air into the pressure tank, which you already half-filled with water. Then you switch hoses and mount the pressure tank on your model.
-
Page 7: A Little Bit Of Theory
A little bit of theory | Air+Water Power PLUS WHAT LAWS OF PHYSICS ARE INVOLVED? Your models are powered with two extremely environmentally friendly substances: and water. When machines are powered by air or compressed air, we can also say that they work pneumatically. This word comes from a Greek word meaning “wind”... -
Page 8: Tips For Model And Hose Assembly
Air+Water Power PLUS | Tips for model and hose assembly ASSEMBLING THE RODS AND FRAMES Use the anchor pins to connect rods and frames (Fig. 1). Some components can also be connected without anchor pins (Fig. 2). Use end A of the part separator tool to release A AA the anchor pin from a hole (Fig. - Page 9 Assembling the hoses | Air+Water Power PLUS Do the same thing with the large threaded Let both components slide down to the plug. Push the fastener over the plug and take the connector. part separator tool in your hand. Slide end B of the part separator tool over the Now, tighten the threaded connector (in a This is how the end of the hose should look flattened part of the plug.
- Page 10 Air+Water Power PLUS | Jet nozzle models (no. 1 – 19) for land and water WITH ONE PRESSURE TANK Water Find the following items in the box: pump, Fill the pressure tank halfway with water. Hold the pressure tank upright so you can pressure tank, base, hose with fastener and check the water level.
- Page 11 | Air+Water Power PLUS Jet nozzle models (no. 1 – 19) for land and water MODEL Get the hose with fastener and nozzle. Mount the pressure tank on the model (here, Turn on the switch and the model zooms away! Connect the end with the fastener to the Model 1).
- Page 12 Air+Water Power PLUS | Models (No. 20 – 30) with air+water motor WITH ONE PRESSURE TANK Find the following items in the box: pump, Screw the pressure tank into the base. Do not Be sure that the switch is flipped down. hose with 2 fasteners, air+water motor, base, put any water into the pressure tank! funnel, pressure tank.
- Page 13 | Air+Water Power PLUS Models (No. 20 – 30) with air+water motor As soon as all of the water has flowed down, Attach the free end of the hose to the motor Turn on the switch and the model zooms flip the lever back down again.
-
Page 14: Experiments
Air+Water Power PLUS | Experiments Note the safety information on page 2! RACE Model 8: You will find material for two boats in Build two models and the kit. Set both boats in the water and race against your off you go! friends! Whose boat goes farther? Model 1:... - Page 15 Experiments | Air+Water Power PLUS Note the safety information on page 2! HOW MUCH YOU PUMP How far will your car or boat go if WHAT CAN YOUR you pump only half the number of CAR HANDLE? times? Try driving your models on different surfaces (grass, smooth ground, gravel…).
-
Page 16: Model 1 Race Car
Air+Water Power PLUS | MODEL 1 Race car Required Parts Assemble two cars and hold a race with your friends! You will find instructions for charging the pressure tank on page 10. -
Page 17: Model 2 Limousine
MODEL 1 Race car | Air+Water Power PLUS Completed Assembly notes The model will run best if you leave a gap 1 mm wide between the axle lock and the frame. Fill the pressure tank halfway with water and pump 20 times. Open the switch and the model zooms off! MODEL 2 Limousine... - Page 18 Air+Water Power PLUS | MODEL 2 Limousine You will find instructions for charging the pressure tank on page 10. Completed Assembly notes The model will run best if you leave a gap 1 mm wide between the axle lock and the frame. Fill the pressure tank halfway with water and pump 20 times.
- Page 19 MODEL 3 Sports car | Air+Water Power PLUS 模型 3 Which car goes faster? The sports car or the limousine (Model 2)? Required Parts You will find instructions for charging the pressure tank on page 10.
-
Page 20: Model 3 Sports Car
Air+Water Power PLUS | MODEL 3 Sports car Completed Assembly notes The model will run best if you leave a gap 1 mm wide between the axle lock and the frame. Fill the pressure tank halfway with water and pump 20 times. Open the switch and the model zooms off! Air+Water Power PLUS |... - Page 21 MODEL 4 Rocket car | Air+Water Power PLUS You will find instructions for charging the pressure tank on page 10. Completed Assembly notes The model will run best if you leave a gap 1 mm wide between the wheel and the frame. Fill the pressure tank halfway with water and pump 20 times.
- Page 22 Air+Water Power PLUS | MODEL 5 Airplane 模型 5 Required Parts...
-
Page 23: Model 5 Airplane
MODEL 5 Airplane | Air+Water Power PLUS Completed You will find instructions for charging the pressure tanks on page 11. front Assembly notes rear The model will run best if you leave a gap 1 mm wide between the axle lock and the frame. It moves! First open the front switch, and then the rear one when you’re... - Page 24 Air+Water Power PLUS | MODEL 6 Tanker truck You will find instructions for charging the pressure tanks on page 11. Completed front Assembly notes rear The model will run best if you leave a gap 1 mm wide between the axle lock and the frame. It moves! First open the front switch, and then the rear one when you’re...
- Page 25 MODEL 7 Pickup truck | Air+Water Power PLUS 模型 7 Required Parts You will find instructions for charging the pressure tank on page 10.
-
Page 26: Model 7 Pickup Truck
Air+Water Power PLUS | MODEL 7 Pickup truck Completed Assembly notes The model will run best if you leave a gap 1 mm wide between the axle lock and the frame. It moves! To start, open both switches at the same time! Air+Water Power PLUS | MODEL 8 Boat 模型... -
Page 27: Model 9 Speed Boat
MODEL 8 Boat | Air+Water Power PLUS Assembly notes Completed Fill the pressure tank halfway with water and pump 20 times. Open the switch and the model takes off! MODEL 9 Speed boat | Air+Water Power PLUS 模型 9 Required Parts You will find instructions for charging the... -
Page 28: Model 10 Hydroplane
Air+Water Power PLUS | MODEL 10 Hydroplane 模型 10 Required Parts You will find instructions for charging the pressure tank on page 10. Completed Assembly notes Fill the pressure tank halfway with water and pump 20 times. Open the switch and the model starts! - Page 29 MODEL 11 Flying fish | Air+Water Power PLUS 模型 11 Required Parts You will find instructions for charging the pressure tank on page 10.
-
Page 30: Model 11 Flying Fish
Air+Water Power PLUS | MODEL 11 Flying fish Completed Assembly notes Fill the pressure tank halfway with water and pump 20 times. Open the switch and the model takes off! Air+Water Power PLUS | MODEL 12 Aircraft carrier 模型 12 Required Parts... - Page 31 MODEL 12 Aircraft carrier | Air+Water Power PLUS You will find instructions for charging the pressure tanks on page 11. Completed Assembly notes Fill the pressure tank halfway with water and pump 20 times. First open the left switch (viewed in the direction of travel), and then open the right one when you are ready to start..
-
Page 32: Model 13 Submarine
Air+Water Power PLUS | MODEL 13 Submarine You will find instructions for charging the pressure tanks on page 11. Completed Assembly notes Fill the pressure tank halfway with water and pump 20 times. First open the right switch (viewed in the direction of travel), and then open the left one when you are ready to start. -
Page 33: Model 14 Underwater Ship
MODEL 14 Underwater ship | Air+Water Power PLUS Required Parts You will find instructions for charging the pressure tanks on page 11. -
Page 34: Model 15 Water Gun
Air+Water Power PLUS | MODEL 14 Underwater ship Completed Assembly notes Fill the pressure tank halfway with water and pump 20 times. The 2 thrust nozzles are project- ing out here. To start, open both switches at the same time! Air+Water Power PLUS | MODEL 15 Water gun Required Parts... - Page 35 MODEL 15 Water gun | Air+Water Power PLUS You will find instructions for charging the pressure tank on page 10. Completed Assembly notes Fill the pressure tank halfway with water and pump 20 times. Open the switch and the model zooms off!
- Page 36 Air+Water Power PLUS | MODEL 16 Power water gun 模型 16 Required Parts...
-
Page 37: Model 16 Power Water Gun
MODEL 16 Power water gun | Air+Water Power PLUS You will find instructions for charging the pressure tanks on Completed page 11. front back Assembly notes Fill the pressure tank halfway with water and pump 20 times. First open the front switch, and then the rear one when you’re ready to go. - Page 38 Air+Water Power PLUS | MODEL 17 Cross water gun You will find instructions for charging the pressure tanks on page 11. Completed Assembly notes Fill the pressure tank halfway with water and pump 20 times. The 2 thrust nozzles are projecting out here.
- Page 39 MODEL 18 Double water gun | Air+Water Power PLUS 模型 18 Required Parts...
-
Page 40: Model 18 Double Water Gun
Air+Water Power PLUS | MODEL 18 Double water gun You will find instructions for charging the pressure tanks on page 11. Completed Assembly notes Fill the pressure tank halfway with water and pump 20 times. The 2 thrust nozzles are projecting out here. - Page 41 MODEL 19 Water wheel | Air+Water Power PLUS Required Parts...
-
Page 42: Model 19 Water Wheel
Air+Water Power PLUS | MODEL 19 Water wheel You will find instructions for charging the pressure tanks on page 11. Note: The pressure tanks are not connected to each other. Completed Assembly notes Make sure that the red and blue gear wheels interlock properly. - Page 43 MODEL 20 Tractor | Air+Water Power PLUS 模型 20 Required Parts x16 x15 You will find instructions for getting the pressure tank and motor ready for action on page 12.
-
Page 44: Model 20 Tractor
Air+Water Power PLUS | MODEL 20 Tractor Completed Assembly notes The model will run best if you leave a gap 1 mm wide between the axle lock and the frame. Connect the pressure tank to the pump and pump 25 times. Open the switch and the model zooms off! -
Page 45: Model 21 Traction Engine
MODEL 21 Traction engine | Air+Water Power PLUS 模型 21 Required Parts x1 x4 x15 x16 x1 x14... - Page 46 Air+Water Power PLUS | MODEL 21 Traction engine You will find instructions for getting the pressure tank and motor ready for action on page 12. Completed Assembly notes The model will run best if you leave a gap 1 mm wide between the axle lock and the frame.
-
Page 47: Model 22 Big Rig
MODEL 22 Big rig | Air+Water Power PLUS 模型 22 Required Parts x15 x16... - Page 48 Air+Water Power PLUS | MODEL 22 Big rig You will find instructions for getting the pressure tank and motor ready for action on page 12. Completed Assembly notes The model will run best if you leave a gap 1 mm wide between the axle lock and the frame.
-
Page 49: Model 23 Minivan
MODEL 23 Minivan | Air+Water Power PLUS 模型 23 Required Parts x15 x16 You will find instructions for getting the pressure tanks and motor ready for action on page 13. Completed front rear Assembly notes The model will run best if you leave a gap 1 mm wide between the axle lock and the frame. - Page 50 Air+Water Power PLUS | MODEL 24 Bus 模型 24 Required Parts x1 x4 x16 x16 You will find instructions for getting the pressure tanks and motor ready for action on page 13.
-
Page 51: Model 24 Bus
MODEL 24 Bus | Air+Water Power PLUS Completed rear front Assembly notes The model will run best if you leave a gap 1 mm wide between the axle lock and the frame. It moves! First open the rear switch, and then the front one when you’re ready to... - Page 52 Air+Water Power PLUS | MODEL 25 Cabriolet 模型 25 Required Parts x1 x2 x18 x17 x2 x2...
-
Page 53: Model 25 Cabriolet
MODEL 25 Cabriolet | Air+Water Power PLUS You will find instruc- tions for getting the pressure tanks and motor ready for action on page 13. Completed Assembly notes The model will run best if you leave a gap 1 mm wide between the axle lock and the frame. - Page 54 Air+Water Power PLUS | MODEL 26 Ferris wheel 模型 26 Required Parts x24 x23...
-
Page 55: Model 26 Ferris Wheel
MODEL 26 Ferris wheel | Air+Water Power PLUS You will find instructions for getting the pressure tank and motor ready for action on page 12. Completed Assembly notes Make sure that the yellow and red gear wheels interlock properly. The model will run best if you leave a gap 1 mm wide between the gear wheels and the frame. - Page 56 Air+Water Power PLUS | MODEL 27 Hammer mill 模型 27 Required Parts x1 x2 x20 x20...
-
Page 57: Model 27 Hammer Mill
MODEL 27 Hammer mill | Air+Water Power PLUS You will find instructions for getting the pressure tank and motor ready for action on page 12. Completed Assembly notes Make sure that the shaft does not project beyond the gear wheel. The model will run best if you leave a gap 1 mm wide between the gear wheels and the frame. - Page 58 Air+Water Power PLUS | MODEL 28 Music box 模型 28 Required Parts x17 x16 x2 x2...
-
Page 59: Model 28 Music Box
MODEL 28 Music box | Air+Water Power PLUS You will find instructions for getting the pressure tank and motor ready for action on page 12. Completed Assembly notes Make sure that the yellow and red gear wheels interlock properly. Leave a gap of 1 mm between gear wheels and frame. - Page 60 Air+Water Power PLUS | MODEL 29 Robot 模型 29 Required Parts x17 x16 x2 x1...
-
Page 61: Model 29 Robot
MODEL 29 Robot | Air+Water Power PLUS You will find instructions for getting the pressure tank and motor ready for action on page 12. Completed Assembly notes Make sure that the shaft does not project beyond the blue gear wheel. Make sure that the sprocket wheels line up straight. - Page 62 Air+Water Power PLUS | MODEL 30 Radar station 模型 30 Required Parts x27x28 x2 x10...
-
Page 63: Model 30 Radar Station
MODEL 30 Radar station | Air+Water Power PLUS You will find instructions for getting the pressure tanks and motor ready for action on page 13. Completed right left Assembly notes The model will run best if you leave a gap 1 mm wide between the gear wheels and the frame. - Page 64 Kosmos Quality and Safety More than one hundred years of expertise in publishing science experiment kits stand behind every product that bears the Kosmos name. Kosmos experiment kits are designed by an experienced team of specialists and tested with the utmost care during development and production.
Need help?
Do you have a question about the Air Plus Water Power Plus and is the answer not in the manual?
Questions and answers