Advertisement
Table of Contents
- 1 Table of Contents
- 2 Important Safety Precautions
- 3 Fasteners Supplied
- 4 BBQ Assembly Instructions
- 5 Gas Bottle Safety Information
- 6 Lighting Instructions
- 7 Storage
- 8 Care, Cleaning and Maintenance
- 9 Cleaning the Stainless Steel
- 10 Troubleshooting
- 11 Grilling Hints
- 12 Using the Rotisserie
- 13 Warranty
- 14 Customer Service Contact Information
- Download this manual
Advertisement
Table of Contents

Related Manuals for Prime Grill 3R12

Summary of Contents for Prime Grill 3R12
- Page 1 Owner’s Instruction Manual Prime Grill Models 3R12 / 4L12 / 5L12 / 6L12 Prime Grill Build In Models 4LBI / 5LBI / 6LB1 Please retain this manual for future reference. www.bbqsandmore.co.nz made In cHIna...
-
Page 2: Table Of Contents
Table of Contents Important Safety Precautions Fasteners Supplied BBQ Assembly Instructions Gas Bottle Safety Information Lighting Instructions Storage Care, Cleaning and Maintenance Trouble Shooting Grilling Hints Using the Rotisserie Warranty Customer Service Contact Information www.bbqsandmore.co.nz... -
Page 3: Important Safety Precautions
Important Safety Precautions • Improper installation, adjustment alteration, • Keep the area surrounding the BBQ free from service or maintenance can cause property combustible materials, trash or combustible damage, injury or death. Please read the fluids and vapors such as petrol or charcoal installation, operation and maintenance lighter fluid. Do not obstruct the flow of instructions thoroughly before use. combustion and ventilation air. • For outdoor use only. • Never use the BBQ in windy conditions. If located in a consistently windy area (oceanfront, • Do not store or use gasoline or any other mountain top, etc.) a wind break will be required. - Page 4 Important Safety Precautions • Never use a dented or rusty LPG tank. Keep the ventilation openings of the gas cylinder enclosure free and clear from debris. • Use only dry, heat resistant BBQ mitts or gloves; moist or damp potholders on hot surfaces may cause burns from steam. Do not use a towel or bulky cloth in place of BBQ mitts or gloves. • Should the burners go out while in operation, turn all gas valves off. Open the lid and wait five minutes before attempting the relight, using the lighting instructions. • Spiders and other insects can nest in the burners of the grill and block the gas and airflow to the burner ports. This creates a dangerous condition that can result in a fire behind the valve panel.
-
Page 5: Fasteners Supplied
Fasteners Supplied www.bbqsandmore.co.nz... -
Page 6: Bbq Assembly Instructions
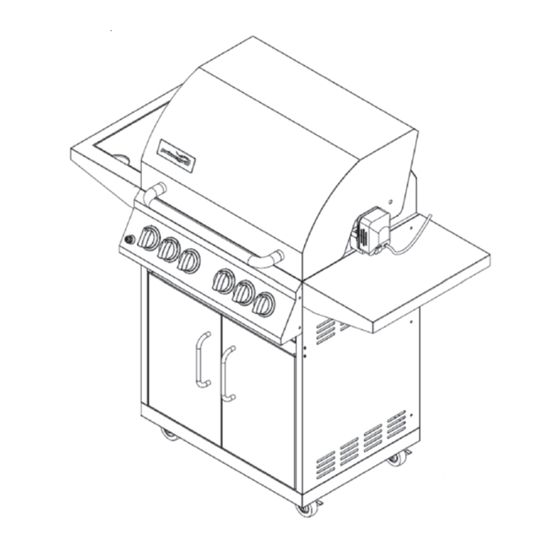
Assembling Your BBQ Cart aSSEMbLing YOur bbQ cart Caution: Although we take every effort to ensure that the assembly process is as easy as possible, Make sure your grill is assembled properly. Detailed assembly instructions are packed it is inherent with fabricated steel parts that with each grill model giving specific assembly corners and edged can cause cuts if improperly procedures for each model. Follow these handled during assembly procedures. - Page 7 Assembling Your BBQ Cart StEp 3 (3r1 /4L1 ) Using 2 screws/washers to fix the left cart panel. StEp 4 (3r1 /4L1 ) Using 2 screws/washers to fix the right cart panel. www.bbqsandmore.co.nz...
- Page 8 Assembling Your BBQ Cart StEp 5 (3r1 /4L1 ) Using 6 screws/washers to fix the rear cart panel. StEp 6 (3r1 /4L1 ) Fit front tie with 2 screws/washers. This tie is fitted to the inside. www.bbqsandmore.co.nz...
- Page 9 Assembling Your BBQ Cart StEp 7 (3r1 /4L1 ) Fix door handles with screws and plastic spacers StEp 8 (3r Fit the LH door by placing the bottom hinge pin in the hole in the base and with a small screwdriver depress the spring loaded top hinge pin and release when lined up iwth the hole in the front tie top.
- Page 10 Assembling Your BBQ Cart StEp 9 (3r1 /4L1 ) Fit RH door as in step 8 StEp 10 (3r10/4L10) Fit the firebox and hood assembly to the top of the cart. This is made easier by removing the grill and hotplate. Using 4 shoulder screws to both sides of the cart.
- Page 11 Assembling Your BBQ Cart StEp 11 Fit the hooks to the RH side tray using screws, nuts and washers StEp 12 Screw the RH tray onto the firebox by screwing 2 screws/washers from the inside of the firebox and 2 screws/washers from the outside. www.bbqsandmore.co.nz...
- Page 12 Assembling Your BBQ Cart StEp 13 (4L1 Mount the LH side tray with the burner using the same method as Step 12. Connect the side burner gas hose to threadded connection underneth the burner and tighten with wrench.Plug ignition cable into igniter . StEp 14 ( Fit side trays as previous step.
- Page 13 Assembling Your BBQ Cart StEp 15 Screw rotisserie motor mount using 2 screws/washers on the RH side of the firebox. www.bbqsandmore.co.nz...
- Page 14 Assembling Your BBQ Cart StEp Screw rotisserie motor mount using 2 screws on the RH side of the firebox. www.bbqsandmore.co.nz...
- Page 15 Assembling Your BBQ Cart StEp Mount warming rack hook using truss head screws and washer. www.bbqsandmore.co.nz...
-
Page 16: Gas Bottle Safety Information
Using Your BBQ LPG Safety Information 7. If you are unable to stop a leak, shut off the gas supply at the cylinder valve. Remove the You will need to purchase a 9kg LPG cylinder to cylinder from the BBQ. Call an authorized gas operate this gas BBQ which can be obtained from appliance service technician or LPG dealer. your nearest LPG dealer. Do not use the BBQ until the leak is corrected. When ready to use your gas BBQ insert the 8. Push in and turn any control knob to release regulator into the LPG cylinder and tighten firmly. -
Page 17: Storage
Dip the brush frequently to increase the amount Storage of your Prime Grill BBQ of steam. Steam is created as water contacts with the hot grill, assists in the cleaning process by Your Gas Bottle must be stored outdoors in a well softening food particles. The food particles will ventilated area and must be disconnected from fall into the drip tray. If the grill is allowed to cool... -
Page 18: Cleaning The Stainless Steel
Using Your BBQ If desired, when completely cool, remove the Use of steel wool is not recommended because grill racks for thorough cleaning. Use soap and if there is any metal residue left behind it will water for this cleaning. Specks of grease can promote oxidation. Removing spills immediately either gather on the surface of the stainless steel will make cleaning easier. -
Page 19: Troubleshooting
Using Your BBQ cautiOn: Do NOT use any chlorinated cleansers Use tongs instead of a fork to turn the meat. The (bleach of any kind) or ammonia to clean the tongs will not puncture the meat and let the juices stainless steel, as it will permanently discolor run out. stainless steel. To get the juiciest meats add salt after the cooking is finished and turn the meat only once (juices are Covering Your Stainless Steel BBQ lost when the meat is turned several times). Turn the meat just after the juices begin to bubble to When not in use and after cooling, cover your the surface. Prime Grill BBQ with the cover included. The Trim any excess fat from the meat before cooking. cover will help protect your cart from detrimental To prevent steaks or chops from curling during effects of weather and environmental pollutants. -
Page 20: Using The Rotisserie
Using the Rotisserie never use the grill burners (bottom burners) on during rotisserie cooking. it will burn your meat and make it very dry. use only one section at a time – grill or rotisserie. Preparation Preparation 4. Place prepared rod into rotisserie motor. Butcher string, scissors, broiler pan (tin foil OK), Lay across to other side in grove. -
Page 21: Warranty
Warranty Information Limited Warranty The Limited Warranty does not cover any failures BBQ’s & More hereby warrants to the ORIGINAL or operating difficulty due to accident, abuse, PURCHASER of this Prime Grill Gas BBQ, that it will misuse, alteration, misapplication, vandalism, be free from defects in material and workmanship improper installation improper maintenance or from the date of purchase as follows: service, or failure to perform normal and routine • All Enamelled Cast Iron Parts maintenance. Deterioration or damage due to... -
Page 22: Customer Service Contact Information
Customer Service Contact Information BBQ’s & More P.O. Box 47686, Ponsonby 1144 Auckland, New Zealand Showroom 616 Great South Road, Greenlane Auckland, New Zealand Telephone +649 579 6699 Facsimile +649 579 6694 Email sales@bbqsandmore.co.nz Website www.bbqsandmore.co.nz www.bbqsandmore.co.nz...
Need help?
Do you have a question about the 3R12 and is the answer not in the manual?
Questions and answers