Table of Contents
Advertisement
Advertisement
Table of Contents

Subscribe to Our Youtube Channel
Related Manuals for Acer XR342CK


Summary of Contents for Acer XR342CK
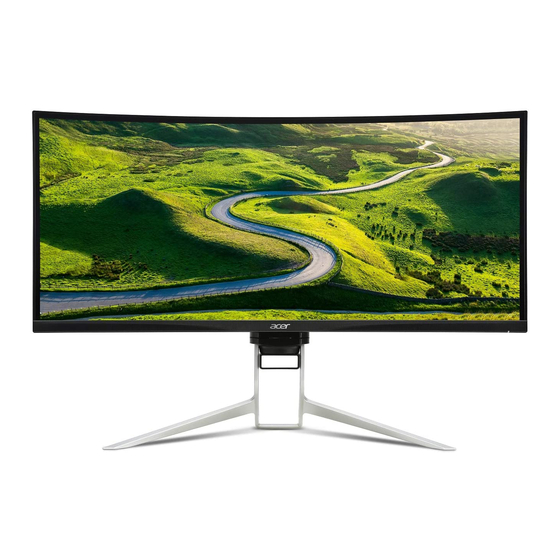
- Page 1 XR342CK...
-
Page 2: Package Contents
Acer LCD Monitor Quick Start Guide (QSG) Important safety instructions Please read the following instructions carefully. To clean the LCD monitor screen: • Turn off the LCD monitor and unplug the power cord. • Spray a non-solvent cleaning solution onto a rag and clean the screen gently. -
Page 3: External Controls
External controls Power button Turns the monitor on/off.Blue indicates power on. Amber indicates standby/ power saving mode. Function key Press to view Main page. Press again to enter hotkey1 function. When the Function Menu is active, press this key to view the basic information for your monitor and current input or reset the custom color settings to the factory defaults. -
Page 4: Adjusting The Osd Settings
Adjusting the OSD settings ‑‑‑‑‑‑‑‑‑‑‑‑‑‑‑‑‑‑‑‑‑‑‑‑‑‑‑‑‑‑‑‑‑‑‑‑‑‑‑‑‑‑‑‑‑‑‑‑‑‑‑‑‑‑‑‑‑‑‑‑‑‑‑‑‑‑‑‑‑‑‑‑‑‑‑‑‑‑‑‑‑‑‑‑‑‑‑‑‑‑‑‑‑‑‑‑‑‑‑‑‑‑‑‑‑‑‑‑‑ Note: The following content is for general reference only. Actual product specifications may vary. The OSD (onscreen display) can be used to adjust the settings of your LCD monitor. Press the MENU key to open the OSD. You can use the OSD to adjust the picture quality and general settings. For advanced settings, please refer to following page: Main page Hot Key1 (Modes, Brightness, Input, Volume,... -
Page 5: Selecting The Input
Selecting the input Open the Input control and select HDMI2.0, HDMI (MHL2.1) or DP In, Mini DP or Auto Source. When you are done, press the joystick to exit current page and store. Input Input HDMI2.0 Auto Source Off Move Enter The Function page Open the Function page to adjust the functions, settings which you want using the arrows. - Page 6 ‑‑‑‑‑‑‑‑‑‑‑‑‑‑‑‑‑‑‑‑‑‑‑‑‑‑‑‑‑‑‑‑‑‑‑‑‑‑‑‑‑‑‑‑‑‑‑‑‑‑‑‑‑‑‑‑‑‑‑‑‑‑‑‑‑‑‑‑‑‑‑‑‑‑‑‑‑‑‑‑‑‑‑‑‑‑‑‑‑‑‑‑‑‑‑‑‑‑‑‑‑‑‑‑‑‑‑‑‑ Note: Higher values allow more blue light through. For the best protection select a lower value. ACM: Turn ACM on or off. The default is off. Super Sharpness: Turn the Super Sharpness On or Off. Super Sharpness technology can simulate high-resolution images by boosting the pixel density of the original source to make images sharper and clearer.
- Page 7 Press the MENU key to open the OSD. Toggle the joystick to the up or down to select Audio from the OSD.Then toggle to the right to navigate to the element you wish to adjust and press the joystick to enter it. Toggle to the left or right to adjust the sliding scales.
- Page 8 System Game Mode - User Picture Input Color Auto Source Off Audio Daisy Chian Clone Gaming DP Format DP 1.2 Wide Mode Full System PIP/PBP Ambient Light Save setting to... Hot Key Assignment Move Enter Game Mode - User Picture DDC/CI Color HDMI Black Level...
- Page 9 Save Setting to…(User mode only) Game Mode - User Picture Game Mode Action Color Game Mode Racting Audio Game Mode Sport Gaming System Save setting to... Move Enter Press the MENU key to open the OSD. Toggle the joystick to the up or down to select "Save Setting to..." from the OSD.Then toggle to the right to navigate to the element you wish to adjust and press the joystick to enter it.
-
Page 10: Standard Timing Table
Standard timing table VESA MODE MODE Resolution 640x480 60Hz 640x480 75Hz SVGA 800x600 56Hz SVGA 800x600 60Hz SVGA 800x600 75Hz SVGA 832x624 75Hz 1024x768 60Hz 1024x768 75Hz 1152x870 75Hz 1280x960 60Hz 1280x720 60Hz SXGA 1280x1024 75Hz WXGA 1280x800 60Hz WXGA 1360x768 60Hz WXGA+... -
Page 11: Regulations And Safety Notices
Consult the dealer or an experienced radio/television technician for help. CE declaration of conformity Hereby, Acer Inc., declares that this LCD monitor is in compliance with the essential requirements and other relevant provisions of EMC Directive 2004/108/EC, Low Voltage Directive 2006/95/EC, and RoHS Directive 2011/65/EU and Directive 2009/125/EC with regard to establishing a framework for the setting of ecodesign requirements for energy-related product. -
Page 12: Specification
Wide Mode External Functions sRGB mode PIP/PBP Controls: 6-axis Hue Ambient Light 6-axis Saturate Hot Key Assignment Volume DDC/CI HDMI Black level Over Drive Quick start mode Aim point Power-off USB charge Language Game mode * All specifications are subject to change without notice. Regulatory Compliance S&E Find manuals and other documents for your Acer product on the official Acer support website. - Page 13 XR342CK xxxxxx; (“x” = 0~9, a ~ z, A ~ Z, of leeg) Wij, Acer Incorporated, verklaren hierbij onder exclusieve verantwoordelijkheid dat het hierboven beschreven product voldoet aan de relevante wetten op harmonisering in de Unie zoals in de onderstaande...
-
Page 14: Declaration Of Conformity
(“x” = 0~9, a ~ z, A ~ Z, or blank) We, Acer Incorporated, hereby declare under our sole responsibility that the product described above is in conformity with the relevant Union harmonization legislations as below Directive and following harmonized... -
Page 15: Déclaration De Conformité
(“x” = 0~9, a ~ z, A ~ Z, ou blanc) Nous, Acer Incorporated, déclarons par la présente, sous notre seule responsabilité, que le produit décrit ci- dessus est conforme aux législations d'harmonisation pertinentes de l'Union comme la directive ci-dessous, et que les normes harmonisées suivantes et / ou d'autres normes pertinentes ont été... - Page 16 XR342CK xxxxxx; („x“ = 0 bis 9, a bis z, A bis Z oder Leerzeichen) Wir, Acer Incorporated, erklären hiermit in alleiniger Verantwortung, dass das oben beschriebene Produkt mit den relevanten Angleichungsrechtsvorschriften der Union entsprechend der nachstehenden Richtlinie übereinstimmt und folgende harmonisierte Standards und/oder anderen relevanten Standards angewandt...
-
Page 17: Dichiarazione Di Conformità
(“x” = 0~9, a ~ z, A ~ Z, o spazio) Acer Incorporated, dichiara sotto la propria responsabilità che il prodotto sopra descritto è conforme alle pertinenti normative di armonizzazione dell'Unione, come le Direttive che seguono, e che sono state... -
Page 18: Declaração De Conformidade
(“x” = 0~9, a ~ z, A ~ Z, ou espaço em branco) Nós, Acer Incorporated, declaramos sob nossa exclusiva responsabilidade que o produto acima descrito está em conformidade com a legislação de harmonização da União e que foram aplicadas as Diretivas e normas... -
Page 19: Declaración De Conformidad
Número de Referencia (SKU): (“x” = 0~9, a ~ z, A ~ Z, o en blanco) Nosotros, Acer Incorporated, por la presente declaramos bajo nuestra exclusiva responsabilidad que el producto descrito anteriormente cumple con la normativa de armonización correspondiente en la Unión Europea, la Directiva a continuación y las siguientes normas armonizadas y/o se han aplicado otras normas... -
Page 20: Federal Communications Commission Declaration Of Conformity
Acer America Corporation 333 West San Carlos St., San Jose Suite 1500 CA 95110, U. S. A. Tel : 254-298-4000 Fax : 254-298-4147 www.acer.com Federal Communications Commission Declaration of Conformity This device complies with Part 15 of the FCC Rules. Operation is subject to the following... -
Page 21: Mounting The Monitor
Mounting the monitor Wall mount BKT ‑‑‑‑‑‑‑‑‑‑‑‑‑‑‑‑‑‑‑‑‑‑‑‑‑‑‑‑‑‑‑‑‑‑‑‑‑‑‑‑‑‑‑‑‑‑‑‑‑‑‑‑‑‑‑‑‑‑‑‑‑‑‑‑‑‑‑‑‑‑‑‑‑‑‑‑‑‑‑‑‑‑‑‑‑‑‑‑‑‑‑‑‑‑‑‑‑‑‑‑‑‑‑‑‑‑‑‑‑‑‑‑‑‑ Note: • The LCD monitor shall only be used with an approved am (e.g.GS mark). • To meet the safety requirements, the monitor must be mounted to an arm that supports the weight of the monitor. •... - Page 22 Acer Headset hook assembly Instructions Illustrations are for reference only.
Need help?
Do you have a question about the XR342CK and is the answer not in the manual?
Questions and answers