Advertisement
Quick Links
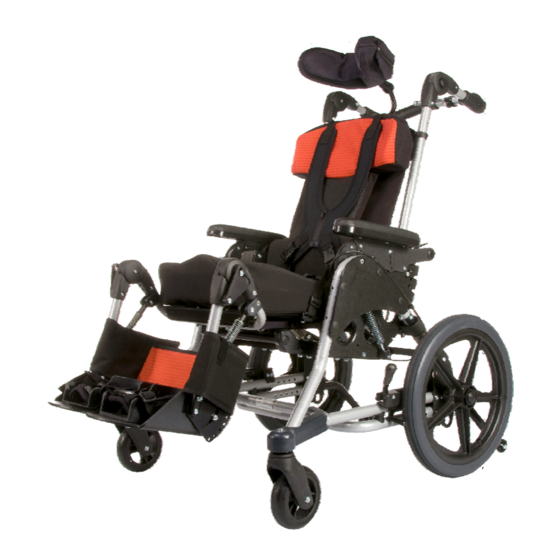
□ Kids ROCK
□ With Transit Option
□ Without Transit Option
□ REACTION
Dynamic Seating System
DEALER: THIS MANUAL MUST BE GIVEN TO THE USER OF THIS
USER: READ THIS MANUAL BEFORE USING THIS DEPENDENT
MOBILITY BASE AND SAVE FOR FUTURE REFERENCE.
Product delivered may vary from the one described and pictured in this manual.
INFMANU4539/Rev B/August 2013
Size 2
TM
™
DEPENDENT MOBILITY BASE.
Serial #:
Date of Delivery:
by
USER MANUAL
*INFMANU4539
Advertisement

Related Manuals for Quantum Rehab kids rock 2


Summary of Contents for Quantum Rehab kids rock 2
- Page 1 □ Kids ROCK Size 2 □ With Transit Option □ Without Transit Option □ REACTION ™ Dynamic Seating System Serial #: Date of Delivery: DEALER: THIS MANUAL MUST BE GIVEN TO THE USER OF THIS DEPENDENT MOBILITY BASE. USER: READ THIS MANUAL BEFORE USING THIS DEPENDENT MOBILITY BASE AND SAVE FOR FUTURE REFERENCE.
- Page 2 You have made a great choice for your child by choosing a Kids ROCK Chair. We believe that every child should be able to move to the best of their ability because “Movement is life!” We welcome questions and comments about our products and services. Please feel free to contact us using the information below: Manufacturer Pride Mobility Products Corporation...
-
Page 3: Table Of Contents
TABLE OF CONTENTS I. CHAIR MODELS & PARTS ..................4 II. UNPACKING YOUR NEW KIDS ROCK CHAIR ............5 III. READ BEFORE USING ....................7 IV. GENERAL WARNINGS ..................... 8 V. SET-UP & ADJUSTMENT ..................11 VI. OPERATING INSTRUCTIONS ................17 VII. -
Page 4: Chair Models & Parts
I. CHAIR MODELS & PARTS Please refer to the front of this manual to determine which configuration was delivered to you. Throughout this manual, you will notice the chair configuration option in brackets like [Adjustable Seat Pan], indicating information that applies only to a specific option. The chair’s parts are labeled below for your reference. -
Page 5: Unpacking Your New Kids Rock Chair
II. UNPACKING YOUR NEW KIDS ROCK CHAIR THE ORIGINAL PACKAGE CONTAINS THE FOLLOWING COMPONENTS: • Kids ROCK Chair • 2 Rear Wheels • Anti-tips • Additional options and accessories as ordered. PREPARING THE CHAIR FOR USE: WARNING: Contact your health care professional before using this unit with a child. 1. - Page 6 Unpacking your chair continued… Active Handle Installation Instructions The active handle is removed for shipping to prevent damage to the chair. It must be installed to enable full functionality of the chair. Tools: 5/32 inch Allen Wrench 7/16 inch Nut Driver Hardware: Nyloc Nut Active Bar...
-
Page 7: Read Before Using
III. READ BEFORE USING READ MANUAL CAREFULLY & OFTEN Read manual completely before use! Familiarize yourself with the handling and functions of the product before use and practice them. You must read and fully understand the contents of this manual. Any caregiver that is going to operate this chair should also read the manual in full. -
Page 8: General Warnings
IV. GENERAL WARNINGS WARNING: The operator/caregiver must read and understand this manual prior to operating this equipment. If you are unable to understand any part of the manual, contact your dealer for assistance. WARNING: The initial set up of this pushchair must be performed by a qualified technician. - Page 9 WARNING: The chair should only be used on solid, level ground. WARNING: Use chair as intended by manufacturer. For instance, do not drive into obstacles (including curbs and steps) without slowing down. WARNING: To clear obstacles such as curbs and steps, tilt the chair onto the rear wheels.
- Page 10 WARNING: Please keep packaging material away from children. Plastic packaging presents the danger of suffocation. WARNING: Never leave your child unattended in the chair even when they are strapped in and the wheel locks are engaged. WARNING: The chair is only intended to carry one child at a time. Do not carry more than one child at a time.
-
Page 11: Set-Up & Adjustment
V. SET-UP & ADJUSTMENT Tools Required: 5/32” Hex Wrench 7/16” Nut Driver 3/4” End Wrench (Active Tension Only) 1-1/8” End Wrench (Adj. Position Axle Only) A. SEAT DEPTH ADJUSTMENT 1. Remove the seat cushion. 2. Use a 5/32” hex wrench to loosen the screws [A] on the left and right tubes. - Page 12 B. BACK HEIGHT ADJUSTMENT 1. Loosen the bolts [A] on the cane guides using 7/16” wrench. 2. Loosen the laterals and other items attached to the back as necessary. 3. Slide the back to the desired position 4. For back heights less than 17 inches, remove the bolts [B] connecting the seat back crossbar to the seat back and move crossbar into desired position.
- Page 13 E. INSTALLING & ADJUSTING THE ANTI-TIPS • The anti-tips should be used at all times. • The anti-tips should be positioned 1-1/2” to 2” off of the ground for proper function. They should also extend at least 4” beyond the point where the rear wheel contacts the ground.
- Page 14 G. EXTENSION LIMIT AND FORCE ADJUSTMENT 1. Remove the child from the chair. 2. Remove the rear wheel. 3. Using a 5/32” Allen wrench and a 7/16” Nut Driver, remove the bolt from the lower pivot block [A] below the spring and then pull the block away from the black plate as shown in Fig.
- Page 15 H. EXTENSION LIMIT AND FORCE ADJUSTMENT [Active Leg Rest Only] 1. Remove the calf protector to expose the lower end of the knee angle tensioning device. 2. Slide the triangular plate [A] (near the child’s knees) toward the back of the chair to depress the button on the black ratchet.
- Page 16 I. USING DIFFERENT WHEEL POSITIONS AND ADJUSTING THE AXLE POSITION WARNING: Adjustable Position Axles should only be moved by qualified technicians. Certain axle positions may make the chair unstable. Always use anti-tips. The casters are not user adjustable. 1. Remove the wheels. 2.
-
Page 17: Operating Instructions
VI. OPERATING INSTRUCTIONS WARNING: Always inspect your chair before placing your child into it. Look for loose parts, sharp edges, hot surfaces, detached harnesses, mechanisms that are not fully engaged, and any other hazards. Always engage the wheel locks before per- forming a transfer of the child to or from the chair. - Page 18 C. TILT-IN-SPACE The Kids ROCK Chair is equipped with a tilt-in-space mechanism that pivots around a point near the child’s center of gravity. This mechanism reduces the feeling of falling that occurs when the chair is tilted. In addition, the tilt-in-space mechanism keeps the child’s center of gravity nearly the same in relation to the wheelbase of the chair so that the stability of the chair is not significantly changed by moving the tilt position.
- Page 19 D. HANDLEBAR ANGLE ADJUSTMENT 1. Press the buttons on the black ratchets simultaneously on both sides of the handlebar. While holding the buttons down, move the handlebar to the desired position. Release the buttons on the black ratchet. Press WARNING: Do not put excessive stress on the han- dlebar.
- Page 20 G. ENABLING THE ROCK ACTIVE MOTION 1. Pre-motion safety checklist: YOU MUST VERIFY THE FOLLOWING PRIOR TO ENABLING THE ROCK ACTIVE MOTION: Hip Angle Adjustment pins fully engaged Tilt-in-space mechanism fully engaged Anti-tips correctly positioned Rear wheels in stable position Wheel locks engaged Figure 24: Active Mode Chair on flat surface...
- Page 21 H. REMOVAL AND INSTALLATION OF REAR WHEELS ** REMOVE THE CHILD FROM THE CHAIR 1. To remove the wheels: a. Release the wheel locks. b. Press the button in the center of the wheel on the quick release axle. Verify that pin b.
- Page 22 J. USING THE Kids ROCK CHAIR FOR TRANSPORTATION IN MOTOR VEHICLES The Kids ROCK Chair is approved for transporting children in motor vehicles when it is equipped with the OPTIONAL transit feature and used in accordance with these instructions. The chair must be secured in a forward-facing position with a Wheelchair Tie-down and Occupant Restraint System (WTORS) which meets the requirements of SAE J2249 Recommended Practice—Wheelchair Tie-down and Occupant Restraint Systems For Use in Motor Vehicles.
- Page 23 k. Refer to Fig. 32: A side view of the desired pelvic belt angle range. (1) NOTE 1: Steeper side-view pelvic-belt angles are especially important if the pelvic belt is intended to be used for postural support in addition to occupant restraint in a frontal crash. Steeper angles will reduce the tendency for a vertical gap to develop between the user and the belt due to compliance of seat cushions and belt movement, thereby reducing the tendency for...
-
Page 24: Maintenance
VII. MAINTENANCE Please consult your dealer should you have any questions about proper maintenance of your Kids ROCK Chair. Consistent thorough maintenance will extend the useful life of your chair. Improper maintenance will decrease the chair’s life significantly. Any damaged parts should be replaced before the chair is used. A maintenance chart is provided below. -
Page 25: Maintenance Record
VIII. MAINTENANCE RECORD Date of purchase and serial number should be recorded on the front cover. Dealer information should be recorded inside the front cover. Service By Company Contact Date Name Person Description of Service “Movement is life!”... - Page 26 This page intentionally left blank. “Movement is life!”...
- Page 27 This page intentionally left blank. “Movement is life!”...
- Page 28 Pride Mobility Products Corporation 182 Susquehanna Avenue Exeter, PA 18643-2694 Pride Mobility Products Company 5095 South Service Road Beamsville, Ontario Canada L0R 1B3 Pride Mobility Products Ltd. 32 Wedgwood Road Bicester, Oxfordshire OX26 4UL United Kingdom Pride Mobility Products Australia Pty. Ltd. 20-24 Apollo Drive Hallam, Victoria 3803 Australia...
Need help?
Do you have a question about the kids rock 2 and is the answer not in the manual?
Questions and answers