Daikin FWT02CATNMV1 Installation Manual
Hide thumbs
Also See for FWT02CATNMV1:
- Installation manual (121 pages) ,
- Installation manual (141 pages)
Advertisement
Table of Contents
- 1 Outline and Dimensions
- 2 Indoor Unit
- 3 Safety Precautions
- 4 Installation Diagram
- 5 Installation of the Indoor Unit
- 6 Electrical Wiring Connection
- 7 Indicator Lights
- 8 Air Conditioner Unit Operation
- 9 Operating Range
- 10 Air Filter
- 11 Service and Maintenance
- 12 Troubleshooting
- Download this manual
See also:
Installation Manual
INSTALLATION
MANUAL
MODELS
FWT02CATNMV1
FWT03CATNMV1
FWT04CATNMV1
FWT05CATNMV1
FWT06CATNMV1
Chilled Water Fan Coil Units
Kaltwasser-Ventilator Luftkühler
Ventilo-convecteur à eau glacée
Koud Water-Ventilator Luchtkoeler
Unidades de serpentín de ventilador de agua fría
Manuale Di Installazione
Unità fan coil ad acqua fredda
Μονάδες πηνίου του ανεμιστήρα για το παγωμένó νερο
Unidades de bobina de ventilador de água refrigerante
Руководство По Установке
ВентилЯторные доводчики с водЯным охлаждением
So¤uk su fan bobin üniteleri
IM-WMJW-0312(0)-DAIKIN (DENV)
Installation Manual
English
Installationshandbuch
Deutsch
Manuel d'installation
Français
Installatiehandboek
Nederlands
Manual de instalación
Español
Italiano
Εγχειρίδιο εγκατάστασης
Ελληνικά
Manual De Instalação
Português
Русский
Kurulum Kılavuzu
Türkçe
Part No.: R08019037507
Advertisement
Table of Contents

Subscribe to Our Youtube Channel
Related Manuals for Daikin FWT02CATNMV1


Summary of Contents for Daikin FWT02CATNMV1
- Page 1 Unidades de serpentín de ventilador de agua fría Manuale Di Installazione Italiano Unità fan coil ad acqua fredda MODELS Εγχειρίδιο εγκατάστασης Ελληνικά FWT02CATNMV1 Μονάδες πηνίου του ανεμιστήρα για το παγωμένó νερο FWT03CATNMV1 Manual De Instalação Português FWT04CATNMV1 Unidades de bobina de ventilador de água refrigerante FWT05CATNMV1 Руководство...
-
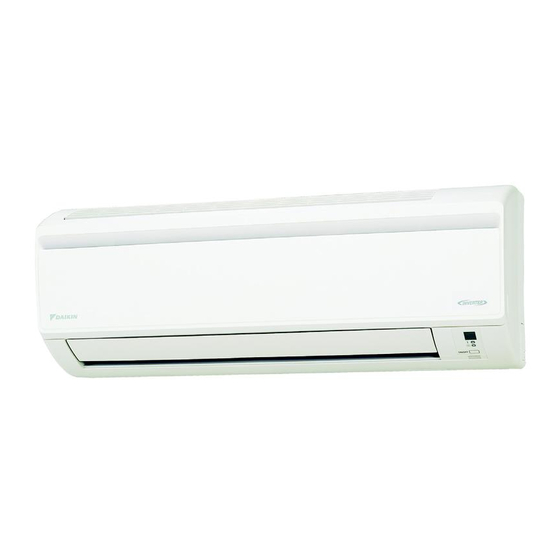
Page 3: Outline And Dimensions
OUTLINE AND DIMENSIONS Indoor Unit THE MARK SHOWS PIPING DIRECTION REAR REAR LEFT RIGHT TOP VIEW NAME PLATE SIGNAL RECEIVER TERMINAL BLOCK WITH EARTH INDOOR UNIT TERMINAL SIDE VIEW ON/OFF SWITCH BOTTOM BOTTOM ROOM TEMPERATURE THERMISTOR (INSIDE) LOUVER FRONT GRILLE FIXED SCREWS (INSIDE) FRONT VIEW Use tape measure as shown. - Page 4 Recommended mounting plate retention spots (7 spots in all) Through the wall hole Ø 65mm Drain hose position Water inlet Water outlet INSTALLATION PLATE FWT05/06 All dimensions are in mm Dimension Model FWT02/03/04 FWT05/06 1065...
-
Page 5: Safety Precautions
INSTALLATION MANUAL This manual provides the procedures of installation to ensure a safe and good standard of operation for the air conditioner unit. Special adjustment may be necessary to suit local requirements. Before using your air conditioner, please read this instruction manual carefully and keep it for future reference. This appliance is intended to be used by expert or trained users in shops, in light industry and on farms, or for commercial use by lay persons. -
Page 6: Installation Diagram
INSTALLATION DIAGRAM CORK TAPE FULLY INSULATED INSULATION THROUGH OUT CHILLED WATER PIPING INSTALLATION OF THE INDOOR UNIT The indoor unit must be installed in such a way so as to prevent The water piping can be routed to the unit in a number of ways short circuit of the cool discharged air with the hot return air. - Page 7 Mounting Installation Plate Hole with cone drill Ensure that the wall is strong enough to withstand the weight Inside Outside of the unit. Otherwise, it is necessary to reinforce the wall Wall embedded pipe with plates, beams or pillars. Caulking (Field supply) Use the level gauge for horizontal mounting, and fix it with 5 suitable screws for FWT02/03/04 and 7 suitable screws for...
-
Page 8: Electrical Wiring Connection
Water Piping Connection The indoor unit is equipped with water outlet and inlet threaded connection. There is an air-vent for air purging that is fi tted at the outlet water header. 3 ways valve is required for cycling off or bypass the chilled water. Black steel pipe, polyuthrene pipe, PVC pipe and copper tube are recommended in fi... -
Page 9: Indicator Lights
INDICATOR LIGHTS IR Signal Receiver When an infrared remote control operating signal has been transmitted, the signal receiver on the indoor unit will respond as below to confi rm acceptance of the signal transmission. ON to OFF 1 Long Beep OFF to ON 2 Short Beep Pump down/Cool force on... -
Page 10: Air Conditioner Unit Operation
AIR CONDITIONER UNIT OPERATION Dry Mode Notes On Flaps And Louvers Angles • When “SWING button” is selected, the fl aps swinging • When the air humidity is high, the unit can operate in dry range depends on the operation mode. (See the fi gure.) mode. -
Page 11: Air Filter
AIR FILTER 1. Open the front panel. 3. Clean or replace each fi lter. • When shaking off remaining water, do not wring the • Hold the panel at the recesses on the main unit fi lter. (2 recesses on right and left sides) and lift it until it stops. -
Page 12: Troubleshooting
When The Unit Is Not To Be Used For An Extended Long Period Of Time Operate the unit for 2 hours with Remove the power plug. If you are using an the following setting. independent electric circuit for your unit, cut Operating mode : cool off the circuit.
Need help?
Do you have a question about the FWT02CATNMV1 and is the answer not in the manual?
Questions and answers