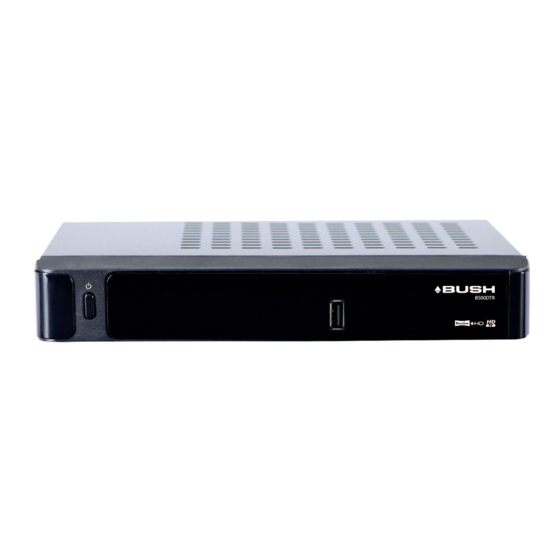
Bush DVB-T2 PVR User Manual
Hide thumbs Also See for DVB-T2 PVR:

Advertisement

248/9502
IMPORTANT - Please read these instructions fully before installing or operating
These instructions contain important information which will help you get the best from
your television and ensure safe and correct installation and operation.
For any help concerning set up and use of your TV please call the
Customer Helpline : 0345 604 0105
Lines open: 9am - 8pm Monday to Saturday and 10am - 4pm Sunday
For any help concerning set up and use for your TV please call the Customer Helpline: 0345 604 0105

Advertisement

Table of Contents
loading

Summary of Contents for Bush DVB-T2 PVR

  • Page 1 248/9502 IMPORTANT - Please read these instructions fully before installing or operating These instructions contain important information which will help you get the best from your television and ensure safe and correct installation and operation. For any help concerning set up and use of your TV please call the Customer Helpline : 0345 604 0105 Lines open: 9am - 8pm Monday to Saturday and 10am - 4pm Sunday For any help concerning set up and use for your TV please call the Customer Helpline: 0345 604 0105...
  • Page 2: Table Of Contents

    Contents Safety Precautions ..........3 Power Cord ............3 Overview of the Remote Control ......5 Connections on the Set Top Box ......6 Inserting Batteries in the Remote Control....7 Connecting the Set Top Box to a TV Set ....7 Antenna Connection ..........
  • Page 3 Features Accessories • 200 channels Please make sure that the following items are included with your device. • Programme recording • 8-Days EPG. • TV scart (with RGB and CVBS support). • Favourite list. • Parental lock options. • Manual and automatic search options. Batteries •...
  • Page 4: Safety Precautions

    Safety Precautions • Should any solid object or liquid fall into the cabinet, unplug the device and have it checked by qualified Power Source Power personnel before operating it any further. • Always use the provided AC adaptor. • The device should not be exposed to dripping or •...
  • Page 5 This equipment has been designed and switch on the equipment and make sure that your manufactured to meet international safety family know how to do this. Special arrangements standards but, like any electrical equipment, may need to be made for infirm or handicapped care must be taken if you are to obtain the people.DON’T continue to operate the equipment if best results and to ensure its safety.
  • Page 6: Overview Of The Remote Control

    Overview of the Remote Control - 5 -...
  • Page 7: Connections On The Set Top Box

    1u BACK VIEW REVÝZYON NO / REVISION NO REVÝZYON TARÝHÝ / REVISION DATE REVÝZYON BÝLGÝSÝ / REVISION INFO 40059441 FR.AS.DVB535/T7655 BUSH B500d TRG MALZEME KODU / MALZEME TANIMI / MATERIAL CODE MATERIAL DEFINITION Mekanik çizim için ekteki linke bakýnýz: \\Manfile2\DWGS\MEKANIK_PARCA_SPEKLERI\5-DVD DVB BOX\DVB_645 MEKANÝK KODU /...
  • Page 8: Inserting Batteries In The Remote Control

    Inserting Batteries in the Remote Control • Remove the battery cover located on the back of the remote control by gently pulling backwards from the indicated part. • Insert two AAA/R3 (2 X 1.5Volt) or equivalent type batteries inside. Place the batteries in the correct direction observing the polarity symbols (+/-) and replace the battery cover.
  • Page 9: Antenna Connection

    Power Connection MPORTANT: The set-top box is designed to operate on 12 V DC. For this, an adaptor is used which gives 12 V voltage. Connect this adaptor to a system that supplies 220-240V AC,50Hz. • After unpacking, allow the set-top box to reach the ambient room temperature before you connect the set to the mains.
  • Page 10 Power On-Off Connect all cables before plugging into the mains. After plugging in the AC adaptor for the set top box to the mains supply, red light will be seen on the front panel (Standby mode). When the set top box is first powered up please wait until the box is initialized before activating the receiver since booting of software will take some time.
  • Page 11: Important - Hard Disk Information

    When the HDD is out of space, it will operate regarding Important - Hard Disk Information one of these options and delete the This Recorder has a built in hard disk (abbreviated recordings. as HDD ) for recording and playback. Beware of •...
  • Page 12: First Time Installation

    • To start installation process, select Yes by using First Time Installation “ ”/“ ” buttons and then press the OK button. IMPORTANT: Ensure that the aerial is connected • The box will start to search available stations. The before switching on the set top box for the first progress bar will move along the line.
  • Page 13: On-Screen Information

    Time Shifting (Pause Live Recording) • To cancel mute, you can press button again or use the V +/- buttons. On-Screen Information • You can press the INFO button to display on-screen information. Details of the station and current programme will be displayed on the information screen.
  • Page 14: Operating The Channel List

    • Press MENU button to view main menu. Select • A message will be displayed to confirm your decision. Channel List item by using “ ”/“ button. Press Select YES to delete the selected channel, select OK to view menu contents. NO to cancel.
  • Page 15: Setting Favourites

    • Mark the other channels you want to lock the same • Press “ ”/“ ” buttons to navigate through channels. way and press OK. • Press “ ”/“ ” buttons to navigate through the • Enter the pin code in the menu displayed and press programme list.
  • Page 16: Configuring Timers

    Record Programme Highlight it and press OK button to set the programme to recording. Record Series/Delete Series In the EPG menu, after you have selected a programme, press the OK button and select the Record Series option and press the OK button again.
  • Page 17: Recordings Library

    Resume: Resumes the recording. Recordings Library Play from offset: Begins playing,from the time which To view the list of recordings, press the MENU button is entered. to display the main menu and use “ ”/“ ” buttons to Manage chapters : It will display any marked chapters highlight the “Recordings Library”...
  • Page 18: Media Browser

    Viewing USB Disk Contents Text After you have selected the Include option in the You can play music, video and picture files from a “Main Title” menu, you can edit the main title. USB memory stick, but only music and picture can be played from an external Hard Disk Drive.
  • Page 19 Play ( Button) : Play files Pause ( Button) : Pauses the playback Stop ( Button) : Stop the playing file Rewind ( Button) : Goes backward Fast Foward ( Button) : Goes foward GREEN : Jumps to the selected time LANG : Set subtitle or audio Playing JPEG Files...
  • Page 20: Auto Discard

    • Select Configuration from Setup & Retune menu and press OK to continue. • You can press BACK button to exit Max Time Shift Select the maximum time allowed for timeshifting. See Time Shifting section for more information on Active channels timeshifting •...
  • Page 21: Menu Lock

    Output Settings • You can enable or disable automatic upgrade by setting Automatic Scanning option. • You can manually search for new software by selecting Scan for upgrade. • You can also update your set top box by using the USB upgrade option.
  • Page 22: Installation

    About Select About and press OK button to display system information. Current (*) (*) These settings can be changed if only the broadcaster supports. Otherwise, settings will not be available to Audio Description be changed. This function enables or disables the audio description •...
  • Page 23: First Time Installation

    • Highlight Yes or No by using “ ” or “ ” buttons and press OK button to confirm. • If Yes is selected, automatic search starts. • Selecting No cancels automatic search. • After the scanning is completed, your set top box will store all the available channels.
  • Page 24: Internet Portal

    • When such a channel is selected, it will usually display Internet Portal the opening page of information automatically, after a You can access internet portal using your set-top box. short break. To do this, an active internet connection is required. •...
  • Page 25: Troubleshooting

    Troubleshooting Problem Possible Reasons What To Do Check if the AC adaptor is plugged into the power socket and STB is Power Adaptor is not connected The LED indicator does not glow. in low power standby mode. Low or low power is disabled. power setting can be modified under configuration menu.
  • Page 26: General Characteristics

    GENERAL CHARACTERISTICS Power supply for set-top box 12 V DC 2Amp Preffered DC Adaptor 220 - 240 V AC, 50-60Hz Input Frequency 470Mhz-862Mhz Frequency Band Maximum Power consumption 17,5 W Standby Power Consumption 0,5 W Operating temperature 5ºC to +40ºC Storage temperature -15ºC to +55ºC Humidity...
  • Page 27: Remote Control

    REMOTE CONTROL Operating Distance 7 m Max. Batteries 2x1.5V Micro (R-03/AAA) TUNERS 1 xRF In IEC-type, female (75Ohm) 1 x RF Out (loop through) IEC-type, male (75Ohm) HARD DISK Hard Disk capacity 320 GB, 500 GB, 1 TB FRONT PANEL Display Seven segment display Remote Control Keys...
  • Page 28 Home Retail Group 489-499 Avebury Boulevard Saxon Gate West Central Milton Keynes MK9 2NW...

This manual is also suitable for:

B500dtr

Table of Contents