Table of Contents
Advertisement
Quick Links
Please Read and Save this Use and Care Book.
IMPORTANT SAFEGUARDS.
When using electrical appliances, basic safety precautions
should always be followed, including the following:
• Read all instructions.
• To protect against risk of electrical shock do not immerse cord,
plugs or appliance in water or other liquid.
• Close supervision is necessary when any appliance is used by
or near children.
• Unplug from outlet when not in use, before putting on or taking
off parts and before cleaning.
• Avoid contacting moving parts.
• Do not operate any appliance with a damaged cord or plug
or after the appliance malfunctions, or is dropped damaged
in any manner. Return appliance to the nearest authorized
service facility for examination, repair or electrical or
mechanical adjustment. Or, call the appropriate toll-free
number listed on this sheet.
• The use of attachments, including canning jars, not
recommended by the manufacturer may cause fire, electric
shock or injury.
• Do not use outdoors.
• Do not let cord hang over edge of table or counter.
• Keep hands and utensils away from moving blades or discs
while processing food to reduce the risk of severe injury to
persons or damage to the food processor. A scraper may be
used, but must be used only when the food processor is not
running.
• Blade is sharp. Handle carefully.
• To reduce the risk of injury, never place cutting blade or discs
on base without first putting bowl properly in place.
• Be certain cover is securely locked in place before operating
appliance.
• Never feed food by hand. Always use food pusher.
• Do not attempt to defeat the cover interlock mechanism.
SAVE THESE INSTRUCTIONS.
This product is for household use only.
POLARIZED PLUG (120V MODELS ONLY)
This appliance has a polarized plug (one blade is wider
than the other). To reduce the risk of electric shock, this
plug is intended to fit into a polarized outlet only one way.
If the plug does not fit fully into the outlet, reverse the plug.
If it still does not fit, contact a qualified electrician. Do not
attempt to modify the plug in any way.
TAMPER-RESISTANT SCREW
Warning: This appliance is equipped with a tamper-resistant screw
to prevent removal of the outer cover. To reduce the risk of fire or
electric shock, do not attempt to remove the outer cover. There are no
user-serviceable parts inside. Repair should be done only by authorized
service personnel.
ELECTRICAL CORD
The cord of this appliance was selected to reduce the possibility of tangling
in or tripping over a longer cord. If more length is needed, use an extension
cord rated no less than 15 amperes. (For 220-volt rated products, use an
extension cord rated no less than 6 amperes.) When using an extension cord,
do not let it drape over the working area or dangle where someone could
accidentally trip over it. Handle cord carefully for longer life; avoid jerking or
straining it at outlet and appliance connections.
Note: If the power cord is damaged, it should be replaced by qualified person-
nel; in Latin America, by an authorized service center.
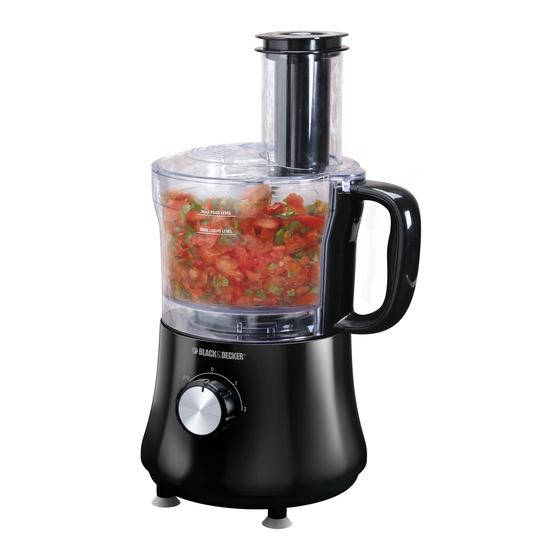
CONTROL PANEL
The controls are located on the front of the base (A). Turn dial to P, 1 or 2 in
order to select a function (see directions below).
OFF CONTROL
Processor should be stored in OFF position (0) and unplugged
when not in use.
PULSE CONTROL
Use PULSE (P) for short processing tasks. This lets you control
A
the size and uniformity of foods being chopped.
• The dial must be turned to the P position and held for the appliance to
operate in PULSE mode. When released, the dial will return to the 0 position
and the function will end.
• The motor of the processor will run as long as the PULSE position is held.
Hold the dial in the PULSE position and then release to allow the blade to
stop running and the food to fall to the bottom of the workbowl.
• Pulsing gives better control when chopping, mincing, mixing and blending
foods. You can control the size of the foods, from coarse to fine.
SPEED 1 and 2 CONTROL
This food processor has two speeds. Turn the dial to the appropriate speed
when the food is ready to be processed. When turned to one of these speeds,
the processor will continue to run until the dial is returned to the OFF (0)
position.
HOW TO USE
This product is for household use only.
• Remove all packing material and any stickers from the
product.
• Please go to www.prodprotect.com/applica to register your
warranty.
Important: Handle chopping blade and slicing and
B
shredding disc carefully. They are very sharp.
• Wash all removable parts as instructed in CARE AND CLEANING section of
this manual.
• Select a level, dry countertop where the appliance is to be used, allowing
air space on all sides to provide proper ventilation for the motor.
ASSEMBLING THE PROCESSOR
HOW TO INSERT AND REMOVE THE CENTER POST
The center post is removable. When you are ready to use the food processor,
place the center post into the smaller opening in the base (B).
HOW TO LOCK THE PROCESSING WORKBOWL IN POSITION
1. Attach center post to workbowl. Place the workbowl on the base with
handle turned to the right of the locking mechanism (C) over the unlock
symbol
2. Hold handle and rotate workbowl clockwise toward the until it clicks
firmly into place (D).
Note: Be sure to lock the workbowl in place before attaching the chopping
blade or the slicing and shredding disc and the cover.
HOW TO CHOP IN THE PROCESSING WORKBOWL
The chopping blade is used to coarsely or finely chop, mince,
mix, and puree foods to a smooth consistency.
1. Lock workbowl into position (see Illustrations C and D).
2. Hold chopping blade by center shaft and insert onto center
C
post (E).
Caution: The chopping blade is very sharp. Use caution when
handling and storing.
3. Place food in workbowl.
D
4. Place cover on workbowl and lock into place by rotating
counterclockwise (H).
5. Place the food pusher in place.
Important: Never use your fingers to direct food through the
feed chute.
6. Select your desired speed (PULSE, 1 or 2).
E
Note: Process foods for no more than a few seconds at a
time. Pulsing produces excellent results and offers
greater control.
Important: Make sure the chopping blade has completely
stopped spinning before removing cover from
processing bowl.
F
7. Return the dial to the OFF (0) position and allow the
chopping blade to stop revolving before removing cover.
Twist cover toward
(clockwise) to remove.
Important: Unlock lid first before removing workbowl.
8. Unlock workbowl by turning it counterclockwise and lift off
base.
Note: Remove workbowl from appliance before removing
the chopping blade to prevent food from leaking through the
center opening of the workbowl.
9. Carefully remove the chopping blade.
G
10. Unplug appliance when not in use.
HELPFUL TIPS FOR CHOPPING
• Watch carefully to avoid over-processing foods.
• The PULSE position offers the best control.
• For best results, process foods that are about the same
size.
• Do not overload the workbowl.
H
• Never walk away from the processor while it is on.
• You may use hot but not boiling liquids.
• Do not process more 3 cups of liquid in the workbowl at any given time.
• To process meat, use no more than 2 cups of ¾-inch cubes. Process using
PULSE in 5-second intervals.
• Insert a funnel into the feed chute when adding ingredients such as oil,
flour and sugar.
HOW TO SLICE OR SHRED IN THE WORKBOWL
1. Lock workbowl into position (see Illustrations C and D).
2. Carefully place slicing and shredding disc on top of center post with
appropriate side up (depending on work to be done) (F).
CAUTION: The slicing and shredding disc is very sharp. Use caution when
handling and storing.
3. Place cover on workbowl and lock into place by rotating cover
counterclockwise (see Illustration H).
4. Fill feed chute with food. Position food pusher over food (G).
5. Turn dial to PULSE, 1 or 2 position; press firmly on food pusher to guide
food through feed chute, but do not force it.
Note: Heavy pressure on the pusher does not speed the work; use the pusher
only as a guide. Let the processor do the work.
6. When finished, return dial to OFF (0) position and wait for disc to stop
rotating before removing cover. Twist cover toward
clockwise to remove.
IMPORTANT: Make sure the slicing and shredding disc has completely
stopped spinning before removing cover from processing bowl.
Important: Unlock lid first before removing workbowl.
7. Carefully remove the slicing and shredding disc. Unlock workbowl by
turning it clockwise and lifting it off the base.
8. Unplug appliance when not in use.
HELPFUL TIPS WHEN SLICING AND SHREDDING
• Before slicing fruits and vegetables in the processor, cut a thin slice from
the bottom of the food to make it flat.
• Place the food cut side down in feed chute.
• Remove seeds and pits before processing.
• Select foods that are firm and not overripe.
• Remove the core from hard vegetables such as cabbage.
• When slicing thinner vegetables, cut them just short of the length of the
feed chute and stand them vertically in feed chute so they are solidly
packed and cannot turn or tilt.
• Shred hard cheeses at room temperature.
• Chill soft and semi-hard cheeses before shredding.
• After food has been processed, remove the cover and invert on countertop.
Remove the slicing and shredding disc before removing the workbowl from
the processor. Place the disc on top of the inverted workbowl cover.
HOW TO LOCK THE COVER
1. Place cover over workbowl with the small latch to the left of the workbowl's
handle (H).
2. Hold feed chute of workbowl cover and rotate cover counterclockwise until
cover locks into place.
Important: For your protection this appliance has an interlock system. The
processor will not operate unless the processing workbowl and cover are
properly locked in place.
3. Insert the food pusher into the feed chute.
Note: The food pusher is used to guide foods through the feed chute and
can be removed when adding liquid or additional foods while the processor is
running.
CARE AND CLEANING
Note: Do not attempt to sharpen the cutting edges of the chopping blade or
slicing and shredding disc. They are permanently sharpened at the factory
and will be ruined if sharpened.
CLEANING
Note: Before cleaning, be sure unit is turned off and cord is unplugged.
• Completely disassemble processor parts before washing.
• Rinse parts immediately after processing for easy cleanup.
Caution: The slicing and shredding disc is very sharp. Use caution when
handling and storing.
• Wipe base and feet with a damp cloth and dry thoroughly. Stubborn spots
can be removed by rubbing with a damp cloth and a mild, nonabrasive
cleaner. Do not immerse base in liquid.
• All removable parts can be washed by hand or in a dishwasher. Hand
washing of plastic parts will help to maintain the food processor's
appearance.
• If washing by hand, fill workbowl with hot soapy water and rapidly raise
and lower the chopping blade or slicing and shredding disc up and down on
the center shaft.
Caution: The slicing and shredding disc is very sharp. Use caution when
handling and storing.
• If washing in a dishwasher, place removable parts on top rack only – not in
or near utensil basket.
• Some staining of parts may occur. If so, make a paste of 2 tablespoons
of baking soda and 1 tablespoon of water. Apply to stains and let stand
overnight. Rinse and dry.
• Do not use rough scouring pads or cleansers on any plastic or metal parts
to clean.
• Do not allow chopping blade or slicing and shredding disc to soak in water
for long periods of time.
• Remember to clean the internal shaft of the chopping blade; use a baby
bottle brush to remove any clogged food particles.
• If you are having trouble closing the cover over the workbowl, apply a small
amount of vegetable oil to the rim of the cover and workbowl. This should
make the pieces work smoother when attaching the cover to the workbowl.
NEED HELP?
For service, repair or any questions regarding your appliance, call the appropriate
800 number on the front of this sheet. Please DO NOT return the product to the
place of purchase. Also, please DO NOT mail product back to manufacturer, nor
bring it to a service center. You may also want to consult the website listed on this
sheet.
TWO-YEAR LIMITED WARRANTY
(Applies only in the United States and Canada)
What does it cover?
• Any defect in material or workmanship provided; however, Applica's liability
will not exceed the purchase price of product.
For how long?
• Two years from the date of original purchase with proof of such purchase.
What will we do to help you?
• Provide you with a reasonably similar replacement product that is either
new or factory refurbished.
How do you get service?
• Save your receipt as proof of date of sale.
• Visit our website at www.prodprotect.com/applica, or call toll-free 1-800-
231-9786, for general warranty service.
• If you need parts or accessories, please call 1-800-738-0245.
What does your warranty not cover?
• Damage from commercial use
• Damage from misuse, abuse or neglect
• Products that have been modified in any way
• Products used or serviced outside the country of purchase
• Glass parts and other accessory items that are packed with the unit
• Shipping and handling costs associated with the replacement of the unit
• Consequential or incidental damages (Please note, however, that some states
do not allow the exclusion or limitation of consequential or incidental damages,
so this limitation may not apply to you.)
How does state law relate to this warranty?
• This warranty gives you specific legal rights. You may also have other rights
that vary from state to state or province to province.
Por favor lea este instructivo antes de usar el producto
INSTRUCCIONES
IMPORTANTES
DE SEGURIDAD.
Cuando se usan aparatos electricos, siempre se deben respetar
las siguientes medidas basicas de segurida.
• Por favor lea todas las instrucciones.
• A fin de protegerse contra el riesgo de un choque eléctrico,
no sumerja el cable, los enchufes ni el aparato en agua ni en
ningún otro líquido.
• Todo aparato eléctrico usado en la presencia de los niños o
por ellos mismos requiere la supervisión de un adulto.
• Desconecte el aparato del tomacorriente cuando no esté en
uso, antes de instalarle o retirarle piezas y antes de limpiarlo.
• Evite el contacto con las piezas móviles.
• No use ningún aparato eléctrico que tenga el cable
o el enchufe averiado, que presente un problema de
funcionamiento o que esté dañado. Acuda a un centro de
servicio autorizado para que lo examinen, reparen o ajusten o
llame gratis al número correspondiente en la cubierta de este
manual.
• El uso de accesorios, incluyendo los tarros de envasar, no
recomendados por el fabricante pueden ocasionar incendio,
choque eléctrico o lesiones.
• No use este aparato a la intemperie.
• No permita que el cable cuelgue del borde de la mesa o del
mostrador.
• Para reducir el riesgo de lesiones severas a las personas
o daño al procesador de alimentos, mantenga las manos
y utensilios alejados de las cuchillas o discos mientras el
aparato está en uso. Se puede usar un raspador siempre y
cuando el procesador no esté en funcionamiento.
• Las cuchillas tienen filo. Manéjelas con cuidado.
• Para reducir el riesgo de lesiones, nunca instale la cuchilla de
cortar ni los discos en la base sin antes colocar el recipiente
debidamente en su lugar.
• Verifique que la tapa esté bien asegurada antes de operar el
aparato.
• Nunca empuje los alimentos con la mano. Siempre use el
empujador de alimentos.
• No trate de anular el mecanismo de enclavamiento de la tapa.
CONSERVE ESTAS
INSTRUCCIONES.
Este aparato electrico es para uso domestico
unicamente.
ENCHUFE POLARIZADO (SOLAMENTE PARA LOS MODELOS DE 120V)
Este aparato cuenta con un enchufe polarizado (un contacto es
más ancho que el otro). A fin de reducir el riesgo de un choque
eléctrico, este enchufe encaja en un tomacorriente polarizada
en un solo sentido. Si el enchufe no entra en el tomacorriente,
inviértalo y si aun así no encaja, consulte con un electricista. Por
favor no trate de alterar esta medida de seguridad.
TORNILLO DE SEGURIDAD
Advertencia: Este aparato cuenta con un tornillo de seguridad para
evitar la remoción de la cubierta exterior del mismo. A fin de reducir el
riesgo de incendio o de choque eléctrico, por favor no trate de remover
la cubierta exterior. Este producto no contiene piezas reparables por
el consumidor. Toda reparación se debe llevar a cabo únicamente por
personal de servicio autorizado.
CABLE ELÉCTRICO
El cable de este aparato fue seleccionado para reducir el riesgo de enredarse
o de tropezar con un cable largo. Si se necesita más longitud, use un cable
de extensión no inferior a 15 amperios. (Para 220-voltios de productos
valorados, use un cordón de extensión no menor de 6 amperios.) Si se utiliza
un cable de extensión, no permita que cuelgue sobre el área de trabajo ni que
cuelgue que alguien se pueda tropezar con él. Manipule el cable con cuidado
para una vida más larga, evitar sacudidas o el esfuerzo que en la salida y las
conexiones de electrodomésticos.
Nota: Si el cable de alimentación está dañado, debe ser sustituido por
personal cualificado y en América Latina, por un centro de servicio
autorizado.
PANEL DE CONTROL
Los controles están situados en la parte frontal de la base (A). Gire el dial a P,
1 o 2 para seleccionar una función (ver direcciones abajo).
APAGADO DE CONTROL
• Procesador deben ser almacenados en posición de apagado
(0) y desenchufado cuando no está en uso.
CONTROL DE PULSO
A
• Utilice PULSE (P) para las funciones cortas. Esto le permite
controlar el tamaño y la uniformidad de los alimentos ser picado.
• El dial debe girarse a la posición P y sostuvo que el aparato funcione
en modo PULSE. Cuando se suelta el mando volverá a la posición 0 y la
función terminará.
• El motor del procesador se ejecutará siempre que la posición PULSE se
lleva a cabo. Mantenga el selector en la posición PULSE y luego suelta para
permitir que la cuchilla para detener la ejecución y la comida caiga al fondo
del recipiente.
• Pulsante permite un mejor control al cortar, picar alimentos, mezcla y
mezcla. Se puede controlar el tamaño de los alimentos, de grueso a fino.
VELOCIDAD 1 Y CONTROL 2
Este procesador de alimentos tiene dos velocidades. Girar el selector a
la velocidad adecuada cuando la comida está lista para ser procesada.
Cuando se volvió hacia uno de estas velocidades, el procesador continuará
funcionando hasta que el disco se devuelve a la posición de apagado (0).
COMO USAR
EEste producto es para uso doméstico solamente.
• Retire todo el material de empaque y calcomanía adherida al producto.
• Por favor, vaya a www.prodprotect.com / applica para
registrar su garantía.
Importante:. Manija cortar la hoja y corte y trituración de
disco cuidadosamente Ellos están muy afiladas.
• Lave todas las piezas removibles según las instrucciones
B
de CUIDADO Y LIMPIEZA de este manual.
• Seleccionar un nivel, encimera seco donde el aparato se va
a utilizar, permitiendo que el espacio de aire por todos los
lados para una ventilación adecuada para el motor.
ENSAMBLAJE DEL PROCESADOR DE ALIMENTOS
C
CÓMO COLOCAR Y RETIRAR EL POSTE CENTRAL
El poste central es removible. Cuando esté listo para usar su
procesadora de alimentos, coloque el poste central dentro de la apertura más
pequeña en la base (B).
D
CÓMO CERRAR EL RECIPIENTE EN POSICIÓN
1. Inserte el poste central en la base. Coloque el recipiente
en la base con el asa orientada hacia la izquierda del
mecanismo de cierre (C) sobre el símbolo de abrir.
2. Sujete el asa y gire el recipiente hacia la dirección del
símbolo hasta que encaje firmemente en su lugar (D).
Nota: Asegúrese de cerrar el recipiente en su lugar antes de
E
insertar las cuchillas de picar o el disco rebanador/rallador y
la tapa.
COMO BLOQUEAR EL PROCESAMIENTO EN POSICIÓN
RECIPIENTE
1. Fije el poste central para recipiente. Coloque el recipiente
en la base con el asa hacia la derecha del mecanismo de
F
bloqueo (C) sobre el símbolo de desbloqueo
2. Sostenga el asa y gire el recipiente hacia la derecha hacia el
símbolo de bloqueo hasta que encaje en su lugar (D).
Nota: Asegúrese de cerrar el recipiente en su lugar antes de
colocar la cuchilla de picar o el disco de corte y trituración y
la tapa.
CÓMO CORTAR EN EL RECIPIENTE PROCESAMIENTO
La cuchilla de cortar se usa para picar texturas gruesas o
finas, picar, mezclar, y los alimentos puré hasta lograr una
consistencia suave.
1. Lock recipiente en su posición (vea las ilustraciones C y D).
G
2. Sostenga la cuchilla de cortar el vástago y deslícela sobre la guía central
(E).
Precaución: La cuchilla para picar es muy fuerte. Tenga
cuidado al manejar y almacenar.
3. Coloque los alimentos en el recipiente.
4. Coloque la tapa sobre el recipiente y bloqueo en su lugar
H
girando en sentido horario (ver la ilustración H).
5. Coloque el empujador de alimentos en el lugar.
Importante: Nunca use los dedos a la alimentación directa a través del
conducto de alimentación.
6. Seleccione la velocidad deseada (PULSE, 1 o 2).
Nota: Procese los alimentos por no más de unos pocos segundos a la vez.
Pulsante produce resultados excelentes y ofertas
un mayor control.
Importante: Asegúrese de que la cuchilla de picar se ha detenido por
completo antes de retirar la cubierta de procesamiento tazón.
7. Gire el selector a la posición de apagado (0) posición y permitir que la
cuchilla de picar dejen de girar antes de retirar la cubierta. Gire la tapa
hacia
(hacia la izquierda) para eliminar.
Importante: Abra la tapa antes de retirar el recipiente.
8. Desbloquear recipiente girándolo hacia la izquierda y levante la base.
Nota: Retire el recipiente del aparato antes de retirar la cuchilla de picar para
evitar que los alimentos se filtre a través de la abertura central del recipiente.
9. Retire con cuidado la cuchilla de picar.
10. Desconecte el aparato cuando no está en uso.
CONSEJOS ÚTILES PARA PICAR
• Preste atención para evitar el exceso de procesamiento de alimentos.
• La posición PULSE ofrece el mejor control.
• Para mejores resultados, se recomienda procesar alimentos
aproximadamente el mismo tamaño.
• No sobrecargue el recipiente.
• Nunca desatienda el procesador mientras está encendido.
• Usted puede utilizar líquidos calientes pero no hirviendo.
• No procese más tazas 3 de líquido en el recipiente en cualquier momento
dado.
• Para procesar la carne, no use más de 2 tazas de cubos de ¾ de pulgada.
Proceso mediante PULSE en intervalos de 5 segundos.
• Insertar un embudo en el conducto de alimentación para agregar
ingredientes como el aceite, la harina y el azúcar.
CÓMO CORTAR NI DESTRUYA EN EL RECIPIENTE
1. Lock recipiente en su posición (vea las ilustraciones C y D).
2. CColoque cuidadosamente cortado y el disco para rallar encima del poste
central con hasta lateral correspondiente (según el trabajo por hacer) (F).
PRECAUCIÓN: El disco de corte y trituración es muy fuerte. Tenga cuidado al
manejar y almacenar.
3. Coloque la tapa y el tazón de bloqueo en su lugar girando la cubierta hacia
la izquierda (ver ilustración H).
4. Rellene alimentar tolva con la comida. Coloque el empujador sobre los
alimentos (G).
5. Gire el dial a PULSE, 1 o posición 2; presione firmemente empujador para
guiar los alimentos a través de rampa de alimentación, pero no lo fuerce.
Nota: fuerte presión sobre el empujador no acelera el trabajo, utilice el
empujador solamente como una guía. Deje que el procesador haga el trabajo.
6. Cuando haya terminado, vuelva a marcar OFF (0) y espere para el disco
deje de girar antes de retirar la cubierta. Gire la tapa
hacia la izquierda
para quitarlo.
IMPORTANTE: Asegúrese de que el disco de corte y trituración haya detenido
por completo antes de retirar la tapa del tazón de procesamiento.
Importante: Abra la tapa antes de retirar el recipiente.
7. Retire con cuidado el disco de rebanar y triturar. Desbloquear recipiente
girándolo hacia la izquierda y levantándola de la base.
8. Desconecte el aparato cuando no está en uso.
CONSEJOS ÚTILES DURANTE EL CORTE Y TRITURACIÓN
• Antes de cortar frutas y verduras en el procesador, cortar una rebanada
delgada de la parte inferior de la comida para hacerla plana.
• Coloque el lado cortado hacia abajo alimentos en el conducto de
alimentación.
• Retire las semillas y los hoyos antes del procesamiento.
• Seleccione alimentos que sean firmes y maduras no.
• Quite el centro de vegetales duros como el repollo.
• Durante el corte más delgadas verduras, se cortan justo antes de la
longitud de la tolva de alimentación y de pie verticalmente en el conducto
de alimentación de manera que están sólidamente embalados y no puede
girar o inclinar.
• Triture los quesos duros a temperatura ambiente.
• Enfríe los quesos blandos y semiduros antes de la trituración.
• Después de la comida se ha procesado, retire la tapa e invierta en la
encimera. Retire el disco cortado y triturado antes de retirar el recipiente
del procesador. Colocar el disco en la parte superior de la tapa del
recipiente invertido.
COMO BLOQUEAR LA CUBIERTA
1. Coloque la tapa sobre el recipiente con el pequeño pestillo a la izquierda del
asa del recipiente (H).
2. Mantenga alimentar tolva de la cubierta tazón y gire hacia la izquierda
hasta cubrir tapa quede en su lugar.
Importante: Para su protección, este aparato cuenta con un sistema de
bloqueo. El procesador no funcionará a menos que el recipiente de
procesamiento y la cubierta están bien bloqueado en su lugar.
3. Inserte el empujador de alimentos en el conducto de alimentación.
Nota: El empujador de alimentos se utiliza para guiar los alimentos a través
de la tolva de alimentación y se puede quitar cuando la adición de alimentos
líquidos o adicional mientras que el procesador está funcionando.
CUIDADO Y LIMPIEZA
Nota: No trate de afilar los bordes cortantes de la cuchilla o disco de cortar
cortar y triturar. Ellos vienen afilados de fábrica y se arruinará si afilada.
LIMPIEZA
Nota: Antes de limpiar, asegúrese de que la unidad está apagada y el cable
desenchufado.
• Completamente desmontar las piezas del procesador antes de lavar.
• Enjuague las piezas inmediatamente después de procesar para una fácil
limpieza.
Precaución: El corte y el disco de trituración es muy fuerte. Tenga cuidado al
manejar y almacenar.
• Limpie la base y los pies con un paño húmedo y séquela bien. Las manchas
persistentes pueden eliminarse frotando con un paño húmedo y un
detergente suave, no abrasivo. No sumerja la base en líquido.
• Todas las piezas desmontables se pueden lavar a mano o en el lavavajillas.
El lavado de manos de las piezas de plástico le ayudará a mantener su
apariencia en el procesador de alimentos.
• Si es necesario lavar a mano, llene el recipiente con agua jabonosa caliente
y rápidamente subir y bajar el disco de cortar la hoja o corte y trituración de
arriba y abajo en el eje central.
Precaución: El corte y el disco de trituración es muy fuerte. Tenga cuidado al
manejar y almacenar.
• Si usa la máquina lavaplatos, coloque las piezas removibles en la bandeja
superior solamente - no en o cerca de canasta utensilio.
• Algunas manchas de partes puede ocurrir. Si es así, haga una pasta
compuesta de 2 cucharadas de bicarbonato de sodio y 1 cucharada de
agua. Aplicar a las manchas y dejar reposar durante la noche. Enjuague y
seque.
• No use almohadillas ni limpiadores abrasivos en ninguna parte de plástico
o de metal para limpiar.
• No permita que la cuchilla de cortar o rebanar y triturar disco en remojo en
agua durante largos períodos de tiempo.
• Recuerde limpiar el eje interno de la cuchilla de picar, el uso de un cepillo
de botella de bebé para eliminar las partículas de alimentos tapados.
• Si usted está teniendo problemas para cerrar la tapa sobre el recipiente,
aplique una pequeña cantidad de aceite vegetal en el borde de la tapa y
el recipiente. Esto debería hacer que las piezas de trabajo más suave al
colocar la tapa al recipiente.
¿NECESITA AYUDA?
Para servicio, reparaciones o preguntas relacionadas al producto, por favor
llame al número del centro de servicio que se indica para el país donde usted
compró su producto. NO devuélva el producto al fabricante. Llame o lleve el
producto a un centro de servicio autorizado.
DOS AÑOS DE GARANTÍA LIMITADA
(No aplica en México, Estados Unidos y Canada)
¿Qué cubre la garantía?
• La garantía cubre cualquier defecto de materiales o de mano de obra que no
haya sido generado por el uso incorrecto del producto.
¿Por cuánto tiempo es válida la garantía?
• Por dos años a partir de la fecha original de compra mientras que tenga una
prueba de la compra.
¿Cómo se obtiene el servicio necesario?
• Conserve el recibo original como comprobante de la fecha de compra,
comuníquese con el centro de servicio de su país y haga efectiva su garantía
si cumple lo indicado en el manual de instrucciones.
¿Cómo se puede obtener servicio?
• Conserve el recibo original de compra.
• Por favor llame al número del centro de servicio autorizado.
¿Qué aspectos no cubre esta garantía?
• Los productos que han sido utilizados en condiciones distintas a las normales.
• Los daños ocasionados por el mal uso, el abuso o negligencia.
• Los productos que han sido alterados de alguna manera.
• Los daños ocasionados por el uso comercial del producto.
• Los productos utilizados o reparados fuera del país original de compra.
• Las piezas de vidrio y demás accesorios empacados con el aparato.
• Los gastos de tramitación y embarque asociados al reemplazo del producto.
• Los daños y perjuicios indirectos o incidentales.
¿Qué relación tiene la ley estatal con esta garantía?
• Esta garantía le otorga derechos legales específicos y el consumidor podría
tener otros derechos que varían de una región a otra.
Póliza de Garantía
(Válida sólo para México)
Duración
Rayovac de México SA de CV garantiza este producto por
2 años a partir de la fecha original de compra.
¿Qué cubre esta garantía?
Esta Garantía cubre cualquier defecto que presenten las piezas, componentes
Advertisement
Table of Contents

Related Manuals for Black & Decker FP1140BD


Summary of Contents for Black & Decker FP1140BD
-
Page 1: Important Safeguards
Please Read and Save this Use and Care Book. The chopping blade is used to coarsely or finely chop, mince, • Do not allow chopping blade or slicing and shredding disc to soak in water valorados, use un cordón de extensión no menor de 6 amperios.) Si se utiliza alimentos (G). - Page 2 ¿Donde hago válida la garantía? fonctionne en mode PULSE (IMPULSION). Lorsqu’on le relâche, le cadran • Pour trancher des légumes minces, les couper à une dimension tout juste Model/Modelo/ Modèle: FP1140BD Monroe 3351 Col. Centro, Cuauhtemoc, Llame sin costo al teléfono 01 800 714 2503, para ubicar el Centro de Ser- retourne à...
Need help?
Do you have a question about the FP1140BD and is the answer not in the manual?
Questions and answers