H3C S5120-EI series Installation Manual
Hide thumbs
Also See for S5120-EI series:
- Operation manual (1191 pages) ,
- Command reference manual (242 pages) ,
- Configuration manual (206 pages)

Related Manuals for H3C S5120-EI series


Summary of Contents for H3C S5120-EI series
-
Page 1: Installation Guide
H3C S5120-EI Switch Series Installation Guide Hangzhou H3C Technologies Co., Ltd. http://www.h3c.com Document version: 6W102-20130630... - Page 2 Copyright © 2009-2013, Hangzhou H3C Technologies Co., Ltd. and its licensors All rights reserved No part of this manual may be reproduced or transmitted in any form or by any means without prior written consent of Hangzhou H3C Technologies Co., Ltd.
- Page 3 Preface H3C S5120-EI Switch Series Installation Guide describes the appearance, installation, power-on, maintenance, and troubleshooting of the S5120-EI switches. This preface includes: • Audience Conventions • About the H3C S5120-EI documentation set • Obtaining documentation • • Technical support Documentation feedback •...
- Page 4 Convention Description The argument or keyword and argument combination before the ampersand (&) sign can &<1-n> be entered 1 to n times. A line that starts with a pound (#) sign is comments. GUI conventions Convention Description Window names, button names, field names, and menu items are in Boldface. For Boldface example, the New User window appears;...
-
Page 5: Obtaining Documentation
Obtaining documentation You can access the most up-to-date H3C product documentation on the World Wide Web at http://www.h3c.com. Click the links on the top navigation bar to obtain different categories of product documentation: [Technical Support &... -
Page 6: Technical Support
– Provides information about products and technologies, as well as solutions. [Technical Support & Documents > Software Download] – Provides the documentation released with the software version. Technical support service@h3c.com http://www.h3c.com Documentation feedback You can e-mail your comments about product documentation to info@h3c.com. We appreciate your comments. -
Page 7: Table Of Contents
Contents Preparing for installation ············································································································································· 1 Safety recommendations ·················································································································································· 1 Examining the installation site ········································································································································· 1 Temperature/humidity ············································································································································· 1 Cleanness ·································································································································································· 2 EMI ············································································································································································· 2 Laser safety ································································································································································ 2 Installation tools ································································································································································· 3 ... - Page 8 Powering on the switch·················································································································································· 30 Maintenance and troubleshooting ···························································································································· 31 Software loading failure ················································································································································ 31 Power supply failure ······················································································································································ 31 Fan failure ······································································································································································· 33 Configuration terminal problems ·································································································································· 33 Appendix A Chassis views and technical specifications ························································································ 34 ...
-
Page 9: Preparing For Installation
Preparing for installation Safety recommendations To avoid any equipment damage or bodily injury caused by improper use, observe these rules: Before cleaning the switch, remove the power cord of the switch. Do not clean the switch with wet • cloth or liquid. Do not place the switch near water or in a damp environment. -
Page 10: Cleanness
Cleanness Dust buildup on the chassis might result in electrostatic adsorption, which causes poor contact of metal components and contact points, especially when indoor relative humidity is low. In the worst case, electrostatic adsorption can cause communication failure. Table 1 Dust concentration limit in the equipment room Substance Unit Concentration limit... -
Page 11: Installation Tools
Installation tools • Flathead screwdriver Phillips screwdriver • Needle-nose pliers • • Wire-stripping pliers Diagonal pliers • ESD-preventive wrist strap • Blow dryer • All these installation tools are user supplied. -
Page 12: Installing The Switch
Keep the tamper-proof seal on a mounting screw on the chassis cover intact, and if you want to open the chassis, contact the local agent of H3C for permission. Otherwise, H3C shall not be liable for any consequence caused thereby. -
Page 13: Installing The Switch Into A 19-Inch Rack
NOTE: The S5120-28C-EI, S5120-52C-EI, S5120-28C-PWR-EI, and S5120-52C-PWR-EI support IRF. For more information, see "Setting up an IRF fabric." Installing the switch into a 19-inch rack Installation methods You can install a switch into a 19-inch standard rack in one of the following ways: Use front mounting brackets •... -
Page 14: Rack-Mounting By Using Front Mounting Brackets
Figure 3 Appearance of a rear mounting bracket (1) Screw hole for attaching the mounting bracket to the cabinet (Use one M6 screw) For the selection of front and rear mounting brackets, see Table Table 4 Selection of mounting bracket for the S5120-EI Switch Series Configuration type of Configuration type of Model... -
Page 15: Rack-Mounting By Using Mounting Brackets And A Rack-Shelf
Figure 4 Attaching front mounting brackets (1) (1) Front panel of the switch Place the switch horizontally in a proper position, and attach the other end of mounting brackets to the front brackets with screws and cage nuts, as shown in Figure Figure 5 Attaching front mounting brackets (2) (1) Front square-holed post... -
Page 16: Rack-Mounting By Using Front And Rear Mounting Brackets
Unpack the screws which are packed together with the front mounting brackets, and attach one end of mounting brackets to the switch, as shown in Figure Place the switch on the rack-shelf horizontally, slide the rack-shelf into the rack, and attach the other end of mounting brackets to the front brackets with crews and cage nuts, as shown in Figure Rack-mounting by using front and rear mounting brackets... - Page 17 Figure 7 Attaching rear mounting brackets (1) Rear square-holed post (2) Rear mounting bracket Support the bottom of the switch with one hand and the front part of the switch with the other hand, and push the switch into the rack gently, as shown in Figure Figure 8 Attaching front and rear mounting brackets...
- Page 18 (1) Front square-holed post (2) Load-bearing screw (3) Rear panel (4) Rear square-holed post (5) Rear mounting bracket (6) Screw used to attach rear mounting brackets to rear posts (7) Front mounting bracket After the switch is pushed into the rack, make sure the upper edge of rear mounting brackets makes close contact with the load-bearing screw, as shown in Figure Figure 9 Front and rear mounting bracket installation (1)
-
Page 19: Mounting The Switch On A Workbench
Figure 10 Front and rear mounting bracket installation (2) (1) (2) (1) Load-bearing screw (2) Rear mounting bracket (3) Front panel (4) Screw used to attach front mounting brackets to front brackets (5) Front mounting bracket (6) Front square-holed post Mounting the switch on a workbench In many cases, standard 19-inch racks are not available. -
Page 20: Grounding The Switch
Attach the rubber feet to the four round holes on the chassis bottom. Place the switch with upside up on the workbench. IMPORTANT: Ensure good ventilation and a space of 10 cm (3.94 in) around the chassis for heat dissipation. •... - Page 21 Figure 11 Connecting the grounding cable to the grounding hole of switch (1) Rear panel of the switch (2) Grounding sign (3) Grounding hole (4) Ring terminal (5) Grounding cable (6) Grounding screw To attach the other end of the grounding cable to the grounding strip: Cut the grounding cable as appropriate for connecting to the grounding strip.
-
Page 22: Grounding The Switch With A Grounding Conductor Buried In The Earth Ground
Grounding the switch with a grounding conductor buried in the earth ground If the installation site has no grounding strips, but earth ground is available, hammer a 0.5 m (1.64 ft) or longer angle iron or steel tube into the earth ground to serve as a grounding conductor. The angle iron must have a dimension no less than 50 ×... -
Page 23: Connecting The Power Cords
Figure 14 Grounding through an AC power PE wire (1) Three-wire AC power input cable (2) Switch rear panel NOTE: To guarantee the grounding effect, use the grounding cable provided with the switch to connect to the grounding strip in the equipment room as long as possible. Connecting the power cords CAUTION: Make sure the grounding cable has been correctly connected before powering on the switch. - Page 24 Figure 15 Connecting an AC power cord to a horizontal AC power receptacle (I) Figure 16 Connecting an AC power cord to a horizontal AC power receptacle (II) Figure 17 Connecting an AC power cord to a vertical AC power receptacle (1) Figure 18 Connecting an AC power cord to a vertical AC power receptacle (2)
-
Page 25: Connecting The Rps Power Cord
Connecting the RPS power cord Connect RPS power cords of S5120-28C-EI, S5120-52C-EI, S5120-24P-EI, and S5120-48P-EI Wear an ESD-preventive wrist strap, and make sure it makes good skin contact and is well grounded. Loosen the captive screws on the RPS receptacle protective cover and remove the protective cover, as shown in Figure 19. -
Page 26: Installing And Removing An Interface Card
Figure 21 Connecting an RPS power cord to the S5120-28C-PWR-EI/S5120-52C-PWR-EI Connect the other end of the RPS DC power cord to the RPS power source. Verify that the RPS LED on the front panel of the switch is ON. If the LED is ON, it shows the power cord is correctly connected. -
Page 27: Removing An Interface Card
Figure 23 Installing an interface card (2) NOTE: • Keep the removed filler panel properly for future use. When tightening the fastening screws at both sides of the interface card with a screwdriver or an electric • screwdriver, make sure the torque is not bigger than 0.4 N-m. Removing an interface card CAUTION: When installing or removing an optional interface card, follow these guidelines:... -
Page 28: Verifying The Installation
The installation and removal procedures of a CX4 cable are similar to an SFP+ cable. This section describes the installation and removal of the SFP+ cable for illustration. To install a dedicated CX4/SFP cable: Wear an ESD-preventive wrist strap and make sure it makes good skin contact is well grounded. Then unpack the dedicated SFP+ cable. -
Page 29: Setting Up An Irf Fabric
Setting up an IRF fabric You can use H3C Intelligent Resilient Framework (IRF) technology to connect and virtualize 5120 EI switches into a virtual switch called an "IRF fabric" or "IRF fabric" for flattened network topology, and high availability, scalability, and manageability. -
Page 30: Drawing A Plan For An Irf Fabric
For more information, see Installing and removing an interface card. Configure software for For more information about the IRF function, see H3C S5120-EI Series the IRF members Ethernet Switches IRF Configuration Guide. Power off the switches Use cables to connect 10 G ports of the interface cards: •... - Page 31 Select the proper interface cards and cables You can select the interface cards and cables according to the distance between members of the IRF fabric. For long-distance connections, use XFP/SFP+ optical modules and fibers to connect the devices; for short-distance connections, use CX4/SFP+ cables or twisted-pair cables to connect the devices. For relevant information, see "Interface cards."...
- Page 32 Install the interface cards in proper slots as needed. Each S5120-EI series provides two expansion • slots. Determine the ports on different devices to be connected. • When 2-port interface cards are used to constitute an IRF fabric and the ports are not assigned to any aggregation group, ports of the interface card in slot 1 (MOD 1) can be connected to ports of MOD 1 or MOD 2.
- Page 33 Figure 29 Cable connections for an IRF fabric with 1-port interface cards...
-
Page 34: Accessing The Switch For The First Time
Accessing the switch for the first time Setting up the configuration environment The first time you access the switch you must use a console cable to connect a console terminal, for example, a PC, to the console port on the switch. Figure 30 Connecting the console port to a terminal Connecting the console cable Console cable... -
Page 35: Setting Terminal Parameters
Connect the RJ-45 connector of the console cable to the console port of the switch. NOTE: Identity the mark on the console port to ensure that you are connecting to the correct port. • The serial ports on PCs do not support hot swapping. If the switch has been powered on, connect the •... - Page 36 Figure 33 Set the serial port used by the HyperTerminal connection Set Bits per second to 9600, Data bits to 8, Parity to None, Stop bits to 1, and Flow control to None, and click OK. Figure 34 Setting the serial port parameters Select File >...
- Page 37 Figure 35 HyperTerminal window On the Settings tab, set the emulation to VT100 and click OK. Figure 36 Setting terminal emulation in Switch Properties dialog box...
-
Page 38: Powering On The Switch
Powering on the switch Before powering on the switch, verify that the following conditions are met: The power cord is correctly connected. • The input power voltage meets the requirement of the switch. • The console cable is correctly connected. •... -
Page 39: Maintenance And Troubleshooting
Maintenance and troubleshooting Software loading failure The switch runs with the original software version after it has failed to load new version of software. To identify and remove the loading failure cause, perform the following check procedure: Verify that the physical ports are correctly connected. •... - Page 40 The power cord is well connected to the switch, and the AC receptacle on the switch and the AC • power receptacle are normal. The AC power source is correctly working. • The operating temperature of the switch is normal, and the power module has good ventilation •...
-
Page 41: Fan Failure
The LED flashes F for fan failure. Seven-segment LED Unit The S5120-EI Switch Series uses built-in fans. If a built-in fan failure occurs, contact your H3C sales agent or service engineer for assistance and do not attempt to fix the problem yourself. NOTE: To ensure normal operation of the switch, contact the local sales agent or service engineer as soon as possible when a built-in fan failure occurs. -
Page 42: Appendix A Chassis Views And Technical Specifications
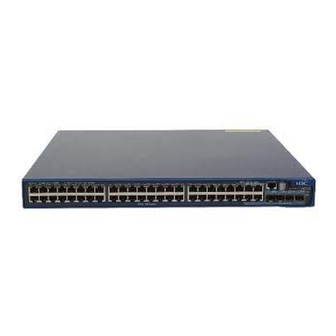
Appendix A Chassis views and technical specifications Chassis views S5120-28C-EI Figure 37 S5120-28C-EI front panel (3) (4) (5) (6) (7) (10) (12) (11) (1) 10/100/1000 Base-T auto-sensing Ethernet port (2) 10/100/1000 Base-T auto-sensing Ethernet port status LED (3) 1000 Base-X SFP port (4) 1000Base-X SFP port status LED (5) Console port (6) Seven-segment LED... -
Page 43: S5120-52C-Ei
S5120-52C-EI Figure 39 S5120-52C-EI front panel (1) 10/100/1000 Base-T auto-sensing Ethernet port (2) 10/100/1000 Base-T auto-sensing Ethernet port status LED (3) Console port (4) Seven-segment LED (5) Port mode LED (Mode) (6) System status LED (PWR) (7) RPS status LED (RPS) (8) Interface card 1 status LED (MOD1) (9) Interface card 2 status LED (MOD2) (10) Port status LED mode switching button... -
Page 44: S5120-24P-Ei
S5120-24P-EI Figure 41 S5120-24P-EI front panel (1) 10/100/1000 Base-T auto-sensing Ethernet (2) 10/100/1000 Base-T auto-sensing Ethernet port port status LED (3) SFP port (4) SFP port status LED (5) Console port (6) Seven-segment LED (7) Port mode LED (Mode) (8) System status LED (PWR) (9) RPS status LED (RPS) (10) Port status LED mode switching button Figure 42 S5120-24P-EI rear panel... -
Page 45: S5120-28C-Pwr-Ei
(5) Port mode LED (Mode) (6) System status LED (PWR) (7) RPS status LED (RPS) (8) Port status LED mode switching button (9) SFP port (10) SFP port status LED Figure 44 S5120-48P-EI rear panel (1) AC power input (2) RPS power input (with filler panel) (3) Grounding screw (4) "DO NOT REMOVE"... -
Page 46: S5120-52C-Pwr-Ei
Figure 46 S5120-28C-PWR-EI (PoE+ model) fear panel (1) RPS power input (2) AC power input (3) Grounding screw (4) Interface card slot 1 (MOD1) (5) Interface card slot 2 (MOD2) (6) PoE+ label Figure 47 S5120-28C-PWR-EI (PoE model) rear panel (1) RPS power input (2) AC power input (3) Grounding screw... - Page 47 Figure 48 S5120-52C-PWR-EI front panel (1) 10/100/1000 Base-T auto-sensing Ethernet port (2) 10/100/1000 Base-T auto-sensing Ethernet port status LED (3) Console port (4) Seven-segment LED (5) Port mode LED (Mode) (6) System status LED (PWR) (7) RPS status LED (RPS) (8) Interface card 1 status LED (MOD1) (9) Interface card 2 status LED (MOD2) (10) Port status LED mode switching button...
-
Page 48: Technical Specifications
NOTE: The S5120-52C-PWR-EI is shipped with the two expansion interface card slots covered by filler panels. You can select one or two interface cards for your switch as needed. For the interface cards available for the S5120-EI Switch Series, see "Interface cards."... - Page 49 The rated voltage range is 10.8 VDC to 13.2 VDC. Use the external RPS power supply voltage units recommended by H3C only. For relevant information, see the RPS user manuals and RPS Ordering Guide for H3C Low-End Series Ethernet Switches.
- Page 50 Input The rated voltage range is –55 VDC to –52 VDC. Use the external RPS power supply voltage units recommended by H3C only. For relevant information, see RPS Ordering Guide for H3C Low-End Series Ethernet Switches. Maximum PoE 15.4 W 30 W 15.4 W...
-
Page 51: Appendix B Ports And Leds
Appendix B Ports and LEDs Ports Console port Each S5120-EI switch provides one console port on the front panel. Table 9 Console port specifications Item Specification Connector type RJ-45 Compliant standard Asynchronous EIA/TIA-232 Transmission baud rate 9600 bps (default) to 115200 bps •... -
Page 52: Leds
either the SFP port or the corresponding 10/100/1000Base-T Ethernet port can be used at a time. For more information about combo interfaces, see the Layer 2—LAN switching configuration guide for the switch. Table 11 Combo interface mapping relationship Model SFP port 10/100/1000Base-T Ethernet port GigabitEthernet 1/0/25 GigabitEthernet 1/0/22... -
Page 53: Rps Status Led
RPS status LED The RPS status LED shows the operating status of the RPS. Table 14 RPS status LED Mark Status Description Power input on the RPS interface is normal or the RPS is in position, and Steady green AC input on the AC power interface is normal. - Page 54 Table 16 Seven-segment LED description (1) Status Description System status LED Seven-segment LED (PWR/SYS) The LED displays numbers one by one. POST is running, and the Flashing green LED displays the ongoing test item ID. The LED displays flashing numbers. POST has failed, and the Flashing red LED flashes the ID of the...
-
Page 55: 10/100/1000Base-T Auto-Sensing Ethernet Port Status Led
Table 17 Seven-segment LED description (2) LED status Description Port mode LED System status Seven-segment LED (Mode) LED (PWR) For example, the The LED displays different signs. Flashing green sign indicates Unit (1 Hz) (PoE Steady green that the switch is 81 - 100% 61 - 80% mode) -
Page 56: Sfp Port Status Led
Status Description Port mode LED Ethernet port status LED Steady green PoE power supply is normal. The device attached to the port requires power higher than the Flashing green (1 Hz) maximum or currently available PoE output power on the port. The port is experiencing a PoE Flashing green (1 Hz) (PoE mode, failure. -
Page 57: Interface Card Status Led
Status Description Port mode LED Ethernet port status LED The port is operating in full duplex mode. The port status LED fast flashes Steady green when the port is sending or receiving data. Steady yellow (duplex mode) Flashing yellow (3 Hz) POST has failed on the port. -
Page 58: Appendix C Frus And Compatibility Matrixes
Appendix C FRUs and compatibility matrixes Interface cards Table 21 describes the interface cards that you can choose for the S5120-28C-EI, S5120-52C-EI, S5120-28C-PWR-EI, and S5120-52C-PWR-EI switches that provide interface card slots. Table 21 Description of the supported interface cards Card model Name Description Remarks... - Page 59 LSWM4STK 10 m (32.81 ft) NOTE: To guarantee the functionality of the SFP/SFP+/XFP ports, always use H3C transceiver modules on the • S5120-EI Switch Series. The transceiver modules available for this switch are subject to change over time. For the most up-to-date •...
- Page 60 Figure 51 SFP+ cable Table 24 10GE XFP transceiver modules Central Max transmission Transceiver module Connector Fiber wavelength distance 50/125 μm multimode 300 m (984.25 ft) optical fiber XFP-SX-MM850 850 nm 62.5/125 μm multimode 33 m (108.27 ft) optical fiber 9/125 μm single mode XFP-LX-SM1310 1310 nm...
-
Page 61: Appendix D Lightning Protection Of The Switch
Appendix D Lightning protection of the switch Installation of lightning arrester for ac power (socket strip with lightning protection) Make sure the arrester is well grounded before using the lightning arrester for power. After inserting AC power cord plug of switch into the socket of lightning arrester, if the green LED is on and the red LED does not alarm, it means that the lightning arrester of power is running and the function of lightning protection has taken effect. - Page 62 (2) Grounding/pole detection LED On indicates a wrong wire connection (the wire is not grounded or the live (red) line and null line are reversely connected), and you need to check the power supply line. (3) Power switch (4) IEC standard socket It is used to connect to the power supply in the equipment room through a power cord.
-
Page 63: Index
Index C D E F G I L M P S T V IRF fabric setup flowchart,21 Chassis views,34 Configuration terminal problems,33 LEDs,44 Connecting the console cable,26 Connecting the power cords,15 Mounting the switch on a workbench,1 1 Drawing a plan for an IRF fabric,22 Ports,43 Power supply...
Need help?
Do you have a question about the S5120-EI series and is the answer not in the manual?
Questions and answers