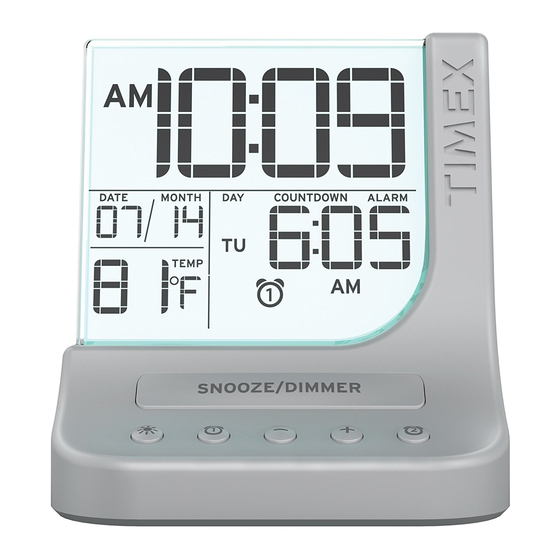
Summary of Contents for Timex T125
- Page 1 Model T125 Color Changing Dual Alarm Clock with USB Charging For additional information, online registration, and exclusive special offers visit our website: Questions? Contact Customer Service at 1-800-888-4491...
-
Page 2: Table Of Contents
What’s in the Box This product ships with the following items. Make sure all are present. 3. User Guide 1. T125 Alarm Clock 2. AC Adapter Product Care • Place the unit on a level surface away from sources of direct sunlight or excessive heat. -
Page 3: Controls Overview
Controls Overview Top Panel Bottom Panel Snooze/Display Dimmer Button Backup Battery Compartment Color Alarm 1 – Set + Set Alarm 2 Daylight Saving Time Button Button Button Button Button Switch Right Side Panel Rear Panel DC Jack Time Set Button USB Charging Port... -
Page 4: Display
Display Time display AM Indicator PM Indicator Backup Battery Low Indicator Calendar Alarm Time/Seconds/ Countdown Display Indoor Temperature (press – and + Buttons together to switch between Fahrenheit AM/PM Alarm Time Indicator and Celsius) Day Indicator Alarm 1/Alarm 2 Active Indicator Daylight Saving Time Mode Indicator... -
Page 5: Set Up
Installing and Replacing Backup Batteries Your new Timex Alarm Clock includes a battery backup system that will maintain the time and alarm settings during a temporary power interruption. 1. Keep unit connected to AC power when changing batteries to avoid losing your settings. -
Page 6: Setting The Time
Setting the Time By default, the Daylight Saving Time (DST) Switch located on the bottom of the unit is set to Auto to automatically adjust the time when it changes in March and November. If you are in a location that does not observe Daylight Saving Time, slide the DST Switch to the -1 or +1 position before setting the time. - Page 7 Setting the Time Press the Time Set Button. The current set year will flash in the month/day section of the display. Press and release the – or + Set Button to adjust to the current year Press the Time Set Button to confirm the set year. The month will flash. Press and release the –...
- Page 8 Setting the Time Press the Time Set Button to confirm the month. The current set date will flash. Press and release the – or + Set Button to adjust to the current date (hold for rapid adjust), then press the Time Set Button to complete time setting.
-
Page 9: Setting And Using Alarms
Setting and Using Alarms This unit has two independent alarms, Alarm 1 (buzzer) and Alarm 2 (melody). Each is set and operates in the same way. Instructions below show setting the buzzer alarm (Alarm 1). Follow the same method to set the melody alarm (Alarm 2). Press and hold the Alarm 1 Button until current alarm time flashes on the display and a beep sounds. -
Page 10: Dimmer
CANCELING/DISARMING AN ALARM Press and release the related Alarm Button to cancel a currently set or sounding alarm. The related alarm indicator will disappear from the display. To re-arm an alarm, press and release the alarm button again. SNOOZE Press and release the Snooze/Dimmer Button when the alarm sounds to silence it for 9 minutes. -
Page 11: Countdown Timer
Countdown Timer 2 SECS Press and hold the Snooze/Dimmer Button to activate the countdown timer. The default setting “10:00” will flash and COUNTDOWN will appear on the display. Press and release the – or + Set Button to adjust the timer to the desired countdown time (press and hold for rapid adjustment). -
Page 12: Charging Devices Using The Usb Port
Connect the USB cable plug included with your device to the standard 1 Amp USB Charging Port on the right side of the T125 and connect the other end to the device you wish to charge. Monitor charging status on the device. Some devices require higher output USB. -
Page 13: Safety Information
IMPORTANT SAFETY INSTRUCTIONS When used in the directed manner, this unit has been designed and manufactured to ensure your personal safety. However, improper use can result in potential electrical shock or fire hazards. Please read all safety and operating instructions carefully before installation and use, and keep these instructions handy for future reference. -
Page 14: Troubleshooting
Troubleshooting 1. The unit does not power ON The unit is not connected to AC outlet, the AC outlet has no power, or is controlled by a wall switch that is “OFF”. Check AC outlet and wall switch. 2. Alarm does not come on The alarm time AM or PM incorrectly set, Alarm was OFF, etc. -
Page 15: Warranty Information
Limited 90 Day Warranty Information Timex Audio Products, a division of SDI Technologies Inc. (hereafter referred to as SDI), warrants this product to be free from defects in workmanship and materials, under normal use and conditions, for a period of ninety (90) days from the date of original purchase. - Page 16 T125-060216-C Printed in China...


Need help?
Do you have a question about the T125 and is the answer not in the manual?
Questions and answers