Table of Contents
Advertisement
Quick Links
Quick Installation Guide
00825-0100-4662, Rev CC
December 2012
Rosemount 8732E Magnetic Flowmeter System
(Transmitter and Sensor)
www.rosemount.com
¢00825-0100-4725.¤
Step 1: Pre-Installation
Step 2: Handling
Step 3: Mounting
Step 4: Installation
Step 5: Grounding
Step 6: Wiring
Step 7: Basic Configuration
Product Certifications
Start
End
Rosemount 8732
Advertisement
Table of Contents

Related Manuals for Emerson Rosemount 8732E


Summary of Contents for Emerson Rosemount 8732E
- Page 1 Quick Installation Guide 00825-0100-4662, Rev CC Rosemount 8732 December 2012 Rosemount 8732E Magnetic Flowmeter System (Transmitter and Sensor) Start Step 1: Pre-Installation Step 2: Handling Step 3: Mounting Step 4: Installation (Flanged Sensors) (Wafer Sensors) (Sanitary Sensors) Step 5: Grounding...
- Page 2 Quick Installation Guide 00825-0100-4662, Rev CC Rosemount 8732 December 2012 © 2013 Rosemount Inc. All rights reserved. All marks property of owner. Emerson Process Management Emerson Process Emerson Process Emerson FZE Rosemount Flow Management Flow Management Asia Pacific P.O. Box 17033...
- Page 3 Quick Installation Guide 00825-0100-4662, Rev CC Rosemount 8732 December 2012 1: P NSTALLATION Before installing the Rosemount 8732 Magnetic Flowmeter Transmitter, there are several pre-installation steps that should be completed to make the installation process easier: • Identify the options and configurations that apply to your application •...
-
Page 4: Installation Procedures
Quick Installation Guide 00825-0100-4662, Rev CC Rosemount 8732 December 2012 Environmental Considerations To ensure maximum transmitter life, avoid excessive heat and vibration. Typical problem areas: • high-vibration lines with integrally mounted transmitters • warm-climate installations in direct sunlight • outdoor installations in cold climates. Remote-mounted transmitters may be installed in the control room to protect the electronics from the harsh environment and provide easy access for configuration or service. - Page 5 Quick Installation Guide 00825-0100-4662, Rev CC Rosemount 8732 December 2012 Changing Hardware Switch Settings In most cases, it is not necessary to change the setting of the hardware switches. If you need to change the switch settings, complete the steps outlined in the manual. Electrical Considerations Before making any electrical connections to the Rosemount 8732, consider local and plant electrical standards and be sure to have the proper power supply, conduit, and other...
- Page 6 Quick Installation Guide 00825-0100-4662, Rev CC Rosemount 8732 December 2012 2: H ANDLING Handle all parts carefully to prevent damage. Whenever possible, transport the system to the installation site in the original shipping containers. PTFE-lined sensors are shipped with end covers that protect it from both mechanical damage and normal unrestrained distortion. Remove the end covers just before installation.
- Page 7 Quick Installation Guide 00825-0100-4662, Rev CC Rosemount 8732 December 2012 3: M OUNTING Upstream/Downstream Piping To ensure specification accuracy over widely varying process conditions, install the sensor a minimum of five straight pipe diameters upstream and two pipe diameters downstream from the electrode plane (see Figure 3).
- Page 8 Quick Installation Guide 00825-0100-4662, Rev CC Rosemount 8732 December 2012 Sensor Location The sensor should be installed in a location that ensures the sensor remains full during operation. Vertical installation allows upward process fluid flow and keeps the cross-sectional area full, regardless of flow rate. Horizontal installation should be restricted to low piping sections that are normally full.
- Page 9 Quick Installation Guide 00825-0100-4662, Rev CC Rosemount 8732 December 2012 4: I NSTALLATION Flanged Sensors Gaskets The sensor requires a gasket at each of its connections to adjacent devices or piping. The gasket material selected must be compatible with the process fluid and operating conditions. Metallic or spiral-wound gaskets can damage the liner.
-
Page 10: Table Of Contents
Quick Installation Guide 00825-0100-4662, Rev CC Rosemount 8732 December 2012 additional 10% increments until the joint stops leaking, or until the measured torque value reaches the maximum torque value of the bolts. Practical consideration for the integrity of the liner often leads the user to distinct torque values to stop leakage due to the unique combinations of flanges, bolts, gaskets, and sensor liner material. -
Page 11: Inch (25 Mm)
Quick Installation Guide 00825-0100-4662, Rev CC Rosemount 8732 December 2012 Table 2. Flange Bolt Torque and Bolt Load Specifications for 8705 (EN 1092-1) PTFE/ETFE liner PN10 PN 16 PN 25 PN 40 Size Code Line Size (Newton-meter) (Newton-meter) (Newton-meter) (Newton-meter) 0.5-inch (15 mm) 1 inch... -
Page 12: Inch (40 Mm)
Quick Installation Guide 00825-0100-4662, Rev CC Rosemount 8732 December 2012 Table 2. (continued) Flange Bolt Torque and Bolt Load Specifications for 8705 (EN 1092-1) Polyurethane, Linatex, Adiprene and Neoprene Liners PN 10 PN 16 PN 25 PN 40 Size Code Line Size (Newton-meter) (Newton-meter) (Newton-meter) - Page 13 Quick Installation Guide 00825-0100-4662, Rev CC Rosemount 8732 December 2012 Wafer Sensors Gaskets The sensor requires a gasket at each of its connections to adjacent devices or piping. The gasket material selected must be compatible with the process fluid and operating conditions. Metallic or spiral-wound gaskets can damage the liner.
- Page 14 Quick Installation Guide 00825-0100-4662, Rev CC Rosemount 8732 December 2012 Table 4. Rosemount Alignment Spacer Table Rosemount Alignment Spacer Table Line Size Dash No. (in) (mm) Flange Rating 0A15 JIS 10K-20K 0A20 JIS 10K-20K 0A30 JIS 10K 0B15 JIS 40K AA15 ANSI - 150# AA20...
-
Page 15: Inch (50 Mm)
Quick Installation Guide 00825-0100-4662, Rev CC Rosemount 8732 December 2012 Flange Bolts Wafer sensors require threaded studs. See Figure 7 for torque sequence. Always check for leaks at the flanges after tightening the flange bolts. All sensors require a second torquing 24 hours after initial flange bolt tightening. -
Page 16: December
Quick Installation Guide 00825-0100-4662, Rev CC Rosemount 8732 December 2012 5: G ROUNDING Use Table 6 to determine which process grounding option to follow for proper installation. The sensor case should be earth grounded in accordance with national and local electrical codes. - Page 17 Quick Installation Guide 00825-0100-4662, Rev CC Rosemount 8732 December 2012 Figure 12. Grounding with Grounding Rings or Lining Protectors Grounding Rings or Lining Protectors Figure 13. Grounding with Grounding Electrode...
- Page 18 Quick Installation Guide 00825-0100-4662, Rev CC Rosemount 8732 December 2012 6: W IRING This wiring section covers the connection between the transmitter and sensor, the 4-20 mA loop, and supplying power to the transmitter. Follow the conduit information, cable requirements, and disconnect requirements in the sections below. Conduit Ports and Connections Both the sensor and transmitter junction boxes have ports for 1/2-inch NPT conduit connections with optional CM20 or PG 13.5 connections available.
- Page 19 Quick Installation Guide 00825-0100-4662, Rev CC Rosemount 8732 December 2012 CONTINUED Run the appropriate size cable through the conduit connections in your magnetic flowmeter system. Run the power cable from the power source to the transmitter. Run the coil drive and signal cables between the flowmeter sensor and transmitter.
- Page 20 Quick Installation Guide 00825-0100-4662, Rev CC Rosemount 8732 December 2012 CONTINUED To order cable specify length as quantity desired. 25 feet = Qty (25) 08732-0753-1003 Table 7. Cable Requirements Description Length Part Number Coil Drive Cable (14 AWG) 08712-0060-0001 Belden 8720, Alpha 2442 08712-0060-2013 or equivalent Signal Cable (20 AWG)
- Page 21 Quick Installation Guide 00825-0100-4662, Rev CC Rosemount 8732 December 2012 CONTINUED Figure 16. Remote Mount Wiring Diagrams NOTE When using the Rosemount supplied combination cable, the signal wires for terminals 18 and 19 contain an additional shield wire. These two shield wires should be tied with the main shield wire at terminal 17 at the sensor terminal block and cut back to the insulation in the transmitter junction box.
- Page 22 Integral Mount Transmitters The interconnecting wire harness for an integral mount transmitter is installed at the factory. See Figure 18. Do not use cable other than that supplied by Emerson Process Management, Rosemount, Inc. Figure 18. 8732EST Integral Mount Wiring Diagram...
- Page 23 Quick Installation Guide 00825-0100-4662, Rev CC Rosemount 8732 December 2012 Connecting the 4–20 mA Analog Signal Cabling considerations If possible, use individually shielded twisted pair cable, either in single pair or multi-pair varieties. Unshielded cables may be used for short distances, provided ambient noise and cross-talk will not adversely impact communication.
- Page 24 The 8732E transmitter is designed to be powered by 90-250 Vac, 50–60 Hz or 12–42 Vdc. Before connecting power to the Rosemount 8732E, consider the following standards and be sure to have the proper power supply, conduit, and other accessories. Wire the transmitter according to national, local, and plant electrical requirements for the supply voltage.
- Page 25 Quick Installation Guide 00825-0100-4662, Rev CC Rosemount 8732 December 2012 CONTINUED 8732E Power Supply For AC power applications (90-250 VAC, 50-60 Hz) connect AC Neutral to terminal 9 (AC N/L2) and connect AC Line to terminal 10 (AC/L1). For DC power applications connect negative to terminal 9 (DC -) and positive to terminal 10 (DC +).
-
Page 26: Basic Setup
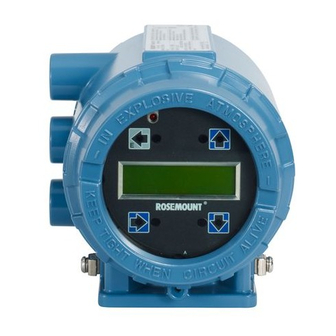
Quick Installation Guide 00825-0100-4662, Rev CC Rosemount 8732 December 2012 7: B ASIC ONFIGURATION Once the magnetic flowmeter is installed and power has been supplied, the transmitter must be configured through the basic setup. These parameters can be configured through either a local operator interface or a HART communication device. - Page 27 Quick Installation Guide 00825-0100-4662, Rev CC Rosemount 8732 December 2012 Table 11. Handheld Fast Keys (HART Handheld Communicator) Function HART Fast Keys Process Variables 1, 1 Primary Variable (PV) 1, 1, 1 PV Percent of Range 1, 1, 2 PV Analog Output (AO) 1, 1, 3 Totalizer Set-Up 1, 1, 4...
- Page 28 Quick Installation Guide 00825-0100-4662, Rev CC Rosemount 8732 December 2012 Figure 22. Local Operator Interface (LOI) Menu Tree for the Rosemount 8732E...
-
Page 29: Approved Manufacturing Locations
Approved Manufacturing Locations Rosemount Inc. — Eden Prairie, Minnesota, USA Fisher-Rosemount Technologias de Flujo, S.A. de C.V. — Chihuahua, Mexico Emerson Process Management Flow — Ede, The Netherlands Asia Flow Technology Center — Nanjing, China EUROPEAN DIRECTIVE INFORMATION The EC declaration of conformity can be found on page 36. The most recent revision can be found at www.rosemount.com. - Page 30 Quick Installation Guide 00825-0100-4662, Rev CC Rosemount 8732 December 2012 North American Certifications Factory Mutual (FM) N0 Non-incendive for Class I, Division 2 Groups A, B, C, and D non-flammable fluids (T4 at 60 °C: -50 °C Ta +60 °C) Dust-ignition proof Class II/III, Division 1 Groups E, F, and G (T5 at 60 °C) Hazardous Locations;...
- Page 31 Quick Installation Guide 00825-0100-4662, Rev CC Rosemount 8732 December 2012 ED ATEX Flameproof Certificate No: KEMA 07ATEX0073 X II 2G Ex de IIB T6 or II 2G Ex de [ia] IIB T6 without LOI (-50 °C Ta +60 °C) with LOI (-20 °C ...
- Page 32 Quick Installation Guide 00825-0100-4662, Rev CC Rosemount 8732 December 2012 International Certifications IECEx E7 IECEx Flameproof Certificate No: KEM 07.0038X Ex IIC or Ex de [ia] IIC T6 without LOI (-50 °C Ta +60 °C) with LOI (-20 °C Ta +60 °C) = 250 V AC or 42 V DC EF IECEx Flameproof Certificate No: KEM 07.0038X...
- Page 33 Quick Installation Guide 00825-0100-4662, Rev CC Rosemount 8732 December 2012 NEPSI - China E3 NEPSI Flameproof Certificate No: GYJ071438X Ex de IIC T6 or Ex de [ia] IIC T6 without LOI (-50 °C Ta +60 °C) with LOI (-20 °C Ta +60 °C) = 250 V AC or 42 V DC EP NEPSI Flameproof Certificate No: GYJ071438X...
- Page 34 Quick Installation Guide 00825-0100-4662, Rev CC Rosemount 8732 December 2012 KOSHA - Korea E9 KOSHA Flameproof Certificate No: 2008-2094-Q1X Ex de IIC or Ex de [ia] IIC T6 without LOI (-50 °C Ta +60 °C) with LOI (-20 °C Ta +60 °C) = 250 V AC or 42 V DC EK KOSHA Flameproof Certificate No: 2008-2094-Q1X...
- Page 35 Quick Installation Guide 00825-0100-4662, Rev CC Rosemount 8732 December 2012 Sensor Approval Information Table 12. Sensor Option Codes Rosemount 8705 Rosemount 8707 Rosemount 8711 Rosemount 8721 Sensor Sensor Sensor Sensors Approval Codes • • • • • • • • •...
- Page 36 Quick Installation Guide 00825-0100-4662, Rev CC Rosemount 8732 December 2012 Figure 23. Declaration of Conformity EC Declaration of Conformity No: RFD 1068 Rev. E Rosemount Inc. 12001 Technology Drive Eden Prairie, MN 55344-3695 declare under our sole responsibility that the product(s), Model 8732E Magnetic Flowmeter Transmitter manufactured by, Rosemount Inc.
- Page 37 Quick Installation Guide 00825-0100-4662, Rev CC Rosemount 8732 December 2012 Schedule EC Declaration of Conformity RFD 1068 Rev. E EMC Directive (2004/108/EC) All Models EN 61326-1: 2006 LVD Directive (2006/95/EC) All Models EN 61010-1: 2001 ATEX Directive (94/9/EC) Model 8732E Magnetic Flowmeter Transmitter KEMA 07ATEX0073 X –...
- Page 38 Quick Installation Guide 00825-0100-4662, Rev CC Rosemount 8732 December 2012 Schedule EC Declaration of Conformity RFD 1068 Rev. E BASEEF07ATEX0203X – Type n, Intrinsically Safe Output Equipment Group II, Category 3 G Ex nA nL IIC T4 Equipment Group II, Category 3(1) G Ex nA nL [ia] IIC T4 EN 60079-0: 2006 EN 60079-15: 2005...
Need help?
Do you have a question about the Rosemount 8732E and is the answer not in the manual?
Questions and answers