Table of Contents
Advertisement
Available languages
Available languages
Model / Modelo:
SE-4225
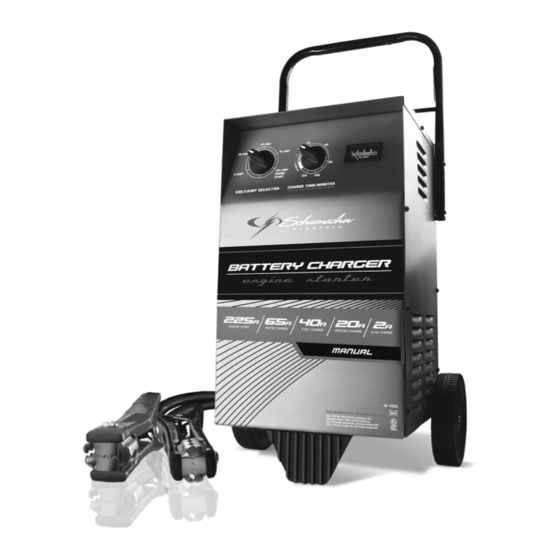
Manual Battery Charger
Cargador de baterías manual
PLEASE SAVE THIS OWNERS MANUAL AND READ BEFORE EACH USE.
This manual will explain how to use the battery charger safely and effectively.
Please read and follow these instructions and precautions carefully.
POR FAVOR CONSERVE ESTE MANUAL DEL USUARIO Y LEALO ANTES DE
CADA USO. En este manual le explica cómo utilizar el cargador de batería de manera
segura y confiable. Por favor, lea y siga las siguientes instrucciones y precauciones.
OWNERS MANUAL
MANUAL DEL USUARIO
0099000821-01
Advertisement
Table of Contents

Related Manuals for Schumacher SE-4225


Summary of Contents for Schumacher SE-4225
- Page 1 OWNERS MANUAL MANUAL DEL USUARIO Model / Modelo: SE-4225 Manual Battery Charger Cargador de baterías manual PLEASE SAVE THIS OWNERS MANUAL AND READ BEFORE EACH USE. This manual will explain how to use the battery charger safely and effectively. Please read and follow these instructions and precautions carefully.
-
Page 2: Table Of Contents
CONTENTS IMPORTANT SAFETY INSTRUCTIONS ..................3 PERSONAL SAFETY PRECAUTIONS .....................3 PREPARING TO CHARGE .......................4 CHARGER LOCATION ........................4 DC CONNECTION PRECAUTIONS ....................4 FOLLOW THESE STEPS WHEN BATTERY IS INSTALLED IN VEHICLE ........4 FOLLOW THESE STEPS WHEN BATTERY IS OUTSIDE VEHICLE ..........5 GROUNDING AND AC POWER CORD CONNECTIONS ..............5 FEATURES ............................5 ASSEMBLY INSTRUCTIONS ......................6 CONTROL PANEL ..........................6... -
Page 3: Important Safety Instructions
1.3 Do not expose the charger to rain or snow. charger from outlet before attempting 1.4 Use of an attachment not recommended any maintenance or cleaning. Turning off or sold by Schumacher Electric ® controls will not reduce this risk. -
Page 4: Preparing To Charge
3. PREPARING TO CHARGE 3.1 If necessary to remove battery from battery without removable cell caps, such vehicle to charge, always remove as valve regulated lead acid batteries, grounded terminal from battery first. Make carefully follow manufacturer’s recharging sure all accessories in the vehicle are off, instructions. -
Page 5: Follow These Steps When Battery Is Outside Vehicle
7. FOLLOW THESE STEPS WHEN BATTERY IS OUTSIDE VEHICLE A SPARK NEAR THE BATTERY MAY connect NEGATIVE (BLACK) charger clip CAUSE A BATTERY EXPLOSION. TO to free end of cable. REDUCE THE RISK OF A SPARK NEAR 7.5 Do not face battery when making final THE BATTERY: connection. -
Page 6: Assembly Instructions
10. ASSEMBLY INSTRUCTIONS 10.1 It is important to fully assemble your charger before use. Remove all cord wraps and uncoil the cables prior to using the battery charger. Follow these instructions for assembly. PARTS TOOLS NEEDED (2) 10-32, thread cutting screws 3/8"... -
Page 7: Operating Instructions
TIMER overcharge a battery if it is not monitored. This will damage your battery and may The timer allows you to set a specified cause property damage or personal injury. time for charging. After the timer expires, the charger stops charging your battery. AMMETER The main function of the timer is to The Ammeter indicates the amount of... -
Page 8: Calculating Charge Time
1. Set the charge rate switch and the NOTE: During extremely cold weather, or timer to the OFF position. if the battery is under 2 volts, charge the battery for 5 minutes before cranking the 2. With the charger unplugged from the engine. -
Page 9: Maintenance And Care
14. MAINTENANCE AND CARE A minimal amount of care can keep your finish shiny and help prevent corrosion. battery charger working properly for years. • Coil the input and output cords neatly • Before performing maintenance, unplug when storing the charger. This will help and disconnect the battery charger (see prevent accidental damage to the cords Sections 6, 7 and 8). - Page 10 PROBLEM POSSIBLE CAUSE REASON/SOLUTION The charger is making an Circuit breaker is cycling. The settings may be wrong. audible clicking sound. Check the charger settings. Battery is defective. Have the battery checked. Shorted battery cables or clips. Circuit breaker cycles when current draw is too high.
-
Page 11: Before Returning For Repairs
Manufacturer does not provide any warranty for any accessories used with this product that are not manufactured by Schumacher Electric Corporation and approved for use with this product. This Limited Warranty is void if the product is misused, subjected to careless handling, repaired, or modified by anyone other than Manufacturer or if this unit is resold through an unauthorized retailer. -
Page 12: Instrucciones Importantes De Seguridad
Volver a ensamblar el cargador en forma o a la nieve. incorrecta puede provocar riesgo de 1.4 El uso de un accesorio no recomendado incendio o descarga eléctrica. o suministrado por Schumacher Electric ® 1.10 Para reducir el riesgo de descarga Corporation puede provocar riesgo de eléctrica, desenchufe el cargador del... -
Page 13: Preparación Para La Carga
de metal sobre la batería. Esto podría 2.8 Utilice este cargador solamente para provocar chispas o un cortocircuito en la cargar baterías recargables de PLOMO- batería o en cualquier otra pieza eléctrica ÁCIDO. Este cargador no está destinado que podría provocar una explosión. a suministrar energía a sistemas eléctricos de baja tensión más que en una aplicación 2.7 No utilice elementos personales de metal... -
Page 14: Siga Estos Pasos Cuando La Batería Esté Colocada En El Vehículo
6. SIGA ESTOS PASOS CUANDO LA BATERÍA ESTÉ COLOCADA EN EL VEHÍCULO UNA CHISPA PROVOCADA CERCA batería al borne POSITIVO (POS, P, DE LA BATERÍA PUEDE CAUSAR LA +) sin descarga a tierra de la batería. EXPLOSIÓN DE LA BATERÍA. PARA Conecte el gancho NEGATIVO REDUCIR EL RIESGO DE PROVOCAR (NEGRO) al chasis del vehículo o al... -
Page 15: Características
enchufe deben adaptarse al receptáculo USO DE UN CABLE DE EXTENSIÓN (tomacorriente). No utilizar con un sistema El uso de una extensión no se recomienda. que no posea descarga a tierra. Si debe usar una extensión, siga estas PELIGRO: Nunca altere el cable o pautas: enchufe de C.A. -
Page 16: Panel De Control
10.2 Acople el pie: 10.4 Ensamble el eje al cargador: Ubique Retire el cargador de los materiales de un extremo de cada abrazadera en la embalaje y ubíquelo en forma invertida ranura que se encuentra en la parte sobre una inferior del cargador. -
Page 17: Instrucciones De Operación
modo cuando desee realizar una carga consume menos corriente del cargador. que supere las 2 horas 15 minutos. Correspondientemente el medidor mostrará Asegúrese de controlar el procedimiento menos corriente absorbida por la batería. de carga y deténgalo cuando la batería Cuando la corriente para de descender, se encuentre cargada. -
Page 18: Cálculo De Tiempo De Carga
2. Con el cargador desenchufado NOTA: Bajo clima frío extremo o si la del tomacorriente de CA, conecte batería es inferior a 2 volts, cargue la el cargador a la batería siguiendo batería por 5 minutos antes de poner en las instrucciones que figuran en la marcha el motor. -
Page 19: Mantenimiento Y Cuidado
14. MANTENIMIENTO Y CUIDADO Con cuidados mínimos puede mantener conservar el acabado brillante y evitar la el cargador de baterías funcionando corrosión. correctamente durante años. • Enrolle los cables de entrada y salida • Antes de realizar mantenimiento, cuidadosamente cuando almacene el desenchufe y desconecte el cargador de cargador. - Page 20 PROBLEMA POSIBLE CAUSA SOLUCIÓN El amperímetro lee una El alargador es demasiado Utilice un alargador de calibre cantidad menor al índice largo o el calibre del cable es más pequeño o pesado. de carga seleccionado demasiado pequeño. cuando se carga una batería descargada.
- Page 21 PROBLEMA POSIBLE CAUSA SOLUCIÓN Ciclo reducido o sin inicio Consumo mayor a 225 A. El tiempo de arranque varía al arrancar el motor. según la cantidad de corriente consumida. Si el arranque consume más de 225 amperes, el tiempo de arranque podría ser menor a 3 segundos.
-
Page 22: Antes De Devolver A Reparaciones
El Fabricante no presta garantía por lo accesorios utilizados con este producto que no sean los fabricados por Schumacher Electric Corporation y que no estén aprobados para su uso con este producto. La presente Garantía Limitada será nula si el producto se utiliza en forma errónea, se trata de manera inadecuada, es reparado o modificado... -
Page 23: Warranty Card
ORIGINAL receipt because it will be required for any warranty claims. This warranty is not transferable. Send warranty card only. DO NOT SEND UNIT TO THIS ADDRESS FOR REPAIR. Mail this card to: Schumacher Electric Corporation 801 Business Center Drive Mount Prospect, IL 60056-2179 Name ______________________________________________________________...
Need help?
Do you have a question about the SE-4225 and is the answer not in the manual?
Questions and answers