
Related Manuals for SaniServ 108R

Summary of Contents for SaniServ 108R
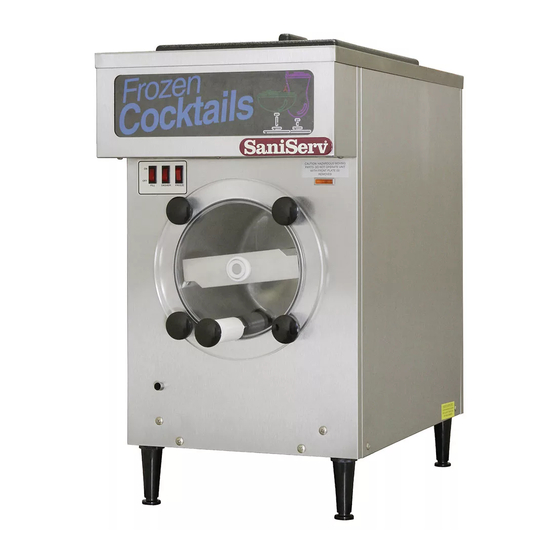
- Page 1 SaniServ ® An AFFINIS GROUP Company “Reliability from the team that Serves the Best” 108R Remote Frozen Beverage Dispenser Operation Manual SaniServ P.O. Box 1089 Mooresville, Indiana 46158...
- Page 3 Installer/Service Technician: _____________________________________________ SERVICE: Always contact your SaniServ dealer or distributor for service questions or service agency referral. If your SaniServ dealer or distributor cannot satisfy your service requirements, he is authorized to contact the factory for resolution. Note: It is the Owner’s responsibility to maintain the Service Record located on the inside rear cover of this manual.
-
Page 4: Table Of Contents
Contents Introduction/Specifications ........................1 Installation ............................2 Leg Adjustment ........................... 2 Drip Tray Bracket ..........................2 Air Circulation............................2 Electrical Hook-Up Procedure......................2 Refrigeration Installation ........................3 Autofill System Installation ......................... 4 Spigot Assembly ..........................4 Disassembly and Cleaning ......................... 5 Emptying the Machine ........................ -
Page 5: Introduction/Specifications
Introduction This manual provides a general system description of the SaniServ 108R Frozen Beverage Dispenser . It has been prepared to assist in the training of personnel on the proper installation, operation, and maintenance of the dis- penser. This unit is a component system having both remote product fill and a remote refrigeration system. -
Page 6: Installation
Installation Leg Adjustment Position the dispensing head and condensing Air Circulation unit in the appropriate locations. Level both A minimum clearance of 6" around the dis- units by turning the adjustment on each leg pensing head and 10" around the condensing clockwise or counterclockwise (Fig. -
Page 7: Refrigeration Installation
Refrigeration Installation Refrigeration specifications are located on the data plate at the rear of the dispensing head and the front of the condens- ing unit. Use standard precautions as with any other refrigerant. Note: This unit uses a refrigerant, HP-62 (R404A). -
Page 8: Autofill System Installation
Autofill System Installation 1. Connect the premix line from the remote fill sys- tem to the 3/8" barbed fitting located at the rear of the remote dispensing head. Oetiker® clamps are required to contain the working pressures of the system. Pressurize the line. 2. -
Page 9: Disassembly And Cleaning
DISASSEMBLY AND CLEANING THIS UNIT DOES NOT COME PRESANITIZED FROM THE FACTORY. BEFORE SERVING PRODUCT, THE DISPENSER MUST BE DISASSEMBLED, CLEANED, LUBRICATED, AND SANITIZED. THESE INSTRUCTIONS ARE GENERAL GUIDELINES. CLEANING AND SANITIZING PROCEDURES MUST CONFORM TO LOCAL HEALTH AGENCY REQUIREMENTS (CONSULT YOUR LOCAL HEALTH AGENCY). -
Page 10: Fig.6 Front Plate Assembly
4. Using a brand name anti-bacterial liquid hand dish- 8. Remove the dasher assembly (Fig. 8) from the washing detergent, make a suitable cleaning solution freezing cylinder being careful not to damage the by adding one to two (2) ounces per gallon of scraper blades. -
Page 11: Fig.11 Carb Tube
9. Remove the drip tray, drip tray insert. 14 Install the o-rings on the carburetor assembly (Fig. 10. Place all parts in a three partition sink: 11). Apply lubricant sparingly over the o-ring. Place the carburetor tube in the bottom of the mix a. -
Page 12: Assembly And Lubrication
& Lubrication Use only food approved lubricants. Sani-gel is recommended and is available from your SaniServ distributor. Lubrication must be performed daily. CAUTION WEAR SANITARY GLOVES FOR THE ASSEMBLY AND LUBRICATION PROCESS 1. Lubricate and assemble the dasher assembly in e. -
Page 13: Sanitizing
Sanitizing PRIOR TO OPERATION, THE MACHINE MUST BE SANI- TIZED. THE UNIT MUST HAVE ALREADY BEEN CLEANED AND LUBRICATED. (NOTE: SANITIZE IMMEDIATELY BE- FORE USAGE, NOT SEVERAL HOURS BEFORE OR THE PREVIOUS EVENING). CLEAN AND SANITIZE DAILY. Assemble gasket on spigot side. WARNING Fig. -
Page 14: Operation
Operation Always start with a cleaned and sanitized dispenser as per previous instructions. Use only fresh mix when charging the units. Adherence to these instructions is critical to the maximum operating efficiency of the machine. 1. Turn on the premix supply system to the unit. -
Page 15: Helpful Hints
Helpful Hints Closed Hours/Shut-Down Front Plate If the machine is turned off during closed hours, fol- low these steps when resuming operation: This component is the plastic device from which the product is dispensed. It is designed and made for NOTE: NEVER POUR FROZEN PRODUCT INTO strength and durability. -
Page 16: Routine Maintenance
Routine Maintenance WARNING DISCONNECT THE MACHINE FROM ITS POWER SOURCE BEFORE PERSONAL PERFORMING ANY MAINTENANCE. INJURY OR DAMAGE TO THE MACHINE COULD RESULT. DAILY: Inspect the machine for signs of product SEMI-ANNUALLY : It is advisable to clean and lu- leaks past seals and gaskets. - Page 17 PERIODICALLY: Sanitize the beverage system as II. Beverage System Detergent Cleaning follows: 1. Ensure all switches are set to the "OFF" posi- tion. I. Beverage System Purge with Warm Water II. Beverage System Detergent Cleaning 2. Precharge a transfer tank with at least two gal- III.
- Page 18 IV. Beverage System Sanitizing 8. Continue to remove liquid as required to keep 1. Ensure all switches are set to the "OFF" posi- the fill circuit engaged. tion. 9. Watch the solution enter the mix pan and con- Pre-charge a transfer tank with at least two gal- tinue to purge the beverage system until the product flow is the color of your premix supply.
-
Page 19: Consistency Adjustment
Consistency Adjustment The consistency control system (Fig. 18) is a very simple method of controlling the consistency of the finished product. The machine operates without a temperature control. Refrigeration is controlled by measuring the torque on the dasher motor and the consistency of the product. The tension of a spring against the torque idler determines how long the unit will run by activating a limit switch which turns the compressor on and off. -
Page 20: Troubleshooting
Trouble Shooting 1. If product will not freeze to proper consistency: Check for properly mixed product. Replace mix as necessary. Check for dull scraper blades. Replace as necessary. Check condenser for dirt or obstructions. See Quarterly Maintenance (page 12). Ensure that compressor and fan will run. E. -
Page 21: Thermostatic Expansion Valve (Txv) Adjustment Procedure
Thermostatic Expansion Valve (TXV) Adjustment Procedure 3. Compare that with what the superheat was when NOTE: THE FOLLOWING INFORMATION WAS OB- the unit was installed. This should have been TAINED FROM SPORLAN ENGINEERING BULLE- TIN 10-11. IT HAS BEEN REPRINTED HERE WITH noted on the operators manual and inside the unit at the time of install. - Page 24 “Reliability from the team that Serves the Best” SaniServ ® An AFFINIS GROUP Company SaniServ P.O. Box 1089 Mooresville, Indiana 46158...
Need help?
Do you have a question about the 108R and is the answer not in the manual?
Questions and answers