Table of Contents
Advertisement
Quick Links
Advertisement
Table of Contents

Related Manuals for Dahua nvs0104dh


Summary of Contents for Dahua nvs0104dh
- Page 1 Network Video Server Quick Start Guide V3.1.0...
-
Page 2: Table Of Contents
Table of Contents OVERVIEW ....................1 General Introduction ......................1 Specifications ........................3 1.2.1 1-channel 4K High Definition Series ................3 1.2.2 4-channel 4K High Definition Series ................4 1.2.3 1/4-channel high Definition Series ................5 1.2.4 9/16-channel High Definition Series ................6 FRONT PANEL/REAR PANEL/INSTALLATION........ - Page 3 Login..........................16 3.2.1 Preparation ........................16 3.2.2 Login ..........................17 Main Window ........................18 Video Wall Splicing (Display Pane) Function ..............24 Add /Remove Front-end Device ..................27 3.5.1 Add device........................27 3.5.2 Delete Device ....................... 27 Decode Channel Setup ....................27 File Playback and Time Playback ...................
- Page 4 Welcome Thank you for purchasing our product! This quick start guide will help you become familiar with our NVS in a very short time. Before installation and operation please read the following safeguard and warning carefully! Please keep it well for future reference!...
- Page 5 Important Safeguard and Warning 1.Electrical safety All installation and operation here should conform to your local electrical safety codes. The product must be grounded to reduce the risk of electric shock. We assume no liability or responsibility for all the fires or electric shock caused by improper handling or installation.
-
Page 6: Overview
1 Overview 1.1 General Introduction These high definition series product is a network audio & video decode device designed and developed for the video network monitor system. It has elegant shape and strong data process capability. It has stable and sound network function and supports all popular encode modes. - Page 7 Model Decode Output Capability Output Port Split Mode output. 36-channel 720P video decode output. 64-channel 960H video decode output. 4-channel 1200W H.265 video decode output. 4-channel 800W H.265 video decode output. 16-channel 1080P H.265 video decode output.
-
Page 8: Specifications
Model Decode Output Capability Output Port Split Mode video decode output. 33-channel 720P resolution video decode output. 44-channel 960H resolution video decode output 48-channel D1 resolution video decode output 16-channel 4-channel 800w resolution The TV screen supports high definition non-real time... -
Page 9: 4-Channel 4K High Definition Series
Specification Decode QCIF/CIF/2CIF/HD1/D1/960H/720P/1080P/300w/500w/600w/800w/ Display 1200w Resolution Video Frame PAL:1~25f/s;NTSC:1~30f/s Rate Bit stream Type Composite stream/Video stream Video Output 1 channel Channel Video Output VGA/HDMI Port Audio Output 1 channel Channel Audio Output HDMI Port Communication One RJ45 10M/ 100M/1000M self-adaptive Ethernet port ... -
Page 10: 1/4-Channel High Definition Series
Specification Decode QCIF/CIF/2CIF/HD1/D1/960H/720P/1080P/300w/500w/600w/800w/ Display 1200w Resolution Video Frame PAL:1~25f/s;NTSC:1~30f/s Rate Bit stream Type Composite stream/Video stream Audio/video input Channel 1 channel Audio/video input Port HDMI Video Output 4 channels Channel Video Output VGA/HDMI/BNC Port Audio Output 4 channels Channel Audio Output HDMI/BNC(Level: 0.2V~3V, Output resistance: 5kΩ) Port... -
Page 11: 9/16-Channel High Definition Series
Input Device Front panel button and keyboard Shortcut Menu Video Standard MPEG4/H.264/ MJPEG Audio Standard PCM/G711 Decode QCIF/CIF/2CIF/HD1/D1/960H/720P/1080P Display Resolution Video Frame PAL:1~25f/s;NTSC:1~30f/s Rate Bit stream Type Composite stream/Video stream Video Output 1 channels 4 channels Channel Hardware Video Output VGA/HDMI/BNC Port Port... - Page 12 Embedded LINUX Input Device Front panel button and keyboard Shortcut Menu Hardware Video Standard MPEG4/H.264/ MJPEG Port Audio Standard PCM/G711 Specification Decode QCIF/CIF/2CIF/HD1/D1/960H/720P/1080P/300w/500w/600w/ Display 800w Resolution Video Frame PAL:1~25f/s;NTSC:1~30f/s Rate Bit stream Type Composite stream/Video stream Video Output 9 channels 16 channels Channel Video...
- Page 13 Dimension 440X408X70mm 448×440×89mm (mm) Weight 4.5kg~4.8kg 7kg~7.5kg...
-
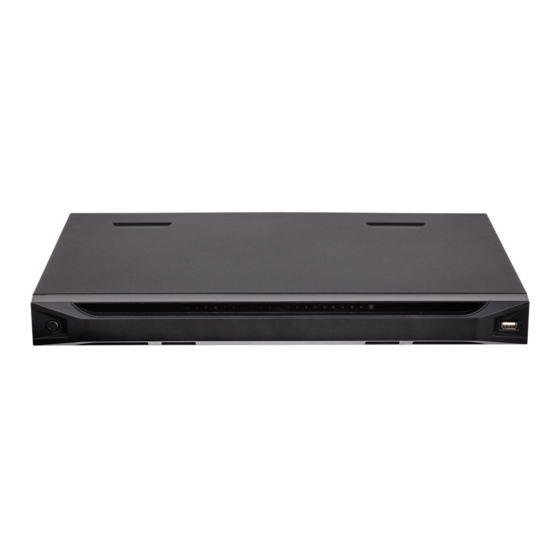
Page 14: Front Panel/Rear Panel/Installation
2 Front Panel/Rear Panel/Installation Note: All the installation and operations here should conform to your local electric safety rules. VGA cable quality and length can affect the video quality. It may result in distorted video, noise, black margin. The video quality may vary even if you are viewing the same video via different VGA cables. -
Page 15: 9/16-Channel High Definition Series
Name Icon Function Alarm indicator light indicator light IR receiver Output indicator It is to display output port working mode. light For 1-channel 4K high definition series and 1-channel high definition series, only the first indicator light is effective. For 4-channel 4K high definition series and 4-channel high definition series, only the channel 1 to channel 4 indicator lights is effective. -
Page 16: Rear Panel
Name Icon Function Power indicator The indicator light becomes on when system boots up. light Network indicator The indicator light becomes on when abnormal light network event occurs (offline, IP conflict and etc.) USB port Connect to external USB device. Alarm indicator light... -
Page 17: 4-Channel 4K High Definition Series
Port Name Port Name Port Name 4-channel alarm input, Audio talk output Audio talk input 4-channel alarm output, port RCA OUT port RCA IN RS485 port. Power socket Power switch 2.3.2 4-channel 4K high definition series The rear panel is shown as below. See Figure 2-5. Figure 2-5 Please refer to the following sheet for detailed information. -
Page 18: 4-Channel High Definition Series
Port Name Port Name Port Name Ground screw hole Audio output port(BNC) Video output port (BNC) Audio talk input Audio talk output VGA port port port RS232 port HDMI port Network interface(10M/100M/100 self-adaptive Ethernet port) Relay input, relay Power socket Power switch output, duplex RS485 port... -
Page 19: 16-Channel High Definition Series
Figure 2-8 Please refer to the following sheet for detailed information. Port Name Port Name Port Name Ground screw hole Power switch Power socket HDMI port Network Relay input, relay interface(10M/100M/1000M output, standard RS485 self-adaptive Ethernet port) port. Audio talk input Audio talk output Audio output port port... -
Page 20: Connection
interface(10M/100M/1000M self-adaptive Ethernet port) Note: When you connect it to the PC network port, please use crossover cable. When you connect it to the PC via router or switcher, please use straight cable. 2.4 Connection Please refer to the follow figure for connection information. See Figure 2-10. The following figure is based on the 4-channel high definition series product. -
Page 21: Operation
3 Operation The following operations are generally based on the 9-channel high definition series product. Slight different may be found in the user interface. 3.1 Boot Up and Shut Down Boot up Connect the NVS to the power and then press the power button in the rear panel. You can see the power indicator light becomes on and NVS boots up. -
Page 22: Login
System is compatible with web control of WINVISTA. But you need to disable account control item and then reboot the PC. 3.2.2 Login Open the IE and then input the NVS IP address in the address column. For example, if your NVS IP address is 192.168.1.100, then please input http:// 192.168.1.100 in IE address column. -
Page 23: Main Window
Figure 3-2 After installation, the interface is shown as below. See Figure 3-3. Figure 3-3 Please input your user name and password. Default factory name is admin and password is admin. Note: For security reasons, please modify your password after you first login. 3.3 Main Window After login successfully, the interface will be shown as Figure 3-4. - Page 24 Figure 3-4 There are ten sections: Section 1: System menu There are system menu buttons. Please refer to the user’s manual for detailed information. Section 2: Decode channel Model Decoded Note Channel 1-channel 4K high The Web adopts the TV screen to display. definition series There is 1 screen corresponding to 1 group output.
- Page 25 definition series There total screens corresponding to 4 groups output. You can use the four icons at the top left corner to select the screen. The first TV screen has 16-channel; the screen 2 to screen 4 each has 4-channel. The Web adopts the TV screen to display.
- Page 26 Section 7:Playback You can select playback by file or by time. Section 8: Window split There are four display modes: 1/4/9/16 window split. Take the first TV screen for an example: there are 16 options for single-window mode: channel 1, Channel 2……channels 16.
- Page 27 Section 9:TV adjust/Screens TV Adjust It is not for splicing wall. It is for current screen only. This function is for 4-channel 4K high definition and 1/4-channel high definition series only. The 1-channel 4K high definition series product does not support this function. It is to adjust margin.
- Page 28 Screen BLC Mode Note This function is for some screens only. Click screen BLC mode, you can go to the following interface. Select one or more screen(s) or you can check ALL to select all screens and then click Switch mode button. See Figure 3-9.
-
Page 29: Video Wall Splicing (Display Pane) Function
Section 10: Close full-screen monitor It is to close all monitor channel of current TV screen. 3.4 Video Wall Splicing (Display Pane) Function The video wall splicing function is to output several physical video walls (1-9 screens) to one screen and can be used as one screen (Such as Test1 in Figure 3-11). The 4-channel 4K high definition series supports 1×1, 2×1, 1×2, 2×2 splicing mode. - Page 30 Figure 3-12 Step 2 Select screens. See Figure 3-13. Left click mouse to select one. Left click mouse +Ctrl button to select more screens. Figure 3-13...
- Page 31 Step 3 Click button, you can see an interface shown as in Figure 3-14. Figure 3-14 Step 4 In Figure 3-14, you can input customized splicing wall name. Click Save button to save current setup. Step 5 Now you can close splicing wall interface and then go back to the main interface. The splicing wall can be used as a physical screen.
-
Page 32: Add /Remove Front-End Device
delete the splicing wall, the corresponding physical screens are off too. 3.5 Add /Remove Front-end Device 3.5.1 Add device Click button in the main window. System pops up the following dialogue box. Here you need to input the front-end device information including manufacturer (Private, Onvif, and General), connection mode (TCP, UDP, AUTO) device name, device IP, port, device user name and password. -
Page 33: File Playback And Time Playback
then release. See Figure 3-17. Figure 3-17 Right click channel of the front-end, you can enable main stream or sub stream. See Figure 3-18. Figure 3-18 : Open/close sub stream. : Open main stream. Screen on-off button. : Open. -
Page 34: File Playback
3.7.1 File Playback Please select a online device first and then select playback by file button. You can see the following interface. See Figure 3-19. Figure 3-19 Please select the decode channel, record type and then select start time/end time, click search button, you can see an interface is shown as below. - Page 35 3-21. Figure 3-21 The main interface is shown as below. See Figure 3-22.Click the process bar to adjust file playback position. Or you can click button to play, pause, and stop. Figure 3-22 Double click decode channel, you can view in full screen. The playback bar is shown as below.
-
Page 36: Time Playback
The three buttons ranges from left to the right are: playback, pause, and stop. Figure 3-23 Note: If you searched device is offline, system prompts “Channel search failed” or “No record”. System max supports 4-channel playback at the same time. ... - Page 37 On the main menu, from decoder->decode tour; you can see the following interface. See Figure 3-25. Figure 3-25 Double click a channel you want to set or click , you can set chanekl tour detailed information. See Figure 3-26.
- Page 38 Figure 3-26 Please refer to the following sheet to set tour information. Parameter Note Protocol type It includes: private, Onvif, General. Connection For different device modes, the connection mode may vary. mode Front-end device IP address. Port Default setup is 37777. Channel The channel of the front-end device.
-
Page 39: Decode Output
: Stop tour. : Pause tour. 3.8.2 Decode Output On the main window, from decoder->decoded info, interface is shown as below. See Figure 3-27. Here you can view current decode information. Status: Current channel working status. There are four statuses: Monitor/Playback/Tour/Idle. -
Page 40: Screen Show
Figure 3-28 3.8.4 Screen Show On the main menu, from decoder->screen No. overlay, you can see the following interface. See Figure 3-29. It is for you to overlay device IP and TV number of current channel at the top left corner of current channel output interface. -
Page 41: Background Color
Figure 3-30 3.8.6 Background Color Note This function is for 4-channel 4K high definition series and 9/16-channel high definition series. On the main menu, from decoder->Background color, you can see the following interface. See Figure 3-31. It is to set the background color of the screen. There are two options: blue (default)/black. Figure 3-31 3.8.7 Split Line Note... - Page 42 Figure 3-32...
-
Page 43: Alarm Input And Output
4 Alarm Input and Output Before device connection, please make sure: Alarm Input Please check the alarm type (Normal open/normal close) first. Then set decoder network alarm type. Set decoder alarm type as NO (Normal Open) if it is ground alarm, otherwise set it as NC (Normal Close). - Page 44 Figure 4-2 Parameter 1/4-channel high definition standard series, (Ground alarm) GND port 1-16 Relay input port C1-C8;NO1-NO8 Relay output port(NO) R0+, R0-, R1+, R1-, T0+, T0-, Duplex RS485 port T1+, T1- The 9-channel high definition series product interface is shown as in Figure 4-3. Figure 4-3 Parameter 9-channel high definition standard series...
-
Page 45: Alarm Input Port
Figure 4-4 Parameter 9-channel high definition standard series A/B cable of the control device. GND port Alarm input port IN1-IN4 Alarm output port (NO) C1-C4;NO1-NO4 Alarm Input Port There are 16-ch alarm inputs and the input type can be NO or NC. ... -
Page 46: Alarm Output Relay Specifications
To avoid overload to damage the device, please refer to the following sheet for relay specification information. About A/B cable of RS485, they are used to connect to the PTZ decoder A/B cable. Please refer to Figure 4-6 for alarm input module information. Figure 4-6 Please refer to Figure 4-7 for alarm output module information. - Page 47 100mΩ(0.1A 6VDC) Contact Resistance Contact Material AgNi+Gilded Contact Rating 0.5A 125VAC/1A 30VDC ( Resistive) Max. switching voltage 125VAC/60VDC Max. switching current Max. switching power 62.5VA/30W Min. permissible loading 1mA 5V Mechanical durability 1x107times(300 times/min) Electrical durability 1x105times(30 times/min) Note: For detailed operation introduction, please refer to our resource CD included in your package for electronic version of the User’s Manual.
Need help?
Do you have a question about the nvs0104dh and is the answer not in the manual?
Questions and answers