Table of Contents
Advertisement
Advertisement
Table of Contents

Related Manuals for Samsung XRN-1610S


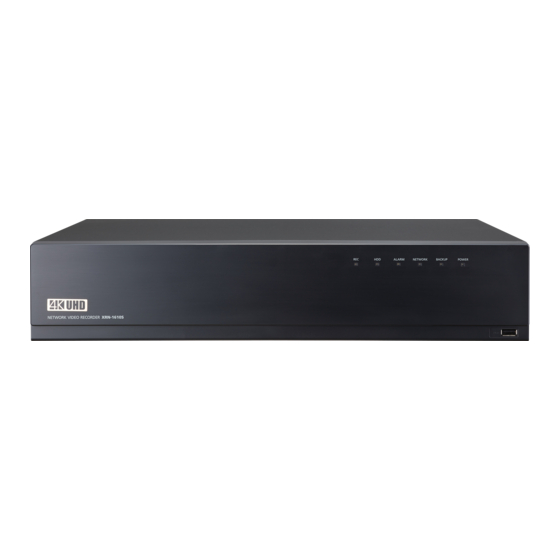
Summary of Contents for Samsung XRN-1610S
- Page 1 NETWORK VIDEO RECORDER User Manual XRN-1610S/1610...
- Page 2 Network Video Recorder User Manual Copyright ©2016 Co., Ltd. All rights reserved. Hanwha Techwin Trademark Each of trademarks herein is registered. The name of this product and other trademarks mentioned in this manual are the registered trademark of their respective company. Restriction Copyright of this document is reserved.
-
Page 3: Important Safety Instructions
overview Important Safety InStructIonS Before Start Read these operating instructions carefully before using the unit. This manual provides operational information necessary for using the product and contains a description about each Follow all the safety instructions listed below. component part and its function as well as menu or network settings. Keep these operating instructions handy for future reference. - Page 4 overview operating temperature The guaranteed operating temperature range of this product is 0°C ~ 40°C (32°F ~ 104°F). This product may not work properly if you run right after a long period of storage at a temperature below the guaranteed one. Prior to using a device that has been stored for a long period in low temperatures, allow the product to stand at room temperature for a period.
-
Page 5: Table Of Contents
Connecting the Alarm Input/Output Connecting the Network Setup vIeWer Setup Viewer LIve Getting Started Live Screen Configuration Live Screen Mode Zoom PoE Status (XRN-1610S) Layout BacKup vIeWer SEC Backup Viewer Audio ON/OFF Freeze Event Monitoring Capture Maintain the Screen Ratio... -
Page 6: Contents
• Installation Wizard Function (Easy Setup, Quick Setup) Network Viewer Software / User Manual or Quick Manual Bracket Rack User Manual CD HDD Fixing Screw Bracket Fixing Screw HDD SATA/Power cable (XRN-1610) SATA Power Cable SATA Data Cable (XRN-1610S (XRN-1610S) 6_ overview... -
Page 7: Part Names And Functions (Front)
Connects the USB devices. (USB 3.0 supported) Power Terminal to connect power to. Power Switch Power on/off switch.(XRN-1610S) PoE (CAMERA) Power supply port to connect to a camera. (XRN-1610S) [CONSOLE] is designed for the service repair purpose only. English _7... -
Page 8: Remote Control
overview remote controL using the numeric buttons CHANNEL 1–9 Press each button between 1 to 9. CHANNEL 10 Press the [+10] button first, then press the 0 button again within 3 seconds. poWer Displays the Exit pop up screen. Starts or ends the live recording. CHANNEL 11–16 Press the [+10] button first, then press any number between 1 to 6 within 3 seconds. -
Page 9: Installation
installation racK InStaLLatIon Please take note of the followings before using this product. • Do not use the product outdoor. Install the Bracket-Rack as shown in the figure, and then fasten the • Do not spill water or liquid in the connection part of the product. screws on both sides. -
Page 10: Hdd Addition
Number of HDDs supported : XRN-1610: up to 8 HDDs supported, XRN-1610S: up to 4 HDDs supported 1. Remove the screws located on the left/right side and Make sure to unplug the power cord from the wall outlet before proceeding with the installation. - Page 11 COM COM VGA OUT ALARM eSATA NETWORK AUDIO RS-232C HDMI CONSOLE XRN-1610 CAMERA NETWORK ALARM 1 2 3 4 5 6 ALARM RESET VGA OUT eSATA AUDIO NETWORK eSATA NC NO NO NO HDMI COM COM CONSOLE ALARM XRN-1610S English _11...
-
Page 12: Connecting With Other Device
connecting with other device connectIng to an externaL devIce connectIng the aLarm Input/output The Alarm In/Out port at the back is composed of the following. The following figures are based on Model XRN-1610. ALARM ALARM IN RESET NETWORK 2 1 2 3 4 5 6 7 8 ALARM ALARM IN RESET... -
Page 13: Connecting The Network
Network Viewer Network Camera Network Camera Windows connecting the network camera Network Viewer Network Camera network connection via router pnp mode(xrn-1610S) ex) IP : 192.168.231.100 ALARM ALARM IN RESET NETWORK 2 ALARM 1 2 3 4 5 6 7 8... - Page 14 connecting with other device connecting the iScSI manual mode directly connecting to the nvr ex) IP : 192.168.1.100 ALARM ALARM IN RESET VGA OUT NETWORK 2 1 2 3 4 5 6 7 8 AUDIO OUT CAMERA eSATA HDMI CONSOLE NETWORK 1 NC NO NO NO COM COM COM...
-
Page 15: Live Getting Started
Network • Network 1 / Network 2 Setup - IP Type : Choose the network connection method. - IP Address, Subnet Mask, Gateway, DNS • Switch mode: PnP mode and Manual Setup Mode (XRN-1610S only) Connected Authentication errors Disconnected If PnP Mode is selected, NVR will assign IP address to the IP cameras automatically. -
Page 16: Live Screen Configuration
live Shutting down the System LIve Screen confIguratIon Icons on the Live Screen 1. In the live screen menu, select <Shutdown>. 2. The “Shutdown” confirmation pop-up window will appear. You can check the status or operation of the NVR with the icons on the live screen. FULL RAID RAID... -
Page 17: Error Information
error Information Name Description • If the built-in HDD is not connected, the “NO HDD” icon ( ) will be displayed in the top left corner. In this It is displayed when the max permitted amount of data for each channel is exceeded. FULL RAID RAID... - Page 18 Refer to “Live Status”. (Page 21) Shows the record status of each channel. Record Status Refer to “Record Status”. (Page 21) Set the PoE status in each channel. (XRN-1610S only) PoE Status Refer to the “PoE Status”. (Page 22) Set the layout of each channel.
-
Page 19: Live Screen Mode
LIve Screen mode view the Launcher menu The Launcher menu appears on the bottom of the live screen. 16 live videos are displayed in a single screen, kinds of split screens, and an automatic switchover screen. 1. Select <Show Launcher> in the context menu of the Live screen. When you register a camera, the Live4NVR profile is created to set H.264 900*600 30fps as default. -
Page 20: Switching The Split Mode
live CH10 CH10 CH11 CH10 CH11 CH12 CH10 CH11 CH12 CH11 CH12 CH12 CH10 CH11 CH12 CH13 CH7 CH8 CH9 CH10 CH11 CH12 CH13 CH14 CH15 CH16 Switching the split mode • If pressing the right [+] button in 4-split mode : CH13 CH13 CH14... -
Page 21: Zoom
CH13 CH13 CH14 CH14 CH15 CH15 CH16 CH16 Switching to Single mode CH10 CH13 CH14 • : Reloads the recording information. CH10 CH13 CH14 • Record Setup : The menu screen will switch to the record setting screen. When in split mode, select and double-click a desired channel to switch to its Single mode. CH11 CH11 CH12... -
Page 22: Poe Status(Xrn-1610S)
Overall PoE power specifications for XRN-1610S(16 ports) is 220W, If a single port exceeds 36W, or the power to all ports exceeds the overall PoE power specifications, the power to ports will be shut off sequentially. -
Page 23: Audio On/Off
CH13 CH14 CH15 CH16 CH16 audIo on/off Ex : If you set <Event Display> to 5 seconds, and the second event occurs in CH 2 within the set time after the first event CH10 CH13 CH14 occurred in CH 1. You can turn the sound on/off corresponding to the channel in Live mode. -
Page 24: Maintain The Screen Ratio
live maIntaIn the Screen ratIo dISpLay text The screen ratio for a live video can be changed. change text output maintain a screen ratio for all channels The NVR can display text on a live screen when a text device is set. Video screen ratio for all channels can be changed in live split screen mode. - Page 25 using the ptZ camera preset You can use a single PTZ camera to perform the Pan, Tilt and Zoom operations to monitor multiple places, and Preset is a specific position remembered by the PTZ camera. You can use the Preset function to define up to configure the custom settings of the presets in a desired mode.
-
Page 26: Backup
live BacKup You can check the backup device and set the backup schedule by channel or by time. 1. Select <Backup> from the live screen menu. You can click on < > in the launcher menu. 2. The backup settings screen will be opened. • Channel : Sets the channel to backup. -
Page 27: Menu Setup
menu setup You can setup the system, devices, and options for recording, event and network. • Holiday : A user can select specific dates as holidays according to their own preferences. Holidays are applied in the <Recording Schedule> or <Alarm Schedule> setting too. SyStem Setup You can setup Date/Time/Language, User, System Properties and Log. - Page 28 menu setup user user setting You can create a group or set permissions for each group. You can set permissions of each user over the NVR's specific function and settings. You can add a user and edit the registered user information. Setting the Administrator You can set and change Administrator's ID and password.
- Page 29 If you want to register a user • Restriction on Network Access : Restricts remote access from a <Restricted Access> network. - All Network : Restricts all access instances via Network Viewer and Web Viewer. - Web Viewer : Restricts access via the Web Viewer. • Auto Log out : A user will be automatically logged out if there is no operation on NVR for over set period of time.
- Page 30 If <Initialization> is selected, a confirmation dialog for "Load Factory Default" prompts. Press <OK> to 3. Select <System Information>. initialize the system to the factory default. After changing the mode, reboot to initialize. (PnP mode <-> Manual Setup Mode) (XRN-1610S only) 30_ menu setup...
- Page 31 Checking the event log • Power off : If the power is off, the first alarm is generated. After checking the checkbox, if the <Apply> button is pressed, all event alarms that are set to the first alarm output are released, and then the first alarm cannot be selected by other alarm output.
-
Page 32: Setting The Device
When you connect a camera in PnP mode, the initial ID, password and DHCP mode should be set in advance. Samsung cameras are registered for Samsung protocols and other cameras are registered by using the Onvif protocol. In PnP mode, you cannot connect a device that runs the DHCP server in PoE port or camera setting port. (Ex: hub) - Page 33 - Samsung Network Camera/Encoder : Means the camera/encoder supports Hanwha Techwin's SUNAPI, • Authentication has failed : This message appears if the ID or password provided for registering the camera SVNP protocol. When connecting a camera that does not appear in the camera list, select Samsung Netowrk Camera/Encoder.
-
Page 34: Camera Setting
menu setup OnVIF Setup event You can set details of the event. In the bottom of the camera addition screen, click on the <OnVIF Setup> button to set additional settings for cameras with the ONVIF protocol. • Available events (camera) : It shows the list of all the events supported by a camera by using the ONVIF protocol. - Page 35 Press <Dewarping Setup> at the bottom of the camera settings screen and a distortion correction settings window for each channel is prompted. SUNAPI (Samsung Unified Network API) : Camera that supports the communication protocols provided by Hanwha Techwin 1. Camera supporting SUNAPI.
- Page 36 menu setup Setting Camera password Live Setting You can change the passwords of all registered cameras at once. You can change the live transfer settings of the network camera. • Live Replacement : You can select the live profile setup mode. If you select <manual>, the profile setup items are enabled, and you can change settings manually.
- Page 37 • Status : Displays the current working condition of a storage device. For inspection or replacement of HDD alarms, please refer to "hDD Alarm Setting." (Page 39) If the channel is set to <Covert1> or <Covert2> mode, the channel's sound is not hearable. - Normal : It is displayed during normal operation.
- Page 38 menu setup Connecting the iSCSI For iSCSI equipment, use network port 2. If you connect the NVR with an iSCSI device, you can search, connect and disconnect the iSCSI device. When using a hub to connect an iSCSI device with NVR, make sure to use the GIGA hub and to use an independent network to save data normally.
- Page 39 use Joystick hDD Alarm Setting The SPC-2000 joystick is operated as follows: For HDD malfunctions, you can set the inspection alarm output terminal, the replacement alarm output terminal, the iSCSI alarm output terminal and the alarm time. • Alarm - If <All> was selected, both beep sound and alarm signal through rear side ports will output. - If <Beep>...
-
Page 40: Monitor Settings
menu setup monitor If the new resolution does not fit the monitor, the output will not be displayed normally. In this case, wait until the monitor You can set the information displayed on the monitor as well as the output system. returns to the default resolution and then change to a different resolution. -
Page 41: Setting The Recording
Record setting by the color • Encoding type : Select an encoding type to use from a list. - You can select starting and ending character strings. Color Function Description No Color No Recording No schedule / event recording General characters, special characters, and Hex codes (e.g. 0x12, 0x34) can be used for character strings. Green Continuous Scheduled recording only... - Page 42 menu setup Record Option • Event : When an event occurs, you can set which point you will start or stop recording. - Pre : When an event occurs, recording will be started regardless of the time set. If you set it to five seconds, recording will start at five seconds before an event occurs. When the HDD capacity is full, you can set whether to stop recording or start overwriting.
-
Page 43: Setting The Event
SettIng the eVent Camera event You can set the activation of events (motion detection, video analysis, audio event) sent from the camera, alarm You can make the setup for record in case of sensor detection, camera event or video loss detection. output method and alarm time. - Page 44 menu setup Video Loss Detection You can set the camera so that the camera can trigger the alarm if it is disconnected or the video is lost due to unstable network connection. • Apply to CH : If you select <Apply to Ch>, the "Apply to Ch" confirmation window will appear. After selecting channels that the settings will be applied to, click on <OK>...
-
Page 45: Network Configuration
"password" to register in PPPoE. • Setting the nVR network In PnP mode, XRN-1610S Network 1 only set to DHCP. 1. Set the <network> in <Interface> menu of the connected NVR to <Static>. We recommend not to set the same network address for Network 1 and Network 2. - Page 46 menu setup DDnS • Setting the DhCp Ip Address of the Broadband Router 1. To access the Broadband Router's configurations, open a web browser on the local PC that is connected If a remote user accesses the network, you can set whether or not to use DDNS and the site to be connected. to the Broadband Router and enter the router's address (ex : http://192.168.1.1).
-
Page 47: Ddns Setting
If a camera's IP address is not included in the Permit list or is in the Reject list access to it will be rejected. In PnP mode,XRN-1610S can`t setup the Network 1. • EAPOL Version : Select the EAPOL version to be used as protocol. -
Page 48: Event Setting
menu setup e-mail • Password : Enter the password provided by the RADIUS server administrator. If the password you entered does not match that of the client's private key, it won't be processed properly. You can send an e-mail to a NVR-registered user at a specific time interval, or if an event occurs. • Certificates : Search for a device. - Page 49 • Network 1/2 : Select <Setup>, and you can set the IP range operated by the server and time. • Select a recipient group to receive emails. In PnP mode,XRN-1610S only Network 1 supports DHCP Server. If a group is added, it will appear in the group list.
-
Page 50: Search & Play 50 Search
search & play search & play SeARCh 3. The record data on the specific date will be listed. The display bar is different according to the data type. So check the data type for the color in the left pane. You can perform the search for recorded data by the time or by the search criteria such as an event. - Page 51 text Search 1. Select <Backup Search> in the <Search> menu. 2. When storage media with data is connected, the list of recordings stored is displayed on the equipment. You can search data that was entered into POS systems connected to NVR. • File Name : Displays the name of a file recorded.
-
Page 52: Playback
search & play pLAyBACK using the playback Button play You can play data stored in the HDD and backup a desired portion of the data. Name Description Play Timeline Indicates the current playback point, and can be used to move. Skip Backward Moves backward by unit time. -
Page 53: Starting Web Viewer
starting web viewer WHAT IS WeB vIeWer? COnneCTIng WeB vIeWer WebViewer is a software program with which the operator can access a remote NVR (Network Video Recorder) for 1. Open your web browser and type the IP address or URL of NVR into the URL address box. real-time monitoring, PTZ control (if configured) or search. - Page 54 starting web viewer If you want to access the web viewer with multiple browsers Live viewer screen layout Set auto execution of plugin (npNVRViewer) in the browser menu that you first access and refresh the screen after activating the plugin or selecting plugin reliability. Each time the browser is upgraded in the future, the plugin activation method can be changed.
-
Page 55: Live Viewer
live viewer LIve vIeWer Menu Description You can check the video from camera registered in the NVR connected from a remote PC. Also, you can adjust the Shows the channel information selected. camera and check the network transfer status. If the user's PC monitor does not support 60Hz at a specific high resolution, or the HDMI Channel information cable does not support HDMI 2.0, 60fps or higher will not be output from the channel Live viewer Screen... -
Page 56: Live Screen Configuration
live viewer LIve SCreen COnFIgUrATIOn To capture a screen 1. Click < > button. System Status When a pop-up window appears, select the saving path for captured image. You can check the status or operation of the NVR with the icons on the live screen. 2. - Page 57 Setting the layout If you want to delete the layout After selecting the layout to delete, click on < >. If you don't add or save it in the layout after registering a camera, the live screen will not be displayed. The selected layout will be deleted.
- Page 58 live viewer Setting screen switching To perform switching CH10 CH11 CH12 Click on the <Sequence> button to activate the switching mode CH10 CH11 CH12 If you don't register the layout, the screen switching function will not operate. CH13 CH14 CH15 CH16 CH13 CH14...
-
Page 59: Controlling A Connected Network Camera
COnTrOLLIng A COnneCTed neTWOrK CAmerA How to query text devices and data Checks the text data transmitted from POS systems that are Controlling PTZ connected to NVR. If the < > button is selected, you can turn on/off the If PTZ camera is connected, the < >... - Page 60 live viewer To set a preset Item Description 1. Click < > button to display "Preset" window. Group Moves in the path specified by combining the preset. 2. Click on < > to select the preset order. Trace Moves camera's framing in the predefined path. 3.
-
Page 61: Search Viewer
search viewer SeArCH vIeWer Item Description Audio You can search and play the video record saved in NVR by accessing NVR remotely. Sets the sound connected to each channel to either ON/OFF. Search viewer Screen Capture Saves current video for selected channel in the designated path. Print Prints current video image for selected channel through the assigned printer. - Page 62 search viewer Color indications depending on current recording status To back up the search results You can back up the search results in the list. Displays the corresponding color according to the recorded data type. 1. Click the [ ] button. 2.
- Page 63 Text Search names and Functions of Play Buttons You can search data that was entered into POS systems connected to NVR. If you want to search by a text 1. Select a date and time to search. 2. Set event keywords and search conditions. - Search Condition : Enter a text to search.
-
Page 64: Setup Viewer
setup viewer SeTUP vIeWer System You can configure the various settings of the NVR system. You can configure the NVR settings remotely on the network. date/Time/Language To configure the NVR settings, click <Setup>. Settings Screen For more information, refer to "date/Time/Language" in the "System" menu. (Page 27) date/Time Set the date and time. - Page 65 User System management For more information, refer to "User" in the "System Setup" menu. (Page 28) For more information, refer to "System management" in the "System" menu. (Page 30) Administrator System Information You can change the admin ID or the password. You can see information of the current system.
- Page 66 setup viewer event log Camera Setup The event log lists recorded events, such as sensor events, You can change the settings of a connected network camera. camera events, or video losses. When you click the [Camera website] button, a new camera web browser window is opened.
- Page 67 Channel Setup Hdd Alarm You can configure the video settings for each channel. You can set the alarm output port and the duration in case an error occurs. monitor Storage device monitor You can check and change the settings related to the data storage device. You can configure the monitoring screen settings and set the output system.
-
Page 68: Recording Schedule
setup viewer Text record For more information, refer to "Setting the recording". (Page 41) device Relevant values of a device connected to NVR can be set. recording Schedule If you set a recording schedule for a specific date and time, the recording will start at that specific time. - Page 69 event Camera You can set the recording profile for a network camera. For more information, refer to "Setting the event". (Page 43) Sensor detection nvr / Camera You can set the sensor operation mode and the synchronized camera as well as the alarm output type and the duration. If the connected network camera that has configured the alarm in/out settings triggers an alarm, NVR will perform the alarm out.
- Page 70 setup viewer Alarm Out Schedule ddnS You can schedule the alarm output according to the day of the network 1/2 week and the time. You can check the DDNS settings. The default setting is Event Sync, which activates the alarm only if an event occurs.
- Page 71 802.1x event You can set the event interval and specify which events the When connecting to a network, you can select whether to use server sends mails for. the 802.1x protocol and install corresponding certificate. recipient Live Streaming You can set groups and recipients to receive emails. You can set the video profile transmitted to the network and the expansion monitor.
- Page 72 For more on camera registration, refer to "To register a camera". : Display the ID of user connected. • (Page 70) Only XRN-1610S supports PoE status. • < > : You will be immediately directed to the homepage of Hanwha Techwin.
-
Page 73: Backup Viewer
backup viewer SeC BACKUP vIeWer Item Description You can play a file that is backed up in the format of SEC. Enlarge the image by up to 100 times as big as the current one. Press the Zoom In ( ) button the enlarge the image;... -
Page 74: Product Specification
PrOdUCT SPeCIFICATIOn Details Item Details XRN-1610 XRN-1610S Item XRN-1610 XRN-1610S BU/EXE(USB), JPG/AVI(Web, CMS) File backup Backup Display Max. 16CH Play, Date-Time/Title display Function Max. 16CH 8/4 (NO 3EA, NO/NC 1EA) Inputs Sensor CIF ~ 12MP 16 channels (network) - Page 75 Details Details Item Item XRN-1610 XRN-1610S XRN-1610 XRN-1610S 1 EA (Up to 16 split screen mode Live Support) Android, I-Phone Support Model Connectors Main : 1 EA (Both Support Live / PB / Setup) RTP, RTSP, HTTP, CGI(SUNAPI) Protocol Support...
-
Page 76: Product Overview
PrOdUCT OvervIeW • Xrn-1610S • Xrn-1610 unit : mm (inches) unit : mm (inches) 76_ appendix... -
Page 77: Default Setting
deFAULT SeTTIng Category Details Factory Default iSCSI To reset the system, move to "System management > Settings > Load Factory default" and press the Check Alarm Output Port BEEP <Initialization> button. Duration Continuous This returns the factory default settings. Storage Device Replace Alarm Output Port BEEP When you initialize with the <Authority Management Settings>... -
Page 78: Troubleshooting
appendix TrOUBLeSHOOTIng Category Details Factory Default IP Type Static IP Network 1(Camera) 192.168.1.200 Problem Action Network 2(All) 192.168.2.200 Network Live video will be slow or cut off. y The frame number set for multiple data transmission set in camera or Subnet Mask 255.255.255.0 network environment could differ from the actual rate of transmission. - Page 79 Problem Action Problem Action No response controlling PTZ in the live viewer. y Check the registered Camera if it support PTZ function. I forgot the password. y Contact the NVR administrator for help. The camera is not connected or the PC fails to y Check if the network cable is connected properly.
- Page 80 appendix Problem Action In the recording setting screen, the permitted level y If the input data is greater than the permitted level for each channel, it is for a specific channel is displayed in orange. displayed in orange. Set the permitted data limit to higher than the amount of input data.
-
Page 81: Open Source License Report On The Product
OPen SOUrCe LICenSe rePOrT On THe PrOdUCT The software included in this product contains copyrighted software that is licensed under the GPL, LGPL, MPL 1.1, BSD 2-Clause License, BSD 3-Clause License, MIT License, libxml2 License, Apache 2.0 License, zlib/libpng License, Boost Software License, Curl License, Microsoft Public License, Code Project Open 1.02 License, JPEG License, RSA MD4 or MD5 Message-Digest Algorithm License, PHP License 3.01, OpenSSL Combined License, PCRE 5 License, NTP License, CodeIgniter License, GLUT for Win32 License, ISC License, Brian Gladman Alternate License. - Page 82 Head Office 86 Cheonggyecheon-ro Jung-gu Seoul 04541 Korea Tel +82.2.729.5277, 5254 Fax +82.2.729.5489 www.hanwha-security.com Hanwha Techwin America 100 Challenger Rd. Suite 700 Ridgefield Park, NJ 07660 Toll Free +1.877.213.1222 Direct +1.201.325.6920 Fax +1.201.373.0124 Hanwha Techwin Europe 2nd Floor, No. 5 The Heights, Brooklands, Weybridge, Surrey, KT13 0NY, UK Tel +44.1932.82.6700 Fax +44.1932.82.6701 PT01-004560A...
Need help?
Do you have a question about the XRN-1610S and is the answer not in the manual?
Questions and answers