Table of Contents
Advertisement
Advertisement
Table of Contents

Subscribe to Our Youtube Channel
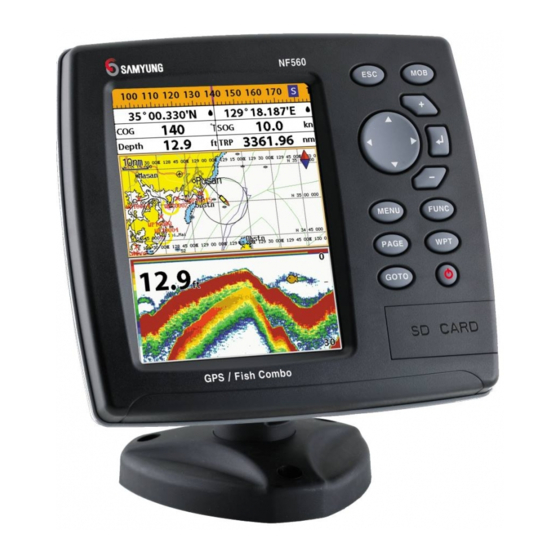
Related Manuals for Samyung F560


Summary of Contents for Samyung F560
- Page 2 Installation and Operation Manual...
- Page 3 Installation: If installation is not correct, the unit can not perform at its designed potential. If in doubt, consult your Samyung ENC dealer. Ensure that any holes made are in a safe position and will not weaken the boat’s structure. If in doubt, consult a qualified boat builder.
- Page 4 If too dry, the tissue won’t glide easily, and may damage the surface. If you require technical advice or assistance, contact your nearest Samyung ENC office or visit our website, www.samyungenc.com. Installation and Operation Manual...
-
Page 5: Table Of Contents
1 Introduction 1-1 General Information ..............9 1-2 Specification................9 1-3 Packing List ................10 2 Getting Started 2-1 Mounting the Unit ..............11 2-1-1 Bracket Mounting................... 11 2-1-2 Flush Mounting ..................11 2-2 Keys ..................12 2-3 Secure Digital (SD) Card............13 2-4 Simulate Mode.............. - Page 6 4 Advance Settings 4-1 System Configuration Settings ........30 4-1-1 Language ....................30 4-1-2 Beep volume ..................30 4-1-3 Auto power.................... 30 4-1-4 Features ....................30 4-1-5 Factory reset ..................30 4-1-6 About ....................30 4-2 Sonar Settings .............. 31 4-2-1 Frequency .....................
- Page 7 5 INSTALLATION 5-1 Options and Accessories ............36 5-2 Connections ................. 37 5-3 Power/data cable..............37 5-4 Alarm .................. 38 5-5 GPS antenna ................ 39 5-6 NMEA 0183 ................39 5-7 NMEA 2000 ................40 5-8 Sonar Transducers ..............41 5-9 Setup and test..............
- Page 8 Installation and Operation Manual...
-
Page 9: Introduction
1 Introduction 1-1 General Information Fish finder uses an echo-sounding technology that uses a transducer to send ultrasonic sound wave through water. The sound wave is reflected back the transducer when these sound wave strike an object such as the bottom. 1-2 Specification [NF560] GENERAL... -
Page 10: Packing List
Battery Voltate Display Display the voltage Color 16 Color Scroll speed 4 Steps + STOP threshold function 0% ~ 75% 1-3 Packing List Item List Part number F560 Display F560-K Ο Bracket N560-DB Ο Display Cover N560-CC Ο Power Cable LTW-2000-8 Ο... -
Page 11: Getting Started
2 Getting Started 2-1 Mounting the Unit N560 is supplied with bracket and flush mount Kit. You can choose a method of installation according to your preference 2-1-1 Bracket Mounting Before installing ensure the area the bracket is mounted to is strong enough to support the weight of the fish finder. -
Page 12: Keys
2-2 Keys – Exit from menu and return to previous menu AUTO – Set to automatic for gain and range CURSOR – Move the cursor on the display – Increases water depth range – Selects the desired option or to confirm selection –... -
Page 13: Secure Digital (Sd) Card
2-3 Secure Digital (SD) Card This section provides instructions for inserting and removing SD card Procedure Inserting the SD Card 1 Hold the SD card so that you can see the C-Map label. 2 Open the door, gently push the SD card into the slot;... -
Page 14: Compass
Setting the data displayed in data bar Selecting the Data bar size 1 Press and select Data bar. 1 Press and select Data bar. 2 Select Data bar then Data bar setup. 2 Select Data bar then Data bar size. 3 Move the cursor key to highlight the data 3 Select the desired size of data bar. -
Page 15: Multi Window Displays
2-7 Multi window displays Changing window size 1 Press and select Split icon on bottom. 2 Press to change the height of the windows if there is only two windows. Deleting a window 1 Press and hold to select a window you want to delete. - Page 16 The active window To distinguish an active window among windows, an orange border indicates the active window. To change the active window to the next window, press and hold Favorite displays The most commonly used windows are called favorite displays and up to six favorite windows can be saved.
-
Page 17: General Operation
3 General Operation 3-1 Manual / Auto Power on and off Manual power on Auto power Press and hold until the display shows If the unit is wired for auto then: the start up page. When the Warning screen • The unit turns on automatically when you appears, press to accept. -
Page 18: The
3-3 The page window Press to show the page window and select a function icon you want to display. Note 1 Some function icons require optional units and connected sensors. 2 If you press one more time in the main window, favorite window is displayed. -
Page 19: Sonar
3-4 Sonar F560 proposes a sonar function when the fish finder is connected to an depth transducer. 3-4-1 Interpreting the display ① ① ① ① Depth. ② ② ② ② Single fish : Fish symbols with depth. ③ ③ ③ ③ School of fish. -
Page 20: Single And Dual Frequency Fish Finding
3-4-3 Single and Dual frequency fish finding Sonar frequencies The display is useful for comparing the same The unit has dual frequency, 200kHz and picture with two different frequencies. 50kHz to detect various bottom conditions. To select the sonar frequency in sonar window: 1 Press , select Frequency. -
Page 21: Gain
[When the set depth is too low] [When the set depth is too high] 3-4-5 Gain The gain menu To change a mode, The gain is a signal strength received from 1 Press , select Gain. the transducer and the threshold is the level 2 Select a mode. -
Page 22: Sonar Window Display
3-4-6 Sonar window display Five sonar display windows are available and Split A-Scope: Display Sonar history and each display window has unique echo strength (see section 3-4-11) characteristics. Select a display window You can change the split ratio if the window depending on your needs. -
Page 23: Split Zoom And Full Screen Zoom
3-4-8 Split zoom and Full Screen zoom Split zoom Bottom lock Split zoom mode expands selected area of If Bottom lock is on, the zoom depth (the the single frequency by VRM(Variable Range depth of the zoom section) is adjusted Mark). -
Page 24: Split 50/200
3-4-10 Split 50/200 The 50 kHz display appears on the left and the 200 kHz appears on the right. This dual frequency display is very useful for comparing the same scanning with two different frequencies. 3-4-11 Split A-Scope This display shows echoes at each transmission with amplitudes and colors proportional to their intensities;... -
Page 25: Gauges
3-5 Gauges The Gauges window displays all the Selecting a Gauges layout information you need during navigation such The Gauges window can show one of seven as water, engine, fuel related information, gauge layouts. etc. To select the Gauges window, press To select a layout from the Gauges window: 1 Press and select Gauge Layout. -
Page 26: Ais
This information can be displayed on the screen of you unit. AIS functions require an optional AIS unit to be installed. Contact your nearest Samyung ENC dealer for more details or visit at www.samyungenc.com. - Page 27 [AIS Vessel Information -1] [AIS Vessel List] [AIS Vessel Information -2] [AIS Vessel Safety message] Installation and Operation Manual...
-
Page 28: Dsc
3-7 DSC This feature requires connection to optional DSC VHF radio. DSC window shows the distress and poll information received from other vessel through DSC VHF radio. To go to the DSC windows: 1 Press , select DSC icon. 2 Select one of two tabs: Distress or Poll. 3-7-1 distress During a distress situation, a vessel that is equipped with a DSC VHF radio and... -
Page 29: Navtex
3-8 NAVTEX NAVTEX is an international automated direct Deleting a message printing service for delivery of navigational 1 Move the cursor to a message you want to and meteorological warnings and forecast, as delete. well as urgent marine safety information. 2 Press and select Delete. -
Page 30: Advance Settings
4 Advanced Settings The system menu mainly consists of settings which do not require frequent adjustment. To go to system menu, press and hold then select the icon you want. ① ① ① ① System Configuration. ② ② ② ② Sonar. ②... -
Page 31: Sonar Settings
4-2 Sonar Settings Sonar feature requires a connection to depth transducer. To go to the Sonar settings: 1 Press and hold 2 Select the Sonar icon. 4-2-1 Frequency Fish sensitivity You can select a sonar frequency among 200 Select the minimum strength fish echo that kHz, 50 kHz or Mixed. -
Page 32: Memory Settings
4-3 Memory Settings To go to the memory settings: 1 Press and hold 2 Select the Memory icon. A user card is an option SD card which you need to purchase additionally. 4-3-1 Screen snap shot To take the snap shot of current screen, press twice. -
Page 33: Alarms
4-5 Alarms Press and then Alarms: A warning message with beep sound is displayed when an alarm condition is met by user setting. Press to clear the alarm. However, the alarm will be displayed again when the alarm condition occurs again. The unit provides alarms for various functions. 4-5-1 Fish 4-5-5 Temperature rate Trigger an alarm when echo from the... -
Page 34: Others
4-6 Others Press and then Others: 4-6-1 Simulate 4-6-3 Units Simulate :Turn the simulate mode on or off. Select a unit of each measure. Tip: Requires a optional VHF receiver 4-6-2 GPS with barometer connected: InHg or mB. GPS Source: Select a source of GPS signals Static Navigation : This option is very 4-6-4 Comms useful when the boat stops or moves very... -
Page 35: Calibrate
4-6-5 Calibrate 4-6-6 Time Speed : Calibrate the boat speed. Travel at a Local offset : The time information supplied constant known speed and press by the GPS satellites is in GTM. To read the correct time, change the time accordingly. to calibrate the speed. -
Page 36: Installation
Correct installation is important to the performance of the unit. It is vital to read the entire installation section of this manual and the documentation that comes with the antenna and any other units before starting installation. For further information, please contact Samyung ENC. 5-1 Options and Accessories Optional sensors and instruments •... -
Page 37: Connections
[Sonar] Detail number SONAR + SPEED / TEMP. GND SPEED / + SUPPLY TEMP. SONAR - SONAR GND 5-2 Connections The fish finder has connectors that are used to connect to the power supply, GPS antenna and NMEA device such as VHF, AIS receiver and digital instruments. 5-3 Power/data cable Basic power •... -
Page 38: Alarm
Auto power • Wire the display unit for auto power as below picture. • During setup, set up Auto power off. Power/Data cable Ignition Pin number : 2 Fuse 2A Ignition Pin number : 5 switch Fuse 2A Pin number : 1 5-4 Alarm •... -
Page 39: Gps Antenna
5-5 GPS antenna F560 can receive the GPS data from the compatible device(NMEA). The fish finder can coonect several device to an external GPS antenna. 5-6 NMEA 0183 NF560 can be connected to external devices • DSC VHF Radio with NMEA0183 and display information such •... -
Page 40: Nmea 2000
• Engines have fuel flow sensors, therefore fuel sensors are not required. • F560 can receive and display wind speed and direction from an optional compatible wind instrument • N560 can receive and display depth from an optional depth instruments. -
Page 41: Sonar Transducers
Contact Samyung ENC for more the depth from transducer. To connect the information. cable to the unit as the below picture. -
Page 42: Setup And Test
2 If the display unit is bracket mounted, adjust tilt and rotation for best viewing and hand tighten the knob. 3 Install an optional instrument and connect F560 to the optional instrument to make sure that there is data communication between two devices. - Page 43 Thank you for purchasing an SAMYUNG ENC product. This product has been thoroughly checked and is covered by the Samyung ENC’s warranty for defects in materials and workmanship under normal use from the date of purchase. This warranty provides for the free repair or replacement of defective parts from our Samyung ENC authorized dealer.
- Page 44 Installation and Operation Manual...
Need help?
Do you have a question about the F560 and is the answer not in the manual?
Questions and answers