
Related Manuals for Saeco D.A. COMBISNACK


Summary of Contents for Saeco D.A. COMBISNACK
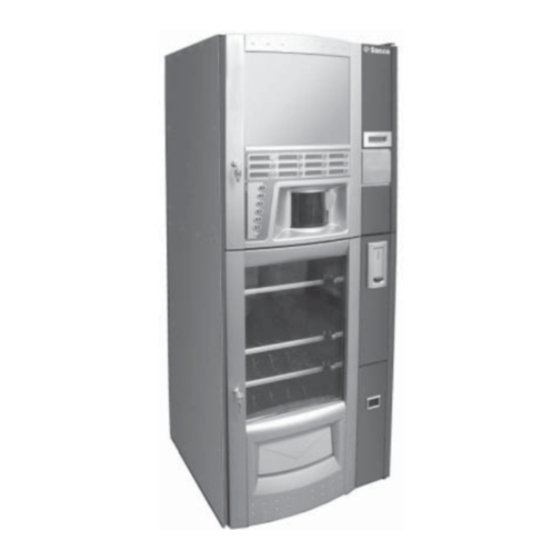
- Page 1 Vending machine ACCESSORIES AND PAYMENT SYSTEMS COMBISNACK D.A. Type: D.A. COMBISNACK Espresso Italia www.espressoitalia.com.au Freecall 1300 660 976...
-
Page 2: Table Of Contents
10 - HANDLING KIT........................... 20 11 - BRITA PURIFIER KIT........................21 12 - RS 232 INTERFACE BOX......................23 13 - SAECO WATER SOFTENER SUPPORT..................24 14 - PROGRAMMING KEY........................ 25 15 - 12V PARALLEL COINER KIT....................... 25 16 - CLOCK MODULE INSERTION (TIME KEEPER). -
Page 3: Diagram Of Connections To The Keypad Board/Cpu
Executive and BDV systems; 24 V DC parallel coiner (non-change giving); 12 V DC parallel coiner (non-change giving) with its suitable kit, Programming key; Clock module; Saeco card; Connector for PC serial interface Feeder kit for payment systems; fig. 1 Italia PTY LTD www.espressoitalia.com.au... -
Page 4: Payment System Installation
- Panel for NRI G13 coiner - Lower Neutra panels (to combine with NRI G 13 panel) Saeco also supplies the relevant wiring harnesses to connect the different payment systems. A specific kit must be used to connect the 12V non-change-giving parallel coiner. -
Page 5: Payment System Feeder Kit
CPU card of Combisnack vending machine, which have a mains voltage of + 12 Vdc (parallel banknote readers) or + 6 Vdc (1432.0xx and 1471.0xx models saeco card). Assembly kit (fig. 3) a. 1 feeder outlet wiring harness - CPU card b. - Page 6 CPU card. Connector Description Voltage connector for parallel banknote readers +12Vdc connector for saeco card universal module +5Vdc or +6Vdc 12,13,14 (see table below) Pin 12, 13, 14 voltage of CN6 is set according to JP8 jumper position. JP8 jumper position...
-
Page 7: Independent Tank Kit
English INDEPENDENT TANK KIT Open the upper door and take out the retaining spring from the left hand pipe (fig. 11). This kit allows the vending machine to be supplied by means of an internal tank instead of by the water network. To do this, it is necessary to use the tank inside the machine as drinking water hopper. - Page 8 English Disconnect the two power supply wirings from the water inlet Tighten the pump by means of the two screws and two washers solenoid valve (fig. 14). 4,3x16 (ref. h, fig. 9) to the bottom (fig. 17). fig. 14 fig. 17 Connect the pipe (ref.
- Page 9 English PINK 230V 50Hz Power supply wirings fan motor PINK PINK PINK RELAY PUMP 1 DARK BLUE DARK BLUE PINK DARK BLUE DARK BLUE BLUE DARK BLUE Power supply wirings inlet solenoid valve INLET SOLENOID VALVE DARK BLUE BLUE fig. 19 24 V D.C.
-
Page 10: Float Kit
English FLOAT KIT Slide the other end of the reed wiring inside the hole (ref. d, It allows the display to read the discharge fluid maximum level. In fig. 26) and couple it to the this condition, no hot beverage is available and the display will connector (ref. - Page 11 English Access the machine programming menu and set “YES” in the Important “TANK” menu (fig. 34) to enable the display reading of the When the tank maximum level is reached, the display will discharge fluid maximum level. read “HOT BEVERAGES NOT AVAILABLE” (ERROR 09 code). In this condition, the V.M.
-
Page 12: Pulse Counter Kit
English PULSE COUNTER KIT To enable the counting of coffees or beverages brewed, access the machine programming menu and set “COFFEE” or “BEVERAGES” in the “PULSE COUNTER” menu (fig. 38). The vending machine can be fitted with an electromechanical pulse counter (24V DC) which will count the number of coffees or In order to properly carry out this operation, disable the safety the total beverages brewed by the machine. -
Page 13: Water Solenoid Valve Kit
English WATER SOLENOID Open the upper door and loosen the screw (fig. 42) fixing the block support plate. VALVE KIT It is possible to brew hot water alone by installing the required kit Assembly kit (fig. 39) a. 1 water pipe set b. - Page 14 English Screw the nut and fix the OR (ref. b, fig. 39) on the 2-way Insert the pipe clamp (ref. b, fig. 39) on pipe (ref. a, fig. 39). solenoid valve (ref. c, fig. 39). Remove the block support Then, fasten the pipe (fig. 48) at the solenoid valve outlet and from its seat and screw the solenoid valve in the hole (fig.
-
Page 15: Sugar Coil Kit
English 8 - SUGAR COIL KIT Disassemble the sugar-dispensing channel (Fig. 52). This kit allows the sugar door opening only when required, since an electromagnet controls it. This prevents any sugar grain from accidentally falling when the “without sugar” option has been selected. - Page 16 English Fasten the connecting rod on the sugar door (fig. 56) by Reinstall the sugar channel and fix it with the spring (fig. 59). means of an M3x8 screw and an M3 nut (ref. c, fig. 50). fig. 56 fig. 59 Close the vending machine upper door.
-
Page 17: Saeco Card Assembly Kit
60 Important To use the Saeco card, the machine must be equipped with a Time keeper. Important If the universal module to be mounted has a 1432.0xx or 1471.0xx code, it will be necessary to use a payment system... -
Page 18: Espresso Italia Pty Ltd
English Tighten the two screws (fig. 65). Connect the antenna cable to the universal module (fig. 68). fig. 65 fig. 68 Assemble the guard (ref. b, fig. 60) on the universal module (fig. 69). Fasten the universal module by means of the 4 screws and spacers (ref. -
Page 19: Saeco Card Programming
This function allows setting the credit maximum level, beyond which all recharge operation (if enabled) is ineffective. The Saeco card module presence (automatically detected by the By setting MAX CARD LOAD = 20.00, the credit on the V.M. V.M.) adds the following entries to the PAYMENT SYSTEM will pass to the card if their sum does not exceed 20.00. -
Page 20: Handling Kit
English 10 - HANDLING KIT Insert the carriage set under the V.M. (fig. 73), move the lever back to its initial position, then remove it from under the machine (fig. 74). This kit allows easy handling of the vending machine in order to carry out any maintenance operations and to place it in narrow spaces. -
Page 21: Brita Purifier Kit
English 11 - BRITA PURIFIER KIT Assemble the cover (ref. b, fig. 79) on the support (ref. c, fig. 79) and tighten it by using the 4 screws (ref. d, fig. 79). Then screw the 2 fittings (ref. a, fig. 79) inside the holes following It is possible to install a filter, manufactured by Brita Company, on the right orientation, as shown in fig. - Page 22 English The following operation differs according to whether the machine Insert the other clamp (ref. i, fig. 79) into the pipe free end is connected to a water network or if it uses an independent tank (ref. m, fig. 79) and the latter into the lower fitting of the cartridge support set (ref.
-
Page 23: Rs 232 Interface Box
English The pipe connection logic is clearer in fig. 89, since some 12 - RS 232 INTERFACE BOX plates have been removed. The RS232 interface box allows connecting the automatic vending machine to a PC, in order to transfer statistic data. Assembly kit (fig. -
Page 24: Saeco Water Softener Support
13 - SAECO WATER SOFTENER Insert the water softener (ref. b, fig. 92) into the support (fig. 94). SUPPORT This support allows fixing the water softener supplied by Saeco in a proper way. Assembly kit (fig. 92) a. 1 water softener support b. -
Page 25: Programming Key
English 14 - PROGRAMMING KEY 15 - 12V PARALLEL COINER KIT Allows to use 12Vdc parallel coin selectors. The programming key allows the set data transfer in the following programming menu entries: Assembly kit (fig. 95) PRICE MANAGEMENT. All data can be transferred; a. -
Page 26: Clock Module Insertion (Time Keeper)
English 16 - CLOCK MODULE PASSWORD INSERTION PRICE VALUE PRICE MANAGEMENT PRICE VALUE PREZZO 001: 50 (TIME KEEPER) PRICE VALUE PRICE 002: 250 PRICE VALUE PRICE n: 550 BEVERAGE PRICES To insert the clock module, do as follows: GLOBAL BEVERAGE PRICES NORMAL 001:200 ABCDEFGHI GLOBAL... -
Page 27: Time Keeper Functions In The Maintenance Menus
TT:000050 PP:000050 TT:000050 PP:000050 DIFF. 2 DIFF. 2 TT:000000 PP:000000 TT:000000 PP:000000 BEVERAGE TEST CARD Saeco Card CARD the total number of test beverages brewed is displayed. TT:000450 PP:000250 TT:000450 PP:000250 FREE TT:000015 PP:000002 FREE SELECTIONS TEST TEST the total number of free selections dispensed is displayed. -
Page 28: Espresso Italia Pty Ltd
Espresso Italia PTY LTD www.espressoitalia.com.au Freecall 1300 660 976...
Need help?
Do you have a question about the D.A. COMBISNACK and is the answer not in the manual?
Questions and answers