
Related Manuals for Honda st1300/a 2007


Summary of Contents for Honda st1300/a 2007
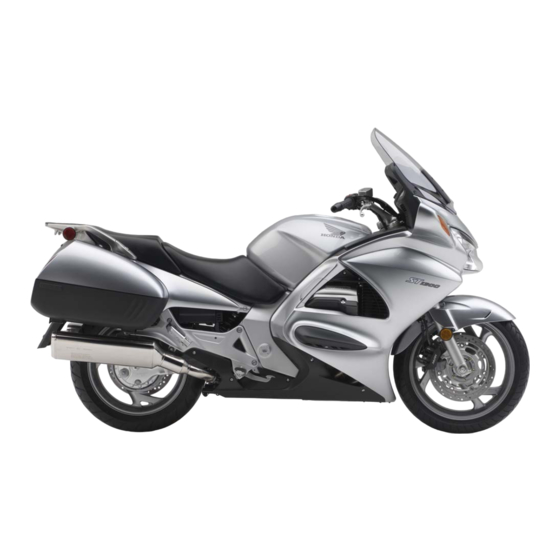
- Page 1 2007 ST1300/A SET-UP INSTRUCTIONS Set-up and pre-delivery service must be performed by an authorized Honda motorcycle dealer. MPD 11856 (0701) Issued: February 2007 ©2007 American Honda Motor Co., Inc. – All Rights Reserved...
-
Page 2: For Your Customer's Safety
To reduce the possibility of a fire or explosion, be careful when working around gasoline or batteries. Use only a nonflammable solvent, not gasoline, to clean parts. Keep all cigarettes, sparks and flames away from the battery and all fuel-related parts. ©2007 American Honda Motor Co., Inc. – All Rights Reserved... - Page 3 Indicates the pre-delivery section Modifications and Accessories Modifications that you may have made, or should make in the future, to any Honda product, shall be deemed by our company to have been performed at your sole risk and responsibility, and without our company's or the manufacturer's approval, or consent, implied or expressed.
- Page 4 3. Remove the side braces, wheel assembly, loose parts cartons, and crate frame. Remove the ties securing the front wheel assembly and loose parts cartons. PARTS PARTS TIES CARTON CARTON ©2007 American Honda Motor Co., Inc. – All Rights Reserved...
- Page 5 Using two people, carefully remove the crate frame, being careful not to damage the motorcycle. Remove the front shipping brace, being careful not to damage the motorcycle. FRONT SHIPPING BRACE ©2007 American Honda Motor Co., Inc. – All Rights Reserved...
- Page 6 *Optional parts. Give the knee grip pads to the customer at the time of delivery or install if the customer wants them installed (see step 15). (Continued on next page.) ©2007 American Honda Motor Co., Inc. – All Rights Reserved...
- Page 7 Claims for missing loose parts or those damaged during transit should be submitted to American Honda, not the carrier. After completing repairs, submit a Transportation Claim via iN. For complete details, please refer to the Warranty Policy and Procedures Manual.
- Page 8 Remove the washer bolts and lower shipping bracket from the crate base. Discard the washer bolts. CALIPER BOLTS CALIPER BOLTS LOWER WASHER BOLTS SHIPPING (discard) BRACKET AXLE BOLT PINCH BOLTS ©2007 American Honda Motor Co., Inc. – All Rights Reserved...
- Page 9 6 x 16 mm flange bolts. 6 x 18 mm SOCKET BOLT Torque the bolts. RUBBER WASHER Torque: 12 N·m (1.2 kgf·m, 9 lbf·ft) 6 x 20 mm PAN SCREW 6 mm FLANGE REFLECTOR ©2007 American Honda Motor Co., Inc. – All Rights Reserved...
- Page 10 16.5 mm Torque: 79 N·m (8.1 kgf·m, 58 lbf·ft) LEFT FRONT WHEEL SIDE Tighten the right axle pinch bolts to the COLLAR specified torque. Torque: 22 N·m (2.2 kgf·m, 16 lbf·ft) ©2007 American Honda Motor Co., Inc. – All Rights Reserved...
- Page 11 Visually check the position of the brake disc in relation to the brake caliper; it should be DISC centered. If not, recheck the wheel and brake caliper installation. CALIPER BRACKET ©2007 American Honda Motor Co., Inc. – All Rights Reserved...
- Page 12 6 x 20 mm flange bolts on each side. Torque the bolts. Torque: 12 N·m (1.2 kgf·m, 9 lbf·ft) SHIPPING BOLTS Install the two hose clips as shown. (discard) ©2007 American Honda Motor Co., Inc. – All Rights Reserved...
- Page 13 Check that the mirror cover rubber and mirror cover are installed securely and there is no clearance between each of the components. ©2007 American Honda Motor Co., Inc. – All Rights Reserved...
- Page 14 Torque: 12 N·m (1.2 kgf·m, 9 lbf·ft) Then, install the following: Windscreen covers • 4 x 25 mm pan screws • Torque the pan screws. Torque: 1.0 N·m (0.1 kgf·m, 0.7 lbf·ft) ©2007 American Honda Motor Co., Inc. – All Rights Reserved...
- Page 15 Push in on the saddlebag lever lock while aligning it with the cutout in the saddlebag as shown. SADDLEBAG LEVER LOCK CUTOUT ©2007 American Honda Motor Co., Inc. – All Rights Reserved...
- Page 16 Close the latch lever and turn the ignition key counterclockwise. IGNITION Be sure the seat is locked securely in position. Place the ignition key into the ignition. ©2007 American Honda Motor Co., Inc. – All Rights Reserved...
- Page 17 After attaching the pads, press down firmly over the entire area of the pad to ensure maximum adhesion. Avoid washing the motorcycle or riding in wet conditions for 24 hours after attaching the pads. ©2007 American Honda Motor Co., Inc. – All Rights Reserved...
- Page 18 NEGATIVE (-) BATTERY TERMINAL POSITIVE (+) BATTERY TERMINAL BATTERY BOX RIGHT TURN SIGNAL 2P (SKY BLUE) CONNECTOR RIGHT RUNNING LEFT TURN LIGHT SIGNAL 2P CONNECTOR (ORANGE) CONNECTOR LEFT RUNNING LIGHT CONNECTOR ©2007 American Honda Motor Co., Inc. – All Rights Reserved...
- Page 19 Close the latch lever. SADDLEBAG Remove the right side cover: 5 mm SCREWS Remove the three screws and the right side cover. SIDE COVER 5 mm SCREW ©2007 American Honda Motor Co., Inc. – All Rights Reserved...
- Page 20 16. Reinstall the battery holder, bolts, and battery cover. Reinstall the right side cover securing it with the three screws. 5 mm SCREWS SIDE COVER 6 mm SCREW ©2007 American Honda Motor Co., Inc. – All Rights Reserved...
- Page 21 Close the latch lever and lock it with the ignition key. Remove the ignition key and place it in the ignition switch in the OFF position. SADDLEBAG SLOTS ©2007 American Honda Motor Co., Inc. – All Rights Reserved...
- Page 22 Support the motorcycle in an upright position on a firm, level surface. INSPECTION WINDOW Check the inspection window to ensure the engine has oil. UPPER LEVEL MARK LOWER LEVEL MARK ©2007 American Honda Motor Co., Inc. – All Rights Reserved...
- Page 23 Recommended oil: Pro Honda Shaft Drive Oil or equivalent SAE 80 hypoid gear oil LOWER EDGE Reinstall and torque the oil filler cap. Torque: 12 N·m (1.2 kgf·m, 9 lbf·ft) ©2007 American Honda Motor Co., Inc. – All Rights Reserved...
- Page 24 Idle speed: l,000 100 rpm INCREASE If an adjustment is needed, turn the throttle stop screw to set the idle speed using a screwdriver. Stop the engine and remove the tachometer. ©2007 American Honda Motor Co., Inc. – All Rights Reserved...
- Page 25 Turn on the ignition, set the engine stop switch to the RUN position, and press the starter button. If the engine starts, there is a problem with the sidestand ignition cut-off switch. Troubleshoot the cause. ©2007 American Honda Motor Co., Inc. – All Rights Reserved...
- Page 26 LOW POSITION 27. Complete the Set-up/Pre-delivery form. Complete an On-Road Motorcycle Set-up/Pre- delivery Checklist (Reorder No. S0299, also available on iN) by checking the boxes confirming the steps were done. ©2007 American Honda Motor Co., Inc. – All Rights Reserved...
- Page 27 2007 ST1300/A ©2007 American Honda Motor Co., Inc. – All Rights Reserved...
- Page 28 ©2007 American Honda Motor Co., Inc. – All Rights Reserved...
Need help?
Do you have a question about the st1300/a 2007 and is the answer not in the manual?
Questions and answers