Table of Contents
Advertisement
Quick Links
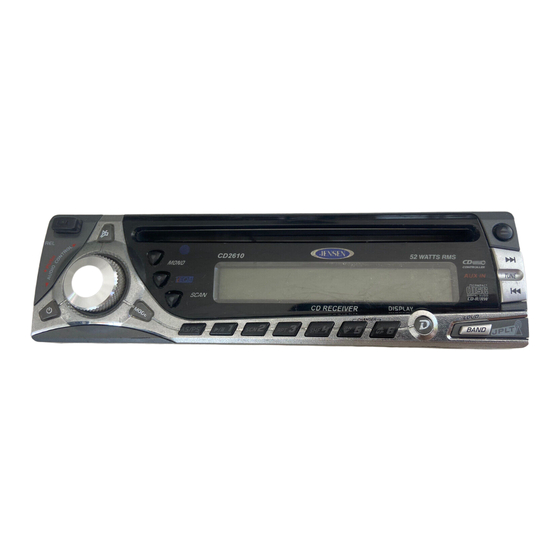
CD2610
Owner's Manual
CD2610
MONO
Audiovox Electronics Corporation
150 Marcus Boulevard
Hauppauge, NY 11788
1-800-323-4815
www.jensen.com
© 2005 Audiovox
Thank You!
Thank you for choosing a Jensen product. We hope you will find the instructions in this
owner's manual clear and easy to follow. If you take a few minutes to look through it, you'll
learn how to use all the features of your new Jensen receiver for maximum enjoyment.
Preparation . . . . . . . . . . . . . . . . . . . . . . . . . . . . . . . . . . . . . . . . . . . . . . . . . . . . . . . . . . 1
Wiring . . . . . . . . . . . . . . . . . . . . . . . . . . . . . . . . . . . . . . . . . . . . . . . . . . . . . . . . . . . . . . 3
Installation . . . . . . . . . . . . . . . . . . . . . . . . . . . . . . . . . . . . . . . . . . . . . . . . . . . . . . . . . . 5
Operation . . . . . . . . . . . . . . . . . . . . . . . . . . . . . . . . . . . . . . . . . . . . . . . . . . . . . . . . . . . 8
Tuner Operation . . . . . . . . . . . . . . . . . . . . . . . . . . . . . . . . . . . . . . . . . . . . . . . . . . . . . . 13
CD Player Operation . . . . . . . . . . . . . . . . . . . . . . . . . . . . . . . . . . . . . . . . . . . . . . . . . . 16
CD Changer Operation . . . . . . . . . . . . . . . . . . . . . . . . . . . . . . . . . . . . . . . . . . . . . . . . 19
Remote Control . . . . . . . . . . . . . . . . . . . . . . . . . . . . . . . . . . . . . . . . . . . . . . . . . . . . . . 20
Care and Maintenance . . . . . . . . . . . . . . . . . . . . . . . . . . . . . . . . . . . . . . . . . . . . . . . . . 21
Specifications . . . . . . . . . . . . . . . . . . . . . . . . . . . . . . . . . . . . . . . . . . . . . . . . . . . . . . . . 23
Warranty . . . . . . . . . . . . . . . . . . . . . . . . . . . . . . . . . . . . . . . . . . . . . . . . . . . . . . . . . . . . 26
52 WATTS RMS
v.122604
Preparation
Getting Started
It's a good idea to read all of the instructions before beginning the installation.
Tools and Supplies
The following tools and supplies are needed to install the radio.
•
Torx type, flathead and Philips screwdrivers
•
Wire cutters and strippers
•
Tools to remove existing radio (screwdriver, socket wrench set or other tools)
•
Electrical tape
•
Crimping tool
•
Volt meter/test light
CD
•
Crimp connections
CONTROLLER
•
18 gauge wire for power connections
/
•
16-18 gauge speaker wire
Speaker Requirements: Only connect speakers rated in the load impedance of 4 ohms.
Speakers with a load impedance less than 4 ohms could damage the unit.
Disconnect Battery
Before you begin, always disconnect the battery negative terminal.
Remove Radio from Sleeve
Lift latches on both sides of sleeve to remove half-sleeve from radio.
Remove Radio from Sleeve
Remueva el Radio de la Manga
Enlever la radio du manchon
CD 26
10
52 WA
TT S
RM S
CD
CON
TRO
LLER
Advertisement
Table of Contents

Related Manuals for Audiovox Jensen CD2610


Summary of Contents for Audiovox Jensen CD2610
-
Page 1: Table Of Contents
CD2610 Owner’s Manual CD2610 MONO Audiovox Electronics Corporation 150 Marcus Boulevard Hauppauge, NY 11788 1-800-323-4815 www.jensen.com © 2005 Audiovox v.122604 Thank You! Thank you for choosing a Jensen product. We hope you will find the instructions in this owner’s manual clear and easy to follow. If you take a few minutes to look through it, you’ll learn how to use all the features of your new Jensen receiver for maximum enjoyment. -
Page 2: Preparación
4 ohms peuvent nuire à l'appareil. Débrancher la batterie Il faut toujours débrancher la borne de batterie négative avant de commencer. Enlever la radio du manchon Soulever les loquets des deux côtés du manchon pour enlever le demi-manchon de la radio. CD2610... -
Page 3: Wiring
When replacing a fuse, make sure the new fuse is the correct type and amperage. Using an incorrect fuse could damage the radio. The CD2610 uses one 15 amp fuse located below the wiring connector (15 amp fast blow ATO). -
Page 4: Cableado
Lors du remplacement d’un fusible, assurez-cous que le fusible de remplacement est du type et de la puissance appropriés. L’utilisation d’un fusible non approprié pourrait endommager la radio. Le CD2610 est doté d’un fusible de 15 A, situé sous le connecteur du câblage (15 A à fusion rapide, type ATO). -
Page 5: Installation
CD2610 Installation This unit is designed for installation in cars, trucks and vans with an existing radio opening. In many cases, a special installation kit will be required to mount the radio to the dashboard. These kits are available at electronics supply stores and car stereo specialty shops. Always check the kit application before purchasing to make sure the kit works with your vehicle. -
Page 6: Instalación
10. Rattachez le panneau d'avant au châssis et vérifier l'opération de la radio en vous référant aux instructions d'opération pour l'appareil. A NOTER : Pour le fonctionnement correct du changeur CD, le châssis doit être monté au dedans du 20 degrés horizontal. Assurez vous que l'appareil soit monté à l'intérieur de cette limite. CD2610... - Page 7 CD2610 Installation (continued) Kit Installation If your vehicle requires the use of an installation kit to mount this radio, follow the instructions included with the installation kit to attach the radio to the mounting plate supplied with the kit. Wire and test the radio as outlined in the Universal Installation instructions.
-
Page 8: Operation
When adjusting audio functions, the unit will automatically exit select mode and return to the normal display after five seconds or when another function is activated. Operation Operación Opération CD2610 MONO Operación Encendido Presione el botón de encendido (1) o cualquier otro botón en el frente del radio para encender la unidad cuando la ignición del automóvil esté... - Page 9 CD2610 Operation (continued) Select (continued) Bass Press PUSH (4) twice until “BAS” appears in the display. Within five seconds, rotate the volume control (3) clockwise or counter clockwise to adjust bass from “-10” to “+10”. “00” represents a flat response. The bass level will be shown on the display for five seconds or until another function is activated.
- Page 10 A NOTER : Les panneaux d'affichage prennent du temps pour afficher lorsqu'ils ont été exposés au froid pendant longtemps. En outre, la visibilité des numéros sur l'affichage à cristaux liquides peut diminuer un peu. L'affichage sera remis à normal lorsque les températures reviendront à des niveaux normaux. CD2610...
- Page 11 CD2610 Operation (continued) Display (DISPLAY) When the unit is off, the LCD will display the time of day. When the unit is on, the LCD will automatically show the tuner, CD or CD changer display, depending on which mode of operation is currently activated.
- Page 12 Un DEL pour décourager les voleurs Un diode electroluminescente (DEL) (12) est situé sur le châssis derrière le panneau d'avant et clignotera lorsque le panneau est enlevé. Le clignotement sert d'avis au voleur potentiel que l'appareil a été désactivé par l'enlèvement du panneau d'avant. CD2610...
-
Page 13: Tuner Operation
CD2610 Tuner Operation AM/FM Band Selector (BAND) Press BAND (13) during radio play to switch between three FM bands and one AM band. “F1”, “F2”, “F3” or “AM” will appear in the display to indicate the band currently selected. Tuning... - Page 14 Momentarily press AS/PS again to stop scanning and listen to the current station. Store Preset Station Sintonía Preseleccionado Des stations préréglées CD2610 MONO Press and hold resione y mantenga presionado ppuyez et maintenez Operación del Radio (continuado)
- Page 15 CD2610 Tuner Operation (continued) Mono/Stereo Selector (MONO) Press MONO (18) during FM radio operation to select stereo reception of the broadcast signal. Under normal reception, the unit should be left in the stereo mode as indicated by the “ST” designation and the associated signal strength indicator that appear on the display panel when tuned to an FM stereo signal.
-
Page 16: Cd Player Operation
CD play. CD Player Operation Operación del Equipo de CD Opération de la platine CD CD2610 MONO Operación del Equipo de CD Insertar un CD Con el lado del sello hacia arriba, suavemente inserte el disco en la ranura para CD (21) hasta que el suave mecanismo de carga enganche el CD y lo jale hacia adentro. - Page 17 CD2610 CD Player Operation (continued) Play/Pause Press the play/pause button (23) to suspend disc play. “S--PAUSE” will appear in the display, and the center of the disc icon (22) will stop rotating. Press the play/pause button again to resume disc play. The “S--PAUSE” indication will disappear from the display, and play will resume from the point at which the pause occurred.
- Page 18 Disc play can be resumed by pressing MODE (2) to choose the CD player function. Eject CD Expulsar Disco Ejection du disque CD2610 MONO CD2610 CD Player Error Codes If a problem should develop while operating the CD player, an error code (ER-1, ER-2, etc.) may appear on the display panel.
-
Page 19: Cd Changer Operation
CD2610 CD Changer Operation Please call Jensen technical support at 1-800-323-4815 for a list of CD changers compatible with this unit. The following Jensen models are not compatible with this unit: CH1001, CH600U, CH6001, XCH6RF (CH6001 with RF modulator), UCH6006 (CH6001 with RF modulator), KCH6000 (CH6001 with RF modulator) and RF6DCW (CH6001 with RF modulator). -
Page 20: Remote Control
Remote Control The remote control will allow you to control the basic functions of the CD2610. The remote control sensor is at the top left of the MONO (18) button. Remote Control Prêt à... -
Page 21: Care And Maintenance
CD2610 Care and Maintenance CD Player The following guidelines will help you extend the life of your CD player: When cleaning the vehicle interior, do not get water or cleaning fluids on the unit. The CD player will not operate properly in extreme hot/cold or under damp conditions. In case of such conditions, wait until the vehicle interior reaches a normal temperature or any condensation on the disc player lens has evaporated before using the player. - Page 22 N'exposez pas vos disques au soleil, à des températures haute ou à une humidité excessive pendant des périodes longues. Ne collez pas de papier, de bandes ou d'étiquettes sur la surface du disque. N'écrivez pas dessus avec des marqueurs quelconques. CD2610...
-
Page 23: Specifications
CD2610 Troubleshooting Problem Cause Does not operate No power to yellow wire; no (display does not light) power to red wire Inline fuse blown No power to unit Inline fuse blown No speakers operate Speaker harness not (display lights normally) -
Page 24: Especificaciones
Dimensiones ......7 x 7 x 2 pulg.(178mm x 178mm x 51mm) Especificaciones sujetas a cambio sin aviso previo. CD2610... -
Page 25: Caractéristiques
CD2610 Dépannage Probléme Cause L’appareil ne fonctionne Aucune alimentation au fil pas (l’affichage ne jaune Aucune alimentation s’allume pas) au fil rouge Fusible grillé Les haute-parleurs ne Les fils des haut-parleurs ne fonctionnent pas sont pas raccordés (l’affichage s’allume mormalement) Les haut-parleurs ne Épissures ou connexions... -
Page 26: Warranty
CANADA: Llamar a 1-800-323-4815 para la ubicación de la estación que le proporciona servico de garantía. Garantie Limitée de 12 Mois AUDIOVOX CORPORATION (la Société) garantit à l’acheteur initial du produit que si tout ou partie de ce produit, en cours d’utilisation et sous des conditions normales, venait à présenter des vices de matière primitive ou des défauts de fabrication, dans les 12 mois suivant la date d’achat initial, ce(s) défaut(s)