Raypak HD401 Installation & Operating Instructions Manual
Hide thumbs
Also See for HD401:
- Installation & operating instructions manual (48 pages) ,
- Brochure & specs (10 pages) ,
- User manual (4 pages)
Table of Contents
Advertisement
INSTALLATION & OPERATING
Models
HD101–HD401
Types H & WH
WARNING: If these instructions are not followed exactly, a fire or explosion may
result causing property damage, personal injury or death
FOR YOUR SAFETY: Do not store or use gasoline or other flammable vapors and
liquids or other combustible materials in the vicinity of this or any other appliance. To
do so may result in an explosion or fire.
WHAT TO DO IF YOU SMELL GAS:
• Do not try to light any appliance.
• Do not touch any electrical switch; do not use any phone in your building.
• Immediately call your gas supplier from a neighbor's phone. Follow the gas
supplier's instructions.
• If you cannot reach your gas supplier, call the fire department.
Installation and service must be performed by a qualified installer, service agency or
the gas supplier.
This manual should be maintained in legible condition and kept adjacent to the heater or in another safe place for
future reference.
CATALOG NO. 1000.52D
INSTRUCTIONS
®
Effective: 10-15-15
.
Replaces: 09-14-12
P/N 241356 Rev. 5
Advertisement
Table of Contents

Subscribe to Our Youtube Channel
Related Manuals for Raypak HD401


Summary of Contents for Raypak HD401
- Page 1 INSTALLATION & OPERATING INSTRUCTIONS ® Models HD101–HD401 Types H & WH WARNING: If these instructions are not followed exactly, a fire or explosion may result causing property damage, personal injury or death FOR YOUR SAFETY: Do not store or use gasoline or other flammable vapors and liquids or other combustible materials in the vicinity of this or any other appliance.
- Page 2 Rev. 5 reflects the following: Changes to: Table C on page 9, Figs. 7 and 8 on page 10, “Direct Combustion Air” on page 11, “Recovery Water Connections” on page 13, Figs. 10-12 on page 15, “Piping-Heating Boilers” on page 16, Table G on page 18, Table I on page 22, Table K on page 25, Table L on page 27, Table M on page 29, Table N on page 30, Fig.
-
Page 3: Table Of Contents
HD101–HD151 TYPE WH Pay Attention to These Terms BEFORE INSTALLATION WIRING DIAGRAM—MODELS HD101-HD151 TYPE H Product Receipt WIRING DIAGRAM—MODELS HD201- Model Identification HD401 TYPE WH Ratings and Certifications WIRING DIAGRAM—MODELS Installations at Elevation HD201-HD401 TYPE H Component Locations HD TROUBLESHOOTING General Information... -
Page 4: Warnings
WARNINGS — Pay Attention to These Terms Indicates the presence of immediate hazards which will cause severe DANGER: personal injury, death or substantial property damage if ignored. Indicates the presence of hazards or unsafe practices which could cause WARNING: severe personal injury, death or substantial property damage if ignored. Indicates the presence of hazards or unsafe practices which could cause CAUTION: minor personal injury or product or property damage if ignored. -
Page 5: Before Installation
If, after reviewing this manual, you still have questions places identify the size of the heater. which this manual does not answer, please contact your local Raypak representative or visit our website at Ratings and Certifications www.raypak.com. Thank you for purchasing a Raypak product. We hope... -
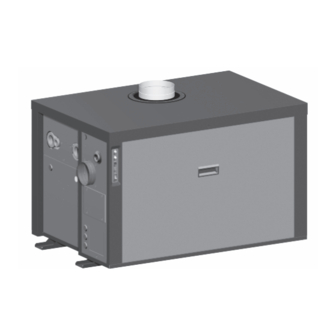
Page 6: Component Locations
Component Locations Fig. 1: Component Locations — Angle View Fig. 2: Component Locations — Left Side CONTROLLER (OPTIONAL ON HD401) (BEHIND CONTROLLER) Fig. 3: Component Locations — Front (Panels removed for clarity) -
Page 7: General Information
General Information Vent Size (in.) Model Quantity of Burners Flue Intake HD101 HD151 HD201 HD251 HD301 HD401 Table A: Basic Data Fig. 4: Air Shutter Adjustment Fig. 5: Gas Valves... -
Page 8: General Safety
GENERAL SAFETY To meet commercial hot water use needs, the high limit safety control on this water heater will shut off the main gas valve before the outlet temperature reaches 210°F. However, water temperatures over 125°F can cause instant severe burns or death from scalds. When supplying general purpose hot water, the rec- ommended initial setting for the temperature control is 125°F. -
Page 9: Installation
Equipment Base Raypak offers several optional temperature controllers for regulation of the water temperature in the heater. Type H models 101 through 301 are equipped as stan- The heater should be mounted on a level, structurally dard with an onboard operating controller to provide sound surface. - Page 10 Fig. 7: Minimum Installed Service Clearances — Indoor/Closet Installations hang. Roof water drainage must be diverted away CAUTION: Service clearances less than the from heaters installed under overhangs. minimums may require removal of the heater to service either the heat exchanger or the burners. Minimum Installed Heater Side The heater must be installed in a manner that will...
-
Page 11: Combustion And Ventilation Air
Fuel Gas Code. Combustion and Ventilation Air 3. In cold climates, and to mitigate potential freeze- up, Raypak highly recommends the installation of Combustion Air Filter a motorized sealed damper to prevent the circula- tion of cold air through the heater during This heater is supplied with an integral combustion air non-operating hours. -
Page 12: Water Piping
a. Where directly communicating with the out- air flow from the outdoors for natural draft, partial doors or where communicating to the fan assisted, fan-assisted or power draft-assisted outdoors through vertical ducts, each opening burners, there shall be a permanent air supply shall have a minimum free area of 1 in. -
Page 13: Relief Valve Piping
Reversing Water Connections Follow these instructions to change the water connec- tions from the left-hand side (standard) to the right-hand side. This is an ASME-Certified pressure vessel. It is the installer’s responsibility to ensure that the pressure vessel is properly sealed after making these changes. -
Page 14: Hydronic Heating
In order to ensure proper performance of your boiler system, you must install a properly-sized pump. Raypak recommends using a 20°F ∆T as design ∆T. Heater requires minimum inlet temperature of 105°F. (∆T is the temperature difference between the inlet Consult the following sections for piping details. - Page 15 Fig. 10: Single Boiler — Primary/Secondary Piping *Maximum 4 times the pipe diameter or 12”, Max. Fig. 11: Single Boiler — Low-Temperature Application (Heat Pump) Primary/Secondary Piping *Maximum 4 times the pipe diameter or 12”, Max. Fig. 12: Dual Boiler—Primary/Secondary Piping...
-
Page 16: Domestic Hot Water Piping
Raypak boilers are high recovery low mass water cut-off device. The boiler, when used in connec- boilers not subject to thermal shock. Raypak offers a... -
Page 17: Gas Supply
TANKSTAT OR TANK SENSOR WHEN EQUIPPED Fig. 13: Single Heater — Domestic Hot water with One Storage Tank Gas Supply Gas Supply Connection DANGER: Make sure the gas on which the heater CAUTION: The heater and its manual shutoff valve will operate is the same type as specified on the must be disconnected from the gas supply during heater’s rating plate. -
Page 18: Electrical Power Connections
Fig. 14: Sediment Trap Orientation Gas Pressure Regulator CAUTION: Do not use Teflon tape on gas line pipe thread. A pipe compound rated for use with gas systems is recommended. Apply sparingly only on The gas valve pressure regulator(s) on the heater are male pipe ends. - Page 19 Input 3/4” 1” 1-1/4” 1-1/2” Model (KBTUH) HD1 1 HD151 HD2 1 HD251 HD3 1 HD4 1 Table H: Maximum Equivalent Pipe Length Natural gas – 1,000 BTUH per ft , .60 specific gravity at 0.5 in. WC pressure drop Propane gas –...
-
Page 20: Hot Water
4 for the temperature controller, as shown in Fig. 16. This will be done based on the controller option selected with your heater order. Fig. 17: Single Stage Tankstat For operation with a Temp-Tracker controller, refer to Temp-Tracker Installation Operating Instructions, Raypak Catalog number 5000.66 (P/N 241177). -
Page 21: Venting
2-STAGE TANKSTAT Category II. A heater which operates with a non-posi- tive vent static pressure and with a vent gas temperature that may cause excessive condensate STAGE 2 CONNECTION OR STAGE 1 production in the vent. STAGE 1 CONNECTION CONNECTION OF HEATER 2 Category III. - Page 22 Combustion Air Exhaust Certified Combustion Air Venting Category Supply Configuration Appliance Material Inlet Material Type B or any Vertical Natural Category I Venting Draft Venting Fan-Assisted From Inside System* Building (Non-Direct Horizontal Venting) Stainless Steel Thru-wall (Gas Tight) Venting Type B or any Vertical Venting Category I Venting Fan-Assisted...
- Page 23 Fig. 19: Minimum Clearances from Vent/Air Inlet Terminations – Indoor and Outdoor Installations U.S. Installations Canadian Installations Clearance above grade, veranda, porch, 1 ft (30 cm) 1 ft (30 cm) deck, or balcony 4 ft (1.2m) below or to side Clearance to window or door that may be of opening;...
- Page 24 ances shall not terminate over public walkways or g) The vent terminal of a direct vent appliance with over an area where condensate or vapor could an input over 50,000 BTUH per hour shall require create a nuisance or hazard or could be detrimen- a 12-inch vent terminal clearance.
-
Page 25: Venting Installation Tips
Venting Installation Tips on, Venting of Equipment, of the latest edition of NFGC, or in Canada, B149 Installation Code for Gas Burning Appliances and Equipment, or applicable pro- Support piping: visions of local building codes. · horizontal runs- at least every five (5) feet. ·... - Page 26 B type vent is 4” for HD101 and HD151, 5” for HD201, HD251 and HD301, and 6” for HD401. CAUTION: Vent connectors for natural draft NOTE: Vent Adapter will have to be used to connect venting systems must be type “B”...
- Page 27 Certified Model Appliance Vent Size Max. Venting Venting Category (inches) Length (feet) Material HD101 HD151 Stainless HD201 Steel HD251 (Gas Tight) HD301 HD401 Maximum 4 elbows. Table L: Horizontal Thru-wall Venting (Category III)
- Page 28 Follow the vent manufacturers installation instructions carefully. b) The vent be insulated through the length of the horizontal run. Raypak does not support common venting under Catagory III (possitive pressure) conditions. For appliances installed in extreme cold climate, it is recommended that: a) The vent be installed with a slight upward slope of not more than 1/4"...
- Page 29 Category (inches) Length Pipe Length Material (inches) (feet) Material (feet) HD101 HD151 Galvanized Stainless 100, Steel HD201 Steel 4 Elbows HD251 (Gas Tight) Max. HD301 CPVC HD401 Maximum 4 elbows, for either intake or vent. Table M: Horizontal Thru-wall Venting...
- Page 30 Type B HD201 (HD201) 6 Equivalent HD251 (HD251) 6 HD301 (HD301) 11 CPVC HD401 *Over 25 feet, use single acting barometric damper. Consult the factory for additional information. Maximum 4 elbows, for either intake or vent. Table N: Vertical Venting...
-
Page 31: Outdoor Installation
Vertical Direct Vent System blockage from snow. The vent cap must have a mini- Installation mum 3 foot clearance from the air inlet opening. Outdoor Installation These installations utilize the heater mounted blower to draw combustion air from outdoors and uses the natural buoyancy of the heated flue products to create Outdoor models are self-venting when installed with a thermal driving head that expels the exhaust gases... -
Page 32: Controls
This controller is also an available may result in control damage, heater malfunction, option for model HD401 and for all Type WH models. property damage, personal injury, or death. The standard configuration provides for outdoor air reset of the system target water temperature based on WARNING: Turn off the power to the heater before a user defined reset ratio. - Page 33 ITEM FEATURE SETTING / DESCRIPTION DEFAULT Operating Reset Ratio Dial Reset Ratio 0.4 to 3.6 / Setpoint Target 120°F to 200°F Temperature 0.4 to 3.6 Single Stage DIP #1 Firing Mode Single Stage (On) / Two Stage (Off) (On) Outdoor DIP #2 Configuration Outdoor Reset (On) / Setpoint (Off)
-
Page 34: Digital Temperature Control (Optional)
The WH-101 thru WH-401 heaters can be equipped tain a set temperature in the storage tank. The with a Raypak digital temperature control. For opera- differential is fixed at 5F below target. The System tion with this control, refer to the Temp-Tracker Supply Sensor (S2) is used as the operating sensor. -
Page 35: Flow Switch
The optional adjustable auto reset high limit is located cient gas pressure is present for proper regulator per- behind the front panel (see Fig. 3). Adjust the setting formance. The low gas pressure switch automatically to approx. 20°F (10°C) above desired outlet tempera- shuts down the heater if gas supply drops below the ture. -
Page 36: Wiring Diagram-Models Hd101-Hd151 Type Wh
WIRING DIAGRAM—MODELS HD101-HD151 TYPE WH... -
Page 37: Wiring Diagram-Models Hd101-Hd151 Type H
WIRING DIAGRAM—MODELS HD101-HD151 TYPE H... -
Page 38: Wiring Diagram-Models Hd201-Hd401 Type Wh
WIRING DIAGRAM—MODELS HD201-HD401 TYPE WH... -
Page 39: Wiring Diagram-Models Hd201-Hd401 Type H
WIRING DIAGRAM—MODELS HD201-HD401 TYPE H... -
Page 40: Hd Troubleshooting
HD101-HD401 Troubleshooting Check the switch, transformer Does the main power switch provide Step 1 power to the green power LED? and/or line voltage Reattach. Is Disable connection intact? Is temperature controller Step 2 Install. Is there a Call For Heat? -
Page 41: Pre-Start-Up
PRE-START-UP NOTE: Digital manometers are not recommended. Filling System-Heating Heaters Preparation for Start-Up Fill system with water. Purge all air from the system WARNING: Do not turn on gas at this time. using purge valve sequence. After system is purged of air, lower system pressure. -
Page 42: Start-Up
Start-Up Check the Gas Supply Pressure Blower Adjustment 1. Slowly turn on main gas shut-off valve. 2. Read the gas supply pressure from the manome- 1. A nylon tee fitting is connected with hoses in-line ter; minimum supply pressure is 4 in. WC, with the air pressure switches. -
Page 43: Main Burner Adjustment
Gas Type above. Firing Gas Valve Stage Natural Propane 4. Replace cap(s) when pressure is set. Invensys 3.4" WC Invensys (Model HD401 Natural Hi-Fire Honeywell or Only) +/- 0.2"WC 3.1" WC 9.6" WC White-Rodgers Invensys 1.1" WC 1. Turn heater off. -
Page 44: Gas Type Conversion On Valve
The scales on the NOTE: Model HD401 requires replacement of switch are approximate only); Low gas pressure valve. switch (optional) must be set at 3.5 in. WC for nat- ural gas and 10.5 in. -
Page 45: Post Start-Up Check
• Remove all Manometers and replace hose, replace all gas pressure caps. • Check for gas leaks one more time. POST START-UP CHECK Check off steps as completed: 1. Heater and heat distribution units or storage tank filled with water? 2. -
Page 46: Air Filter Inspection/Removal
Heat Exchanger Removal 12. Heater cycled with thermostat? Raise to highest setting and verify heater goes through normal start-up cycle. Reduce to lowest setting and verify Refer to Fig. 40 for the following procedure. heater goes off. 1. Before beginning, make sure the heater is cool to 13. -
Page 47: Maintenance
7. Carefully lift and remove the flue collector. HANDS ON OR GRASP PIPES. Use a light touch - return piping will heat up quickly. 8. Lift heat exchanger straight up being careful not to damage the refractory. 11. Check blower and blower motor. Clean and oil as necessary. -
Page 48: Appendix
APPENDIX Areas causing contaminated combustion air: Inside Combustion Air • dry cleaning/laundry areas and establishments Contamination: • metal fabrication plants • beauty shops • refrigeration repair shops All heaters experience some condensation during • photo processing plants start-up. The condensate from flue gas is slightly •... -
Page 49: Important Instructions For The Commonwealth Of Massachusetts
Important Instructions for the Commonwealth of Massachusetts The Commonwealth of Massachusetts requires compliance (b) EXEMPTIONS: The following equipment is exempt from with regulation 248 CMR 4.00 and 5.00 for installation of 248 CMR 5.08(2)(a)1 through 4: through – the – wall vented gas appliances as follows: 1. - Page 52 Raypak, Inc., 2151 Eastman Avenue, Oxnard, CA 93030 (805) 278-5300 Fax (805) 278-5468 Litho in U.S.A.
Need help?
Do you have a question about the HD401 and is the answer not in the manual?
Questions and answers